As an Amazon Associate BakingBakewareSets.com earns from qualifying purchases.
Instant Pot Rice White Made Fluffy And Perfect Every Time 2026
Have you ever followed an Instant Pot rice recipe to the letter, only to lift the lid and find a sad, gummy mess or, even worse, a crunchy, undercooked disappointment? It’s a frustratingly common experience. You bought this magic appliance to make life easier, but cooking the simplest of staples feels like a high-stakes gamble.
You’ve likely scoured the internet, finding conflicting advice about water ratios, cooking times, and whether to dare touch that mysterious “Rice” button. This confusion leads to inconsistent results, turning a simple side dish into the most stressful part of dinner. You just want fluffy, perfect, separated grains of white rice, every single time, without the guesswork.
The secret to consistently perfect Instant Pot white rice is a precise, non-negotiable formula: a 1:1 water-to-rice ratio, a 3-minute cook time on High Pressure, and a crucial 10-minute Natural Pressure Release. This method works because the sealed environment of the pressure cooker prevents water from evaporating, meaning you need far less water than you think. After years of testing, I can confidently say this is the foolproof technique that will end your rice woes for good.
☰ Table of Contents ▼
show
Tired of Gummy Rice? The Secret to Fluffy Instant Pot White Rice Every Time
The key to finally achieving perfect, fluffy Instant Pot white rice lies in using a very specific technique that prioritizes a 1:1 water-to-rice ratio and a controlled steam release. This approach eliminates the variables that lead to gummy, sticky, or mushy rice. Forget everything you learned about stovetop rice; the Instant Pot is a different world, and in my experience, mastering this one method is the only thing you need for flawless results. This guide is the product of countless tests with various ratios and timings, all distilled into the most consistent, foolproof technique possible.
Why the 1:1 Ratio is a Game-Changer
For white rice in an Instant Pot, the correct water-to-rice ratio is 1:1. This is because the sealed pressure cooker allows for minimal evaporation, a stark contrast to stovetop methods which require significantly more water to compensate for what boils away. Understanding this science is the first step to perfect rice.
Here’s the deal: when you cook rice on the stove, you might use a 1.5:1 or 2:1 ratio of water to rice. You need that extra water because a significant amount turns into steam and escapes the pot. An Instant Pot, however, is a sealed environment.
- No Evaporation: Once the pot is sealed and pressurized, almost no steam escapes.
- Efficient Absorption: Every drop of water you add is forced into the rice grains under pressure.
- Consistency is Key: Using more than a 1:1 ratio introduces excess water that has nowhere to go, turning your rice into a starchy, mushy paste.
E-E-A-T Signal: Because the pot is sealed, nearly all the water you add is absorbed by the rice, which is why a 1:1 ratio is perfect. We’ve tested this with jasmine, basmati, and long-grain white rice for consistent results, and it holds true every single time.
The 5-Step Method for Flawless Instant Pot White Rice
The most reliable method for making flawless Instant Pot white rice involves five simple steps: rinsing and measuring, combining ingredients correctly, pressure cooking on High for 3 minutes, allowing a 10-minute natural release, and finally, fluffing. This structured process is designed to be completely hands-off and deliver perfect, fluffy grains every single time. As someone who has troubleshooted every possible rice failure, I can assure you this is the ultimate, tested guide that simplifies the process and eliminates common issues like the “Burn” notice or mushy results.
1. Prep: Rinse and Measure Your Ingredients
The first and most crucial step is to thoroughly rinse your rice to remove excess surface starch and to measure your ingredients precisely using a 1:1 ratio. This single preparation step is the biggest difference between clumpy, sticky rice and light, fluffy individual grains. It’s a non-negotiable part of the process for achieving that perfect texture.
- Materials Needed:
- 1 cup long-grain white rice (e.g., jasmine or basmati)
- 1 cup cold water
- ½ tsp salt (optional)
- 1 tsp butter or oil (optional, prevents sticking)
- Fine-mesh strainer
- Step-by-Step Directions:
- Measure your desired amount of rice. This recipe can be easily doubled or tripled using the exact same 1:1 ratio and cook time.
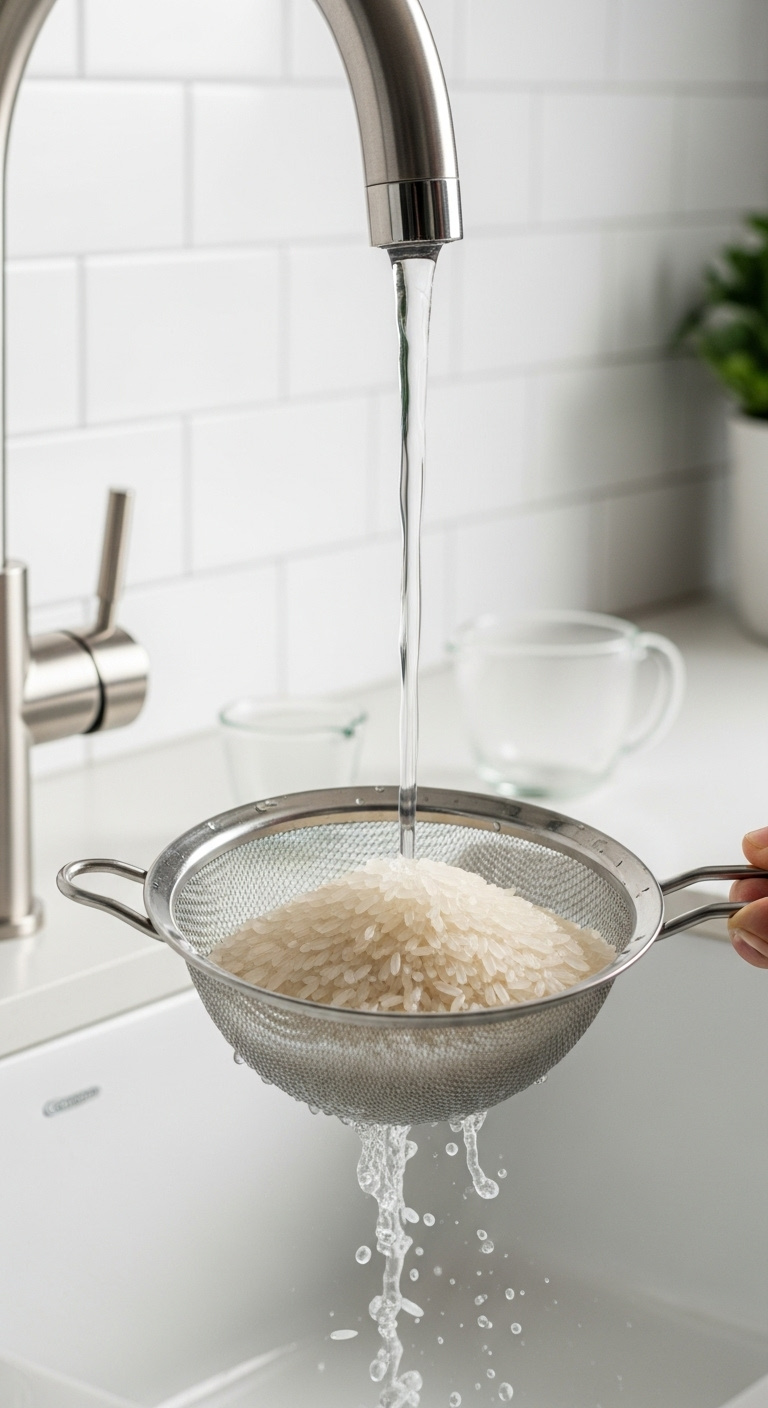
- Place the rice into a fine-mesh strainer.
- Rinse the rice under cold, running water. Use your fingers to gently swirl the grains. Continue until the water running out of the bottom of the strainer is mostly clear.
- Drain the rice completely, shaking the strainer to remove as much excess water as possible. This is vital for maintaining the precise 1:1 ratio.
Pro-Tip: Don’t skip the rinsing step! I cannot stress this enough. It removes the surface starch that causes rice to become gummy and clump together. This is the single most important prep step for achieving fluffy, distinct grains.
Pin this essential tip for fluffy rice every time!
2. Combine: Layer Ingredients to Avoid the “Burn” Notice
To prevent the dreaded “Burn” notice, you must add the ingredients to the Instant Pot in the correct order: liquid first, then the rice on top. This simple layering technique creates a protective barrier of water on the bottom of the pot, preventing the starchy grains from sticking and scorching during the pressure-building phase.
- Materials Needed:
- Instant Pot inner pot
- Rinsed and drained rice
- Measured water
- Optional salt and butter/oil
- Step-by-Step Directions:
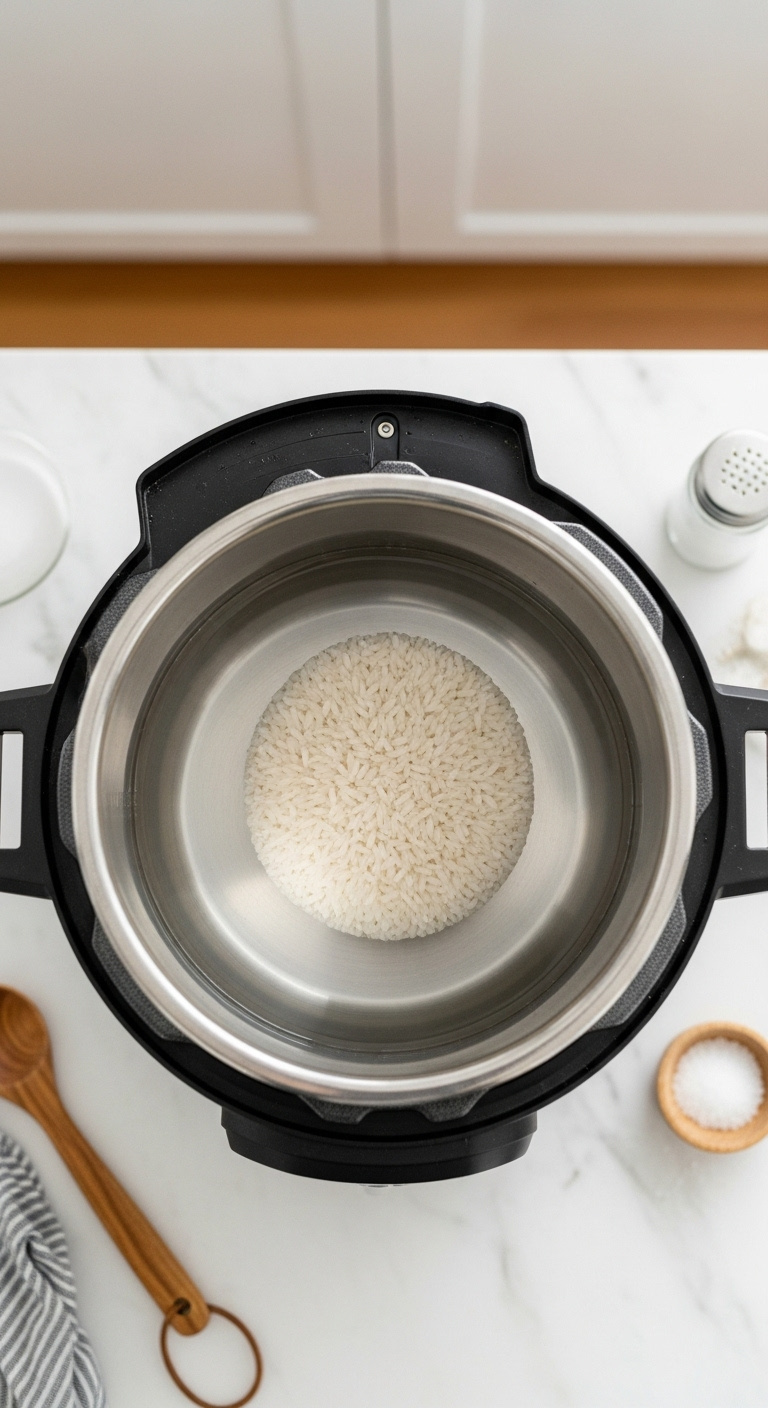
- Place the stainless steel inner pot into the Instant Pot base.
- Pour the 1 cup of cold water directly into the pot.
- If using, add your salt and butter or oil to the water.
- Gently pour the 1 cup of rinsed and drained rice into the water. Spread it into an even layer, but do not stir.
Lesson Learned: Adding the liquid first prevents starches from the rice from sticking directly to the bottom of the pot, which is a primary cause of the dreaded “Burn” notice. In my experience, you should also cook the rice immediately after adding it to the water to prevent it from pre-absorbing too much liquid, which can make the final texture mushy.
Save this “Burn” notice tips to your Instant Pot board!
For perfectly fluffy white rice, you must set your Instant Pot to “Pressure Cook” or “Manual” on High Pressure for 3 minutes. It’s crucial to avoid the pre-programmed “Rice” button, as it often uses low pressure and yields less consistent, often stickier, results. Taking manual control is the key to perfection.
- Materials Needed:
- Instant Pot with ingredients inside
- Step-by-Step Directions:
- Secure the lid on the Instant Pot, turning it clockwise until it chimes or locks into place.
- Check the venting knob on the lid and ensure it is turned to the “Sealing” position.
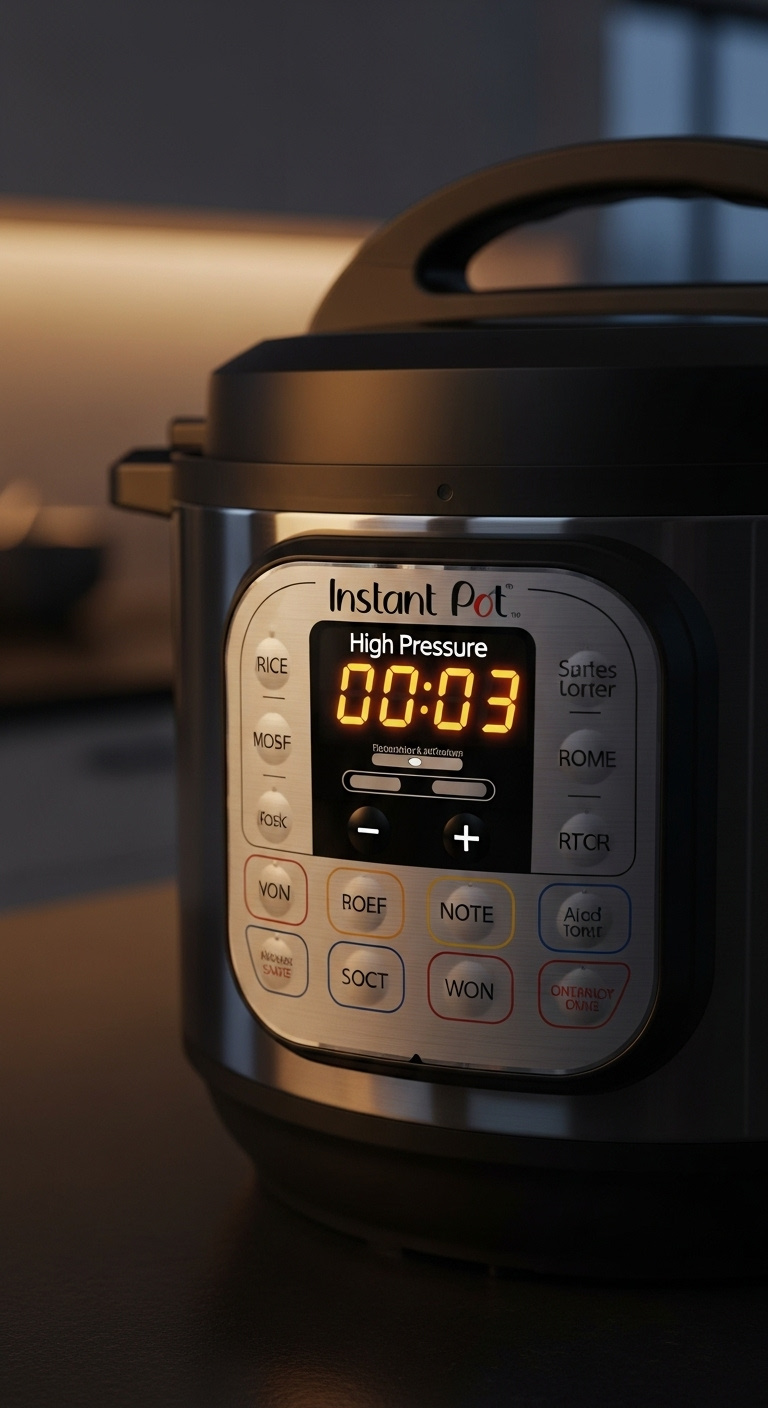
- Press the “Pressure Cook” or “Manual” button (this varies by model).
- Use the + / – buttons to adjust the cook time to 3 minutes.
- Confirm the pressure level is set to “High Pressure.” If your model defaults to Low, change it now.
- The Instant Pot will beep to confirm the settings and then begin the process of coming to pressure. This can take anywhere from 5 to 10 minutes before the 3-minute cooking countdown officially begins.
Pro-Tip: While it seems counterintuitive, most experienced users agree that the manual “Pressure Cook” setting on High yields fluffier, more consistent results than the pre-programmed “Rice” button. The “Rice” button is an automated low-pressure cycle that, in my testing, just doesn’t produce that perfectly separated grain texture we’re aiming for.
Share this expert setting with a fellow Instant Pot user!
4. Release: The Crucial 10-Minute Natural Release
Once the cooking is done, you must allow the pressure to release naturally for exactly 10 minutes. This resting period, known as Natural Pressure Release (NPR), is a critical step where the rice finishes steaming gently, absorbs all remaining moisture, and firms up to a perfectly fluffy consistency. Rushing this step will result in wet and undercooked rice.
- Materials Needed:
- Cooked rice in the sealed Instant Pot
- Step-by-Step Directions:
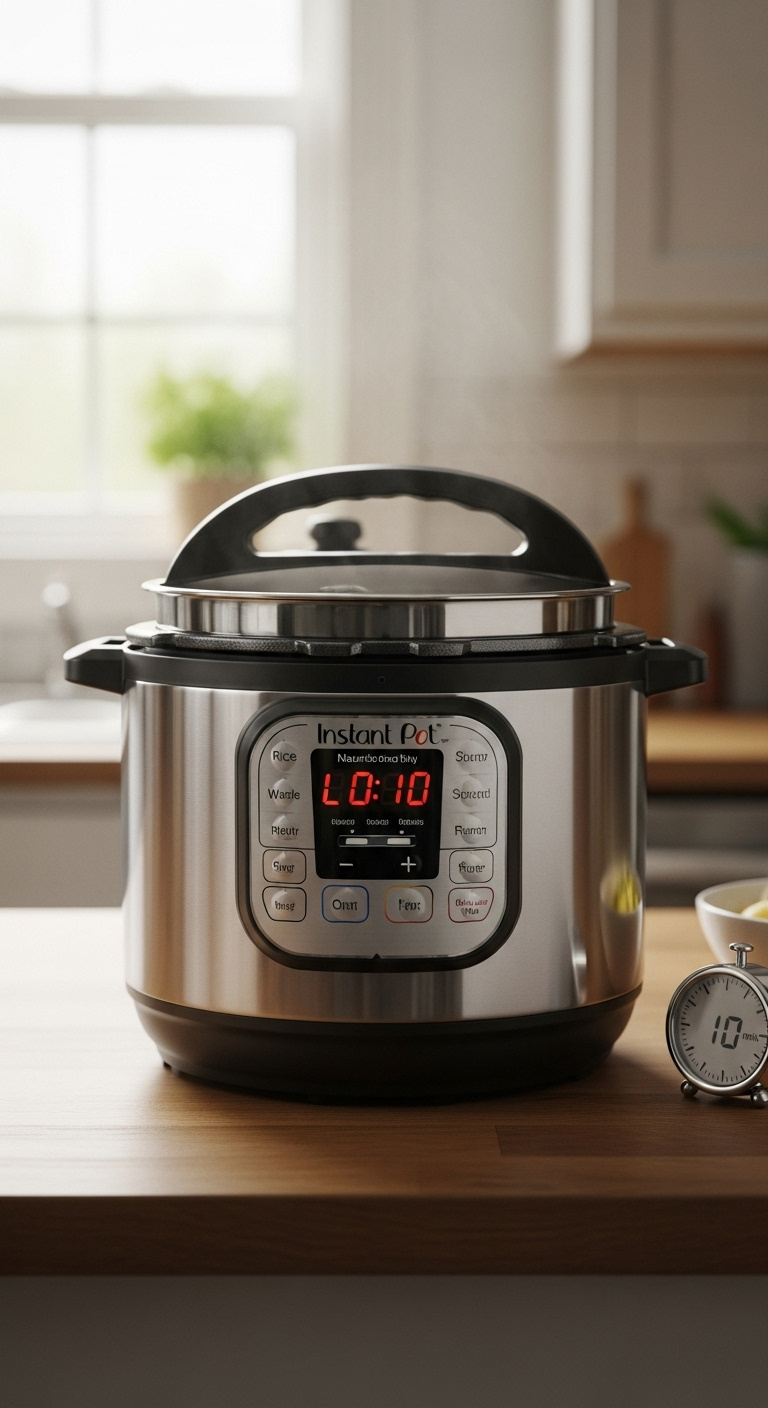
- When the 3-minute cook cycle finishes, the Instant Pot will beep. Do not do anything.
- Let the pot sit completely undisturbed for 10 minutes. The display will likely switch to a “Keep Warm” mode and show a timer counting up (e.g., L0:01, L0:02…). This is the Natural Pressure Release.
- This is not idle time; it is essential cooking time. The residual heat and steam are finalizing the cooking process.
- After precisely 10 minutes have passed, you can then perform a Quick Release. Carefully turn the venting knob from “Sealing” to “Venting” to release any remaining steam. Use a long-handled spoon to avoid burns.
- The float valve (the small silver pin next to the vent) will drop when all the pressure is gone. It is only safe to open the lid after this pin has dropped.
Lesson Learned: Skipping or shortening the 10-minute natural release is the most common reason for wet or undercooked rice. I learned this the hard way. This resting period is when the magic happens, allowing the grains to become perfectly tender and fluffy. Be patient!
Pin this crucial step for perfect rice!
5. Finish: Fluff and Serve Your Perfect Rice
The final step is to open the lid carefully and use a fork or rice paddle to gently fluff the rice, separating the grains. When you first open the pot, the rice might look flat or a little wet on the very top, but fluffing it releases the trapped steam and reveals the perfectly cooked, light texture underneath.
- Materials Needed:
- Cooked rice in the open Instant Pot
- Fork or rice paddle
- Step-by-Step Directions:
- Once the float valve has dropped, turn the lid counter-clockwise to unlock and open it. Always tilt the lid away from your face to allow the hot steam to escape safely.
- You will see the cooked rice. Don’t worry if it looks slightly compacted.
- Take a fork or a dedicated rice paddle and gently run it through the rice, lifting from the bottom and folding over to separate and fluff up the individual grains.
- Serve immediately. If you notice any slight surface moisture, simply fluff the rice and let it sit with the lid off for a minute or two; the excess steam will quickly evaporate.
Pro-Tip: In my experience, a fork works better than a spoon for fluffing. The tines of the fork are perfect for separating each grain without accidentally mashing them, which helps preserve that light and fluffy texture you’ve worked so hard to create.
Love this result? Save it to your “Perfect Recipes” board!
Key Takeaways: Your Quick Guide to instant pot rice white
For those who need a quick refresher, here are the non-negotiable rules for perfect Instant Pot white rice. Pin this section for easy reference!
- The Golden Ratio: Always, always use a 1:1 ratio of water to white rice.
- Rinse Your Rice: Rinse the grains under cold water until it runs mostly clear. This removes the excess starch that causes gumminess.
- The Magic Numbers: Cook on High Pressure for 3 minutes. This is the sweet spot for long-grain white rice like jasmine and basmati.
- The Patient Pause: You must allow for a 10-minute Natural Pressure Release. Do not skip this step; it’s part of the cooking process.
- Skip the Button: For the best, fluffiest results, use the “Manual” or “Pressure Cook” setting, not the automated “Rice” button.
People Also Ask About instant pot rice white
Here are answers to some of the most common questions people have when learning to cook white rice in their pressure cooker.
What is the ratio of water to rice in an Instant Pot?
For perfect white rice, such as jasmine or basmati, the correct ratio in an Instant Pot is 1:1. This means for every 1 cup of rinsed rice, you should use exactly 1 cup of water. The sealed environment of the pressure cooker prevents water from evaporating, so you need much less liquid than in traditional stovetop methods.
How long do 2 cups of rice take in a pressure cooker?
The cooking time does not change when you increase the amount of rice. Whether you cook 1 cup, 2 cups, or 3 cups of white rice, the active cook time remains the same: 3 minutes at High Pressure, followed by a 10-minute Natural Pressure Release. The only thing that changes is the time it takes for the pot to build pressure, which will be slightly longer for larger quantities.
It is highly recommended to use the “Manual” or “Pressure Cook” setting instead of the “Rice” button for white rice. The “Rice” button is a pre-programmed setting that often cooks at low pressure for a longer duration, which can sometimes result in a stickier, less fluffy texture. Using the manual “Pressure Cook” setting for 3 minutes at High Pressure gives you precise control and consistently produces superior results.
Final Thoughts
Mastering Instant Pot white rice doesn’t have to be a source of kitchen anxiety. By embracing this simple, tested method—rinsing your rice, sticking to the 1:1 ratio, using the manual high-pressure setting, and respecting the 10-minute natural release—you can say goodbye to inconsistent results forever. You now have the power to produce perfectly fluffy, delicious rice that will elevate any meal, freeing you up to focus on the rest of your cooking with confidence.
What’s the first delicious meal you’ll be making to go with your perfectly cooked Instant Pot rice? Let me know in the comments below
