As an Amazon Associate BakingBakewareSets.com earns from qualifying purchases.
The Only No Fail Herb Butter Thanksgiving Turkey Recipe
For many, the Thanksgiving turkey is the glorious, golden-brown centerpiece of the entire holiday. But let’s be honest, it’s also the source of the most anxiety. Will it be dry? Will it be bland? Will it even be cooked through on time? The pressure to produce a perfect bird can turn a joyful holiday preparation into a stressful culinary test.
This fear of failure leads cooks down a rabbit hole of complicated brines, questionable cooking gadgets, and conflicting advice. You’re trying to create a memorable meal for your loved ones, but the overwhelming amount of information often leads to more confusion than confidence. The result can be a dry, disappointing turkey that doesn’t live up to the holiday’s promise, leaving you feeling like you’ve let everyone down.
The secret to a moist, flavorful, and perfect Thanksgiving turkey every single time is a two-part process: insulating the meat with a rich herb butter under the skin and roasting it to the correct internal temperature using a meat thermometer. After years of testing countless methods, we’ve perfected this one technique that delivers a perfectly moist and flavorful turkey every single time. This guide will walk you through the simple, no-fail steps to make this year’s turkey the best you’ve ever had.
☰ Table of Contents ▼
show
Tired of Dry, Flavorless Thanksgiving Turkey? Here’s The Secret to a Perfect Bird
The secret to a moist turkey is a two-part process: insulating the meat with a rich herb butter under the skin and roasting it to the correct internal temperature using a meat thermometer. This foolproof combination ensures the breast meat stays incredibly juicy while the skin gets perfectly golden-brown and crispy. Forget complicated techniques; this simple, direct approach to adding flavor and locking in moisture is all you need.
After years of testing countless methods, we’ve perfected the one technique that delivers a perfectly moist and flavorful turkey every single time. It’s a method that works for both beginner cooks and experienced hosts, taking the guesswork and stress out of preparing the holiday’s main event. By focusing on these two key areas—flavorful insulation and precise temperature—you create a stunning centerpiece that is as delicious as it is beautiful.
Your 5-Step Guide to the Perfect No-Fail Herb Butter Turkey
To achieve a perfect result, you can follow this complete, sequential blueprint for success. This guide is designed for both first-timers and seasoned cooks, with pro-tips included at every stage to prevent common mistakes. The process is broken down into five manageable stages: 1. Thaw the Turkey Correctly, 2. Prepare the Herb Butter, 3. Season Under and Over the Skin, 4. Roast to Temperature, Not Time, 5. Rest Before Carving. By following these steps, you are guaranteed a juicy, flavorful, and impressive Thanksgiving turkey.
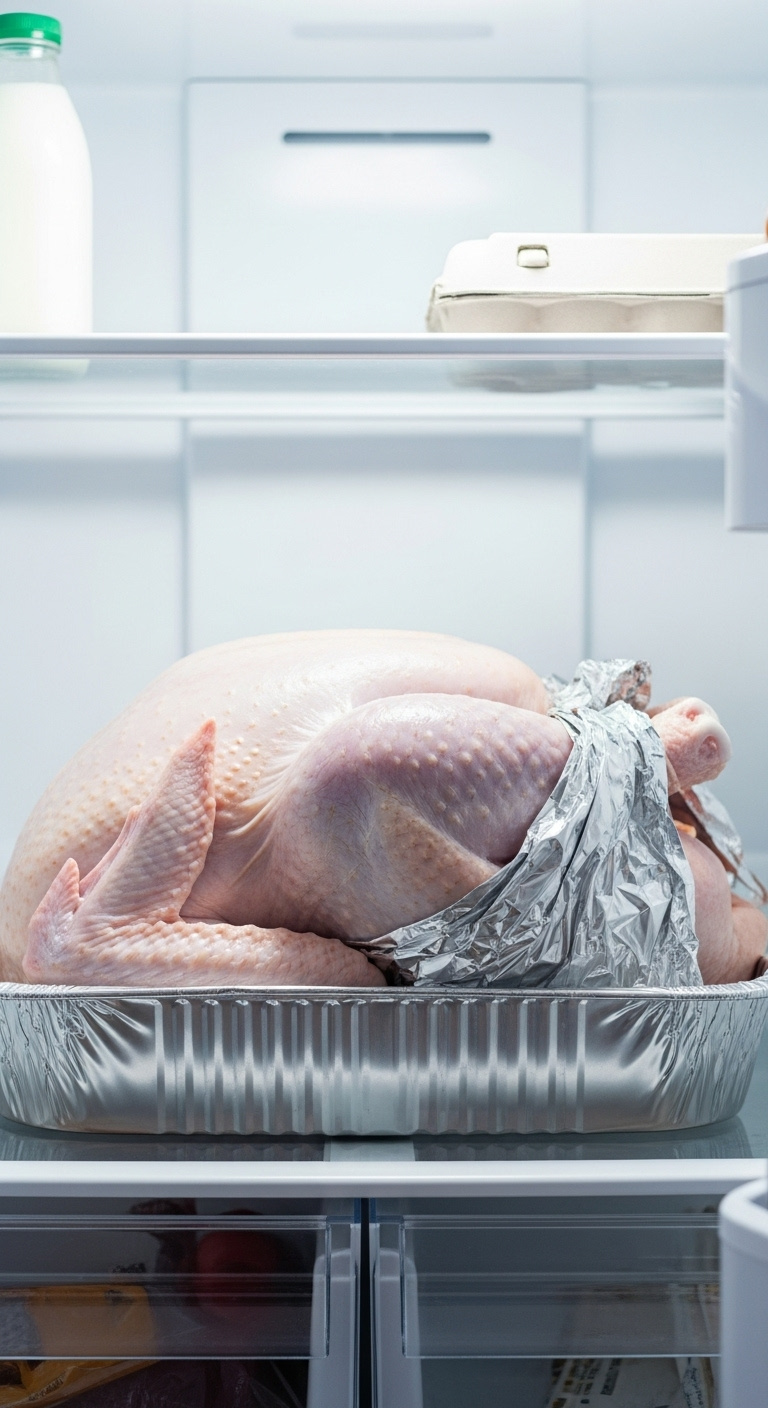
1. The Foundation: How to Thaw Your Turkey Safely
- Materials Needed:
- 1 frozen turkey (14-16 lbs)
- 1 large disposable foil pan or roasting pan
- Step-by-Step Directions:
- Plan Ahead: Place the frozen turkey, still in its original wrapping, into the foil pan. The pan is crucial for catching any drips and preventing cross-contamination with other foods in your refrigerator.
- Calculate Thawing Time: Move the turkey and pan to the bottom shelf of your refrigerator. This is the safest place for it. Allow at least 1 day of thawing for every 4 pounds of turkey. A 16-pound turkey will need approximately 4 full days to thaw completely.
- Check for Readiness: Once the thawing time has passed, the turkey should feel pliable, with no hard, frozen spots or ice crystals remaining in the cavity. A fully thawed turkey can be safely kept in the fridge for up to 2 days before you need to cook it.
Pro-Tip: Never thaw your turkey on the counter. The refrigerator method is the only food-safe way to ensure the turkey remains at a safe temperature (below 40°F) and prevents the growth of harmful bacteria. A little planning goes a long way toward a safe and delicious meal.
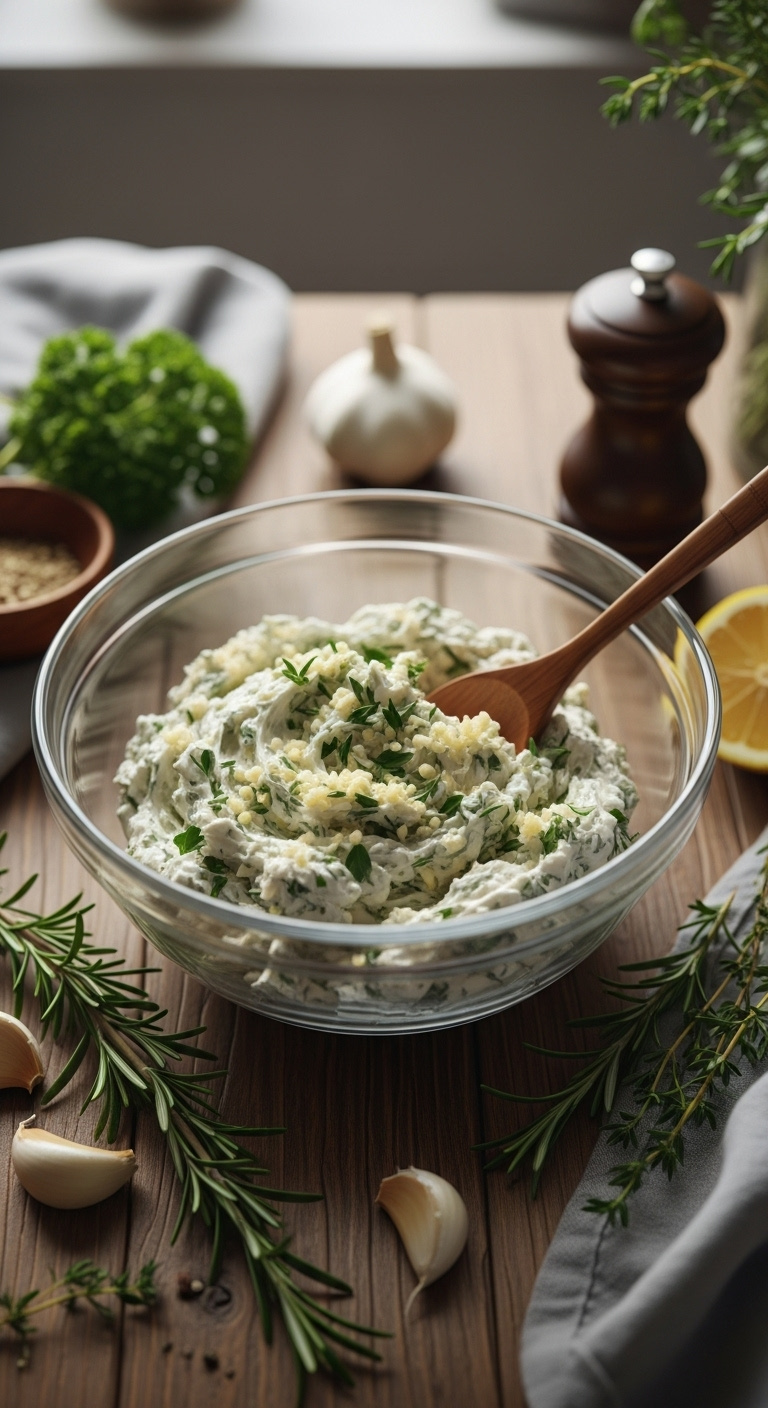
2. Crafting the Flavor: The Ultimate Garlic Herb Butter
- Ingredients:
- 1 cup (2 sticks) unsalted butter, softened to room temperature
- 4-6 cloves garlic, finely minced
- 2 tbsp chopped fresh rosemary
- 2 tbsp chopped fresh thyme
- 2 tbsp chopped fresh sage
- 1/4 cup chopped fresh parsley
- 1 tsp kosher salt
- 1/2 tsp freshly ground black pepper
- Instructions:
- Soften Butter: For this to work, your butter must be truly at room temperature so it’s easy to mix. If it’s still cold from the fridge, you can microwave it at 30% power for 15-second intervals. Check it frequently—you want it malleable, not melted.
- Combine Ingredients: In a medium-sized bowl, add the softened butter, the finely minced garlic, all of your chopped fresh herbs, kosher salt, and freshly ground black pepper.
- Mix Thoroughly: Use a simple fork or a flexible spatula to mix everything together until the garlic and herbs are completely and evenly distributed throughout the butter. You can prepare this herb butter up to two days in advance and store it in the refrigerator; just be sure to let it return to room temperature before using it.
Lesson Learned: Using fresh herbs makes a world of difference in the final flavor, creating a more vibrant and aromatic turkey. If you absolutely must use dried herbs, a good rule of thumb is to use only one-third of the amount called for (e.g., about 2 teaspoons of dried rosemary instead of 2 tablespoons of fresh).
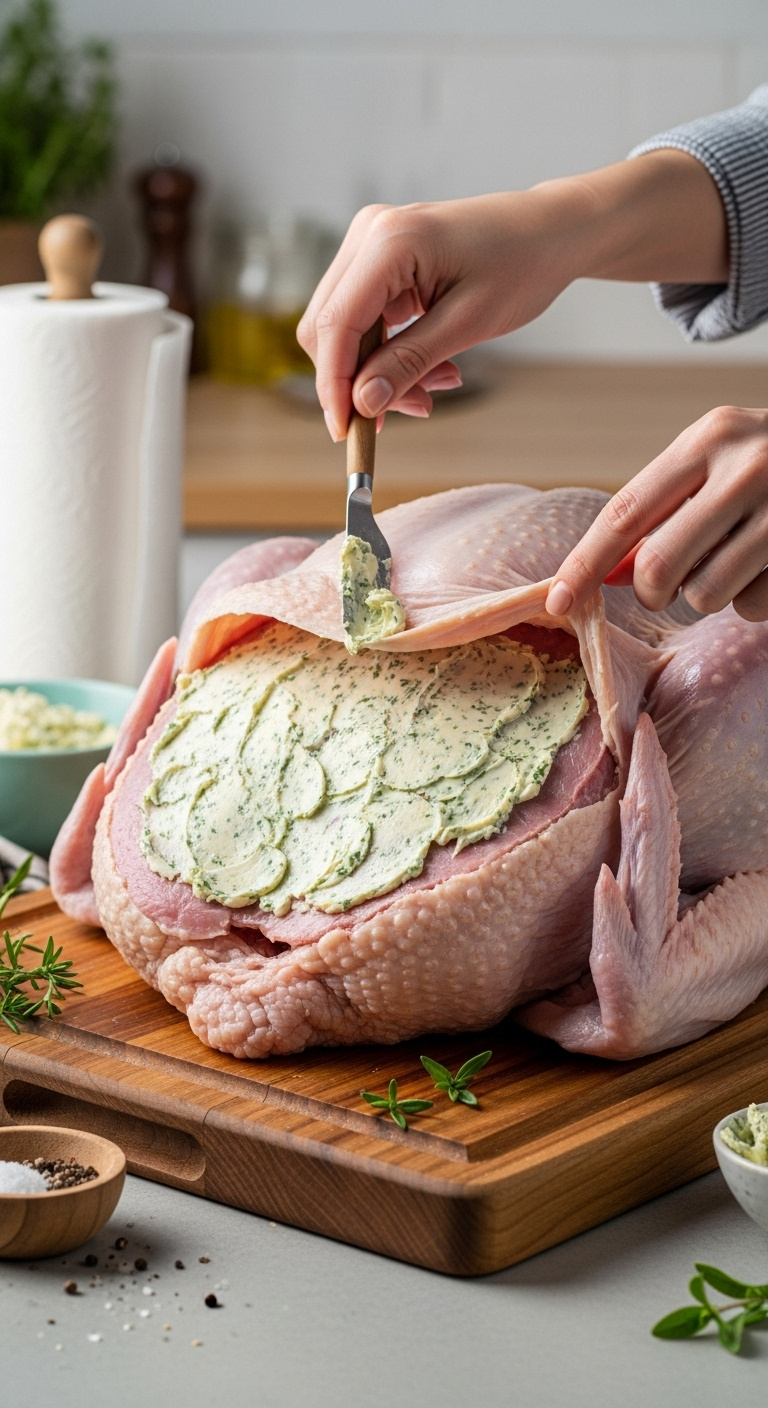
3. The Prep Work: How to Season Your Turkey for Crispy Skin and Juicy Meat
- Materials Needed:
- 1 fully thawed turkey
- Prepared Garlic Herb Butter
- Paper towels
- Aromatics: 1 onion (quartered), 1 lemon (quartered), 1 head of garlic (halved), fresh herb sprigs
- Cooking twine
- Step-by-Step Directions:
- Dry the Turkey: First, remove the packet of giblets and the neck from the turkey’s cavities; you can save these for gravy or discard them. Next, use paper towels to thoroughly pat the entire turkey completely dry, both inside and out. This is the #1 secret to achieving perfectly crispy skin, as moisture is the enemy of browning. Do not rinse the turkey in the sink, as this can spread bacteria around your kitchen.
- Loosen the Skin: Gently slide your fingers between the skin and the meat, starting over the thickest part of the breast. Carefully work your way down over the breasts and thighs to create large pockets. Be gentle to avoid tearing the skin.
- Butter Under the Skin: Take about half of your prepared herb butter and rub it directly onto the meat underneath the loosened skin. Spread it as evenly as you can over the entire breast and thigh meat.
- Butter the Exterior: Use the remaining herb butter to rub generously all over the outside of the turkey. This will help the skin brown and become deliciously crisp. Season the buttered skin liberally with additional kosher salt and pepper.
- Stuff the Cavity: Fill the main cavity with your aromatics: the quartered onion, quartered lemon, halved head of garlic, and any leftover fresh herb sprigs. These will steam from the inside, infusing the meat with subtle flavor.
- Truss the Legs: Tuck the wing tips under the body of the turkey. Tie the legs together loosely with a piece of cooking twine to help the bird cook more evenly.
Pro-Tip: Don’t be shy! Getting a thick, even layer of butter under the skin is the single most important step for ensuring juicy breast meat. This technique essentially creates a self-basting system, where the melting butter and herbs continuously season and moisten the meat from the inside out as it roasts.
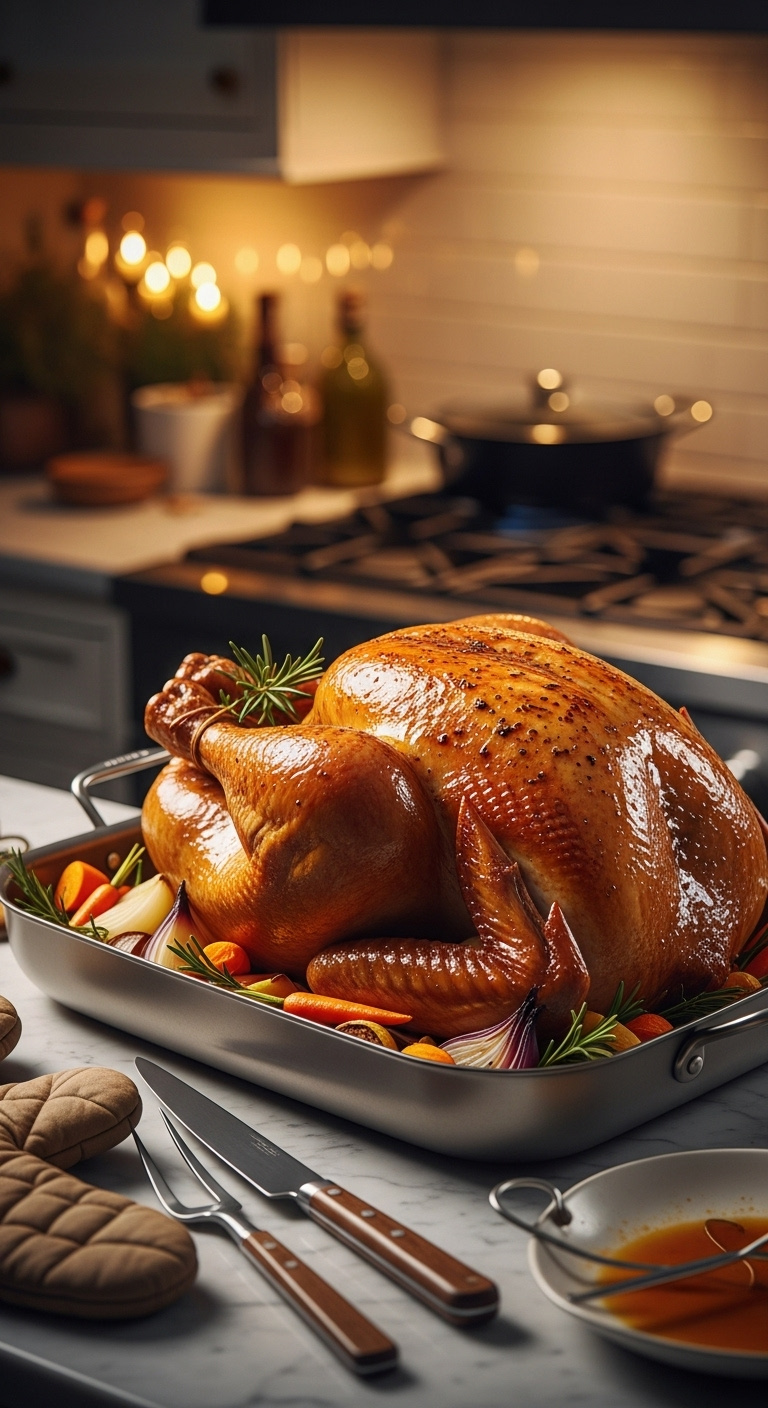
4. The Main Event: Roasting for a Golden, Juicy Finish
- Materials Needed:
- Prepared turkey
- Roasting pan
- Chopped vegetables (2 carrots, 2 celery stalks, 1 large onion)
- 1 cup chicken or turkey broth
- Digital meat thermometer
- Step-by-Step Directions:
- Prepare the Pan: Preheat your oven to 425°F. Scatter the chopped carrots, celery, and onion on the bottom of your roasting pan. These vegetables will act as a natural roasting rack, elevating the turkey slightly and flavoring the pan drippings for your gravy. Place the prepared turkey on top and add the broth to the bottom of the pan.
- Initial High-Heat Roast: Place the turkey in the preheated oven and roast at 425°F for 30 minutes. This initial blast of high heat is key to kickstarting the browning process and beginning to crisp up the skin.
- Lower and Slower: After 30 minutes, reduce the oven temperature to 350°F. Continue roasting, calculating a rough cooking time of about 13-15 minutes per pound. For a 16-pound turkey, this will be approximately 3.5 to 4 hours more.
- Monitor Temperature: About two-thirds of the way through the estimated cooking time, begin checking the internal temperature. Insert a digital meat thermometer into the thickest part of the thigh, making sure you do not touch the bone.
- Check for Doneness: The turkey is perfectly cooked and safe to eat when the thigh reaches an internal temperature of 170-175°F and the thickest part of the breast reaches 165°F. If you notice the skin on the breast is getting too dark before the thigh is cooked, loosely tent just the breast area with a piece of aluminum foil.
Lesson Learned: Do not trust the little red pop-up timer that comes with some turkeys. They are notoriously unreliable and often don’t pop until the turkey is already overcooked and dry. A reliable digital meat thermometer is the only way to guarantee your turkey is cooked perfectly and safely without drying it out.
5. The Final Secret: Why Resting Your Turkey is Non-Negotiable

- Materials Needed:
- Fully roasted turkey
- Large cutting board
- Aluminum foil
- Step-by-Step Directions:
- Transfer the Turkey: As soon as the turkey reaches the correct internal temperature, carefully remove the roasting pan from the oven. Transfer the hot turkey from the pan to a large, clean cutting board, preferably one with a juice groove.
- Tent with Foil: Loosely tent the entire turkey with a piece of aluminum foil. It’s important not to wrap it tightly; a loose tent will trap enough heat to keep it warm while allowing steam to escape, which prevents the skin from becoming soft and soggy.
- Let It Rest: Let the turkey rest undisturbed for a minimum of 30 minutes. For a larger bird (16 pounds or more), an hour is even better. During this crucial time, the muscle fibers in the meat relax, and the juices, which were pushed to the center during cooking, redistribute throughout the bird.
- Make Gravy: This 30-60 minute rest period is the perfect window of time to use those delicious, flavorful pan drippings to make your gravy.
- Carve and Serve: Once the turkey has fully rested, you can remove the foil, carve it, and serve it to your guests. You’ll be rewarded with incredibly moist, tender, and juicy meat.
Pro-Tip: If you ignore this final step and cut into the turkey immediately after it comes out of the oven, all of those delicious juices will run out onto the cutting board instead of being reabsorbed into the meat. Patience during this final step is the true difference between a good turkey and a truly great, unforgettable one.
Key Takeaways: Your Quick Guide to a No-Fail Thanksgiving Turkey
To ensure you have all the most critical information in one place, here is a quick summary of the non-negotiable rules for a perfect, juicy Thanksgiving turkey.
* Always Pat Dry: A completely dry turkey skin is the first and most important step for getting that crispy, golden-brown finish you want. Moisture is the enemy of crispiness.
* Butter Under the Skin: Don’t just season the outside. Taking the time to get that flavorful garlic herb butter directly onto the meat is the ultimate secret to a juicy, self-basting breast that stays moist.
* Trust the Thermometer, Not the Clock: Your digital meat thermometer is your best and most reliable friend in this process. Cook to temperature (165°F in the breast), not just for a set amount of time. This eliminates all guesswork.
* Rest is Best: Letting the turkey rest for at least 30 minutes before you even think about carving is mandatory for juicy, tender meat. Do not skip this final, crucial step.
People Also Ask About Thanksgiving Turkey Recipes
What is the secret to a moist turkey?
The primary secret to a moist turkey is twofold: insulation and temperature control. First, rubbing a generous amount of a high-fat compound butter under the skin of the breast and thighs creates a self-basting effect that keeps the meat from drying out during the long roasting process. Second, using a digital meat thermometer to pull the turkey from the oven the moment the breast reaches 165°F ensures you don’t overcook it. Finally, always rest the turkey for at least 30 minutes before carving to allow the juices to redistribute.
Do you cook a Thanksgiving turkey covered or uncovered?
You should cook your Thanksgiving turkey uncovered for the majority of the roasting time. This allows the hot, dry air of the oven to circulate freely, which is essential for rendering the fat in the skin and making it deliciously golden-brown and crispy. If you notice that the breast skin is browning too quickly before the internal temperature is reached, you can loosely tent just the breast area with a piece of aluminum foil for the last 30-60 minutes of cooking.
What is the best way to cook a turkey without drying it out?
The best and most reliable method is to use a high-fat compound butter under the skin, manage your oven temperatures, and cook to a precise internal temperature. Start roasting at a high temperature (425°F) for about 30 minutes to get the skin browning, then lower it (to 350°F) for the remainder of the time. Most importantly, rely on a meat thermometer instead of a timer and remove the turkey when the breast hits 165°F. A 30-minute rest before carving is the final, crucial step to lock in all the juices and guarantee it won’t be dry.
Final Thoughts
Cooking the Thanksgiving turkey doesn’t have to be a source of stress and anxiety. By focusing on a few key fundamentals—proper thawing, a flavorful herb butter, precise temperature monitoring, and a patient rest—you are not just following a recipe; you are guaranteeing a successful outcome. With this detailed, no-fail guide, you are now fully equipped to make the best, juiciest, and most flavorful Thanksgiving turkey of your life, creating a memorable centerpiece for a wonderful holiday meal.
Now that the main course is handled, what is your absolute favorite side dish that makes the Thanksgiving meal complete? Share your traditions in the comments below
