As an Amazon Associate BakingBakewareSets.com earns from qualifying purchases.
9 Easy Spooky Halloween Dessert Recipes To Impress Guests
Are you scrolling through endless pages of Halloween desserts, only to find the same boring pumpkin spice cookies and generic candy corn bark? It can feel like a real challenge to find treats that are spooky enough for the season but simple enough that you don’t need to be a professional pastry chef to make them. You want to impress your guests and delight your family, not spend your entire day covered in flour and frustration. The pressure is on to create something memorable that stands out from the usual party spread.
As a seasoned home baker who’s hosted more than a few Halloween parties, I know the secret is in recipes that deliver maximum spook-factor for minimal effort. These are my go-to’s. Updated for 2026, this guide is your secret weapon for a stress-free and spectacular Halloween. Forget complicated techniques and impossible decorations. We’re focusing on fun, flavor, and frightfully good results that anyone can achieve.
Looking for easy, spooky Halloween desserts? This guide provides 9 simple recipes, from Witch Finger Cookies to Vampire Bite Cupcakes, designed to impress your guests without spending all day in the kitchen. Perfect for parties and kid-friendly fun, these treats will make your spooky bash the talk of the town.
☰ Table of Contents ▼
show
9 Frightfully Easy Halloween Dessert Recipes for Your Next Spooky Bash
Get ready to transform your kitchen into the most popular haunt on the block! This list is packed with nine frightfully fun and delicious Halloween dessert recipes that are guaranteed to be a graveyard smash. I’ve specifically chosen these treats because they deliver that “wow” factor without complicated steps. Each recipe includes simple, step-by-step instructions and a pro-tip I’ve learned along the way to ensure your creations look as good as they taste. These recipes have been tested and approved for their simplicity, crowd-pleasing flavors, and major visual impact, ensuring your Halloween party spread is a screaming success.

Save this spooky cookie idea to your Halloween board!
This classic Halloween cookie recipe creates buttery, crumbly shortbread fingers that are both creepy and delicious. They are surprisingly easy to shape and the “bloody” details make them a standout on any dessert table.
Ingredients:
* 1 cup unsalted butter, softened
* 1 cup powdered sugar
* 1 egg
* 1 tsp almond extract
* 1 tsp vanilla extract
* 2 ¾ cups all-purpose flour
* 1 tsp baking powder
* ½ cup whole blanched almonds
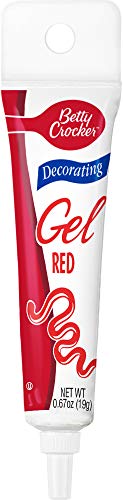
* Red decorating gel
Instructions:
1. Cream together butter and sugar until smooth. Beat in the egg and extracts.
2. In a separate bowl, whisk together flour and baking powder. Gradually add to the wet ingredients until a dough forms. Chill for 30 minutes.
3. Roll a small portion of dough into a thin finger shape. Squeeze near the middle to create a knuckle and use a knife to make small cuts for wrinkles.
4. Press an almond firmly into the tip for the “fingernail.”
5. Bake at 325°F (165°C) for 20-25 minutes, until lightly golden.
6. Once cooled, lift the almond, squeeze a small amount of red cookie decorating gel onto the nail bed, and press the almond back on. Add more gel to the severed end of the cookie.
Pro-Tip: Don’t skip chilling the dough! It makes the fingers much easier to shape and prevents them from spreading too much while baking, keeping those creepy details intact.
2. Ghoulish Vampire Bite Cupcakes

Pin this bloody good recipe for your Halloween party!
To create a bloody and delicious Halloween cupcake, start with a simple chocolate cupcake and top it with white frosting, then use a chopstick to poke two holes and fill them with a thinned-out red jam for a realistic vampire bite effect.
Ingredients:
* 1 box of your favorite chocolate cake mix (plus ingredients on the box)
* 1 jar marshmallow fluff/frosting
* ½ cup seedless strawberry or raspberry jam
* 1 tbsp water
Instructions:
1. Bake 24 chocolate cupcakes according to the package directions. Let cool completely.
2. Frost the cooled cupcakes with a generous layer of marshmallow frosting.
3. In a small bowl, whisk together the jam and water to create a slightly thinner “blood” consistency. Using a strawberry filling suitable for baking ensures a rich color and authentic look.
4. Use the end of a chopstick or a piping tip to poke two small holes, close together, on top of the frosting.
5. Carefully spoon or use a small squeeze bottle to drip the “blood” into the holes, letting it overflow slightly and run down the sides.
Lesson Learned: Warm the jam slightly in the microwave for 10 seconds before thinning it with water. This helps it flow much more smoothly for a realistic dripping blood effect.

3. Easiest Ever Ghost S’mores Dip

Save this 10-minute dessert idea for a spooky movie night!
This shareable Halloween dip is made by melting chocolate chips in an oven-safe skillet, topping it with marshmallows, and baking until golden and gooey. It’s an incredibly fast and popular party dessert.
Ingredients:
* 1 (12 oz) bag of milk chocolate chips
* 1 bag of large marshmallows or ghost-shaped Peeps
* Graham crackers, apple slices, or pretzels for dipping
Instructions:
1. Preheat your oven to 450°F (230°C).
2. Pour the chocolate chips into a small cast iron skillet for dips or another oven-safe pan, spreading them into an even layer.
3. Bake for 3-5 minutes, until the chocolate is melted and glossy.
4. Remove from the oven and immediately top with the marshmallows in a single layer. If using regular marshmallows, you can add candy eyes later.
5. Return to the oven for 2-3 minutes, or until the marshmallows are puffed and golden brown on top. Keep a close eye on them as they can burn quickly!
6. Serve immediately with your favorite dippers.
Pro-Tip: For extra gooeyness, place a layer of caramel bits under the chocolate chips before baking. It adds another delicious dimension to this simple dip.

4. Jack Skellington Oreo Pops

Pin this fun Nightmare Before Christmas treat idea!
This fun, no-bake treat is made by dipping Oreo cookies on lollipop sticks into melted white candy melts and drawing on Jack Skellington’s face with an edible ink marker once they have hardened.
Materials Needed:
* 1 package of Oreo cookies
* 1 bag of bright white candy melts
* Lollipop sticks
* A black edible ink food marker
* A block of styrofoam
Step-by-Step Directions:
1. Carefully insert a lollipop stick into the cream filling of each Oreo cookie. Don’t push it all the way through. Freeze the Oreos on their sticks for 10 minutes to help them set.
2. Melt the white candy melts in the microwave in 30-second intervals, stirring until smooth.
3. Dip each Oreo pop into the melted candy, ensuring it’s fully coated. Gently tap off any excess.
4. Stick the pops into the styrofoam block to dry completely.
5. Once the coating is hard, use a black edible ink food marker to draw on Jack Skellington’s face: two large oval eyes and a long mouth with vertical stitches.
Pro-Tip: If your candy melts are too thick for dipping, stir in a tiny bit (about 1/2 teaspoon) of coconut oil or vegetable shortening to thin it out for a perfectly smooth coating.

5. Pumpkin Patch Dirt Pudding Cups

Save this adorable kid-friendly dessert for your fall festivities!
This classic no-bake dessert is made by layering chocolate pudding with crushed Oreo “dirt” in individual cups and topping them with candy pumpkins and gummy worms for a festive and fun treat.
Ingredients:
* 1 large box of instant chocolate pudding mix
* Milk (as called for on the pudding box)
* 1 package of Oreo cookies
* 1 tub of Cool Whip, thawed (optional)
* Candy pumpkins
* Gummy worms
Instructions:
1. Prepare the chocolate pudding according to the package directions and let it set in the fridge. Once set, you can fold in the Cool Whip for a lighter, mousse-like texture.
2. Crush the Oreo cookies into fine crumbs. A food processor works best, but a sealed plastic bag and a rolling pin also do the trick.
3. Assemble the cups. Use clear plastic dessert cups to show off the layers. Start with a layer of pudding, then a layer of Oreo “dirt.” Repeat until the cups are full, ending with a final layer of dirt.
4. Top each cup with a few candy pumpkins and gummy worms to create your spooky pumpkin patch or graveyard scene.
5. Chill until ready to serve.
Lesson Learned: For the best “dirt” texture, make sure to remove the cream filling from the Oreos before crushing them. This prevents the crumbs from getting clumpy and creates a more realistic soil look.

6. Easy Spiderweb Brownies

Pin this simple decorating tips for your next batch of brownies!
This impressive decorating technique involves piping concentric circles of white icing onto frosted brownies and dragging a toothpick from the center outwards to create a stunning spiderweb effect with minimal effort.
Ingredients:
* 1 box of your favorite brownie mix (plus ingredients on box)
* 1 container of chocolate frosting
* 1 tube of white decorating icing with a fine tip
* A toothpick or skewer
Instructions:
1. Bake the brownies according to package directions in a 9×13 inch pan. Let them cool completely.
2. Once cooled, spread an even layer of chocolate frosting over the top.
3. Using a white cookie icing tube, pipe concentric circles on top of the chocolate frosting, starting with a small circle in the center and working your way out.
4. Working quickly before the icing sets, drag the tip of a toothpick from the center circle out to the edge of the brownies.
5. Wipe the toothpick clean and repeat every inch or so around the brownie, always starting from the center and pulling outwards to create the web effect.
6. Let the icing set before cutting into squares.
Pro-Tip: For super clean cuts, run your knife under hot water and wipe it dry between each slice. This will prevent the frosting and brownie from sticking and smudging your beautiful web design.
7. Salty & Sweet Mummy Pretzel Bites

Save this spooky-cute 3-ingredient treat idea!
This super simple, no-bake treat requires only three ingredients: square pretzels, white melting wafers, and candy eyeballs. Simply coat the pretzels, add the eyes, and drizzle with more white chocolate for the mummy bandages.
Materials Needed:
* 1 bag of square pretzels (snaps)
* 1 bag of white chocolate melting wafers
* 1 package of edible candy eyeballs
Step-by-Step Directions:
1. Line a baking sheet with parchment paper. Arrange the pretzels in a single layer.
2. Melt the white chocolate wafers in the microwave according to package directions.
3. Spoon a small amount of melted chocolate onto each pretzel, spreading it to cover the top.
4. While the chocolate is still wet, place two edible candy eyeballs on each pretzel.
5. Pour the remaining melted chocolate into a small plastic bag and snip off a tiny corner.
6. Drizzle the chocolate back and forth over the pretzels to create the “mummy bandage” look.
7. Let them set completely at room temperature or in the fridge for about 10 minutes.
Pro-Tip: Use melting wafers instead of white chocolate chips. Wafers are designed to melt smoother and set harder without needing to be tempered, which makes this quick project even easier.


Pin this monsterously easy no-bake recipe!
These quick, colorful cookies are a classic no-bake recipe made by boiling a mixture of sugar, butter, and milk, then stirring in peanut butter, oats, and green food coloring. Top with candy eyeballs before they set for a monstrously fun treat.
Ingredients:
* ½ cup butter
* 2 cups granulated sugar
* ½ cup milk
* ¼ cup unsweetened cocoa powder
* 1 cup creamy peanut butter
* 1 tsp vanilla extract
* 3 cups quick-cooking oats
* Green food coloring
* Assorted monster candy eyeball sprinkles
Instructions:
1. In a saucepan, combine butter, sugar, milk, and cocoa powder. Bring to a rolling boil and let it boil for exactly one minute.
2. Remove from heat and immediately stir in the peanut butter and vanilla extract until smooth.
3. Add a few drops of green food coloring until you reach your desired monster shade.
4. Quickly stir in the oats until everything is well combined.
5. Drop spoonfuls of the mixture onto wax or parchment paper.
6. Working fast, press several monster candy eyeball sprinkles of various sizes onto each cookie before they set.
7. Let the cookies cool and harden completely at room temperature.
Lesson Learned: The one-minute boil time is critical. Boiling for too long will result in dry, crumbly cookies, while not boiling long enough will prevent them from setting up properly. Use a timer!

9. Bloody Vampire Poke Cake

Save this sinfully delicious poke cake recipe for your adult Halloween party!
This dramatic and moist cake is made by baking a white cake, poking holes all over the top, and pouring warm cherry pie filling over it. After chilling, it’s frosted with whipped topping for a gruesome-yet-gorgeous dessert.
Ingredients:
* 1 box white cake mix (plus ingredients on box)
* 1 tsp almond extract
* 1 (21 oz) can of tart cherry pie filling
* 1 (8 oz) container of Cool Whip, thawed
Instructions:
1. Prepare and bake the white cake mix in a 9×13 inch pan according to package directions, adding the almond extract to the batter.
2. Let the cake cool for about 15 minutes.
3. Using the round handle of a wooden spoon, poke holes all over the top of the warm cake, about an inch apart.
4. Microwave the tart cherry pie filling for about 30 seconds to make it more pourable. Pour it evenly over the cake, encouraging it to seep into the holes.
5. Refrigerate the cake for at least 3 hours, or until completely chilled.
6. Once chilled, spread the Cool Whip evenly over the top. For a “blood splatter” effect, reserve a tablespoon of the pie filling and drizzle it over the whipped topping before serving.
Pro-Tip: To ensure the filling gets deep into the cake, gently wiggle the spoon handle in each hole to widen it slightly before pouring the cherry topping. This creates more dramatic “bloody” streaks in every slice.

Key Takeaways: Your Quick Guide to Easy Spooky Halloween Desserts
- Embrace the Theme: Simple recipes like brownies or cupcakes can become spooky masterpieces with easy decorations like spiderwebs or “blood.”
- No-Bake is Your Friend: Don’t have time to bake? Recipes like Mummy Pretzels, Dirt Pudding Cups, and Monster Cookies are fast, fun, and require zero oven time.
- The Right Tools Matter: Simple items like edible ink pens, candy eyeballs, and icing tubes can elevate your treats from simple to spooky with minimal effort.
- Get the Kids Involved: Choose recipes with simple assembly steps like Oreo Pops or Dirt Cups to turn dessert-making into a fun family activity.
- Salty & Sweet Wins: A touch of salt from pretzels or a savory cookie base can balance the sweetness and make your desserts even more addictive for a crowd.
People Also Ask About halloween recipes dessert
What is the easiest Halloween dessert to make for a party?
The easiest Halloween dessert for a party is often a no-bake option like Ghost S’mores Dip or Pumpkin Patch Dirt Pudding Cups. They can be made in large batches with minimal prep time, require no baking skills, and are always a huge hit with both kids and adults. Mummy Pretzel Bites are another fantastic choice as they only require 3 ingredients.
What are some traditional Halloween desserts?
Traditional Halloween desserts often feature classic fall flavors and activities. Candy apples and caramel apples are iconic treats, along with anything pumpkin-flavored, such as pumpkin pie, pumpkin bread, or pumpkin cookies. Soul cakes, simple spiced cakes or cookies, are another historical treat associated with the holiday’s origins.
How can I make my Halloween desserts look scary but still taste good?
The key is to use delicious bases and add spooky decorations. Start with a crowd-pleasing recipe like chocolate cupcakes or fudgy brownies. Then, use red jam or food gel for a “blood” effect, white icing for spiderwebs, or candy eyeballs to turn any treat into a monster. This way, the flavor remains delicious while the appearance is perfectly scary.
What are some elegant Halloween dessert ideas for adults?
For an adult party, focus on sophisticated flavors with a subtle spooky twist. Vampire Bite Cupcakes with a rich chocolate base and tart “blood” filling are a great option. A Bloody Vampire Poke Cake offers a dramatic presentation, while dark chocolate brownies with a delicate white chocolate spiderweb design look elegant and on-theme.
Final Thoughts
Creating impressive, spooky Halloween desserts doesn’t need to be complicated or stressful. Armed with these simple recipes, you can easily whip up a festive spread that will have all your ghouls and goblins screaming with delight. The most important ingredient is to have fun with it and embrace the spooky spirit of the season!
Now you have 9 frightfully easy recipes ready to make your party a smash. Which one of these spooky treats are you most excited to try first? Let me know in the comments below
Last update on 2026-06-29 at 00:11 / Affiliate links / Images from Amazon Product Advertising API
