As an Amazon Associate BakingBakewareSets.com earns from qualifying purchases.
11 Easy Halloween Baking Recipes Kids Will Love This Year
Are you searching for fun Halloween activities that go beyond just costumes and candy? Do you dream of creating spooky, delicious treats with your kids but dread the thought of complicated recipes, long ingredient lists, and a kitchen covered in flour and food coloring? It’s a common challenge for busy parents: finding Halloween recipes that are simple enough for little hands to help with but still deliver that “wow” factor.
You need ideas that are more about fun and connection than culinary perfection. The goal is to find kid-friendly Halloween treats that are engaging, mostly mess-free, and result in something you’re all proud to share and eat. This guide is your answer. Halloween baking with kids is a fantastic family activity that combines creativity and fun, helping to develop fine motor skills, teach basic kitchen science, and create delicious, spooky treats perfect for parties or a festive afternoon. This guide offers 11 easy recipes designed for all skill levels, ensuring more smiles and fewer kitchen nightmares.
☰ Table of Contents ▼
show
Looking for Spooky & Simple Halloween Treats Your Kids Can Actually Make?
Yes, you can absolutely find easy, fun, and visually appealing Halloween baking and treat-making ideas that are perfect for children with beginner skill levels. The secret is to focus on recipes that prioritize assembly and decoration over complex baking techniques. From no-bake wonders that come together in minutes to simple baked goods that serve as a canvas for creativity, there are countless ways to get your kids involved in the kitchen this Halloween.
I remember the first time I tried an overly ambitious Halloween recipe with my little ones. The result was more trick than treat! That experience taught me that the best holiday memories are made when things are kept simple and joyful. That’s why I’ve curated this list of spooktacularly simple recipes. Each one is designed to be a success, perfect for little hands and short attention spans, ensuring you have a fun and memorable experience creating spooky sweets together.
11 Easy Halloween Baking Recipes Kids Will Love This Year
This curated list of 11 easy Halloween treats offers a fantastic mix of no-bake options for quick fun and simple baked goods for a more traditional kitchen experience. We’ve selected these recipes specifically for their high success rate with young helpers and their impressive “wow” factor, based on our own experience hosting kids’ Halloween parties and baking sessions. Whether you need fun Halloween recipes for a school party, a festive after-school snack, or just a memorable family activity, you’ll find the perfect idea right here.
We’ve included a variety of themes, from classic monsters and mummies to creepy spiders and cute pumpkins. Each recipe features straightforward, step-by-step instructions and practical tips on how to get your kids involved at every stage. Get ready to create some delicious memories!
1. No-Bake Mummy Oreo Bark

Save this spooky-easy idea to your “Halloween Treats” board!
This No-Bake Mummy Oreo Bark is the ultimate easy Halloween treat, requiring no oven and only three simple ingredients. It’s the perfect recipe for even the youngest toddlers to help with, as they can have a blast crushing the cookies, sprinkling them into the chocolate, and, of course, placing the all-important candy eyeballs.
Ingredients:
- 16 oz white chocolate melting wafers
- 15 Oreo cookies, crushed
- 1/2 cup candy eyeballs
Instructions:
- Line a baking sheet with parchment paper to prevent sticking and ensure easy cleanup.
- In a microwave-safe bowl, melt 12 oz of the white chocolate wafers. Microwave in 30-second intervals, stirring between each one, until the chocolate is completely smooth. For the best results, use high-quality white chocolate melting wafers specifically designed for an easy, lump-free melt.
- Let the kids stir the crushed Oreo cookies into the melted chocolate. They’ll love this part!
- Pour the chocolate-cookie mixture onto the prepared baking sheet and help your child spread it into an even layer with a spatula.
- Melt the remaining 4 oz of white chocolate. Let your child help drizzle it over the bark to create the crisscrossing “mummy” strips.
- Before the chocolate sets, let them press the candy eyeballs into the bark wherever they like.
- Refrigerate the bark for at least 30 minutes, or until it’s completely firm. Once set, break it into spooky shards and enjoy!
Pro-Tip: For cleaner and more controlled drizzles, pour the melted white chocolate into a small plastic sandwich bag and snip off a tiny corner. This transforms it into a simple piping bag that gives kids much more control than using a messy spoon.

2. Spooky Strawberry Ghosts

Pin this healthy-ish Halloween treat for later!
If you’re looking for a healthier Halloween treat that doesn’t skimp on the fun, these Spooky Strawberry Ghosts are a fantastic choice. They combine the freshness of fruit with the sweetness of white chocolate, creating a light and refreshing snack that kids adore. The dipping and decorating process is a wonderful sensory activity for children.
Ingredients:
- 1 lb fresh strawberries, washed and dried thoroughly
- 12 oz white chocolate melting wafers
- Mini chocolate chips
Instructions:
- Prepare your workstation by lining a large baking sheet with wax or parchment paper.
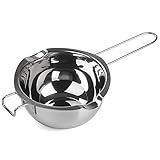
- Melt the white chocolate in a deep, narrow bowl, which makes dipping the strawberries much easier. Using a double boiler for melting chocolate is a great method to prevent scorching and ensures you get a perfectly smooth consistency for dipping.
- Show your child how to hold a strawberry by its green stem and dip it into the melted white chocolate, leaving a little bit of red showing at the top.
- Gently shake off any excess chocolate, allowing it to drip slightly to form a ghostly “tail,” then place the strawberry on the prepared baking sheet.
- Before the chocolate has a chance to set, let your child carefully place two mini chocolate chips for the eyes and one for a spooky, open mouth.
- Place the baking sheet in the refrigerator for about 15 minutes, or just until the white chocolate is firm to the touch.
Lesson Learned: From my own experience, I can’t stress this enough: make sure your strawberries are completely dry before you start dipping. Even a tiny drop of water can cause the melted chocolate to “seize,” turning it into a thick, clumpy mess.

Save this creepy-crawly cookie idea to your Halloween board!
These Peanut Butter Spider Cookies are a Halloween classic for a reason. They are incredibly easy to assemble, especially when you use store-bought cookies as a base, and the final result is adorably spooky. This is a wonderful activity for teaching kids about symmetry as they carefully add the chocolate legs and eyes.
Ingredients:
- 1 dozen peanut butter cookies (store-bought or your favorite recipe)
- 12 mini Reese’s peanut butter cups, unwrapped
- 1/4 cup semi-sweet chocolate chips, melted
- 24 candy eyeballs
Instructions:
- Arrange the peanut butter cookies on a flat surface like a baking sheet or cutting board.
- If you’ve just baked the cookies, press one mini Reese’s cup into the center of each one while they are still warm and soft. If you’re using pre-made cookies, simply use a small dab of melted chocolate as “glue” to secure the Reese’s cup body.
- Pour your melted semi-sweet chocolate into a piping bag fitted with a small round tip. This tool gives you the precision and control needed to draw thin, delicate, spider-like legs.
- Carefully pipe four legs on the left side of the Reese’s cup body and four legs on the right side.
- Use a tiny dot of melted chocolate to attach two candy eyeballs to the front of the Reese’s cup, giving your spider a cute and goofy look.
- Allow the chocolate to set completely at room temperature before serving or storing your creepy-crawly creations.
Pro-Tip: If you don’t have a piping bag on hand, don’t worry! A simple Ziploc or sandwich bag works just as well for drawing the spider legs. Just spoon the melted chocolate inside, push it to one corner, and snip off a tiny bit of the tip.

4. Silly Monster Cupcakes

Pin this monsterously fun cupcake idea!
Unleash your child’s inner artist with these Silly Monster Cupcakes. This is less of a strict recipe and more of a creative project. A simple cupcake serves as a blank canvas for endless monster possibilities, making it a perfect activity for Halloween parties or a fun-filled afternoon. Kids can practice their fine motor skills while letting their imaginations run wild.
Materials Needed:
- 1 dozen baked and cooled cupcakes (any flavor) in festive Halloween cupcake liners
- 1 container of white vanilla frosting
- Green, purple, and orange food coloring
- Assorted candy eyeballs in various sizes
- Assorted Halloween sprinkles (jimmies, nonpareils, monster teeth shapes)
Step-by-Step Directions:
- Divide the white frosting evenly among three bowls. Add a few drops of food coloring to each bowl—green in one, purple in the second, and orange in the third—and mix thoroughly until the colors are vibrant and consistent.
- Let the kids take the lead on frosting the cooled cupcakes. They can use a kid-safe knife or a small spatula to spread it on, or you can help them pipe a big swirl on top.
- Create a “decorating station” by setting out small, easy-to-reach bowls of the candy eyeballs and various Halloween sprinkles. This is where their creativity truly takes over!
- Encourage them to design their own unique monster faces. They can create a one-eyed monster, a monster with five eyes, or a fuzzy-looking monster by pulling up little peaks in the frosting with the back of a spoon. Sprinkles can become hair, eyebrows, or a toothy grin.
Pro-Tip: To easily make frosting look like shaggy monster “fur,” use a grass piping tip (like a Wilton #233). It’s a simple technique that creates a professional-looking, textured effect that kids find absolutely fascinating.


Save this classic cookie decorating idea for a fun afternoon!
Decorating sugar cookies is a quintessential holiday activity, and Halloween is no exception. This traditional baking project is wonderful for developing fine motor skills and spatial reasoning as kids roll the dough, use cookie cutters, and meticulously decorate their spooky creations with icing and sprinkles.
Materials Needed:
- 1 roll of refrigerated sugar cookie dough (or your favorite homemade recipe)
- All-purpose flour, for dusting
- A Halloween cookie cutter set that includes classic bat and pumpkin shapes
- Tubes of store-bought orange, black, and green cookie icing with tips
- A variety of Halloween sprinkles
Step-by-Step Directions:
- Preheat your oven according to the instructions on your cookie dough package.
- On a lightly floured surface, let your child help you roll out the cookie dough to an even 1/4-inch thickness.
- This is the fun part! Let the kids use the cookie cutters to press out as many bat and pumpkin shapes as they can. Carefully transfer the shapes to a parchment-lined baking sheet.
- Bake as directed by the recipe and allow the cookies to cool completely on a wire rack before decorating.
- Once the cookies are cool, it’s time to decorate! The tubes of icing make it easy for little hands to outline and fill in the shapes. Let them add sprinkles and other decorations before the icing sets.
Pro-Tip: To ensure your cookies hold their intricate shapes perfectly during baking, place the baking sheet with the cut-out dough into the freezer for about 10 minutes before putting it in the hot oven. This quick chill helps prevent the cookies from spreading.

6. Ghoulishly Green Slime Popcorn

Pin this ooey-gooey snack idea for your Halloween movie night!
This Slime Popcorn is the perfect treat for a spooky movie night. It’s a fantastic sensory experience for kids, who will be fascinated by the transformation of marshmallows into a sticky, gooey, green “slime.” It’s also a great, subtle way to talk about states of matter as the solid marshmallows melt into a viscous liquid.
Ingredients:
- 10 cups of plain, popped popcorn
- 1 bag (10 oz) of mini marshmallows
- 4 tbsp butter
- Green food coloring
- 1/2 cup candy eyeballs
Instructions:
- Place your popped popcorn in a very large, heatproof bowl. Make sure it’s big enough to allow for easy mixing later on.
- In a medium saucepan, melt the butter over low heat. Once melted, add the entire bag of mini marshmallows and stir continuously with a silicone spatula until they are completely melted and smooth.
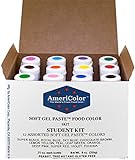
- Remove the saucepan from the heat and stir in several drops of green food coloring until you achieve a vibrant, slimy green color. Using a high-quality gel food coloring will give you a rich color without making the marshmallow mixture watery.
- Working carefully, pour the hot green marshmallow mixture all over the popcorn in the large bowl.
- Using a well-greased spatula, gently fold and stir the popcorn and marshmallow mixture together until the popcorn is evenly coated. This is a great step for older kids to help with under supervision.
- While the mixture is still sticky, stir in the candy eyeballs. Let it cool slightly before serving to the ghouls and goblins.
Lesson Learned: You need to work quickly once the marshmallow mixture is poured over the popcorn, as it will begin to set and harden fast. If you want to form the mixture into popcorn balls, grease your hands with butter or cooking spray to prevent a sticky mess.
7. Silly Rice Krispie Monsters

Save this easy no-bake monster idea for a quick party treat!
Transforming classic Rice Krispie treats into silly monsters is one of the easiest and most customizable Halloween activities you can do. It requires no baking and allows for maximum creativity with minimal effort and mess. Kids can design their own unique monster friend, making it a perfect treat for class parties.
Materials Needed:
- 1 batch of prepared Rice Krispie treats, cut into rectangles
- Bags of colored candy melts (green, purple, orange)
- Candy eyeballs in various sizes
- Halloween sprinkles
- Popsicle sticks (optional, but they make dipping easier)
Step-by-Step Directions:
- If you’re using them, carefully insert a popsicle stick into the bottom of each Rice Krispie treat rectangle to create a handle.
- Melt the different colored candy melts in separate, wide-mouthed, microwave-safe bowls according to the package directions. Using a variety of colored candy melts is the key to making a vibrant and diverse monster crew.
- Let your child dip one end of a Rice Krispie treat into their chosen color of melted candy, covering about half of it.
- Immediately place the dipped treat on a sheet of wax paper to prevent sticking.
- Before the candy coating has a chance to harden, let the kids go wild decorating their monsters with candy eyeballs and festive Halloween sprinkles.
- Allow the treats to sit at room temperature or in the refrigerator for a few minutes until the colorful candy coating is completely firm.
Pro-Tip: For an ultra-smooth candy coating that’s perfect for dipping, add about a teaspoon of coconut oil or vegetable shortening to the candy melts before you microwave them. It helps them melt more evenly and creates a wonderfully fluid consistency.

8. Witch Hat Cone Cupcakes

Pin this magical cupcake idea for your Halloween party!
These Witch Hat Cone Cupcakes are a clever and visually impressive treat that will be the star of any Halloween party. While they look intricate, they are surprisingly simple to assemble, turning a basic cupcake into a magical, edible work of art.
Materials Needed:
- 1 dozen baked chocolate cupcakes
- 1 container vanilla frosting
- Green and orange food coloring
- 12 pointed sugar cones for baking
- 1 bag (12 oz) dark chocolate melting wafers
- 12 large round chocolate cookies (like the wafer part of an Oreo) for the hat brim
Step-by-Step Directions:
- Melt the dark chocolate wafers until smooth. Let your child help dip the sugar cones into the chocolate, using a spoon to coat them completely. Place the cones upside down on wax paper to set.
- Create the hat brim by placing the round chocolate cookies on the wax paper. Add a small dollop of melted chocolate to the center of each cookie and then place a set chocolate cone on top. This “glues” the hat together. Let it set fully.
- Divide your vanilla frosting and tint it with food coloring to create separate batches of green and orange.
- Pipe or spread a generous swirl of green frosting onto each chocolate cupcake.
- Carefully place one of the finished chocolate witch hats on top of the green frosting.
- Using a small piping bag or a Ziploc bag with the corner snipped, let your child add a decorative orange band around the base of the cone hat.
Lesson Learned: Be patient and make sure the chocolate-coated cones are completely firm and set before you try to assemble them onto the cupcakes. If they are still soft, they can easily collapse or slide off the frosting.

9. Jack-o’-Lantern Mandarin Orange Pumpkins

Save this super-easy and healthy Halloween snack idea!
When you need an incredibly simple, healthy, and allergy-friendly Halloween snack, these Mandarin Orange Pumpkins are the perfect solution. They are ideal for classroom parties where treats need to be safe for everyone, and they are so easy to make that even the smallest toddlers can feel like they are cooking.
Ingredients:
- Mandarin oranges, clementines, or tangerines
- Celery stalks
Instructions:
- Let your child practice their peeling skills on the mandarin oranges. Help them get started, but encourage them to do as much as they can on their own, being careful to keep the orange whole.
- While they are peeling, wash and dry the celery stalks.
- Cut the celery into small, thin pieces that are about 1-inch long, perfect for resembling a pumpkin stem.
- Show your child how to gently push one small piece of celery into the center hole at the top of each peeled mandarin orange.
- Arrange your adorable and healthy mini fruit pumpkins on a festive Halloween fruit platter for a vibrant and guilt-free display that everyone will love.
Pro-Tip: This is the perfect “first recipe” for toddlers. The act of peeling the orange and carefully pushing in the celery stem is a fantastic activity for developing their fine motor skills and hand-eye coordination.

10. Funny Face Halloween Brownies

Pin this easy brownie decorating idea for a guaranteed laugh!
Everyone loves a good brownie, and this activity provides an easy and hilarious way to dress them up for Halloween. Using a pan of baked brownies as your starting point, you can create an entire village of funny, spooky, or downright goofy monster faces.
Materials Needed:
- 1 batch of baked and cooled brownies, cut into squares. Using a quality square brownie pan with dividers is a fantastic trick to ensure you get perfectly uniform squares every time.
- Vanilla frosting, tinted with green, orange, or purple food coloring
- A generous supply of candy eyeballs
- 1 tube of black decorating icing with a writing tip
Step-by-Step Directions:
- Bake your favorite brownie recipe (or a box mix!) in a square pan and allow it to cool completely before cutting into individual squares.
- Spread a small, thin layer of colored frosting on top of each brownie square. It doesn’t have to be perfect—a messy smear adds to the monster character!
- Let the kids place the candy eyeballs on the frosting. Encourage them to be creative—maybe one monster has three eyes, and another has only one!
- Use the tube of black decorating icing to draw funny, spooky, or silly mouths right under the eyes. A simple squiggle, a zig-zag, or a single line can create a ton of personality.
- Allow the icing to set for a few minutes before serving up your hilarious brownie creations.
Lesson Learned: For incredibly clean, professional-looking brownie cuts, chill the entire pan of brownies in the refrigerator for at least 30 minutes before slicing. For extra fudgy brownies, a plastic knife often works better than a metal one to prevent sticking and crumbling.


Save this classic, quick, and easy Halloween treat!
Arguably one of the most recognizable and easiest Halloween treats, these Oreo Mummy Cookies are a must-make. With only three simple ingredients and no baking required, you can whip up a batch of these adorable mummies in just a few minutes, making them a perfect last-minute party contribution.
Ingredients:
- 1 package of classic Oreo cookies
- 12 oz white chocolate melting wafers
- Candy eyeballs
Instructions:
- Line a baking sheet with wax or parchment paper for easy cleanup.
- Melt the white chocolate in a microwave-safe bowl until it’s smooth and ready for drizzling.
- Place two candy eyeballs onto each Oreo cookie. Use a tiny dab of the melted white chocolate as “glue” to secure them in place. Using edible candy eyeballs is crucial for making this step work perfectly.
- Dip a fork into the remaining melted white chocolate, then wave it back and forth over the cookies to create thin, layered drizzles that look just like mummy wraps. Be sure to leave the candy eyes peeking out!
- Let the cookies sit at room temperature until the chocolate is completely set. If you’re in a hurry, you can place them in the refrigerator for about 10 minutes to speed up the process.
Pro-Tip: Resist the urge to dip the entire cookie in white chocolate. The drizzling method is not only faster and uses less chocolate, but it also creates a much more authentic and textured “mummy wrap” appearance.

Key Takeaways: Your Quick Guide to easy baking recipes for kids halloween
To ensure your Halloween kitchen adventures are a sweet success, keep these key points in mind:
- No-Bake is Your Best Friend: For the youngest children or when you’re simply short on time, stick to recipes that don’t require an oven. Treats like Mummy Oreo Bark, Spooky Strawberry Ghosts, and Silly Rice Krispie Monsters are perfect choices. They focus on the fun of assembly and decoration, eliminating any worries about oven safety.
- Embrace the Monster Mash: Simple baked goods like cupcakes and brownies are the perfect blank canvases for Halloween creativity. Set up a decorating station with colorful frosting, a variety of sprinkles, and lots of candy eyeballs, and let your kids’ imaginations run wild as they create their own unique monster masterpieces.
- It’s Educational Fun: Remember that every recipe is a mini-lesson in disguise. Baking with your kids teaches them valuable life skills like measuring ingredients (math), following multi-step instructions (reading and comprehension), and expressing themselves through food (art and creativity).
- Safety First, Always: Constant adult supervision is essential, especially when dealing with hot ovens, melted chocolate, or mixers. Always assign age-appropriate tasks to keep the experience fun, positive, and safe for every member of the family.
People Also Ask About easy baking recipes for kids halloween
What are some 3-ingredient Halloween treats for kids?
Oreo Mummy Cookies are a classic 3-ingredient treat using just Oreos, white chocolate, and candy eyeballs. Another incredibly simple idea is the Mandarin Orange Pumpkins, which only requires mandarin oranges and a small piece of celery for the stem. These options are perfect for quick, festive fun with minimal prep.
What are the easiest no-bake Halloween treats to make?
The easiest no-bake treats involve simple melting and assembly. Spooky Strawberry Ghosts, which are just strawberries dipped in chocolate, Ghoulishly Green Slime Popcorn made by mixing popcorn with melted marshmallows, and any kind of Halloween Bark are all fantastic options that require zero oven time and are very forgiving for beginners.
How can I make Halloween baking educational for my kids?
You can turn any baking session into a fun STEM lesson. Have your children help measure ingredients to practice real-world math and fractions. Discuss how ingredients change when they are heated or cooled to introduce basic science concepts. Allowing them to design their own monster cupcakes lets them practice art and simple engineering principles, all while having a blast.
Final Thoughts
This Halloween, remember that the best treat you can make is a lasting, happy memory. Getting into the kitchen with your kids to create these easy, spooky, and silly snacks is about so much more than just the food; it’s about spending quality time together, working as a team, and starting fun family traditions that they will cherish for years to come. We hope these 11 easy ideas inspire you to have a deliciously fun and memorable Halloween in the kitchen!
Which one of these spooky treats will you and your little monsters try first? Let us know in the comments below
Last update on 2026-07-08 at 17:17 / Affiliate links / Images from Amazon Product Advertising API
