As an Amazon Associate BakingBakewareSets.com earns from qualifying purchases.
9 Spooky Easy Halloween Pretzel Ideas for July 2026
Struggling to find a Halloween treat that’s both spooktacularly impressive and secretly simple? You’re not alone. The quest for the perfect festive snack often leads down a rabbit hole of complicated recipes that require hours of work. Halloween pretzels are the perfect answer—a delightful, kid-friendly treat that combines the irresistible crunch of salty pretzels with the sweet, creative magic of chocolate and candy decorations. They are the ultimate no-stress solution for creating memorable, spooky snacks that look like they took all day to make.
The pressure is on to bring something fun and festive to the party, the school event, or even just your own kitchen table. You want treats that wow the kids without causing a total meltdown for the baker (that’s you!). Many recipes look amazing but are secretly difficult, requiring special equipment or advanced skills. You need simple halloween baking ideas that are genuinely easy, involve the kids safely, and deliver that perfect sweet-and-salty flavor combination that everyone, from ghouls to goblins, adores. It’s all about finding that perfect balance between creative fun and practical, quick execution.
Halloween pretzels are festive, easy-to-make treats combining salty pretzels with sweet, colorful decorations. They are perfect for parties, kid-friendly activities, and last-minute spooky snacks, offering a delightful sweet-salty crunch in fun, customizable designs. This guide will unearth 9 of the best, most creative, and shockingly simple Halloween pretzel ideas for your July 2026 celebrations. We’ll cover everything from adorable mummies and spooky monsters to creepy crawly spiderwebs, providing step-by-step instructions that guarantee a fun and successful treat-making adventure for the whole family.
☰ Table of Contents ▼
show
Unearth 9 Spooky Easy Halloween Pretzel Ideas for Your July 2026 Party!
Welcome to your ultimate guide for no-stress, high-impact Halloween treats! Forget complicated baking and long ingredient lists. The beauty of Halloween pretzels lies in their simplicity and versatility. That classic sweet and salty combination is a universal crowd-pleaser, and pretzels provide the perfect crunchy canvas for all your spooky creations. In our experience, these are the treats that disappear first from the party table. We’ve handpicked 9 proven Halloween pretzel ideas that are not only easy to make but are also fantastic projects for getting the kids involved. Get ready to dip, decorate, and delight everyone with these festive, homemade halloween snacks.
9 Spooky Easy Halloween Pretzel Ideas to Charm Every Ghoul and Goblin
Here are 9 spooky easy Halloween pretzel ideas that have been tried and tested for maximum fun and minimal fuss. Each design uses simple ingredients like pretzels, candy melts, and edible decorations to create a show-stopping platter of Halloween party treats. These recipes are designed to be foolproof, making them a perfect kid-friendly activity. Let’s dive into the spooktacular world of decorated halloween pretzels!
1. Spooky Mummy Pretzels

Pin this genius tips to your ‘Dream Halloween’ board!
These adorable mummy pretzels are a classic for a reason. Using just a few ingredients—pretzel rods, smooth white chocolate, and expressive candy eyes—you can create a batch of spooky, cute treats in minutes. They are the perfect entry-level project for little helpers.
Materials Needed:
- 1 bag (12 oz) pretzel rods (sturdy, straight pretzel rods work best for dipping)
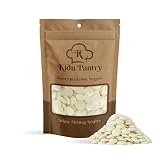
- 1 bag (12 oz) white candy melts (specifically designed for smooth melting and setting)
- 1 container edible candy eyes (various sizes for character)
- Parchment paper or wax paper
- Baking sheet
Step-by-Step Directions:
- Line a baking sheet with parchment paper.
- In a microwave-safe bowl, melt white candy melts in 30-second intervals, stirring thoroughly after each, until completely smooth and fluid. Be careful not to overheat.
- Dip each pretzel rod into the melted white chocolate, leaving a small section at the top undipped for “the head.” Tap gently against the side of the bowl to remove excess chocolate.
- Lay the dipped pretzels on the prepared baking sheet. While the chocolate is still wet, place two candy eyes near the top (the undipped section).
- Allow the chocolate to set slightly, then transfer any remaining melted white chocolate into a piping bag or a ziploc bag with a tiny corner snipped off.
- Drizzle the chocolate horizontally across the dipped pretzel, overlapping to create the “bandages” around the eyes.
- Let the mummy pretzels set completely at room temperature or chill in the refrigerator for 10-15 minutes for quicker setting.
Pro-Tip: For extra-crisp white chocolate bandages, drizzle in two passes: first a light layer, then a second slightly thicker layer after the first has mostly set.
2. Cute Pumpkin Patch Pretzels

Save this clever organization idea!
Transform bite-sized pretzel twists into a charming pumpkin patch! These festive treats use vibrant orange candy melts and a touch of green icing to create an iconic Halloween symbol that’s almost too cute to eat.
Materials Needed:
- 1 bag (16 oz) mini pretzel twists (ensures a good “pumpkin” shape)
- 1 bag (12 oz) orange candy melts (for bright, consistent color)
- 1/4 cup green candy melts or green cookie icing (for stems)
- Parchment paper or wax paper
- Baking sheet
Step-by-Step Directions:
- Line a baking sheet with parchment paper.
- Melt the orange candy melts in a microwave-safe bowl in 30-second bursts, stirring until smooth.
- Dip each mini pretzel twist into the orange candy melts, ensuring it’s fully coated. Lift with a fork and tap off any excess.
- Place the dipped pretzels on the prepared baking sheet.
- Melt the green candy melts (if using) in a separate small bowl, or prepare green cookie icing.
- Once the orange chocolate has almost set (it should still be tacky), use a small spoon or a piping bag with a tiny hole to drizzle a small “stem” or leaf design on top of each pretzel pumpkin.
- Allow to set completely at room temperature or in the refrigerator.
Pro-Tip: If the orange candy melts become too thick, add 1/2 teaspoon of vegetable shortening or coconut oil and stir until smooth again.

3. Frightening Monster Pretzel Rods

Get ready for monstrous fun, save this idea!
Unleash your creativity with these quirky and colorful monster pretzel rods. There are no rules here—use different colored candy melts, a wild assortment of Halloween sprinkles, and as many candy eyes as you like to create a mob of fun, friendly monsters.
Materials Needed:
- 1 bag (12 oz) pretzel rods (the foundation for tall, spooky monsters)
- Assorted bags (12 oz each) of green, purple, and black candy melts (for vibrant monster colors)
- 1 container edible candy eyes (assorted sizes)
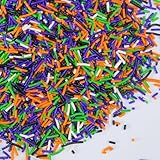
- Assorted Halloween sprinkles (jimmies, nonpareils, seasonal shapes)
- Parchment paper or wax paper
- Baking sheet
Step-by-Step Directions:
- Line a baking sheet with parchment paper.
- Melt each color of candy melts separately in microwave-safe bowls, stirring until smooth. Use deep, narrow bowls for easier dipping.
- Dip about two-thirds of each pretzel rod into one color of melted candy. Tap off excess.
- Place the dipped rods on the prepared baking sheet. While the coating is still wet, apply candy eyes (one, two, or three per monster!) and press various sprinkles onto the coated area.
- For extra details, use a contrasting color of melted candy in a piping bag to create mouths, scars, or additional monster features once the first coat is partially set.
- Let set completely at room temperature or in the refrigerator.
Pro-Tip: Set up a “monster factory” station with small bowls of different sprinkles and candy eyes so kids can easily customize their own creations, minimizing mess and maximizing fun.
4. Ghoulish Pretzel Bones

Save this spooky recipe for your next Halloween bash!
These ghoulish pretzel bones are brilliantly simple yet incredibly effective. By combining pretzel sticks, mini marshmallows, and bright white chocolate, you can assemble a pile of spooky, skeletal bones that are perfect for any Halloween party platter.
Materials Needed:
- 1 bag (8-10 oz) small pretzel sticks (ensure they are uniform in size)
- 1 bag (12 oz) white candy melts or good quality white chocolate chips (for the bone color)
- 1 bag mini marshmallows (the key to the “bone” ends)
- Parchment paper or wax paper
- Baking sheet
Step-by-Step Directions:
- Line a baking sheet with parchment paper.
- Melt the white candy melts or chocolate chips in a microwave-safe bowl in 30-second intervals, stirring until smooth.
- Dip each end of a pretzel stick into the melted white chocolate, leaving the middle section uncovered.
- Immediately, while the chocolate is still wet, gently press a mini marshmallow onto each dipped end of the pretzel stick, shaping it slightly to resemble the rounded end of a bone.
- Place the finished pretzel bones on the prepared baking sheet.
- Allow them to set completely at room temperature or chill in the refrigerator for 10-15 minutes.
Pro-Tip: If using white chocolate chips instead of candy melts, add 1/2 teaspoon of vegetable shortening per cup of chocolate to make it smoother and easier to work with, and to help it set more quickly.

5. Creepy Crawly Spiderweb Pretzels

Pin this spooky spiderweb design!
These intricate-looking spiderweb pretzels are surprisingly easy to create. A dark chocolate base on a mini pretzel twist provides the perfect backdrop for a delicate white chocolate web, proving that even beginner-friendly halloween treats can look professionally made.
Materials Needed:
- 1 bag (16 oz) mini pretzel twists (choose symmetrical ones for best web base)
- 1 bag (12 oz) black candy melts or dark chocolate chips (for the web’s dark background)
- 1/2 bag (6 oz) white candy melts or white chocolate chips (for piping the web)
- Parchment paper or wax paper
- Baking sheet
- Small plastic spiders (optional, for garnish)
Step-by-Step Directions:
- Line a baking sheet with parchment paper.
- Melt the black candy melts or dark chocolate chips in a microwave-safe bowl until smooth.
- Dip each mini pretzel twist completely into the dark chocolate, ensuring full coverage. Tap off excess and place on the prepared baking sheet.
- While the black chocolate is setting but still slightly tacky, melt the white candy melts in a separate small bowl. Transfer the melted white chocolate into a piping bag or a ziploc bag with a tiny corner snipped off.
- Pipe three concentric circles of white chocolate onto the black-coated pretzel.
- Using a toothpick, drag it from the center of the pretzel outwards, through the white circles, to create the “spokes” of the spiderweb design. Repeat 3-4 times around the pretzel.
- If desired, place a small plastic spider onto one of the webs.
- Allow to set completely at room temperature or in the refrigerator.
Pro-Tip: For a really neat web, work quickly while the black chocolate is still quite wet. If it sets too much, the white chocolate won’t blend smoothly when dragged.

6. Eerie Ghostly Pretzel Twists

Save this adorable ghost idea for your trick-or-treaters!
Say “Boo!” with these friendly ghost pretzels. A simple dip in white chocolate transforms mini pretzel twists into spooky spirits. Once they’re set, an edible food marker is all you need to give each one a unique, eerie face.
Materials Needed:
- 1 bag (16 oz) mini pretzel twists (the perfect canvas for a ghost)
- 1 bag (12 oz) white candy melts or white chocolate chips (for the ghostly coating)
- 1 black edible food marker (fine tip for drawing faces)
- Parchment paper or wax paper
- Baking sheet
Step-by-Step Directions:
- Line a baking sheet with parchment paper.
- Melt the white candy melts or chocolate chips in a microwave-safe bowl, stirring until smooth and fluid.
- Dip each mini pretzel twist into the melted white chocolate, ensuring it’s fully coated. Lift with a fork and tap off excess, allowing a few drips to hang for a “sheet-like” effect.
- Place the dipped pretzels on the prepared baking sheet.
- Allow the chocolate to set completely (this is important before drawing). Chill in the refrigerator for 10-15 minutes to speed up the process.
- Once fully set, use the black edible food marker to draw simple ghost faces (two dots for eyes, an oval or wavy line for a mouth) onto each white pretzel.
Pro-Tip: Make sure the white chocolate is completely hardened before drawing on the faces. Any lingering softness can cause the edible marker to bleed or smudge.

7. Witch’s Broomstick Pretzels

Fly into action! Pin this magical treat!
These witch’s broomstick pretzels are more assembly than recipe, making them one of the fastest treats on our list. The combination of a pretzel rod handle and a miniature Reese’s Peanut Butter Cup for bristles creates an instantly recognizable and delicious edible craft.
Materials Needed:
- 1 bag (12 oz) thin pretzel rods (for the broom handles)
- 1 bag miniature Reese’s Peanut Butter Cups (the “bristles” of the broom)
- 1/4 cup chocolate chips or candy melts (for “glue”)
- Black licorice laces (optional, for tying the broom)
- Parchment paper or wax paper
- Baking sheet
Step-by-Step Directions:
- Line a baking sheet with parchment paper.
- Unwrap all the miniature Reese’s Peanut Butter Cups.
- Melt a small amount of chocolate chips or candy melts in a microwave-safe bowl (this will act as your “glue”).
- Dip one end of a pretzel rod into the melted chocolate, just enough to coat about an inch.
- Immediately press the dipped end of the pretzel rod into the top (flat side) of an unwrapped Reese’s Peanut Butter Cup, pushing it in gently until secure. The cup should be upside down, so the wider, ridged base faces outwards, resembling broom bristles.
- Place the broomstick pretzel on the prepared baking sheet.
- If using, tie a small piece of black licorice lace around the pretzel rod just above where it meets the Reese’s cup for added detail.
- Allow to set completely, chilling in the refrigerator for 15-20 minutes to ensure the chocolate glue hardens.
Pro-Tip: Store these broomsticks upright in a tall glass or jar for a whimsical display until party time!

8. Classic Candy Corn Pretzel Bites

Sweet and salty perfection! Save this classic!
This 3-ingredient wonder is a beloved Halloween classic. The combination of a salty pretzel, a melted Hershey’s Kiss, and a piece of candy corn is the definition of sweet and salty perfection. It’s a quick, easy, and endlessly snackable treat.
Materials Needed:
- 1 bag (16 oz) mini square or round pretzels (e.g., pretzel snaps or mini twists)
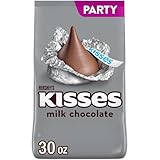
- 1 bag (10 oz) Hershey’s Kisses, unwrapped (milk chocolate or white chocolate will work)
- 1 bag (11 oz) candy corn (the iconic Halloween candy)
- Parchment paper or wax paper
- Baking sheet
Step-by-Step Directions:
- Preheat oven to 200°F (93°C). Line a baking sheet with parchment paper.
- Arrange the pretzels in a single layer on the prepared baking sheet.
- Place one unwrapped Hershey’s Kiss on top of each pretzel.
- Bake for 3-5 minutes, or until the Hershey’s Kisses are shiny and slightly softened but not fully melted into a puddle.
- Remove from oven. Immediately press one candy corn piece firmly onto the center of each softened Hershey’s Kiss. The warmth of the chocolate will help it adhere.
- Allow to cool and set completely at room temperature, or chill in the refrigerator for about 10 minutes to speed up the hardening process.
Pro-Tip: For extra flavor and visual variety, try using Hershey’s Hugs (white chocolate with milk chocolate stripes) or other flavored Kisses!
9. Bloody Vampire Teeth Pretzel Bites

Get your fangs ready! Pin this bloody good idea!
Sink your teeth into these spooky vampire bites! This creative design uses mini pretzels, red candy melts for “gums,” and slivered almonds for sharp “fangs.” They are a fantastically eerie addition to any Halloween spread.
Materials Needed:
- 1 bag (16 oz) mini pretzel twists or square pretzels (for the “mouth” base)
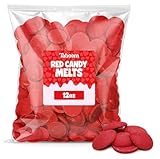
- 1 bag (12 oz) red candy melts or white candy melts + red gel food coloring (for the “gums” and “blood”)
- 1/2 cup slivered almonds (for the “fangs”)
- Parchment paper or wax paper
- Baking sheet
- Toothpicks or small knife
Step-by-Step Directions:
- Line a baking sheet with parchment paper.
- Melt the red candy melts (or white candy melts with a few drops of red gel food coloring until desired blood-red color is achieved) in a microwave-safe bowl until smooth.
- Take two mini pretzels. Dip one side of each pretzel into the red melted candy, coating it completely. These will be your “gums.”
- On the parchment-lined sheet, place one red-dipped pretzel. Spoon a small dollop of the red melted candy onto the red-dipped side.
- Carefully place two slivered almonds (pointy side out) onto the red candy dollop, positioning them like vampire fangs.
- Immediately place the second red-dipped pretzel on top of the almonds, gently pressing down to sandwich the almonds and the red candy “gums.”
- Using a toothpick, apply a tiny “drip” of red melted candy or red gel food coloring near the almonds for a “bloody” effect.
- Allow to set completely at room temperature or chill in the refrigerator for 15-20 minutes.
Pro-Tip: If the red candy melts are too thick to easily sandwich the almonds, add a tiny bit of vegetable shortening to thin them out. Ensure the almonds are firmly pressed in to prevent them from falling out.
Key Takeaways: Your Quick Guide to halloween recipes pretzels
- Ease: All 9 recipes are designed for minimal effort and quick assembly, perfect for busy schedules.
- Variety: From mummies to monsters, there’s a spooky design for every taste and skill level.
- Kid-Friendly: Involve little helpers in decorating for a fun, hands-on Halloween activity.
- Sweet & Salty: The irresistible combination makes these treats universally appealing.
- Make-Ahead: Prepare these festive pretzels up to two weeks in advance for stress-free party planning.
People Also Ask About Halloween Pretzel Treats
What kind of pretzels are best for dipping?
Pretzel rods are ideal for dipping due to their long, sturdy shape, making them easy to handle and decorate with linear designs like mummies or monster legs. Mini pretzel twists or square pretzels work well for bite-sized treats like pumpkins or candy corn clusters, offering a broader surface for coating. Choose thicker, sturdier pretzels to prevent breakage during handling.
How do you melt chocolate or candy melts for dipping smoothly?
For smooth, dippable chocolate or candy melts, use a double boiler or microwave on low power. In the microwave, heat in 30-second intervals, stirring thoroughly after each, until smooth and fluid. Avoid overheating, as this can cause chocolate to seize or become lumpy. Ensure all utensils and bowls are completely dry to prevent seizing.
How do I get sprinkles and candy eyes to stick to Halloween pretzels?
The key to getting sprinkles and candy eyes to stick is to apply them immediately after dipping the pretzel in melted chocolate or candy melts, while the coating is still wet. If the chocolate starts to harden, you can dab a tiny bit of fresh melted chocolate on the back of the decoration to help it adhere. Working in small batches can also prevent the chocolate from setting too quickly.
Can kids help make Halloween pretzels, and how can I involve them safely?
Absolutely! Halloween pretzels are a fantastic kid-friendly activity. Children can safely participate by stirring sprinkles, placing candy eyes, or arranging candy corn after the pretzels have been dipped by an adult. For older children, with adult supervision, they can help with dipping the pretzels in the cooled, melted chocolate. Ensure hot chocolate is handled by adults.
How long do homemade Halloween pretzels last and how should I store them?
When stored in an airtight container at room temperature, homemade Halloween pretzels typically stay fresh for 1 to 2 weeks. Keep them away from direct sunlight or excessive heat, which can cause the chocolate to melt or discolor. Avoid refrigerating, as condensation can make the pretzels soggy and affect the chocolate’s texture.
Final Thoughts
Halloween is all about embracing the spooky spirit with fun, memorable moments—and these 9 easy pretzel ideas are designed to do just that! Whether you’re whipping up a quick snack for the family or preparing a show-stopping platter for a party, these sweet and salty treats offer a perfect blend of simplicity and festive charm. You’ve got all the tips and tricks to make these creations come to life, from creepy mummies to charming pumpkins. So, grab your pretzels, melts, and imagination, and get ready to create some deliciously spooky magic!
Which of these spooky easy Halloween pretzel ideas are you most excited to try first for your July 2026 celebrations? Let us know in the comments below
Last update on 2026-07-25 at 18:09 / Affiliate links / Images from Amazon Product Advertising API
