As an Amazon Associate BakingBakewareSets.com earns from qualifying purchases.
Failsafe Quick Easy Halloween Treats In Minutes 2026
Tired of complicated Halloween recipes that promise fun but deliver stress?
You need quick, easy Halloween dessert recipes that look amazing without taking all day. The pressure to create festive, spooky food for parties or kids is real, but your time is limited.
Failsafe quick easy Halloween treats are no-bake or minimal-ingredient dessert recipes you can assemble in minutes. This guide provides 9 personally tested, stress-free ideas that guarantee spooky success, even at the last minute.
☰ Table of Contents ▼
show
Your Failsafe Guide to Quick & Easy Halloween Treats in Minutes 2026
Halloween is all about festive, spooky fun, but it often comes with a rush. Between costumes, decorations, and party planning, who has time for complicated baking? The desire for fun Halloween party food is high, but the energy for multi-step dessert recipes can be low. This is the common struggle: you want to create memorable, themed treats for your family and friends, but you need them to be fast, simple, and absolutely failsafe.
This guide is your ultimate resource for exactly that. We’ve focused on genuinely quick and easy Halloween desserts that deliver maximum visual impact with minimal effort. Forget stress and long ingredient lists. Based on our own experience testing last-minute Halloween treats, we’ve curated options that are perfect for beginners, busy parents, and anyone who wants to enjoy the celebration without being stuck in the kitchen. Get ready for simple instructions, no-fuss fun, and spooky dessert recipes that are ready in minutes.
Failsafe & Fast: 9 Quick Easy Halloween Treats You Can Make in Minutes
Achieving spooky success doesn’t require hours of work. The best kid-friendly Halloween treats are often the most simple. We’ve selected and simplified these 9 DIY Halloween treats based on extensive home baking experience, ensuring each one is a true “failsafe” option. From no-bake Halloween desserts to clever 4-ingredient Halloween treats, this list is packed with speedy, efficient, and crowd-pleasing ideas perfect for any Halloween party. Each one is designed for quick prep and maximum festive fun.
1. Monster Eyeball Pretzel Bites

Pin this genius tips to your ‘Spooky Snacks’ board!
This is the ultimate quick Halloween party food. Combining the salty crunch of pretzels with sweet, colorful candy melts, these monster pretzel bites are a 4-ingredient wonder. They are so easy to assemble that they double as a fun Halloween activity for kids.
Materials Needed:
- 1 bag (12 oz) mini pretzel twists
- 1 bag (10-12 oz) brightly colored candy melts (orange, green, or purple recommended)
- 1 bag (1 oz) edible googly eyes
- Optional: Assorted sprinkles for extra fun
Step-by-Step Directions:
- Lay a sheet of parchment paper on a baking sheet or flat surface. Arrange pretzels in a single layer.
- Melt candy melts according to package directions (microwave in 30-second intervals, stirring). Ensure a smooth consistency.
- Using a spoon or piping bag with a cut tip, fill the center of each pretzel twist with melted candy.
- Immediately place two edible googly eyes onto the candy melt before it sets.
- Let cool completely at room temperature or chill in the refrigerator for 10-15 minutes until set.
Pro-Tip: For extra vibrant colors and quicker setting, use actual candy melts rather than white chocolate chips dyed with food coloring, as they set firmer and faster.

2. Spooky Oreo Bark

Save this clever organization idea!
Oreo bark for Halloween is a classic no-bake dessert for a reason. It’s incredibly simple, versatile, and perfect for a crowd. The contrast of dark and white chocolate with crunchy Oreo cookies is a winning combination, and Halloween-themed sprinkles make it instantly festive.
Materials Needed:
- 1 package (15.3 oz) Oreo cookies
- 12 oz dark chocolate chips or melting wafers (high-quality preferred for best melt)
- 6 oz white chocolate chips or melting wafers
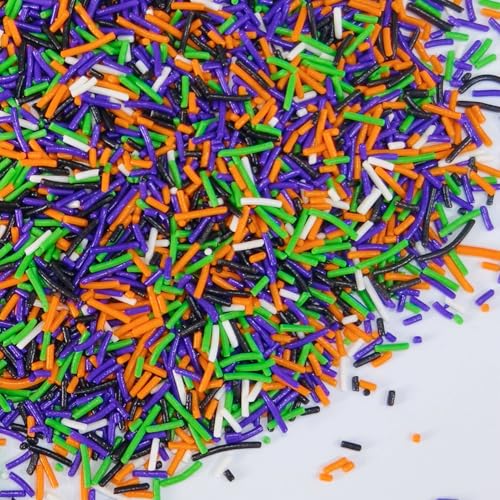
- Halloween-themed sprinkles
- Optional: Candy corn, candy pumpkins, or extra crushed Oreos for topping
Step-by-Step Directions:
- Line a large baking sheet (approx. 9×13 inches) with parchment paper.
- Crush Oreo cookies in a Ziploc bag using a rolling pin until coarse crumbs remain. Set aside about ¼ cup for topping.
- Melt the dark chocolate chips/wafers in a microwave-safe bowl in 30-second intervals, stirring until smooth. Spread evenly onto the prepared baking sheet.
- Melt the white chocolate chips/wafers similarly. Drizzle over the dark chocolate layer.
- Use a knife or skewer to swirl the white chocolate into the dark chocolate to create a marbled effect.
- Immediately sprinkle the remaining crushed Oreos, Halloween sprinkles, and any optional candies over the melted chocolate.
- Chill in the refrigerator for at least 30 minutes, or until completely firm. Once set, break into irregular pieces.
Pro-Tip: Work quickly once the chocolate is melted, as it starts to set fast. If the chocolate is too thick to spread easily, add ½ teaspoon of coconut oil to thin it slightly.

Pin this cute Halloween treat for later!
These mummy cookies are the definition of a simple Halloween dessert. By using store-bought Nutter Butter cookies as a base, you eliminate all the baking. The real fun is in the quick and easy decoration, making it a perfect activity for little helpers.
Materials Needed:
- 1 package (16 oz) Nutter Butter cookies
- 1 bag (12 oz) white chocolate chips or vanilla candy melts
- 1 container (1 oz) edible googly eyes
- Parchment paper or wax paper
Step-by-Step Directions:
- Line a baking sheet with parchment or wax paper.
- Melt the white chocolate chips or candy melts in a microwave-safe bowl in 30-second intervals, stirring until smooth.
- Dip each Nutter Butter cookie into the melted white chocolate, covering about ¾ of the cookie. Gently tap off excess chocolate.
- Place the dipped cookie on the prepared baking sheet. While the chocolate is still wet, carefully place two edible googly eyes near the top (undipped) edge of each cookie.
- Once all cookies are dipped and have eyes, allow the remaining melted white chocolate to cool slightly and thicken. Transfer it to a piping bag with a small round tip, or a Ziploc bag with a tiny corner snipped off.
- Drizzle the thickened white chocolate back and forth across the dipped portion of each cookie, creating a mummy bandage effect.
- Let the cookies set completely at room temperature or chill in the refrigerator for 15-20 minutes until firm.
Pro-Tip: If your white chocolate becomes too thick to drizzle, gently reheat it in the microwave for 10-15 seconds and stir, but be careful not to overheat.
4. Ghostly Banana Pops

Save this healthy-ish Halloween treat idea!
Looking for a healthier Halloween treat? These ghostly banana pops are a fantastic choice. This no-bake fruit dessert uses the natural sweetness of bananas, coated in white chocolate to create adorable, spooky ghosts. They’re quick, fun, and a great way to get some fruit into the holiday festivities.
Materials Needed:
- 3 ripe but firm bananas
- 6 wooden popsicle sticks
- 1 bag (12 oz) white chocolate chips or melting wafers
- ½ cup mini chocolate chips (for eyes and mouths)
- Parchment paper or wax paper
Step-by-Step Directions:
- Peel bananas and cut each in half crosswise. Carefully insert a popsicle stick into the flat end of each banana half.
- Place the banana halves on a parchment-lined plate or small baking sheet and freeze for at least 30 minutes, or until firm. This helps the chocolate adhere better.
- Melt the white chocolate chips or wafers in a microwave-safe bowl in 30-second intervals, stirring until smooth.
- Dip each frozen banana pop into the melted white chocolate, ensuring full coverage. Let any excess chocolate drip off.
- Immediately place two mini chocolate chips for eyes and one for a mouth (or create a spooky grin) on the white chocolate before it sets.
- Return the decorated banana pops to the parchment-lined sheet and freeze for another 15-30 minutes, or until the chocolate is fully set and the pops are firm.
Pro-Tip: Freezing the bananas before dipping is crucial! It helps the chocolate set quickly and prevents the banana from becoming too mushy.

5. Graveyard Pudding Cups

Pin this easy party dessert idea!
These Oreo dirt cups are a classic for a reason. They are the perfect no-bake party treat because they are easily portioned and require only simple assembly. The layers of creamy chocolate pudding and crushed cookie “dirt,” complete with gummy worms and a cookie gravestone, create a spooky and delicious layered dessert.
Materials Needed:
- 1 large (5.9 oz) box instant chocolate pudding mix
- 3 cups cold milk (dairy or non-dairy equivalent for pudding)
- 1 package (15.3 oz) Oreo cookies
- 12 small plastic or glass serving cups (5-7 oz capacity)
- 1 package (5 oz) gummy worms
- 12 rectangular shortbread or graham cracker cookies (for gravestones)
- Optional: Black food marker for “RIP” on gravestones
Step-by-Step Directions:
- Prepare the instant chocolate pudding according to package directions using cold milk. Whisk for 2 minutes and let it sit for 5 minutes to thicken.
- While pudding sets, crush the Oreo cookies. You can do this in a food processor or by placing them in a Ziploc bag and crushing with a rolling pin.
- Evenly distribute about 1-2 tablespoons of crushed Oreos into the bottom of each serving cup.
- Spoon or pipe the prepared chocolate pudding over the crushed Oreos, filling each cup about ¾ full.
- Top the pudding layer with another generous sprinkle of crushed Oreos to create the “dirt” effect.
- For each “gravestone,” you can optionally write “RIP” on a rectangular cookie using a black food marker.
- Gently insert one rectangular cookie (gravestone) into the crushed Oreos at the back of each cup.
- Arrange 1-2 gummy worms peeking out of the “dirt” in each cup.
- Chill the pudding cups in the refrigerator for at least 30 minutes before serving.
Pro-Tip: Make the pudding a bit thicker by using slightly less milk than the package calls for, which helps the gravestones stand upright more easily.

6. Creepy Critter Krispie Treats

Save this classic with a spooky twist!
Take a classic no-bake treat and give it a spooky makeover. These monster Rice Krispie treats are incredibly easy to customize. The base is a simple marshmallow and cereal mixture, which you can then decorate with colorful candy melts and edible googly eyes to create an army of creepy critters.
Materials Needed:
- 6 tablespoons unsalted butter
- 1 bag (10 oz) mini marshmallows
- 6 cups Rice Krispies cereal
- 1 bag (12 oz) assorted colored candy melts (orange, green, purple, black)
- Edible googly eyes (various sizes)
- Optional: Black gel food coloring or chocolate sprinkles for details
Step-by-Step Directions:
- Grease a 9×13 inch baking pan with butter or non-stick spray.
- In a large saucepan, melt butter over low heat. Add marshmallows and stir until completely melted and smooth. Remove from heat.
- Add Rice Krispies cereal and stir until fully coated.
- Press the mixture evenly into the prepared pan using a buttered spatula or wax paper. Let cool completely (about 30 minutes).
- Once cool, cut the Rice Krispie treats into desired shapes (squares, rectangles, or use cookie cutters for circles/ghosts).
- Melt different colored candy melts in separate microwave-safe bowls according to package directions.
- Dip or drizzle each Rice Krispie treat with a chosen candy melt color.
- Immediately place edible googly eyes on the wet candy melt to create “critter” faces. For spiders, add black licorice strings or piped chocolate legs. For monsters, add sprinkles.
- Let the candy melts set completely at room temperature or chill briefly in the refrigerator.
Pro-Tip: For perfectly square or rectangular treats, cut them before they are fully hardened but after they have cooled enough to handle. Use buttered hands or a buttered spatula to press the mixture into the pan to prevent sticking.
7. Vampire Bite Cupcakes (using store-bought base)

Pin this elegant spooky treat!
This store-bought cupcake tips is perfect for creating an elegant yet spooky themed dessert in minutes. By simply adding two small slits and a bit of red gel icing to a white-frosted cupcake, you can create a dramatic vampire bite effect. It’s one of the best ideas for quick Halloween decorating.
Materials Needed:
- 12 store-bought vanilla or chocolate cupcakes with white frosting (or homemade if preferred)
- 1 tube (0.68 oz) red gel icing (such as Wilton red sparkly gel)
- 1 package plastic vampire fangs (optional, for display only)
Step-by-Step Directions:
- If using plain store-bought cupcakes, ensure the frosting is white. If not, you can apply your own white canned frosting or piping.
- Using a small, sharp knife or a clean pair of tweezers, carefully make two small, parallel slits in the frosting on each cupcake, mimicking a vampire’s bite. Don’t cut too deep, just enough to create an opening.
- Gently squeeze a small amount of the red gel icing into and around each of the two slits, creating a realistic “blood” oozing effect. A little goes a long way for a dramatic look.
- Repeat for all 12 cupcakes.
- For serving, you can optionally place a plastic vampire fang set next to or slightly into one of the cupcakes for an extra spooky touch.
Pro-Tip: Make sure the red gel icing is at room temperature to ensure it flows smoothly from the tube. You can also slightly warm the tube in your hands for a minute if it’s too stiff.

Save this charming Halloween cookie idea!
These adorable no-bake witch treats are another fantastic store-bought shortcut. By combining a round chocolate cookie with a chocolate Kiss and candy melts, you can quickly assemble an iconic Halloween cookie. It’s a simple party dessert that looks like it took far more effort than it actually did.
Materials Needed:
- 1 package (14.3 oz) round chocolate cookies (like Fudge Stripes or chocolate wafers)
- 1 bag (10 oz) Hershey’s Kisses chocolates, unwrapped
- 1 bag (12 oz) purple candy melts
- 2 oz green candy melts (for drizzle)
- Parchment paper or wax paper
Step-by-Step Directions:
- Line a baking sheet with parchment or wax paper.
- Place the round chocolate cookies flat on the prepared baking sheet.
- On top of the center of each cookie, place an unwrapped Hershey’s Kiss.
- Melt the purple candy melts in a microwave-safe bowl in 30-second intervals, stirring until smooth.
- Spoon the melted purple candy over the Hershey’s Kiss and the cookie, creating a smooth, conical witch hat shape. Ensure the entire Kiss is covered and a “brim” forms around the cookie.
- While the purple candy is still wet, melt the green candy melts in a separate small bowl. Drizzle a thin line of green candy around the “brim” of each witch hat cookie.
- Let the cookies set completely at room temperature or chill in the refrigerator for 15-20 minutes until firm.
Pro-Tip: To ensure the Hershey’s Kiss adheres well to the cookie, put a tiny dab of melted purple candy on the cookie before placing the Kiss, then coat with more melted candy.

9. Spiderweb Brownie Bites (Shortcut)

Save this delicious and easy Halloween dessert!
Transform simple brownie bites into a spooky masterpiece with this quick decoration tips. Whether you use a box mix or store-bought brownie bites, creating a chocolate spiderweb design is surprisingly easy and effective. This simple Halloween dessert is always a crowd-pleaser.
Materials Needed:
- 1 package (18.3 oz) brownie mix (plus ingredients to prepare it per box directions) OR 1 pan of store-bought brownie bites
- 1 container (16 oz) pre-made chocolate frosting
- ¼ cup white chocolate chips or vanilla candy melts
- Optional: Edible spider candies or black gel icing for small spiders
Step-by-Step Directions:
- If making brownies from a mix, prepare and bake according to package directions in a 9×13 inch pan. Let cool completely, then cut into square or rectangular bites. If using store-bought brownie bites, skip to step 2.
- Spread a thin, even layer of chocolate frosting over the top of each cooled brownie bite.
- Melt the white chocolate chips or candy melts in a small microwave-safe bowl in 15-second intervals, stirring until smooth. Transfer the melted white chocolate to a small piping bag or a Ziploc bag with a tiny corner snipped off.
- Pipe concentric circles of white chocolate onto the center of each frosted brownie bite. Start with a small dot in the middle, then pipe increasingly larger circles around it.
- Immediately, while the white chocolate is still wet, drag a toothpick from the center of each brownie out to the edge, creating a spiderweb effect. Repeat this drag several times around the circle.
- Optional: Place an edible spider candy on the web or pipe a small black spider using black gel icing.
- Allow the frosting and chocolate to set slightly before serving.
Pro-Tip: For the best spiderweb effect, make sure your chocolate frosting is smooth and even, and pipe the white chocolate circles quickly before it starts to set. The contrast in color is key!

Key Takeaways: Your Quick Guide to Stress-Free Halloween Treats
To achieve failsafe Halloween treats, remember these core principles for maximum fun and minimal fuss.
* Embrace No-Bake Wonders: Maximize speed and ease with recipes that only require assembly and chilling.
* Leverage Store-Bought Shortcuts: Transform plain cookies or cupcakes into spooky masterpieces with minimal effort.
* Focus on Simple Decor: Edible googly eyes, colored candy melts, and drizzles are your best friends.
* Involve the Kids: Many ‘easy’ recipes are perfect for little helpers, making it a fun activity.
* Prep Ahead: Store-friendly treats like bark or pretzel bites can be made days in advance to reduce last-minute stress.
People Also Ask About Quick & Easy Halloween Treats
What are the absolute easiest Halloween desserts for beginners?
Beginners should prioritize no-bake options that use few ingredients and simple assembly. Monster Eyeball Pretzel Bites, Spooky Oreo Bark, and Mummy Nutter Butter Cookies are excellent choices. They primarily involve melting chocolate/candy melts, assembling pre-made bases, and adding simple decorations like edible googly eyes, ensuring a high success rate with minimal kitchen skills.
How can I make quick Halloween treats for a party without an oven?
To make quick, no-bake Halloween treats for a party, focus on recipes that set by chilling, like Graveyard Pudding Cups or Creepy Critter Krispie Treats. These can be prepared in batches and portioned individually, making them perfect for serving a crowd. Utilize pre-made bases, instant pudding, and candy melts for maximum speed.
What ingredients do I need for truly last-minute Halloween treats?
For truly last-minute Halloween treats, stock up on pantry staples and common store-bought items. Essential ingredients include mini pretzels, Oreo cookies, Nutter Butter cookies, chocolate chips, white chocolate, assorted candy melts, edible googly eyes, instant pudding mix, and gummy candies. These form the base for many quick, no-bake spooky snacks.
Can kids safely help make these quick Halloween desserts?
Absolutely! Many quick and easy Halloween desserts are perfect for involving children. Tasks like crushing cookies, placing edible googly eyes, drizzling melted chocolate, or pressing Rice Krispie treats are safe and engaging for young helpers. Always supervise tasks involving hot melted ingredients or sharp tools, focusing on fun over perfection.
Final Thoughts
Your Halloween celebration in 2026 can be filled with delightful, spooky treats without the usual stress or time commitment. By embracing these failsafe, quick, and easy dessert ideas, you’re not just making food—you’re crafting fun memories, whether it’s with excited kids or for a last-minute party. So, grab your candy melts, unleash your inner ghoul, and enjoy a truly stress-free and delicious holiday. Which of these quick and easy Halloween treats will you conjure up first?
Last update on 2026-04-29 at 03:40 / Affiliate links / Images from Amazon Product Advertising API
