As an Amazon Associate BakingBakewareSets.com earns from qualifying purchases.
Edible Christmas Gift Ideas For Absolutely Everyone 2026
Struggling to find a Christmas gift that feels personal and truly special? You’re not alone in a world of generic gift cards and mass-produced items.
An Edible Christmas Gift is a food-based present, made with care, that offers a delicious and thoughtful alternative. Finding the right idea can feel overwhelming during the busy holiday season, but the effort is always worth it.
Homemade edible gifts are special because they are a personal expression of care and effort. This guide will give you 11 delicious and beautiful edible Christmas gift ideas for absolutely everyone on your list, from coworkers to family.
☰ Table of Contents ▼
show
Why Settle for Store-Bought? The Magic of a Homemade Edible Gift
In a season often defined by crowded stores and online shopping carts, there’s a unique magic in giving something made by hand. A homemade edible gift is more than just a present; it’s a personal expression of your time, care, and thoughtfulness. There’s nothing quite like receiving a tin of cookies still warm from the oven or a beautifully bottled infused oil, knowing someone created it just for you.
Store-bought gifts can feel impersonal and expensive, but a DIY edible gift creates a direct connection. It engages the senses—smell, taste, sight—and ties a delicious experience to a warm holiday memory. These thoughtful gift ideas transform simple ingredients into tokens of generosity and connection, embodying the true Christmas spirit. Best of all, anyone can create a beautiful and delicious homemade food gift, making the holidays feel more personal and less commercial.
11 Delicious Edible Christmas Gift Ideas Anyone Can Make
Get ready to be inspired! This kitchen-tested collection of holiday food gifts has something for everyone on your list, from the chocolate lover to the savory snacker. We’ve selected these creative food gift ideas for their reliability, beautiful presentation, and absolutely delicious results. Each one includes simple, step-by-step instructions and pro tips to ensure your gift-making is a foolproof success.

Pin this timeless cookie recipe to your ‘Holiday Baking’ board!
These classic Christmas cookies are the definition of simple elegance. With a rich, buttery flavor and a delicate, crumbly texture, they are a universally loved treat. Using high-quality unsalted butter and pure vanilla extract is the secret to their incredible taste. This easy cookie gift recipe is perfect for bakers of all skill levels, and the finished cookies look beautiful packaged in festive tins or bags.
Ingredients:
- 1 cup unsalted butter, high-quality, at room temperature
- 1/2 cup powdered sugar
- 1/4 cup cornstarch
- 1 1/2 cups all-purpose flour
- 1 tsp pure vanilla extract
- 1/4 tsp salt
Step-by-Step Directions:
- In a large bowl or stand mixer, cream the softened butter and powdered sugar together until light and fluffy.
- Mix in the vanilla extract.
- In a separate bowl, whisk together the flour, cornstarch, and salt.
- Gradually add the dry ingredients to the butter mixture, mixing on low speed until just combined. Do not overmix.
- Form the dough into a flat disc, wrap in plastic, and chill for at least 30 minutes.
- Roll the chilled dough to 1/4-inch thickness on a lightly floured surface and cut into desired shapes.
- Place on a parchment-lined baking sheet and bake at 325°F (165°C) for 15-20 minutes, or until the edges are lightly golden.
- Let cool completely on a wire rack before packaging.
Pro-Tip: Chilling the dough is essential! It prevents the cookies from spreading during baking, ensuring they keep their beautiful shape. For an extra-professional look, use a decorative shortbread pan.

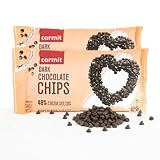
2. Quick No-Bake Peppermint Bark

Save this easy no-bake gift idea for last-minute holiday prep!
This no-bake peppermint bark is a lifesaver for last-minute edible gifts. It’s one of the easiest Christmas candy recipes, requiring just a few high-quality ingredients and no oven time. The beautiful layers of dark and white chocolate, topped with crushed candy canes, create a visually stunning treat. A drop of pure peppermint extract enhances the festive flavor, making this an irresistible holiday classic.
Materials Needed:
- 12 oz high-quality semi-sweet or dark chocolate chips or wafers
- 12 oz high-quality white chocolate chips or melting wafers
- 1/2 tsp pure peppermint extract
- 1/2 cup crushed candy canes or peppermint candies
- A 9×13 inch baking sheet
- Parchment paper
Step-by-Step Directions:
- Line the baking sheet with parchment paper.
- Melt the dark chocolate in a microwave-safe bowl in 30-second intervals, stirring until smooth.
- Pour the melted dark chocolate onto the prepared baking sheet and spread it into an even layer with a spatula.
- Place the sheet in the refrigerator for about 20 minutes, or until the chocolate is firm.
- Melt the white chocolate in a clean bowl. Once melted and smooth, stir in the peppermint extract.
- Pour the white chocolate mixture over the chilled dark chocolate layer and spread evenly.
- Immediately sprinkle the crushed candy canes over the white chocolate.
- Let it set completely at room temperature or in the fridge for another 30 minutes. Once firm, break into large, irregular pieces.
Lesson Learned: Use chocolate melting wafers designed for candy making for the smoothest, glossiest finish without needing to temper the chocolate. It’s a simple swap that makes a huge difference.

3. Sweet & Salty Holiday Spiced Nuts

Pin this addictive snack recipe for an easy, budget-friendly gift!
This spiced nuts recipe creates an irresistibly crunchy and flavorful treat that’s perfect for gifting. The combination of sweet, salty, and warm spices like cinnamon and a hint of cayenne makes these candied pecans and mixed nuts a crowd-pleaser. An egg white coating gives them an extra-crispy shell. This is a wonderfully budget-friendly edible gift that can be made in one large batch and divided into multiple holiday gift tins.
Materials Needed:
- 1 large egg white
- 1 tbsp water
- 4 cups raw, unsalted mixed nuts (like pecans, walnuts, and almonds)
- 1/2 cup granulated sugar
- 1/4 cup packed brown sugar
- 1 tsp salt
- 1 1/2 tsp ground cinnamon
- 1/4 tsp cayenne pepper (optional, for a little kick)
- Airtight holiday gift tins or bags
Step-by-Step Directions:
- Preheat your oven to 300°F (150°C) and line a large baking sheet with parchment paper.
- In a large bowl, whisk the egg white and water until frothy.
- Add the mixed nuts to the bowl and stir until they are all evenly coated.
- In a small bowl, combine the sugars, salt, cinnamon, and cayenne pepper.
- Sprinkle the sugar and spice mixture over the nuts and toss until they are well-coated.
- Spread the nuts in a single layer on the prepared baking sheet.
- Bake for 30-40 minutes, stirring every 15 minutes, until they are golden and fragrant.
- Let the nuts cool completely on the baking sheet. They will crisp up as they cool. Break apart any large clumps before packaging.
Pro-Tip: Stirring the nuts every 15 minutes is crucial for even cooking and to prevent the sugar from burning. Don’t skip this step!

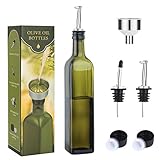
4. Elegant Rosemary & Garlic Infused Olive Oil

Save this unique savory gift idea for the foodie in your life!
For a sophisticated and unique homemade savory gift, this infused olive oil is a perfect choice. Gently warming high-quality extra virgin olive oil with fresh rosemary sprigs and whole garlic cloves creates a fragrant, gourmet food gift that looks stunning in a glass bottle. It’s surprisingly simple to make but feels incredibly elegant. Be sure to use a dark, airtight bottle to protect the oil’s flavor and quality.
Materials Needed:
- 2 cups high-quality extra virgin olive oil
- 4-5 whole cloves of garlic, peeled
- 2-3 large, fresh rosemary sprigs
- A small saucepan
- Dark glass bottles with an airtight seal for storage
Step-by-Step Directions:
- Gently wash and thoroughly dry the rosemary sprigs. Any moisture can cause the oil to spoil.
- In a small saucepan, combine the olive oil, garlic cloves, and rosemary sprigs.
- Heat the oil over low heat for about 5-10 minutes, until it becomes very fragrant. Do not let it simmer or boil, as this will fry the herbs. The goal is to gently warm it to release the flavors.
- Remove the saucepan from the heat and let the oil cool completely with the herbs still in it, for at least one hour.
- For food safety and longer shelf life, strain the oil to remove the cooked garlic and rosemary.
- Pour the cooled, infused oil into your clean, dry glass bottles. For presentation, you can add a fresh, thoroughly dried sprig of rosemary and a new clove of garlic to the bottle just before gifting.
- Seal tightly and add a tag with storage instructions.
Pro-Tip: For food safety, it’s crucial to use dried herbs if you plan to leave them in the oil for long-term storage. For short-term gifting (to be used within a week), using fresh herbs for presentation as described is fine, but be sure to instruct the recipient to refrigerate and use it quickly.

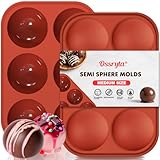
Pin this fun and trendy gift idea that’s perfect for kids and adults!
Jump on the viral trend with this fun DIY hot cocoa bombs recipe. These magical chocolate spheres are filled with cocoa mix and mini marshmallows. When dropped into a mug of hot milk, the chocolate shell melts and releases the goodies inside. Using a silicone sphere mold and chocolate melting wafers makes this trendy gift surprisingly achievable. They are delightful edible gifts for kids and the young at heart.
Materials Needed:
- 12 oz chocolate melting wafers (milk, dark, or white)
- Silicone sphere molds (2.5-inch diameter is standard)
- 1 cup hot cocoa mix
- 1 cup mini marshmallows
- Optional: sprinkles for decoration
Step-by-Step Directions:
- Melt the chocolate wafers until completely smooth.
- Spoon a layer of melted chocolate into each half-sphere mold, using the back of the spoon to coat the entire inside surface. Make sure it’s an even layer.
- Chill the molds in the freezer for 5-7 minutes until the chocolate is firm.
- Apply a second coat of chocolate, paying special attention to the rims to make them sturdy. Freeze again for 5-7 minutes.
- Carefully peel the silicone mold away from the hardened chocolate half-spheres.
- Fill half of the chocolate shells with 1-2 tablespoons of hot cocoa mix and a handful of mini marshmallows.
- To seal them, warm a clean, empty plate in the microwave. Briefly press the rim of an empty chocolate half-sphere onto the warm plate to melt the edge, then immediately place it on top of a filled half to seal it.
- Drizzle with extra melted chocolate and add sprinkles for decoration. Let them set completely.
Lesson Learned: The most common mistake is making the chocolate shells too thin. A generous second coat, especially around the rim, is the secret to strong bombs that won’t crack when you assemble them.

Save this charming ‘gift in a jar’ idea for a fun, interactive present!
A cookie mix in a jar is a beautiful DIY gift that gives the recipient a fun baking experience. By layering the dry ingredients—flour, sugars, festive dried cranberries, and chocolate chips—in a wide-mouth mason jar, you create a stunning visual effect. This homemade baking mix is an especially thoughtful edible gift for teachers or busy friends, as they can enjoy freshly baked cookies whenever they choose.
Materials Needed:
- One 1-quart (32 oz) wide-mouth glass jar with a lid
- 1 3/4 cups all-purpose flour
- 1 tsp baking soda
- 1 tsp salt
- 3/4 cup packed brown sugar
- 1/2 cup granulated sugar
- 1 cup semi-sweet chocolate chips
- 1 cup dried cranberries
- A decorative tag and ribbon/twine
Step-by-Step Directions:
- Ensure your jar is completely clean and dry.
- In a small bowl, whisk together the flour, baking soda, and salt. This is your first layer.
- Carefully pour the flour mixture into the jar. Use a funnel or a rolled piece of paper to keep the sides clean. Gently tap the jar on the counter to create a flat, even layer.
- Add the brown sugar next, pressing it down firmly with a spoon to create a compact layer.
- Add the granulated sugar on top of the brown sugar, creating another distinct white layer.
- Top with the dried cranberries, followed by the chocolate chips.
- Seal the jar tightly.
- Write or print the following instructions on a decorative tag and attach it to the jar: “Cranberry Chocolate Chip Cookies: Preheat oven to 375°F. In a large bowl, beat 1/2 cup softened butter, 1 egg, and 1 tsp vanilla extract until fluffy. Add the entire contents of this jar and mix until just combined. Drop by rounded tablespoons onto a baking sheet. Bake for 9-11 minutes. Enjoy!”
Pro-Tip: The secret to beautiful, distinct layers is to compact each layer (especially the sugars) before adding the next one. This prevents the ingredients from mixing.

7. Foolproof Sea Salt Caramels

Pin this impressive homemade candy recipe to try this holiday season!
Don’t be intimidated by candy making! This easy caramel recipe is designed for beginners and yields perfectly soft, chewy sea salt caramels every time. The key to success is an essential tool: a candy thermometer, which ensures your sugar mixture reaches the perfect temperature. The combination of rich, buttery caramel and a sprinkle of flaky sea salt is simply divine.
Materials Needed:
- 1 cup granulated sugar
- 1/2 cup light corn syrup
- 1/4 cup water
- 1/2 cup unsalted butter, cut into pieces
- 1/2 cup heavy cream, room temperature
- 1 tsp vanilla extract
- 1 1/2 tsp flaky sea salt, divided
- A candy thermometer is essential for this recipe.
- 8×8 inch baking pan
Step-by-Step Directions:
- Line the baking pan with parchment paper, leaving an overhang on the sides to use as handles.
- In a heavy-bottomed saucepan, combine the sugar, corn syrup, and water. Cook over medium heat, stirring until the sugar dissolves.
- Attach the candy thermometer to the side of the pan. Bring the mixture to a boil and cook, without stirring, until the temperature reaches 245°F (118°C), the firm-ball stage.
- Carefully stir in the butter and heavy cream. The mixture will bubble up vigorously.
- Continue to cook, stirring frequently, until the thermometer reads 245°F again.
- Remove from the heat immediately. Stir in the vanilla and 1/2 tsp of the sea salt.
- Pour the caramel into the prepared pan. Let it sit undisturbed for 20-30 minutes, then sprinkle the remaining 1 tsp of sea salt over the top.
- Let the caramel cool completely for at least 4 hours before lifting it out of the pan and cutting it into squares with a lightly oiled knife. Wrap each piece in wax paper.
Pro-Tip: Have all your ingredients measured and ready before you start. Candy making moves fast, and you won’t have time to measure things once the sugar starts to cook.

8. Decadent Vegan Chocolate Avocado Truffles

Save this surprisingly healthy and delicious vegan gift idea!
These vegan chocolate truffles have a secret ingredient: ripe avocado! It creates an unbelievably creamy and luscious texture without any dairy. Paired with high-quality dairy-free dark chocolate and a dusting of unsweetened cocoa powder, no one will ever guess these decadent vegan Christmas treats are on the healthier side. This is the perfect healthy edible gift for friends or family with dietary restrictions.
Materials Needed:
- 1 large, very ripe avocado
- 8 oz high-quality dairy-free dark chocolate chips (60% cacao or higher)
- 1/4 cup unsweetened cocoa powder, plus more for dusting
- 2 tbsp maple syrup or agave nectar
- 1 tsp vanilla extract
- A pinch of salt
Step-by-Step Directions:
- Melt the dairy-free chocolate chips in the microwave or a double boiler until smooth. Set aside to cool slightly.
- In a food processor, combine the flesh of the ripe avocado, 1/4 cup cocoa powder, maple syrup, vanilla, and salt.
- Blend until the mixture is completely smooth and creamy, with no visible green specks. Scrape down the sides as needed.
- Pour in the slightly cooled melted chocolate and blend again until fully incorporated.
- Transfer the mixture to a bowl, cover, and chill in the refrigerator for at least 30 minutes, or until firm enough to scoop.
- Use a small cookie scoop or a spoon to portion the chilled mixture into 1-inch balls. Roll them between your hands to smooth them out.
- Roll each truffle in a shallow dish of cocoa powder to coat. Store in an airtight container in the refrigerator.
Lesson Learned: The avocado must be perfectly ripe and soft for the creamiest texture. An underripe avocado will result in a lumpy, less pleasant truffle.
9. Healthy Gluten-Free Holiday Granola

Pin this easy and healthy gluten-free gift idea for a thoughtful treat!
Homemade granola is a wonderfully versatile and healthy holiday gift. This gluten-free granola recipe uses certified gluten-free rolled oats, a mix of nuts like pecans and almonds, and is naturally sweetened with pure maple syrup. Festive spices and dried cranberries make it perfect for Christmas. The secret to getting big, crunchy clusters is to let it cool completely on the baking sheet without stirring.
Materials Needed:
- 3 cups certified gluten-free old-fashioned rolled oats
- 1 1/2 cups raw nuts and seeds (e.g., pecans, slivered almonds, pumpkin seeds)
- 1/2 cup pure maple syrup
- 1/4 cup melted coconut oil
- 1 tsp ground cinnamon
- 1/2 tsp ground ginger
- 1/2 tsp salt
- 1 cup dried cranberries
- Resealable gift bags or glass jars
Step-by-Step Directions:
- Preheat oven to 325°F (165°C) and line a large baking sheet with parchment paper.
- In a large bowl, combine the gluten-free oats, nuts, seeds, cinnamon, ginger, and salt.
- In a small bowl, whisk together the maple syrup and melted coconut oil.
- Pour the wet ingredients over the dry ingredients and stir until everything is evenly coated.
- Spread the granola mixture in a thin, even layer on the prepared baking sheet.
- Bake for 20 minutes, then remove from the oven and stir. Return to the oven and bake for another 10-15 minutes, or until golden brown.
- Let the granola cool completely on the baking sheet without stirring. This is the secret to getting big, crunchy clusters!
- Once cool, break the granola into chunks and stir in the dried cranberries.
Pro-Tip: For the best clusters, press the granola down lightly with a spatula before baking and do not stir it after the final bake until it has cooled completely.

10. Trendy Homemade Everything Bagel Seasoning

Save this super easy, trendy savory gift that foodies will love!
This everything bagel seasoning recipe is one of the quickest and most popular DIY savory gifts you can make. In just five minutes, you can mix up a big batch of this addictive homemade spice blend. The combination of sesame seeds, poppy seeds, dried garlic flakes, dried onion flakes, and coarse salt is a classic for a reason. It’s an excellent food gift for coworkers, as it’s inexpensive, easy to package in small spice jars, and universally loved.
Materials Needed:
- 2 tbsp poppy seeds
- 2 tbsp white sesame seeds
- 1 tbsp black sesame seeds
- 1 1/2 tbsp dried minced garlic
- 1 1/2 tbsp dried minced onion
- 1 tbsp coarse or flaky sea salt
- Small, attractive spice jars with shaker lids
Step-by-Step Directions:
- In a small bowl, combine all the ingredients: poppy seeds, white sesame seeds, black sesame seeds, dried garlic, dried onion, and coarse salt.
- Stir everything together until it is well mixed.
- Carefully pour the seasoning blend into your spice jars. A small funnel is very helpful for this step.
- Seal the jars and add a custom label. Include suggestions for use, such as on eggs, avocado toast, salads, or roasted vegetables.
Lesson Learned: Use dried minced garlic and onion, not the powdered versions. The minced flakes provide the signature texture and crunch of the classic blend.

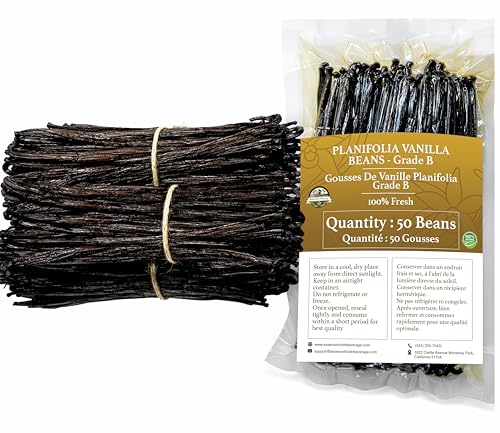
11. Gourmet Homemade Vanilla Extract

Pin this ultimate make-ahead gift idea for the serious baker in your life!
For a truly impressive and gourmet edible gift, learn how to make vanilla extract. This is the ultimate make-ahead food gift, as it requires at least eight weeks to infuse. All you need are two ingredients: Grade B vanilla beans and 80-proof vodka. The resulting homemade vanilla extract is far more flavorful than store-bought versions and is a cherished gift for any serious baker. Store it in amber bottles to protect it from light.
Materials Needed:
- 5-6 Grade B vanilla beans per 8 oz of alcohol
- 80-proof vodka (or bourbon, rum, or brandy)
- Amber glass bottles with airtight stoppers or caps
- A sharp knife and cutting board
Step-by-Step Directions:
- Using a sharp knife, carefully split each vanilla bean lengthwise, leaving about a half-inch intact at the top. This exposes the tiny vanilla seeds inside.
- Place the split vanilla beans inside your clean amber glass bottle.
- Using a funnel, pour the vodka over the beans until the bottle is full, ensuring the beans are completely submerged.
- Seal the bottle tightly and give it a good shake.
- Store the bottle in a cool, dark place (like a pantry) for at least 8 weeks, but ideally for 6-12 months for the best flavor.
- Shake the bottle gently once a week.
- Add a tag that says “Homemade Vanilla Extract” and includes the date you started it. Let the recipient know it will be ready to use after 8 weeks and that the flavor only improves with time.
Pro-Tip: Use Grade B vanilla beans. They are specifically for extracting, are less expensive than plump Grade A beans, and have a lower moisture content, which is perfect for infusing.
Key Takeaways: Your Quick Guide to Gifting Deliciously
- Embrace Variety: Don’t just stick to cookies. Savory gifts like infused oil or spice blends are unique and highly appreciated.
- Prioritize Presentation: Simple, clean packaging with a thoughtful tag can make even the easiest gift look gourmet and special.
- Consider Your Recipient: Cater to different tastes and dietary needs with options like vegan truffles or gluten-free granola to show extra care.
- Plan Ahead (When You Can): Gifts like vanilla extract are perfect for making months in advance, while no-bake bark is a lifesaver for last-minute needs.
- Label Everything: Always include a label with the name of the gift and major allergens (nuts, dairy, gluten) for safety and clarity.
People Also Ask About Edible Christmas Gifts
How long do homemade edible gifts last?
The shelf life of homemade edible gifts varies greatly by type. Dry, crunchy items like spiced nuts and granola can last for several weeks in an airtight container. Soft-baked cookies and fudge are best enjoyed within one week. For maximum freshness, always include a “best by” date on your gift tag.
What are the best edible gifts to mail or ship?
Choose sturdy gifts that won’t easily break, melt, or spoil. Excellent options for shipping include biscotti, shortbread cookies, fudge, chocolate bark, granola, and spiced nuts. Pack them snugly in a durable tin with cushioning like parchment paper to prevent movement and breakage during transit.
How can I make my edible gifts look professional and beautiful?
Focus on clean, consistent, and high-quality packaging. Use glass jars for mixes and granola, airtight tins for cookies, and clear cellophane bags for individual treats. Finish with a simple ribbon or twine and a well-designed, easy-to-read label to create a polished, professional look.
What are some unique edible gift ideas that aren’t sweets?
Think beyond sugar with unique savory gifts. Homemade infused olive oil, custom spice blends like everything bagel seasoning, savory rosemary shortbread, gourmet soup mix in a jar, or a bottle of homemade hot sauce are all creative and sophisticated options for the foodie in your life.
Final Thoughts
The true value of an edible gift lies in the time, care, and thought you put into it. It’s a chance to share a piece of your holiday spirit in the most delicious way possible. A simple, homemade treat is one of the most personal and cherished gifts you can give, creating memories that last long after the last bite.
This holiday season, give the gift of something truly delicious and made with love. You’ll be amazed at the joy a simple, homemade treat can bring. What’s your all-time favorite edible gift to give or receive? Share your traditions in the comments below
Last update on 2026-07-21 at 15:02 / Affiliate links / Images from Amazon Product Advertising API
