As an Amazon Associate BakingBakewareSets.com earns from qualifying purchases.
13 Genius Apple Dessert Recipes For Perfect Results
Ever wonder why that apple dessert didn’t quite match the picture? It’s a common frustration for every home baker.
An apple dessert is any sweet dish where cooked apples are the star. You’ve followed the steps, but the result is a soggy crisp or a dense cake. This guide is here to change that.
The secret to perfect apple desserts is two-fold: choosing the right apple variety for the recipe and mastering a few key techniques. Firm, tart apples like Granny Smith are best for pies, while softer apples work for sauces. This guide provides 13 foolproof recipes to ensure success every single time.
☰ Table of Contents ▼
show
Tired of Apple Desserts That Don’t Turn Out Quite Right?
It’s a familiar story for many home bakers. You spend an afternoon peeling apples and measuring ingredients, dreaming of a cozy, delicious fall dessert. But when the timer goes off, you’re left with a watery filling, a mushy texture, or a topping that never got crisp. That disappointment can make you want to hang up your apron for good.
This isn’t just another list of recipes; it’s a curated collection of kitchen-tested, genius apple desserts designed to solve those common baking problems. We’ve hand-picked these 13 ideas to deliver perfect, consistent results. Get ready to build your baking confidence and create homemade apple desserts that look and taste incredible.
13 Genius Apple Dessert Recipes For Perfect Results
From incredibly simple weeknight treats to impressive showstoppers, this collection has the perfect apple dessert for any occasion. Each recipe has been selected based on years of baking experience, focusing on foolproof methods that work for home cooks. More importantly, every recipe includes a “genius” tip or technique that guarantees amazing flavor and texture, turning a good dessert into an unforgettable one.
1. The Ultimate Classic Apple Crisp with a Crunchy Oat Topping
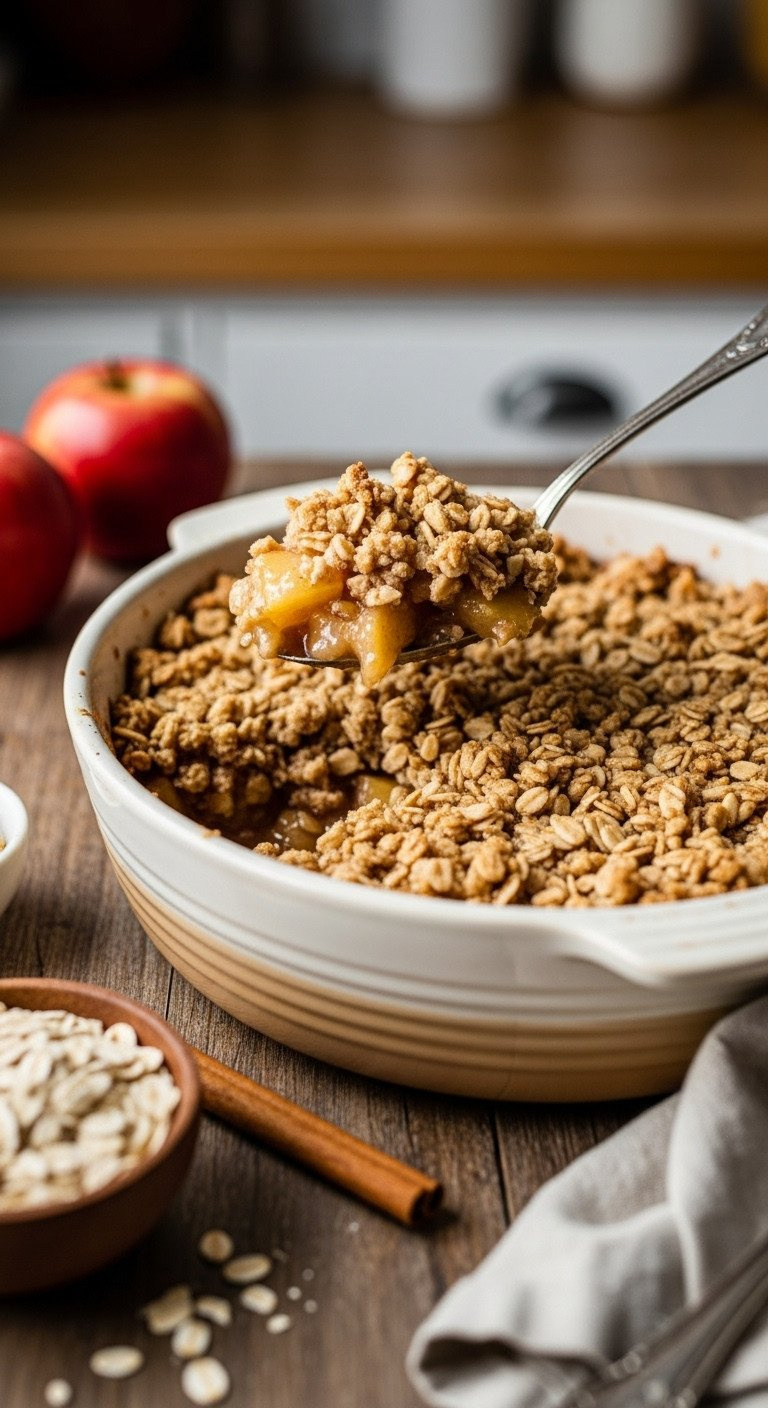
Pin this foolproof crisp recipe to your ‘Fall Baking’ board!
This easy apple crisp recipe is a classic for a reason. With a tender apple filling perfectly spiced with cinnamon and a crunchy topping made with rolled oats, it’s the ultimate cozy dessert. Adding a touch of flour to the filling is the secret to making sure it’s never watery.
Ingredients Needed:
- For the Filling:
- 6 medium baking apples (like Honeycrisp or Braeburn), peeled and sliced
- 1 tbsp lemon juice
- 1/4 cup light brown sugar
- 1 tsp ground cinnamon
- 1 tbsp all-purpose flour (the secret to no watery filling!)
- For the Topping:
- 1 cup old-fashioned rolled oats
- 1 cup all-purpose flour
- 1 cup packed light brown sugar
- 1/2 tsp salt
- 1/2 cup (1 stick) cold unsalted butter, cut into small cubes
Step-by-Step Directions:
- Preheat your oven to 375°F (190°C). Lightly grease an 8×8 or 9×9 inch baking dish.
- In a large bowl, gently toss the sliced apples with lemon juice, 1/4 cup brown sugar, cinnamon, and 1 tbsp flour until evenly coated. Spread this mixture into your prepared dish.
- In a separate bowl, whisk together the oats, 1 cup flour, 1 cup brown sugar, and salt.
- Using a pastry blender or your fingertips, cut the cold butter cubes into the oat mixture until it resembles coarse crumbs with some pea-sized pieces of butter remaining.
- Sprinkle the topping evenly over the apples.
- Bake for 40-50 minutes, or until the filling is bubbly and the topping is a deep golden brown. Let cool for 15 minutes before serving.
Pro-Tip: The key to a truly crunchy topping is using very cold butter and not overmixing. Those little butter pockets will melt and fry the topping to perfection in the oven.
2. Incredibly Moist Cinnamon Sugar Apple Cake
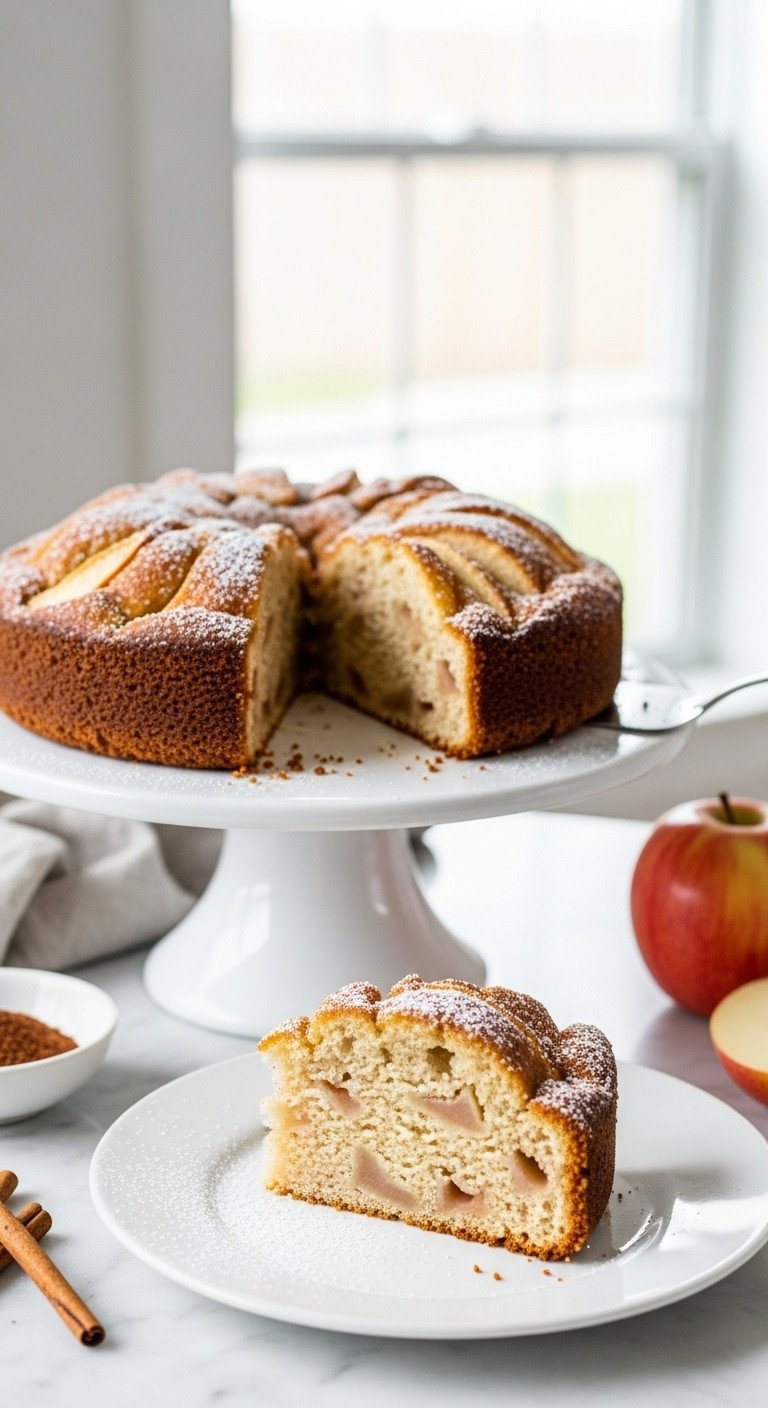
Save this easy one-bowl cake recipe!
If you need a simple apple cake from scratch that always turns out perfectly moist, this is it. It’s an ideal dessert for guests because it’s so easy to make but tastes absolutely incredible, with tender diced apples in every bite and a wonderful crunchy cinnamon sugar topping.
Ingredients Needed:
- 2 large baking apples, peeled, cored, and diced
- 2 cups all-purpose flour
- 1 tsp baking soda
- 1 tsp ground cinnamon
- 1/2 tsp salt
- 1/2 cup (1 stick) unsalted butter, softened
- 1 cup granulated sugar
- 2 large eggs
- 1 tsp vanilla extract
- 1/4 cup sour cream or plain yogurt for extra moisture
- Topping: 2 tbsp granulated sugar mixed with 1 tsp cinnamon
Step-by-Step Directions:
- Preheat oven to 350°F (175°C). Grease and flour a 9-inch round cake pan.
- In a medium bowl, whisk together the flour, baking soda, 1 tsp cinnamon, and salt.
- In a large bowl, use an electric mixer to beat the softened butter and 1 cup of sugar until light and fluffy, about 3 minutes.
- Beat in the eggs one at a time, followed by the vanilla extract.
- Gradually add the dry ingredients to the wet ingredients, mixing on low speed until just combined. Fold in the sour cream, then gently fold in the diced apples. Do not overmix.
- Spread the batter evenly in the prepared pan. Sprinkle the cinnamon-sugar topping over the surface.
- Bake for 30-35 minutes, or until a toothpick inserted into the center comes out clean. Let cool in the pan for 10 minutes before transferring to a wire rack.
Lesson Learned: The sour cream is the “genius” ingredient here. It adds fat and acidity, which work together to create an unbelievably tender and moist crumb that stays fresh for days.

3. The Showstopping (but Secretly Simple) Lattice Apple Pie

Pin this guide to making the perfect apple pie!
Learning how to make a classic apple pie with a beautiful lattice crust is a baking milestone. This recipe breaks it down, giving you tips for the perfect all-butter, flaky pie dough and a thick, spiced apple filling that won’t make your bottom crust soggy.
Materials Needed:
- For the All-Butter Crust:
- 2 1/2 cups all-purpose flour
- 1 tsp salt
- 1 cup (2 sticks) very cold unsalted butter, cubed
- 1/2 cup ice water
- For the Filling:
- 7-8 Granny Smith apples, peeled, cored, and sliced 1/4-inch thick
- 3/4 cup granulated sugar
- 2 tbsp all-purpose flour or cornstarch
- 1 tsp ground cinnamon
- 1/4 tsp nutmeg
- 1/4 tsp allspice
- 1 tbsp lemon juice
- 2 tbsp unsalted butter, cut into small pieces
- For Assembly: 1 egg (for egg wash), coarse sugar for sprinkling
Step-by-Step Directions:
- Make the Crust: In a large bowl, combine flour and salt. Cut in the cold butter with a pastry blender until you have pea-sized crumbs. Drizzle in ice water, 1 tbsp at a time, mixing gently with a fork until the dough just comes together. Form into two disks, wrap in plastic, and chill for at least 1 hour.
- Make the Filling: In a large bowl, toss apple slices with sugar, flour/cornstarch, spices, and lemon juice.
- Assemble: Preheat oven to 425°F (220°C). Roll out one disk of dough and fit it into a 9-inch deep-dish pie plate. Add the apple filling and dot the top with the 2 tbsp of butter pieces.
- Lattice Top: Roll out the second disk. Cut into 1-inch strips. Weave the strips over the pie to create a lattice pattern. Trim and crimp the edges.
- Brush the lattice with a beaten egg and sprinkle generously with coarse sugar.
- Bake: Place the pie on a baking sheet. Bake at 425°F for 15 minutes, then reduce the heat to 375°F (190°C) and bake for another 35-45 minutes, until the crust is golden and the filling is bubbly. Tent with foil if the crust browns too quickly.
- Let the pie cool completely for at least 4 hours before slicing. This is the secret to clean slices!
Pro-Tip: The “genius” move for a non-soggy bottom is to place your pie plate on a preheated baking sheet in the lower third of the oven. This initial blast of heat helps set the bottom crust quickly before the filling can make it wet.

4. Rustic Cast Iron Apple Cobbler with a Cake-Like Topping
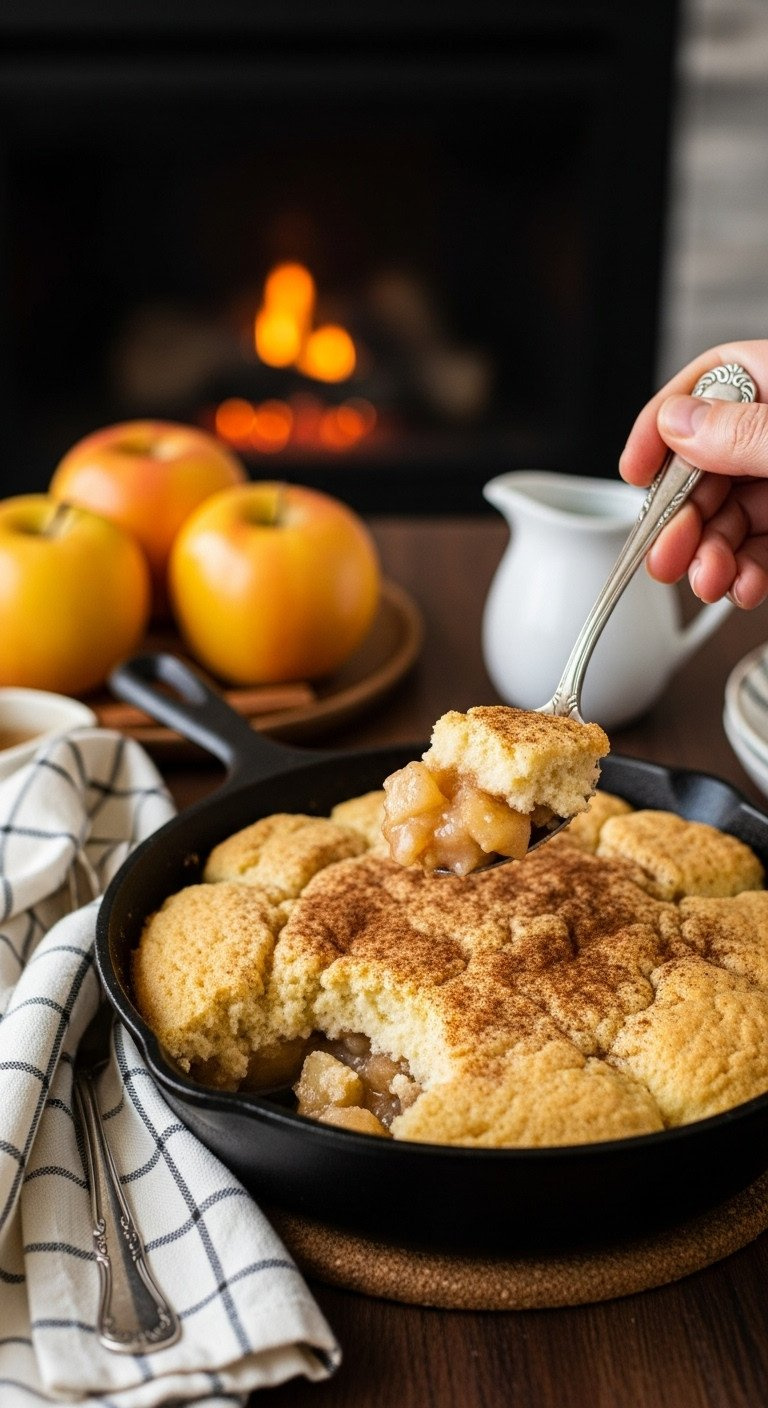
Save this cozy cobbler recipe for a chilly evening!
This is the easiest apple cobbler you will ever make. Baked in a cast iron skillet, this rustic dessert features a wonderfully soft and fluffy cake-like batter that bakes up and around the tender cinnamon apples. It’s pure comfort food.
Materials Needed:
- 1/2 cup (1 stick) unsalted butter
- 1 1/4 cups all-purpose flour
- 1 cup granulated sugar
- 2 tsp baking powder
- 1/4 tsp salt
- 3/4 cup milk
- 1 tsp vanilla extract
- 4 medium apples, peeled and sliced
- 1 tsp ground cinnamon
Step-by-Step Directions:
- Preheat your oven to 350°F (175°C). Place the stick of butter in a 10-inch cast-iron skillet (or an 8×8 baking dish) and put it in the oven to melt.
- While the butter melts, prepare the batter. In a medium bowl, whisk together the flour, sugar, baking powder, and salt.
- Stir in the milk and vanilla extract until just combined. Do not overmix.
- In another bowl, toss the sliced apples with the cinnamon.
- Once the butter is fully melted, carefully remove the hot skillet from the oven. Pour the batter directly over the melted butter. Do not stir.
- Spoon the cinnamon apples evenly over the top of the batter. Again, do not stir.
- Bake for 40-50 minutes, until the topping is golden brown and a tester comes out clean.
Pro-Tip: The “genius” technique here is pouring the batter over the melted butter and topping it with fruit. As it bakes, the batter rises up through the apples, creating a magical self-saucing dessert with a buttery, crisp bottom edge.
5. Simple 5-Ingredient Baked Apples
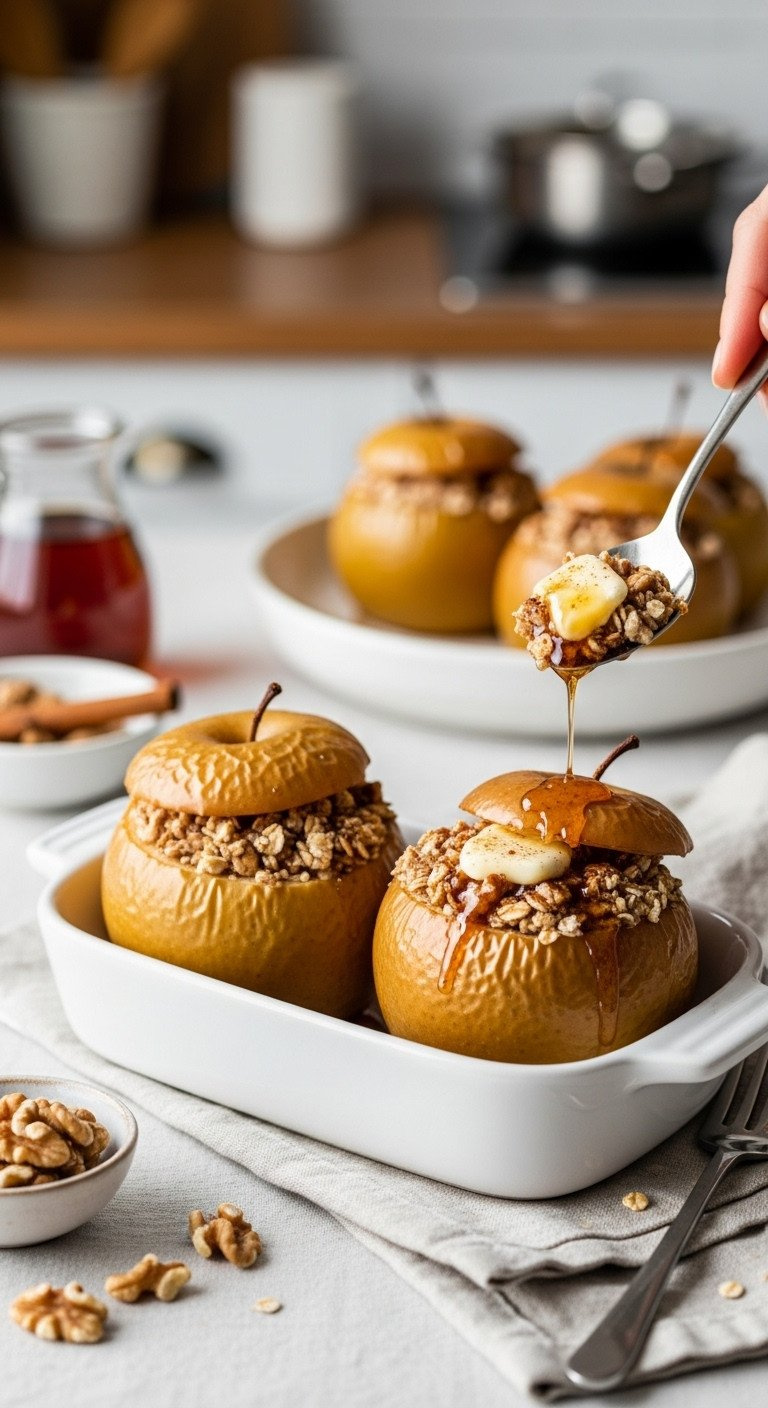
Pin this healthy and easy dessert idea!
For a healthy apple dessert that’s ridiculously easy, baked apples are the answer. This gluten-free recipe uses just a handful of ingredients you probably already have. The apples become wonderfully tender in the oven, filled with a warm, gooey oatmeal and cinnamon mixture.
Ingredients Needed:
- 4 large baking apples (like Rome Beauty or Honeycrisp)
- 1/4 cup old-fashioned rolled oats
- 1/4 cup packed brown sugar or maple syrup
- 1 tsp ground cinnamon
- 2 tbsp cold butter, cut into 4 pieces
Step-by-Step Directions:
- Preheat oven to 375°F (190°C).
- Wash the apples. Using an apple corer or a small knife, remove the core from each apple, leaving the bottom 1/2 inch intact to create a cup.
- In a small bowl, mix together the oats, brown sugar (or maple syrup), and cinnamon.
- Place the apples in a small baking dish that fits them snugly. Stuff the oat mixture into the center of each apple.
- Top each stuffed apple with a small piece of butter.
- Pour about 1/2 inch of hot water into the bottom of the baking dish. This creates steam and prevents the apples from drying out.
- Bake for 45-60 minutes, or until the apples are tender when pierced with a knife.
Pro-Tip: Use a melon baller to easily scoop out the core and seeds after using a corer. It creates a perfect, uniform cavity for the delicious filling.

6. Elegant French Apple Cake (Gâteau Invisible)
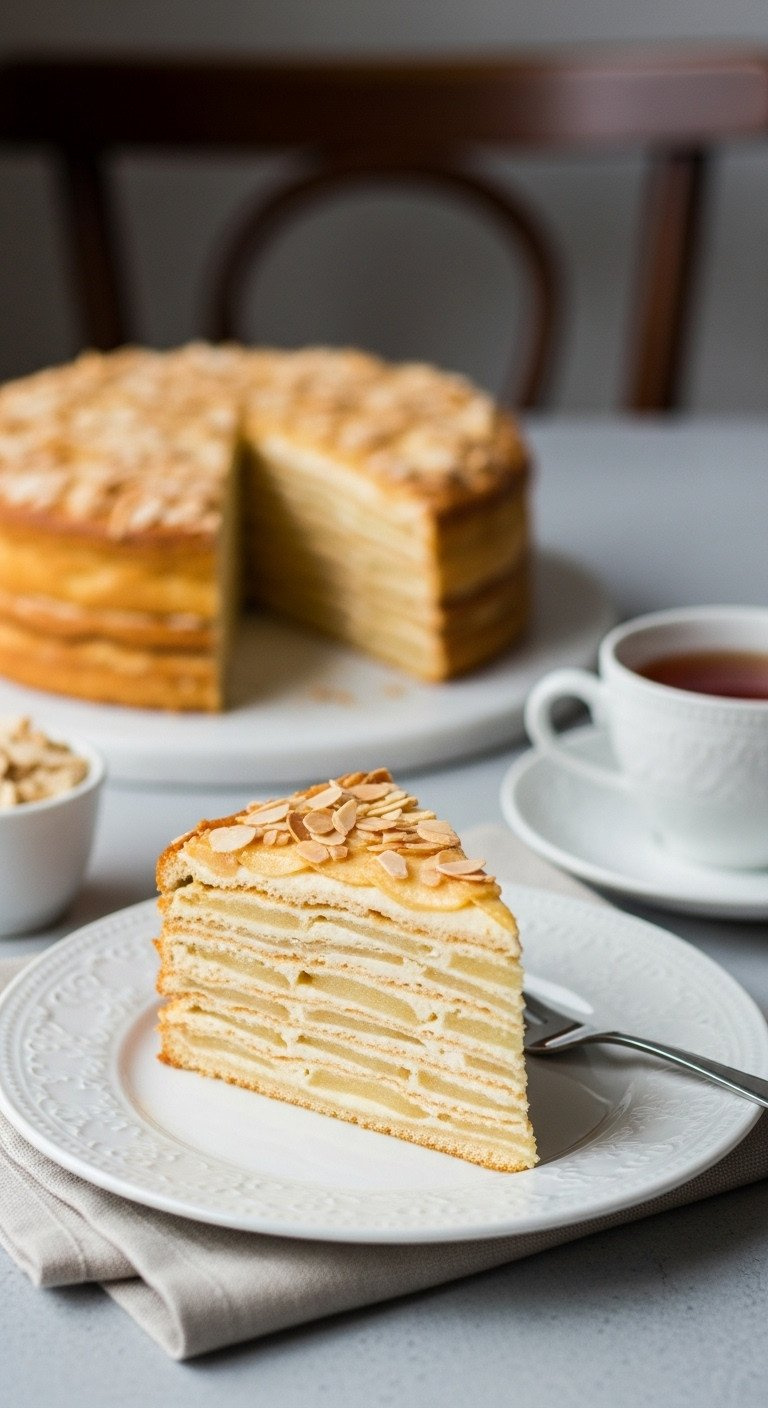
Save this stunning and unique apple cake recipe!
This Gâteau Invisible, or French Apple Cake, is a truly elegant apple dessert. It’s made with countless paper-thin slices of apple held together by just a tiny bit of light, custard-like batter. The result is a delicate, layered cake that’s almost entirely fruit.
Materials Needed:
- 4 medium Golden Delicious or Fuji apples
- 2 large eggs
- 1/2 cup granulated sugar
- 1/2 cup (1 stick) unsalted butter, melted and cooled
- 1 tsp vanilla extract
- 1/2 cup all-purpose flour
- 1 tsp baking powder
- pinch of salt
- 1/2 cup milk
Step-by-Step Directions:
- Preheat oven to 375°F (190°C). Grease an 8-inch round pan and line the bottom with parchment paper.
- The “genius” step: Peel, core, and slice the apples paper-thin using a mandoline slicer. This is essential for the “invisible cake” texture. Place slices in a large bowl.
- In a separate bowl, whisk the eggs and sugar until pale. Whisk in the melted butter and vanilla.
- In another small bowl, whisk the flour, baking powder, and salt. Add this to the egg mixture, alternating with the milk, until you have a smooth, thin batter.
- Pour the batter over the apple slices and gently fold with a spatula until every slice is coated.
- Carefully transfer the coated apple slices into the prepared pan, arranging them in even layers. Pour any remaining batter over the top.
- Bake for 45-55 minutes, until the top is golden and a knife inserted into the center meets tender apples. Let cool completely before slicing.
Lesson Learned: Don’t skip the mandoline. The extreme thinness of the apple slices is what allows them to meld with the light batter, creating a texture that’s part cake, part custard, and entirely apple.

7. Easy Apple Crumble Bars with a Buttery Shortbread Crust

Pin these amazing apple bars for your next potluck!
When you need a portable dessert idea for a potluck or party, these apple crumble bars are perfect. They have all the flavor of apple pie but are far easier to make and serve. The genius tips is that the buttery shortbread crust and the crunchy crumble topping are made from the same simple mixture.
Materials Needed:
- For the Crust & Topping:
- 2 cups all-purpose flour
- 1 cup packed brown sugar
- 1 cup old-fashioned rolled oats
- 1 tsp ground cinnamon
- 1 cup (2 sticks) cold unsalted butter, cubed
- For the Filling:
- 4 medium apples, peeled and finely diced
- 2 tbsp granulated sugar
- 1 tbsp lemon juice
- 1/2 tsp ground cinnamon
Step-by-Step Directions:
- Preheat oven to 375°F (190°C). Line an 8×8 or 9×9 inch baking pan with parchment paper, leaving an overhang to lift the bars out later.
- Genius Hack: Make the crust and topping from one single mixture. In a large bowl, combine the flour, brown sugar, oats, and 1 tsp cinnamon.
- Cut in the cold butter until the mixture resembles coarse crumbs.
- Press two-thirds of this crumb mixture firmly into the bottom of the prepared pan to form the crust. Reserve the remaining one-third for the topping.
- Bake the crust for 15 minutes.
- While the crust bakes, prepare the filling by tossing the diced apples with the granulated sugar, lemon juice, and 1/2 tsp cinnamon.
- Remove the pan from the oven. Spread the apple filling evenly over the hot crust.
- Sprinkle the reserved crumb mixture over the apples.
- Bake for another 25-30 minutes, until the topping is golden and the filling is bubbly. Let cool completely before using the parchment paper to lift and slice into bars.
Pro-Tip: Dicing the apples finely (about 1/4 inch) is key. It ensures they cook through completely in the shorter baking time and makes the bars easy to cut and eat without large chunks falling out.

8. Old-Fashioned Apple Dumplings in a Cinnamon Syrup
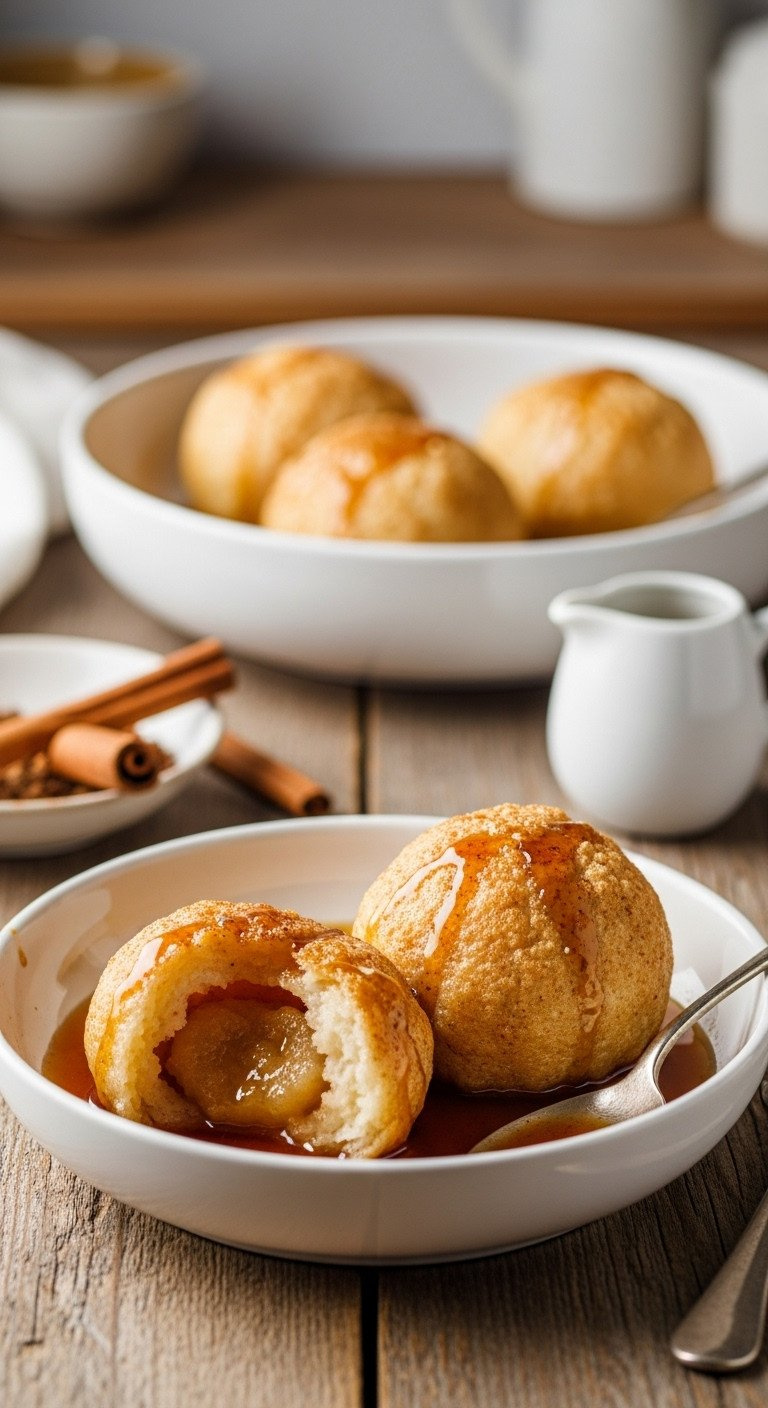
Pin this comforting, old-fashioned dessert recipe!
This classic comfort food recipe creates tender, pastry-wrapped apples baked in a rich, buttery cinnamon syrup. Using refrigerated crescent roll dough is an easy tips that makes this nostalgic dessert incredibly simple to prepare.
Materials Needed:
- 4 small-medium apples (like Granny Smith), peeled and cored
- 1 can (8 oz) refrigerated crescent roll dough
- 1/2 cup (1 stick) butter
- 3/4 cup brown sugar
- 1/2 tsp ground cinnamon
- 1/4 tsp nutmeg
- 1 tsp vanilla extract
- 3/4 cup water (or substitute with Mountain Dew/Sprite for a classic tips)
Step-by-Step Directions:
- Preheat oven to 350°F (175°C). Lightly grease an 8×8 inch baking dish.
- Unroll the crescent dough and separate it into 8 triangles. Press two triangles together along the long edge to form a rectangle. Repeat to make 4 rectangles.
- Place one peeled and cored apple in the center of each dough rectangle. Wrap the dough up and around the apple, pinching the seams to seal completely. Place the 4 dumplings in the prepared dish.
- In a small saucepan over medium heat, melt the butter. Stir in the brown sugar, cinnamon, and nutmeg until the sugar is dissolved. Remove from heat and stir in the vanilla.
- Pour this rich butter syrup evenly over the dumplings in the dish.
- The Genius Hack: Pour the water (or soda) around the edges of the dumplings, not directly on top. This creates a magical, thin cinnamon syrup at the bottom of the pan as it bakes.
- Bake for 35-45 minutes, until the dumplings are golden brown and the apples are tender. Baste with the syrup from the pan halfway through.
Lesson Learned: The soda tips (using Mountain Dew or a lemon-lime soda) sounds strange, but it works! The citric acid and sugar in the soda combine with the butter syrup to create a uniquely delicious and perfectly balanced sauce.
9. Apple Fritter Loaf Bread with a Simple Glaze
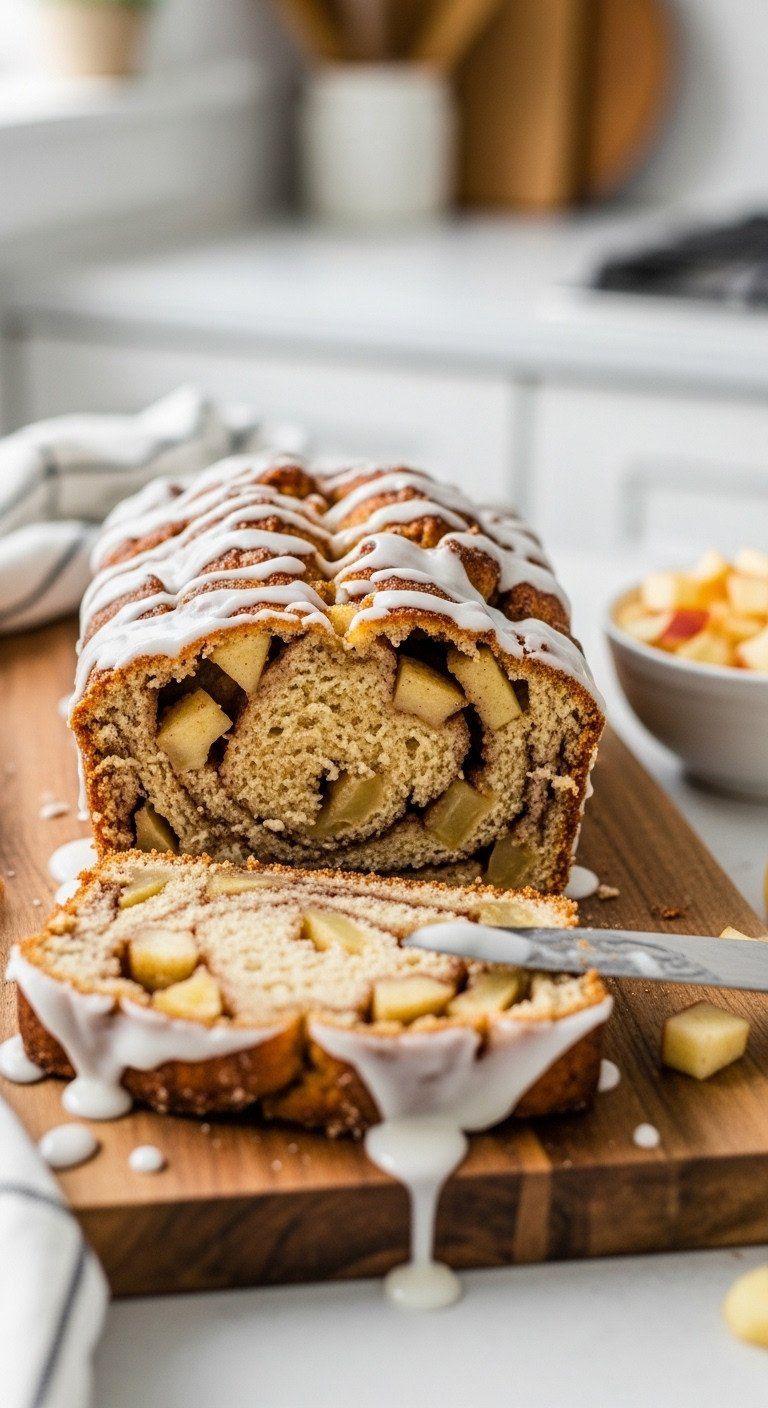
Save this recipe for the best apple bread you’ll ever make!
Enjoy all the flavor of an apple fritter in an easy quick bread! This apple cinnamon bread is incredibly moist, filled with tender apple chunks and a beautiful cinnamon swirl. A simple sweet glaze on top makes it absolutely irresistible.
Ingredients Needed:
- For the Bread:
- 2 cups all-purpose flour
- 1 tsp baking soda
- 1/2 tsp salt
- 1/2 cup (1 stick) butter, softened
- 2/3 cup granulated sugar
- 2 large eggs
- 1 tsp vanilla
- 1/2 cup sour cream
- 2 medium apples, peeled and chopped
- For the Cinnamon Swirl:
- 1/2 cup brown sugar
- 1 tbsp ground cinnamon
- For the Glaze:
- 1 cup powdered sugar
- 2-3 tbsp milk
Step-by-Step Directions:
- Preheat oven to 350°F (175°C). Grease and flour a 9×5 inch loaf pan.
- In a small bowl, mix the brown sugar and cinnamon for the swirl. In a medium bowl, whisk the flour, baking soda, and salt for the bread.
- In a large bowl, cream together the softened butter and granulated sugar. Beat in eggs and vanilla.
- Mix in the dry ingredients alternately with the sour cream. Gently fold in the chopped apples.
- The Genius Layering: Spread half of the batter into the loaf pan. Sprinkle with half of the cinnamon-sugar swirl. Top with the remaining batter, then the remaining cinnamon-sugar. Use a knife to gently swirl it once or twice.
- Bake for 50-60 minutes, until a toothpick comes out clean. Let cool in the pan for 15 minutes, then transfer to a wire rack to cool completely.
- Whisk together the powdered sugar and milk to make a thick glaze. Drizzle over the cooled bread.
Pro-Tip: Layering the cinnamon-sugar mixture in the middle and on top, rather than mixing it in, creates those beautiful, distinct ribbons of flavor just like a real apple fritter.

10. Rustic Salted Caramel Apple Galette
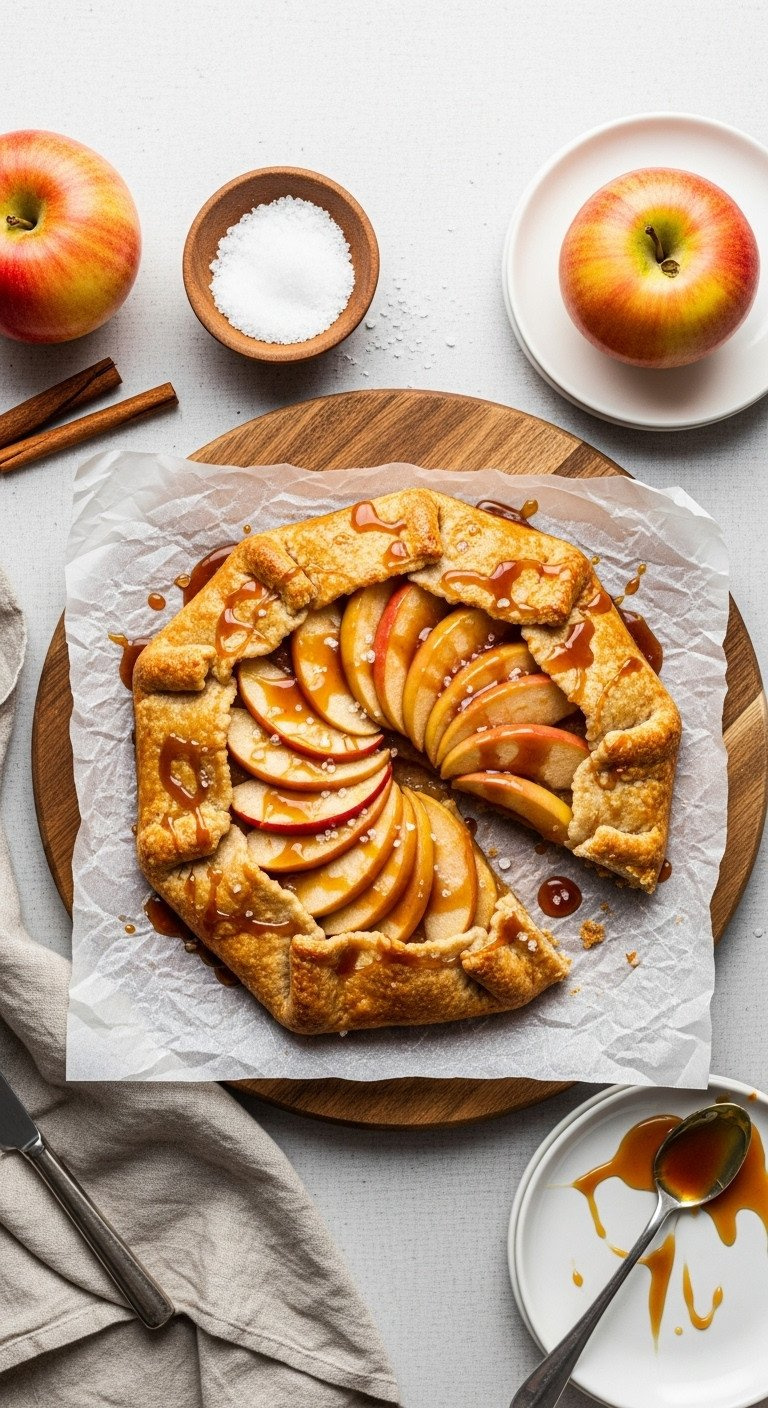
Save this impressive but easy ‘free-form pie’ recipe!
A galette is the perfect solution when you want an impressive dessert that’s much easier than apple pie. This rustic apple tart is a free-form creation, so there’s no need to worry about perfect edges. The fanned apple slices look beautiful, and a drizzle of salted caramel at the end makes it truly special.
Materials Needed:
- 1 single crust pie dough (refrigerated store-bought works great)
- 3 medium apples, thinly sliced
- 2 tbsp granulated sugar
- 1 tbsp all-purpose flour
- 1/2 tsp cinnamon
- 1 tbsp cold butter, cubed
- 1 egg, beaten
- Prepared salted caramel sauce, for drizzling
- Flaky sea salt, for sprinkling
Step-by-Step Directions:
- Preheat oven to 400°F (200°C).
- Let your pie dough come to room temperature for about 15 minutes. Unroll it onto a parchment-lined baking sheet.
- In a bowl, toss the apple slices with the sugar, flour, and cinnamon.
- Arrange the apple slices in an overlapping pattern in the center of the dough, leaving a 2-inch border all around.
- The Genius “No-Fuss” Fold: Gently fold the border of the dough up and over the edges of the apple filling, pleating it as you go to create a rustic crust. It doesn’t have to be perfect!
- Dot the apples with the small pieces of cold butter.
- Brush the folded crust with the beaten egg and sprinkle with a little extra sugar.
- Bake for 30-35 minutes, until the crust is deeply golden and the apples are tender.
- Let cool slightly before drizzling generously with salted caramel sauce and a pinch of flaky sea salt.
Lesson Learned: A galette is the perfect dessert for bakers who fear making a perfect pie crust. The rustic, free-form nature means imperfections are part of its charm.

11. Apple Cider Doughnut Muffins
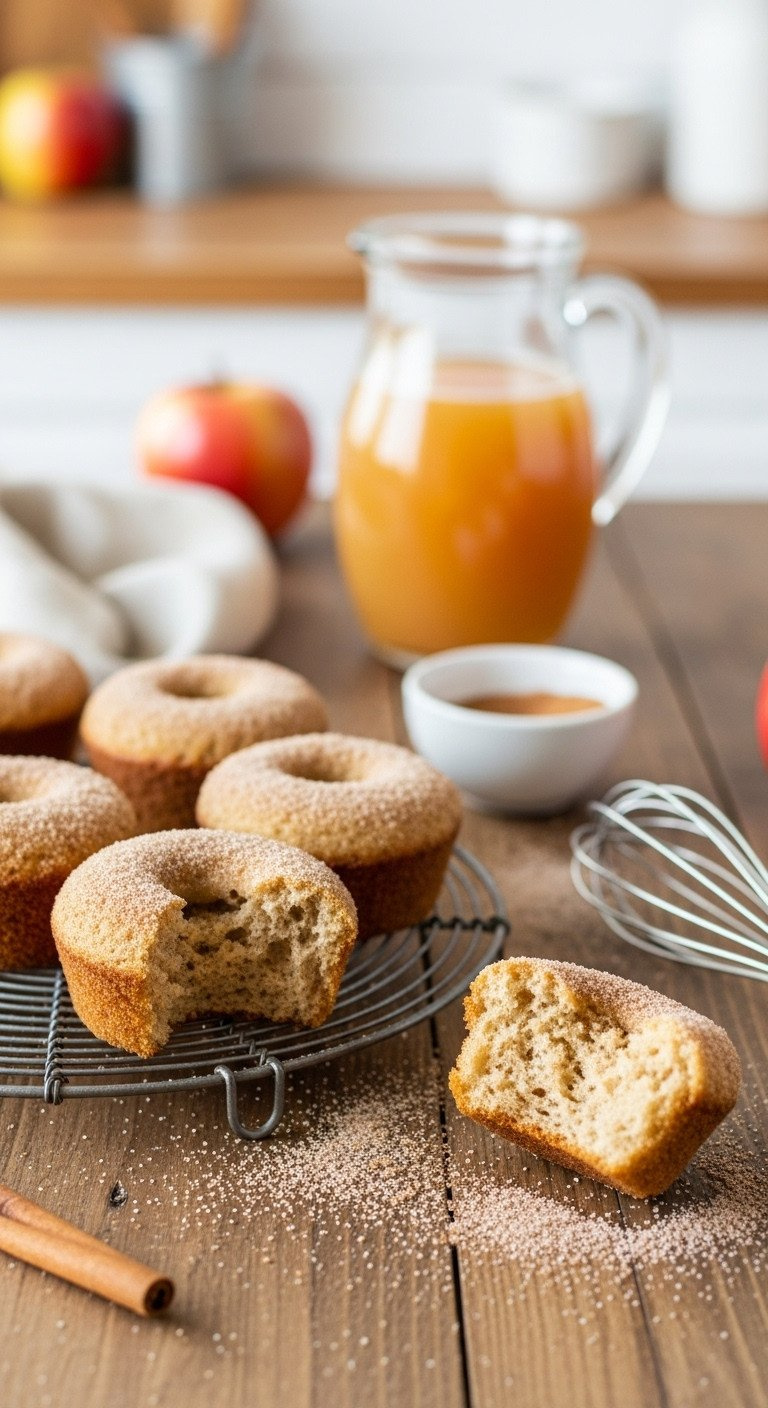
Pin this recipe to get your doughnut fix without a fryer!
Capture the beloved flavor of fall apple cider doughnuts in an easy, baked muffin form. These cakey muffins are perfect for a fall breakfast or snack. The genius flavor booster is reducing apple cider on the stove to concentrate its flavor before adding it to the batter.
Materials Needed:
- 1 1/2 cups apple cider
- 2 cups all-purpose flour
- 2 tsp baking powder
- 1 tsp ground cinnamon
- 1/2 tsp ground nutmeg
- 1/2 tsp salt
- 1/2 cup (1 stick) butter, melted
- 1 cup packed brown sugar
- 1 large egg
- For the Topping:
- 1/2 cup granulated sugar
- 1 tsp ground cinnamon
- 4 tbsp butter, melted
Step-by-Step Directions:
- Genius Flavor Booster: Pour the apple cider into a small saucepan. Bring to a boil and then simmer until it has reduced to about 1/2 cup. This concentrates the flavor intensely. Let it cool.
- Preheat oven to 350°F (175°C). Grease a standard 12-cup muffin tin.
- In a bowl, whisk flour, baking powder, cinnamon, nutmeg, and salt.
- In a large bowl, whisk the melted butter and brown sugar. Whisk in the egg, then the cooled, reduced apple cider.
- Pour the wet ingredients into the dry ingredients and stir until just combined.
- Divide the batter evenly among the muffin cups, filling each about 2/3 full.
- Bake for 18-20 minutes, until a toothpick comes out clean.
- Let the muffins cool for a few minutes. In a small bowl, combine the granulated sugar and 1 tsp cinnamon for the topping.
- Dip the top of each warm muffin into the 4 tbsp of melted butter, then generously roll it in the cinnamon-sugar mixture.
Pro-Tip: Reducing the apple cider is a non-negotiable step. It’s the secret to getting that authentic, deep cider flavor you find at an apple orchard.

12. Chewy Brown Butter Apple Blondies
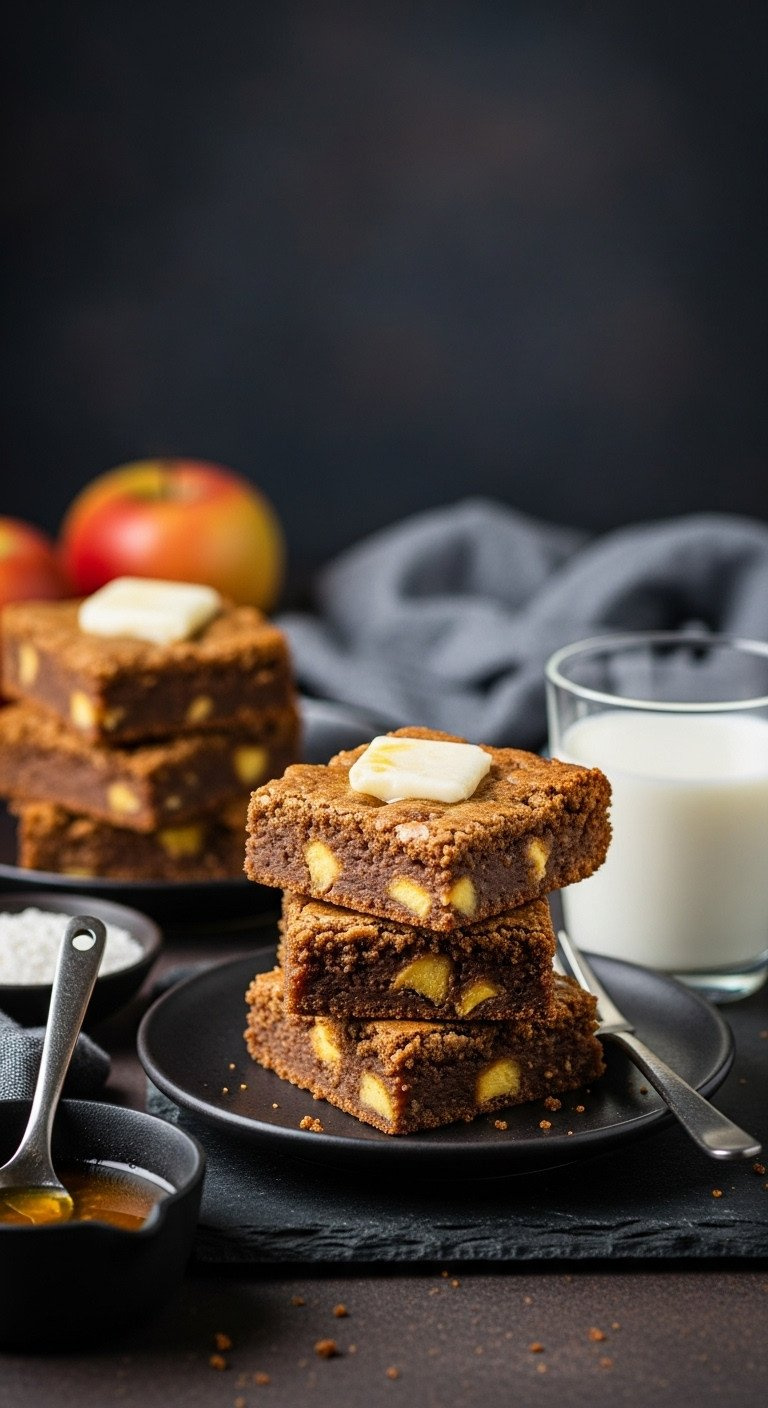
Save this unique blondie recipe for a sophisticated treat!
For a unique fall brownie alternative, these chewy apple bars are a must-try. The blondies have a dense, chewy texture and are studded with finely diced apple. The real genius, though, is the brown butter, which adds a sophisticated, nutty flavor that elevates this dessert to a whole new level.
Materials Needed:
- 1/2 cup (1 stick) unsalted butter
- 1 cup packed light brown sugar
- 1 large egg
- 2 tsp vanilla extract
- 1 cup all-purpose flour
- 1/2 tsp baking powder
- 1/4 tsp salt
- 1 medium apple, peeled and finely diced
- 1 tsp cinnamon
Step-by-Step Directions:
- Preheat oven to 350°F (175°C). Line an 8×8 inch pan with parchment paper.
- The Genius Flavor Step: Brown the butter. Melt the butter in a light-colored skillet over medium heat. Continue cooking, swirling the pan, until it foams, and then brown bits form at the bottom and it smells nutty (about 5-8 minutes). Immediately pour into a large bowl to stop the cooking.
- Whisk the brown sugar into the hot brown butter until combined. Let cool for 10 minutes.
- Whisk in the egg and vanilla extract until smooth.
- In a separate bowl, whisk together the flour, baking powder, salt, and cinnamon.
- Fold the dry ingredients into the wet ingredients until just combined. Gently fold in the finely diced apple.
- Spread the batter into the prepared pan.
- Bake for 22-25 minutes, until the edges are set and a toothpick comes out with moist crumbs, not wet batter. Do not overbake for a chewy texture. Cool completely before slicing.
Lesson Learned: Browning the butter is a simple step that adds an incredible depth of nutty, toffee-like flavor that perfectly complements the apples. It elevates a simple bar into something truly special.

13. 5-Minute Single-Serving Apple Crumble in a Mug
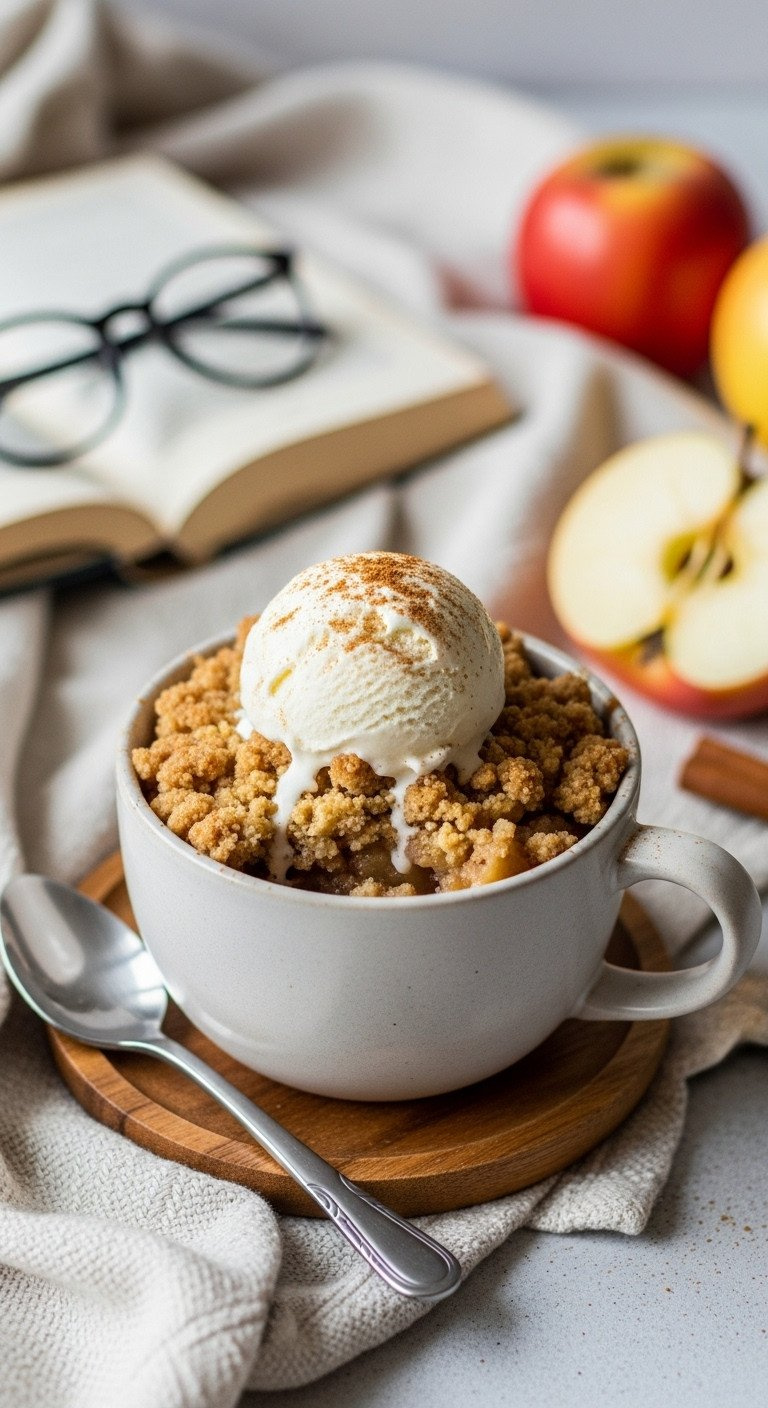
Save this lightning-fast dessert recipe for your next craving!
When a dessert craving hits, you need this quick dessert for one. This single-serving apple crumble is made entirely in the microwave in about five minutes. A quick mix for the crumble topping and finely diced apple create a warm, satisfying treat in no time.
Ingredients Needed:
- 1 small apple, peeled and finely diced
- 1 tbsp brown sugar
- 1/4 tsp cinnamon
- For the Topping:
- 2 tbsp all-purpose flour
- 2 tbsp old-fashioned oats
- 1 tbsp brown sugar
- Pinch of cinnamon
- 1 tbsp cold butter, cubed
Step-by-Step Directions:
- In a large, microwave-safe mug, combine the finely diced apple, 1 tbsp brown sugar, and 1/4 tsp cinnamon. Mix well.
- Microwave the apple mixture on high for 1-2 minutes, until the apple is slightly tender.
- While the apple cooks, prepare the topping. In a small bowl, mix the flour, oats, 1 tbsp brown sugar, and a pinch of cinnamon.
- Using your fingers, rub the cold butter into the flour mixture until it forms small crumbs.
- Sprinkle the crumble topping over the cooked apples in the mug.
- The Genius Quick-Crisp Trick: Microwave on high for another 60-90 seconds, just until the topping is cooked through. It won’t brown like in an oven, but it will be delicious. For a crispier top, you can place it under the broiler for 1 minute (if your mug is broiler-safe).
Pro-Tip: Dicing the apple very small is crucial for microwave cooking. This ensures it becomes tender quickly and cooks evenly without turning to complete mush.

The Secret to Perfect Results: Choosing the Best Apples for Baking
A genius recipe can be ruined by the wrong apple. The key is to choose an apple that can withstand heat without turning to mush and has enough tartness to balance the sugar. This is one of the most important expert tips for baking, and getting it right is a game-changer. Here’s a quick guide:
The Apple Baking Matrix
| Apple Variety | Texture After Baking | Flavor Profile | Best For… |
|---|---|---|---|
| Granny Smith | Very Firm | Very Tart | Pies, Galettes (The absolute gold standard) |
| Honeycrisp | Firm | Sweet-Tart | Cakes, Crisps, Baked Apples (Holds shape well) |
| Braeburn | Firm | Complex, Spicy | Pies, Tarts, Sauces (Doesn’t get watery) |
| Golden Delicious | Tender but holds shape | Sweet & Mild | Cakes, Breads, Sauces (A great all-purpose) |
| Gala | Softer | Sweet | Applesauce, Apple Butter, Breads (Breaks down) |
| McIntosh | Very Soft | Tart | Applesauce ONLY (Turns to mush quickly) |
The Baker’s Golden Rule
For the most complex and delicious flavor, use a mix of two different apples. A classic combination is half Granny Smith (for tartness and structure) and half Honeycrisp or Braeburn (for a balanced sweetness). This simple trick elevates your dessert from good to unforgettable.
People Also Ask About Apple Dessert Recipes
What is the difference between an apple crisp and an apple crumble?
The primary difference is that a classic apple crisp topping contains rolled oats, while an apple crumble does not. This gives the crisp a heartier, chewier texture. A crumble has a more delicate, sandy, or streusel-like topping made from flour, sugar, and butter.
How do you keep apple pie from getting a soggy bottom?
Bake the pie on a preheated baking sheet in the lower third of your oven. This provides an initial blast of heat to the bottom crust, helping it set before the filling’s moisture can soak in. You can also toss your apple filling with a tablespoon of flour or cornstarch to thicken the juices as they bake.
Can I make apple desserts ahead of time?
Yes, many apple desserts are great for making ahead. You can typically assemble an entire unbaked crisp, crumble, or pie and refrigerate it for up to 24 hours before baking. Alternatively, you can fully bake the dessert, let it cool, and then cover and refrigerate. Reheat in a 350°F oven until warm.
Should you peel apples for baking?
It depends on the dessert and your preference. For pies, smooth cakes, and sauces, peeling is recommended for the best texture. For rustic desserts like crisps, galettes, and baked apples, leaving the skin on can add color, texture, and extra nutrients.
Final Thoughts
There you have it—13 kitchen-tested, foolproof apple dessert recipes designed for perfect results. Whether you’re craving a lightning-fast mug crumble or a showstopping holiday pie, the secret is always a combination of a great recipe and the right ingredients. Now you have both. Happy baking!
Which one of these genius recipes will you be trying first? Let me know in the comments below!
Last update on 2026-06-11 at 11:12 / Affiliate links / Images from Amazon Product Advertising API
