As an Amazon Associate BakingBakewareSets.com earns from qualifying purchases.
Christmas Baking With Kids Made Simple 11 Fun Treat Ideas
Struggling to picture a peaceful, joyful Christmas baking session with your kids? You’re not alone.
The dream is magical memories, but the reality is often a kitchen covered in flour and stress levels high. Christmas baking with kids is an activity meant to create a festive family tradition, but it can quickly become overwhelming.
The best way to make Christmas baking with kids simple is to choose easy, no-fail recipes that focus on decorating, and to prep your kitchen for success. In this guide, you’ll discover 11 incredibly fun treat ideas and the parent-tested strategies you need to make the process as sweet as the results.
☰ Table of Contents ▼
show
Want Magical Christmas Baking With Kids (Minus the Meltdown)?
You see the pictures: smiling children, perfectly decorated cookies, a kitchen filled with holiday cheer. You want that magical Christmas memory. But you also know the reality: the spilled milk, the flour that gets everywhere, and the short attention spans that can turn a fun family activity into a stressful, chaotic mess.
Let’s be honest. The desire for a perfect family bonding moment and the fear of a kitchen meltdown are both completely valid. So many guides just give you a list of recipes, but they miss the most important ingredient: the parent tips for actually enjoying the process.
This is different. We’re not just sharing simple recipes; we’re sharing a simple, tested approach. By combining achievable, fun ideas with parent-approved strategies for managing the project, you can finally focus on making joyful memories instead of stressing over the mess.
11 Fun Treat Ideas For Simple Christmas Baking With Kids
Before we jump into the fun list of kids Christmas baking ideas, let’s cover the three golden rules that will transform your experience. According to professional chefs and seasoned parents, this framework is the key to success. Think of it as your recipe for a stress-free afternoon.
- Prep is Everything (Mise en Place): The single best parent tips is to pre-measure all your ingredients before you even call the kids into the kitchen. Put everything into small bowls. This simple step saves your sanity, prevents massive spills, and lets your little ones focus on the fun parts—dumping and stirring.
- Know Your Role (Assign Jobs): Every child can be a helper, but their jobs should match their age. A toddler’s role is sensory—stirring, sprinkling, and tasting. An older child can help with measuring, cracking eggs, or reading the steps. Defining these roles beforehand prevents arguments and keeps everyone engaged.
- Embrace Imperfection (It’s About Fun): The goal of Christmas baking with kids is connection, not perfection. The cookies will be lopsided. The sprinkles will be uneven. And that’s exactly how it should be. The memories you create are far more important than a flawless finish.
Now that you’re prepped for success, let’s dive into 11 of our favorite, simple Christmas treats for kids!
1. No-Bake Reindeer Pretzels

Pin this adorable no-bake idea for a quick holiday activity!
These salty-sweet pretzel reindeer are the ultimate no-bake Christmas treat. This edible Christmas craft is so easy that even the youngest toddlers can help assemble them. The combination of crunchy mini pretzels, smooth milk chocolate, and fun candy eyeballs makes for a guaranteed hit.
What You Need:
- Mini pretzel twists
- Milk chocolate melting wafers (these melt smoother than regular chips)
- Small edible candy eyeballs
- Red candy-coated chocolates (like M&M’s Minis or similar)
- Parchment paper
Step-by-Step Directions:
- Prep Your Station: Line a baking sheet with parchment paper. This is your reindeer landing zone!
- Melt the Chocolate: In a microwave-safe bowl, melt the chocolate wafers in 30-second intervals, stirring in between, until smooth. An adult should handle this step.
- Dip the Pretzels: Carefully dip the bottom two-thirds of each pretzel twist into the melted chocolate, leaving the top two loops (the “antlers”) clean.
- Place and Decorate: Lay the chocolate-dipped pretzel on the parchment paper.
- Kid’s Turn! Before the chocolate sets, have your child place two candy eyeballs and one red candy nose onto the wet chocolate.
- Let Them Set: Allow the Reindeer Pretzels to cool and harden completely at room temperature or in the fridge for 10 minutes.
Pro-Tip: Use a fork to lift the pretzels out of the chocolate. It lets the excess drip off easily and keeps fingers (mostly) clean.

2. Melted Snowman Chocolate Bark
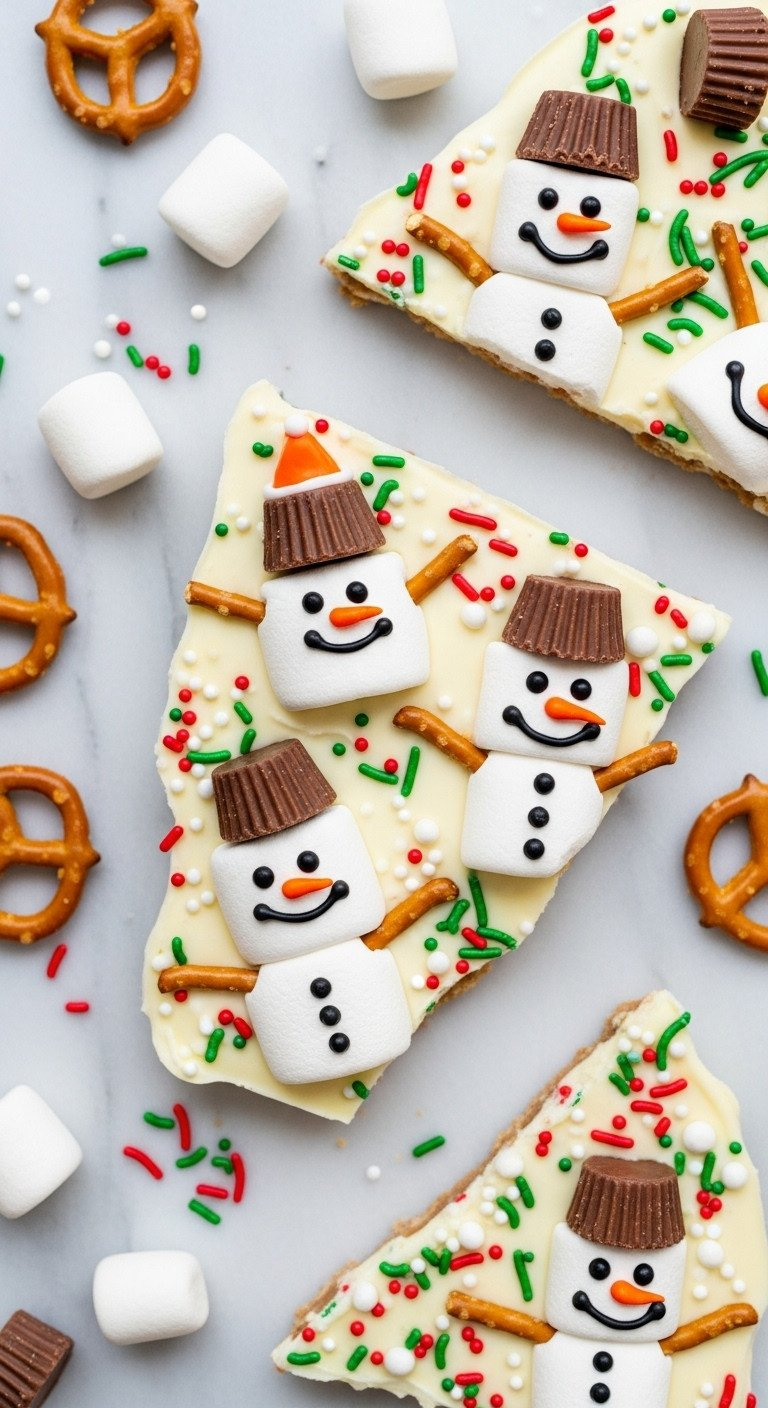
Save this easy chocolate bark recipe for a fun snow day!
This snowman chocolate bark is a perfect holiday party treat because it allows for so much creativity. The base is simple white chocolate, which becomes a snowy canvas for kids to build their own “melted” snowman scenes using marshmallows, sprinkles, pretzel sticks, and mini peanut butter cups.
What You Need:
- High-quality white chocolate melting wafers or bars
- Large marshmallows
- Mini peanut butter cups, unwrapped
- Pretzel sticks, broken in half
- Black decorating icing in a tube with a fine tip
- Orange sprinkles (for the carrot nose)
- Festive red and green sprinkles
Step-by-Step Directions:
- Prep Your Pan: Line a baking sheet with parchment paper.
- Melt the White Chocolate: An adult should melt the white chocolate in a microwave-safe bowl in 30-second intervals until smooth and pourable.
- Spread the Snow: Pour the melted white chocolate onto the prepared baking sheet and use a spatula to spread it into an even layer, about 1/4 inch thick.
- Build Your Snowmen: Now for the fun part! While the chocolate is still wet, press large marshmallows into it to create the snowman heads.
- Decorate: Give your kids the supplies! Add a mini peanut butter cup “hat” above each marshmallow, place pretzel stick “arms,” and scatter festive sprinkles all over the wet chocolate.
- Final Touches: Let the bark set for about 10 minutes until firm. Use the black icing to draw eyes and a mouth on each marshmallow head, and press on an orange sprinkle for the nose.
- Chill and Crack: Refrigerate for 20-30 minutes until completely hard, then break it into fun, irregular pieces.
Parent tips: Put all the small decorations (sprinkles, peanut butter cups) into the cups of a muffin tin. It keeps everything organized and lets kids easily pick what they want to use.

3. Easy Christmas Oreo Pops
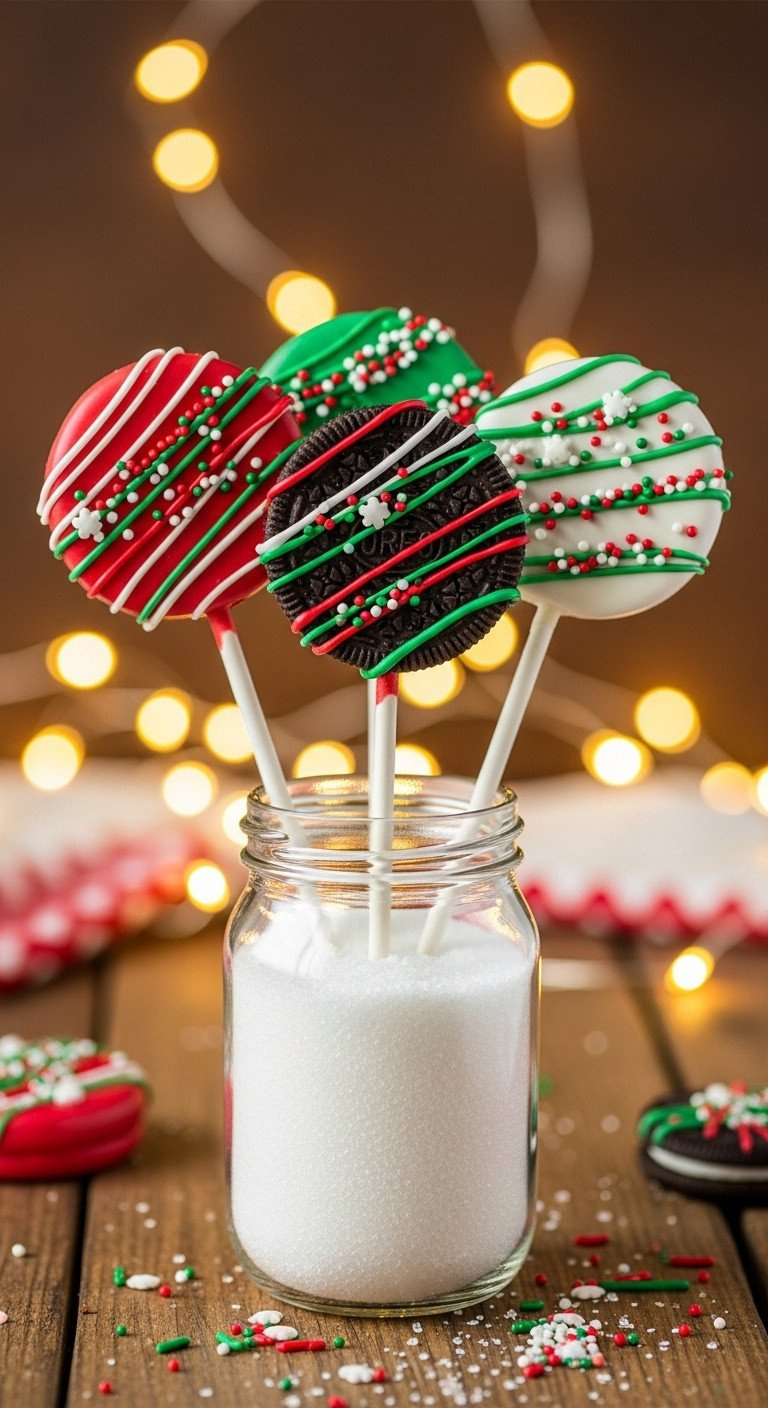
Save this shortcut dessert idea for your next holiday party!
For an impressive-looking treat that’s secretly a shortcut, these Christmas Oreo pops are a winner. Using store-bought Oreo cookies as a base, this activity is all about the decorating. Kids love dipping the cookies into colorful red, green, and white candy melts and covering them in sprinkles.
What You Need:
- Oreo cookies (Double Stuf works best as it holds the stick better)
- Lollipop sticks or sturdy paper straws
- Red, green, and white candy melts
- Holiday-themed sprinkles
- A block of styrofoam or a tall glass filled with sugar/rice
Step-by-Step Directions:
- Insert Sticks: Gently push a lollipop stick into the cream filling of each Oreo cookie, about halfway through. Be careful not to split the cookie.
- Melt the Colors: In separate deep, narrow, microwave-safe glasses, melt each color of candy melts according to package directions. Using a glass makes dipping easier.
- Dip and Coat: Dip each Oreo pop into the melted candy, turning to coat it completely. Gently tap the stick on the rim of the glass to remove excess coating.
- Sprinkle Time! Before the coating sets, let your kids go wild with the sprinkles. Hold the pop over a plate to catch the extras.
- Let Dry: Stick the finished pops into the styrofoam block or glass of sugar to dry upright without smudging the design. Let them harden completely.
Lesson Learned: If your Oreos are splitting, dip the tip of the stick in a little melted candy before inserting it into the cookie. Let it set for a few minutes. The candy acts like glue!
4. Graham Cracker “Gingerbread” Houses
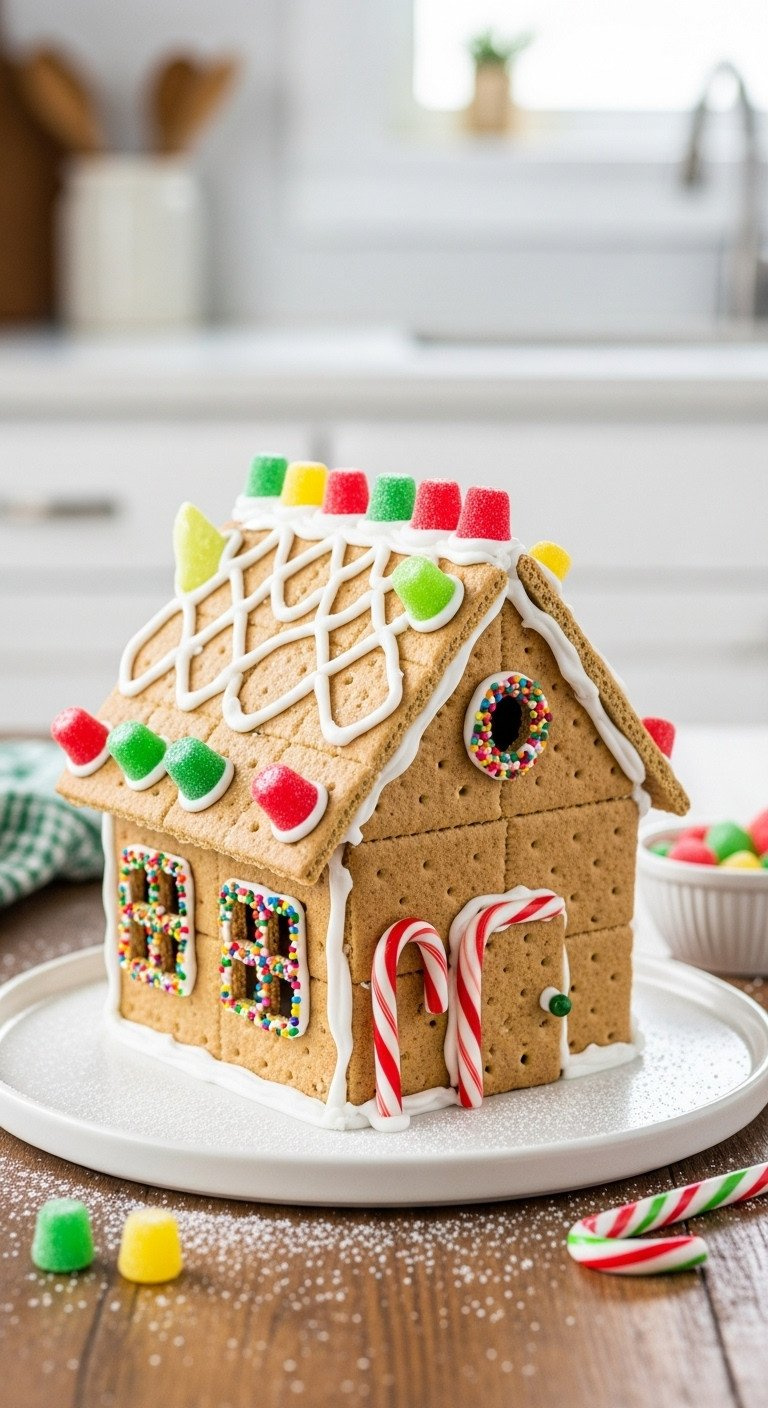
Pin this easy gingerbread house tips for a fun family project!
Building a traditional gingerbread house from scratch can be intimidating. This graham cracker version is the perfect family holiday tradition, offering all the fun with none of the fuss. Use sturdy graham crackers for the walls and roof and strong royal icing as the “glue,” then let the kids’ imaginations run wild with assorted candy decorations.
Materials Needed:
- Graham crackers (you’ll need 6 full sheets per house)
- Royal icing (store-bought mix or homemade; it’s the strongest “glue”)
- A piping bag or a zip-top bag with the corner snipped
- A sturdy paper plate or cardboard square for the base
- A variety of small candies for decorating: gumdrops, mini candy canes, sprinkles, nonpareils, M&M’s, etc.
Step-by-Step Directions:
- Prep the Icing: Prepare the royal icing to a thick, paste-like consistency. Fill your piping bag.
- Build the Walls: An adult should handle this part for stability. Pipe a square of icing on your base. Place four graham cracker halves vertically to form the walls of the house. Pipe extra icing in the inside corners to secure them. Let this set for 10-15 minutes.
- Add the Roof: Pipe icing along the top edges of the walls. Gently place two full graham cracker sheets on top to form a peaked roof. Pipe a thick line of icing along the top ridge to seal it. Let the main structure dry for at least 30 minutes before decorating.
- Time to Decorate! This is the kids’ moment to shine. Use the icing to “glue” candies all over the house. Make windows, doors, roof tiles—anything they can imagine!
Pro-Tip: For very young kids, pre-assemble the house a day in advance so it’s rock solid. This way, they can focus 100% on the decorating without any risk of a house collapse.

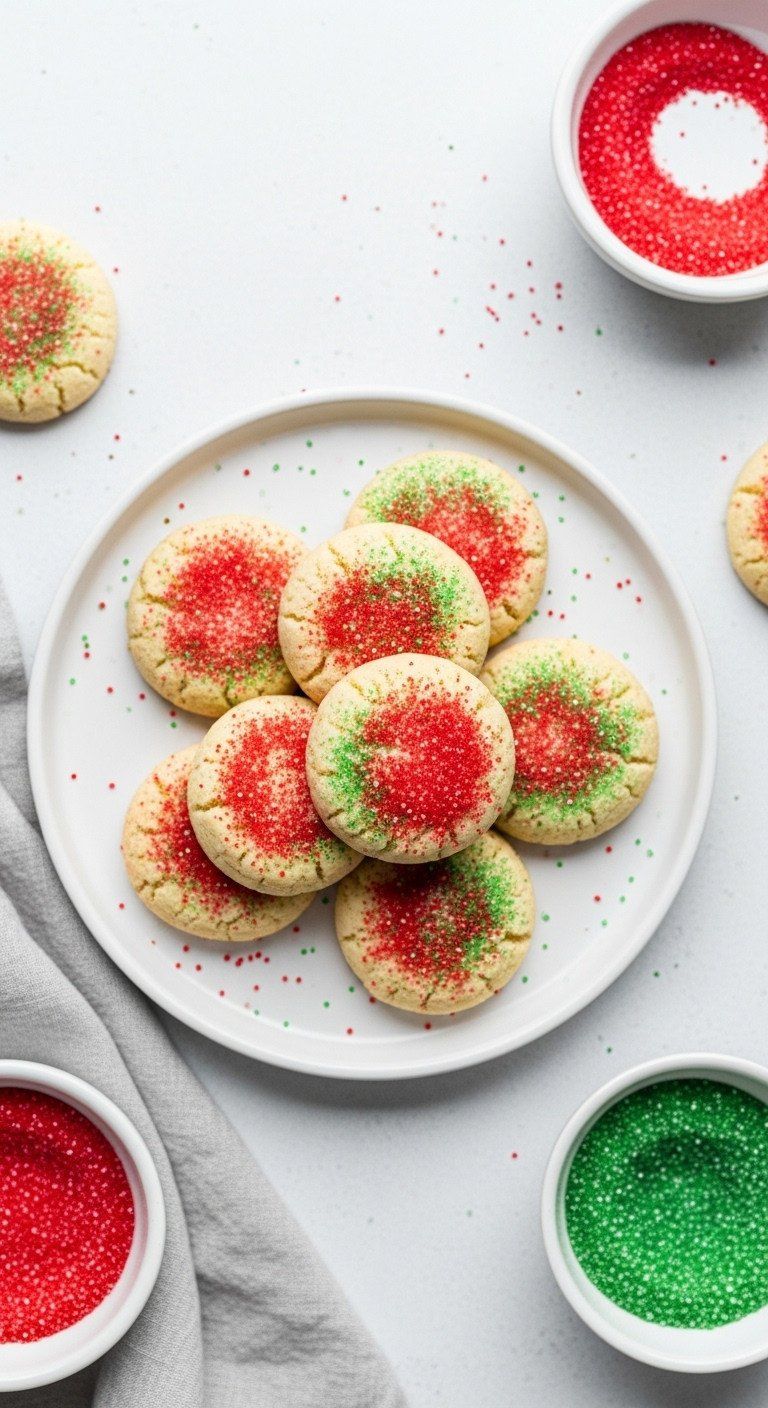
Save this super simple 5-ingredient cookie recipe for last-minute baking!
Looking for a beginner baking recipe? These bite-sized sugar cookies use only five simple ingredients and are perfect for little hands. The dough comes together in minutes, and kids can take charge of the most important step: rolling the dough balls and coating them in festive red and green sanding sugar.
Ingredients:
- 1 cup salted butter, softened
- 1/2 cup granulated sugar
- 2 teaspoons vanilla extract
- 2 cups all-purpose flour
- Red and green sanding sugar for rolling
Instructions:
- Preheat Oven: Preheat your oven to 350°F (175°C) and line a baking sheet with parchment paper.
- Cream Butter & Sugar: In a large bowl, use an electric mixer (or strong arms!) to beat the softened butter and sugar together until light and fluffy.
- Add Vanilla: Mix in the vanilla extract.
- Mix in Flour: Gradually add the flour, mixing on low speed until just combined. Don’t overmix! The dough will be crumbly.
- Roll and Coat: Let your kids scoop out teaspoon-sized bits of dough and roll them into small balls. Then, roll each ball in a bowl of the red and green sanding sugar to coat them completely.
- Bake: Place the coated balls on the prepared baking sheet and bake for 10-12 minutes, or until the edges are just barely golden. Let them cool on the sheet for a few minutes before moving to a wire rack.
Parent tips: This dough is very forgiving. If it’s too crumbly for your kids to roll, just have them press it into a small, greased baking dish, top with sprinkles, and bake as cookie bars instead.

6. Christmas Tree Rice Krispie Treats
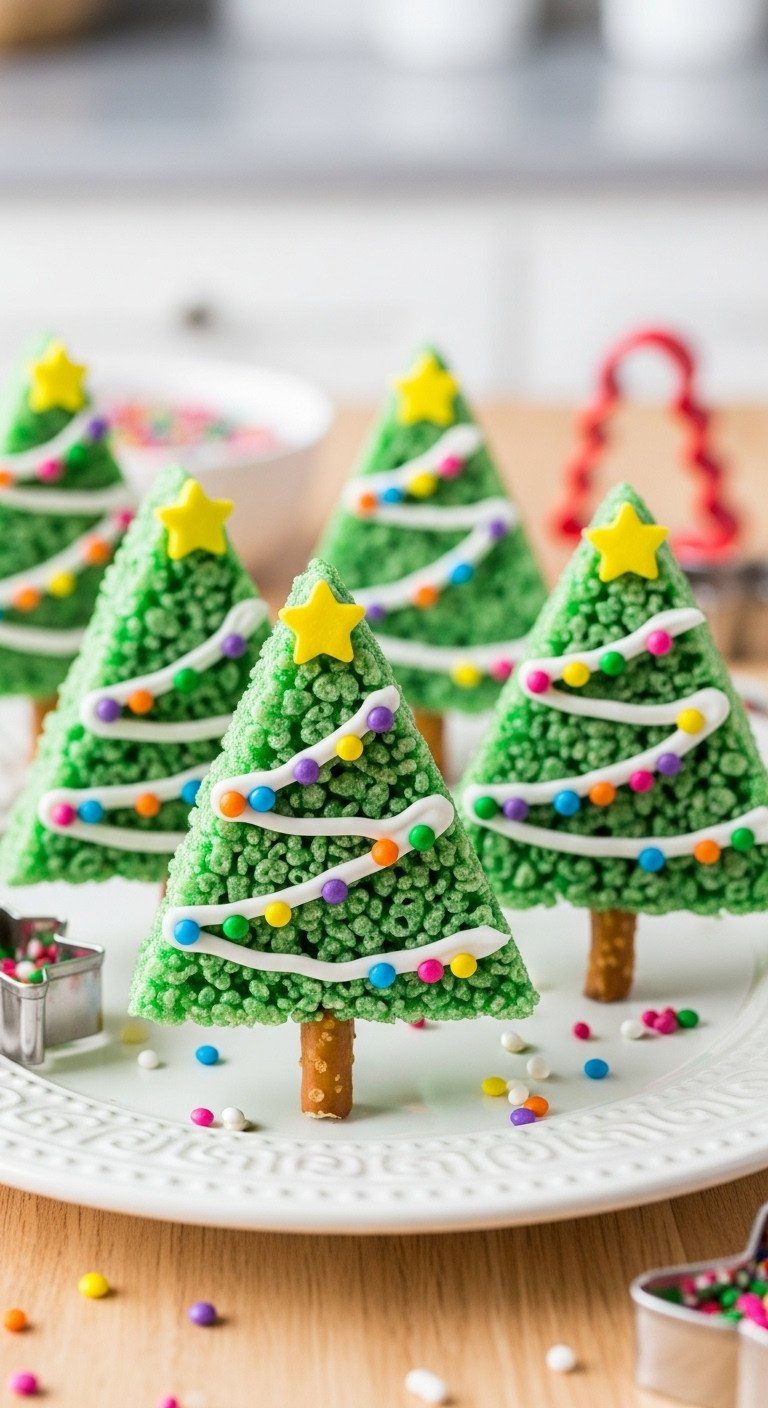
Pin this classic treat with a fun Christmas twist!
Everyone loves Rice Krispie treats, and this festive version is a guaranteed win for any kids Christmas party. By adding green food coloring to the melted marshmallows, you create a perfect base for tree-shaped cookie cutter treats. The best part for kids is decorating their trees with icing “garland” and sprinkle “ornaments.”
What You Need:
- 6 cups Rice Krispies cereal
- 1 package (10 oz) of mini marshmallows
- 3 tablespoons butter
- Green gel food coloring
- White decorating icing
- Assorted sprinkles and star-shaped candies
- Pretzel sticks
- A tree-shaped cookie cutter
Step-by-Step Directions:
- Melt the Base: In a large pot on low heat, an adult should melt the butter. Add the marshmallows and stir constantly until completely melted.
- Go Green: Remove from heat and stir in a few drops of green gel food coloring until you get a festive tree color.
- Mix It Up: Quickly stir in the Rice Krispies cereal until everything is coated.
- Press Into Pan: Press the green mixture firmly and evenly into a greased 13×9 inch pan. Let your kids help press it down with a greased spatula or a piece of wax paper.
- Cool and Cut: Let the treats cool completely. Use the tree-shaped cookie cutter to cut out your trees.
- Decorate: Let the kids decorate their trees with white icing “garland,” sprinkle “ornaments,” and a star on top. Break pretzel sticks into small pieces and gently press one into the bottom of each tree for a trunk.
Pro-Tip: Spray your cookie cutter with non-stick cooking spray before each cut. It will slide through the sticky treats much more easily!
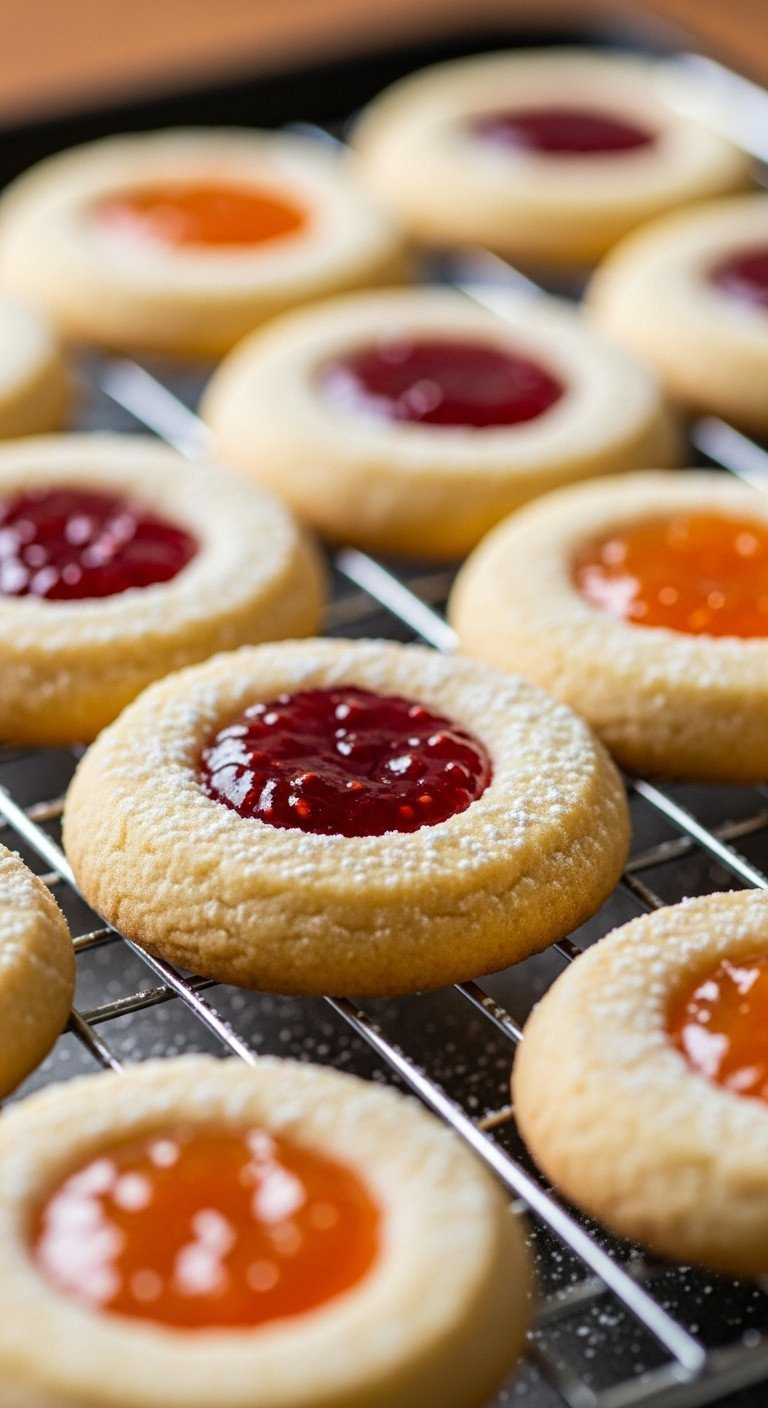
Save this timeless cookie recipe—perfect for little thumbs!
This classic, buttery cookie recipe is perfect for baking with toddlers. The rollable cookie dough is easy for little hands to manage, and the main task is the most fun part: pressing their thumb into the center of each cookie ball to make a well for the jam. It’s a simple, hands-on holiday cookie that always feels special.
Ingredients:
- 1 cup salted butter, softened
- 1/2 cup powdered sugar, plus more for dusting
- 1 teaspoon vanilla extract
- 2 cups all-purpose flour
- 1/2 cup seedless raspberry or apricot jam
Instructions:
- Preheat Oven: Set your oven to 350°F (175°C) and line a baking sheet with parchment paper.
- Make the Dough: In a large bowl, beat the butter and powdered sugar until creamy. Mix in the vanilla. Gradually add the flour until a soft dough forms.
- Roll the Balls: Have your kids help roll the dough into 1-inch balls and place them on the baking sheet.
- The Best Part: Let your child use their thumb (or the back of a small measuring spoon) to press an indentation into the center of each cookie ball.
- Fill with Jam: An adult or older child can carefully spoon a small amount of jam into each thumbprint.
- Bake: Bake for 12-15 minutes, until the edges are lightly golden. Let cool completely on a wire rack and dust with powdered sugar if desired.
Lesson Learned: If the dough cracks a little when you make the thumbprint, don’t worry! Just gently press the cracks back together with your fingers before adding the jam. It adds to the homemade charm.
8. Festive Holiday Popcorn Mix
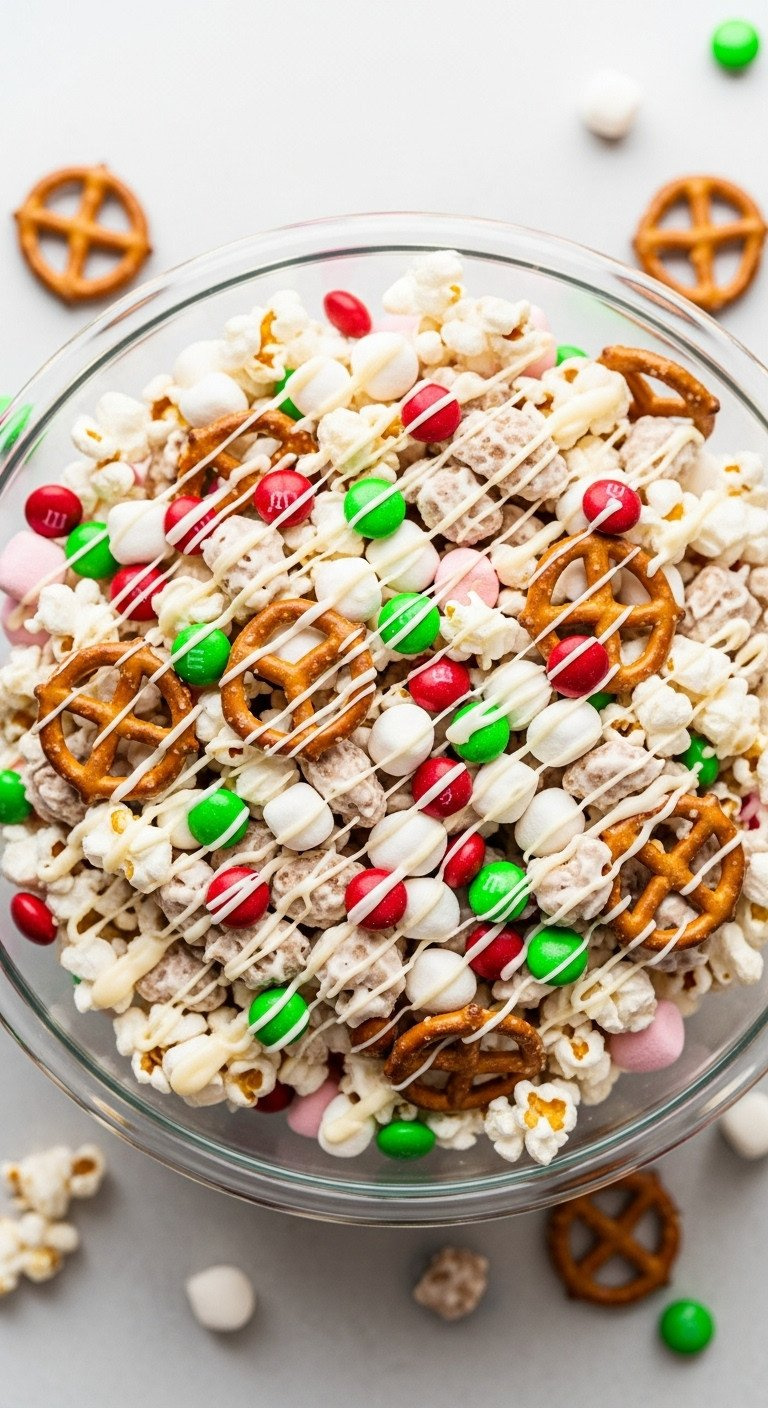
Pin this super-easy snack mix for your next Christmas movie night!
This festive, sweet and salty popcorn mix is the perfect big-batch, no-bake recipe for a holiday movie night. The process is simple: combine popcorn, pretzels, colorful M&M’s, and marshmallows in a giant bowl. Kids can have a blast mixing everything with their hands before an adult drizzles it all with a white chocolate coating.
What You Need:
- 8-10 cups of plain popped popcorn, cooled
- 2 cups mini pretzels
- 1 cup red and green M&M’s
- 1 cup mini marshmallows
- 1 bag (12 oz) of white chocolate melting wafers
- Holiday sprinkles (optional)
Step-by-Step Directions:
- Combine Dry Mix: In a very large bowl, combine the popcorn, pretzels, M&M’s, and mini marshmallows.
- Kid’s Job: Let your kids gently toss everything together with their clean hands. This is a great sensory activity!
- Melt and Drizzle: An adult should melt the white chocolate wafers until smooth. Drizzle the melted chocolate all over the popcorn mixture.
- Mix to Coat: Quickly and gently, use a large spatula to fold the mixture, coating everything as evenly as possible with the chocolate.
- Spread and Sprinkle: Pour the mixture onto a large baking sheet lined with parchment paper and spread it out. If using, add sprinkles now while the chocolate is wet.
- Set and Break: Let the mix cool completely until the chocolate is hard. Then, break it up into clusters.
Pro-Tip: Make sure your popcorn is completely cool before you start. If it’s warm, it will melt the chocolate candies and the marshmallows.

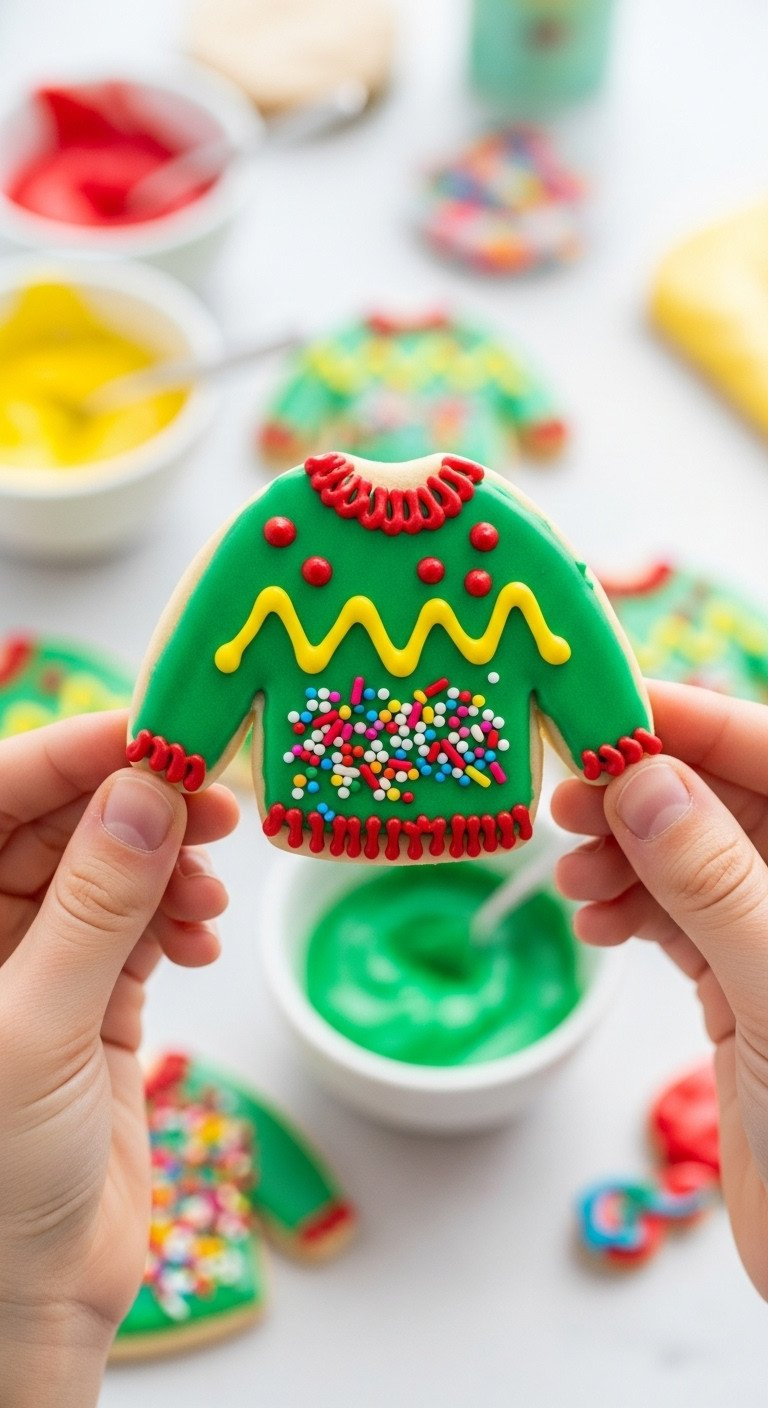
Save this fun idea that celebrates creativity over perfection!
This holiday activity for kids is the perfect antidote to the pressure of creating perfect cookies. The goal of “Ugly Sweater” cookie decorating is to be as wacky, colorful, and creative as possible. Bake some sweater-shaped sugar cookies (store-bought dough is a great shortcut!), set out colorful icing and mismatched sprinkles, and let the kids’ creativity shine.
Materials Needed:
- Plain sugar cookies baked in a sweater shape (use store-bought dough for a shortcut!)
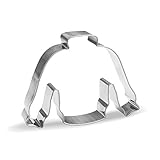
- A sweater-shaped cookie cutter
- Several colors of thick cookie icing (buttercream or royal icing) in piping bags or squeeze bottles
- A huge assortment of clashing, mismatched sprinkles, nonpareils, and small candies
Step-by-Step Directions:
- Bake the Canvas: Bake your sugar cookies using the sweater cutter and let them cool completely.
- Set Up the Station: The key to this activity is variety. Put out all the different icing colors and place all the assorted sprinkles in a muffin tin for easy access.
- The Only Rule: Explain the goal: to make the wackiest, silliest, most colorful sweater possible. There are no mistakes!
- Let Them Create: Give each child a cookie and let them go to town. Encourage them to mix colors, make funny patterns, and pile on the sprinkles.
- Show Them Off: Let the cookies dry completely. You can even have a little “fashion show” and award silly prizes for things like “Most Sparkly” or “Most Colorful.”
Parent tips: This is the perfect activity for using up all the leftover, half-used containers of sprinkles you’ve accumulated over the year. The more random the assortment, the better!
10. Chocolate-Dipped Candy Cane Spoons
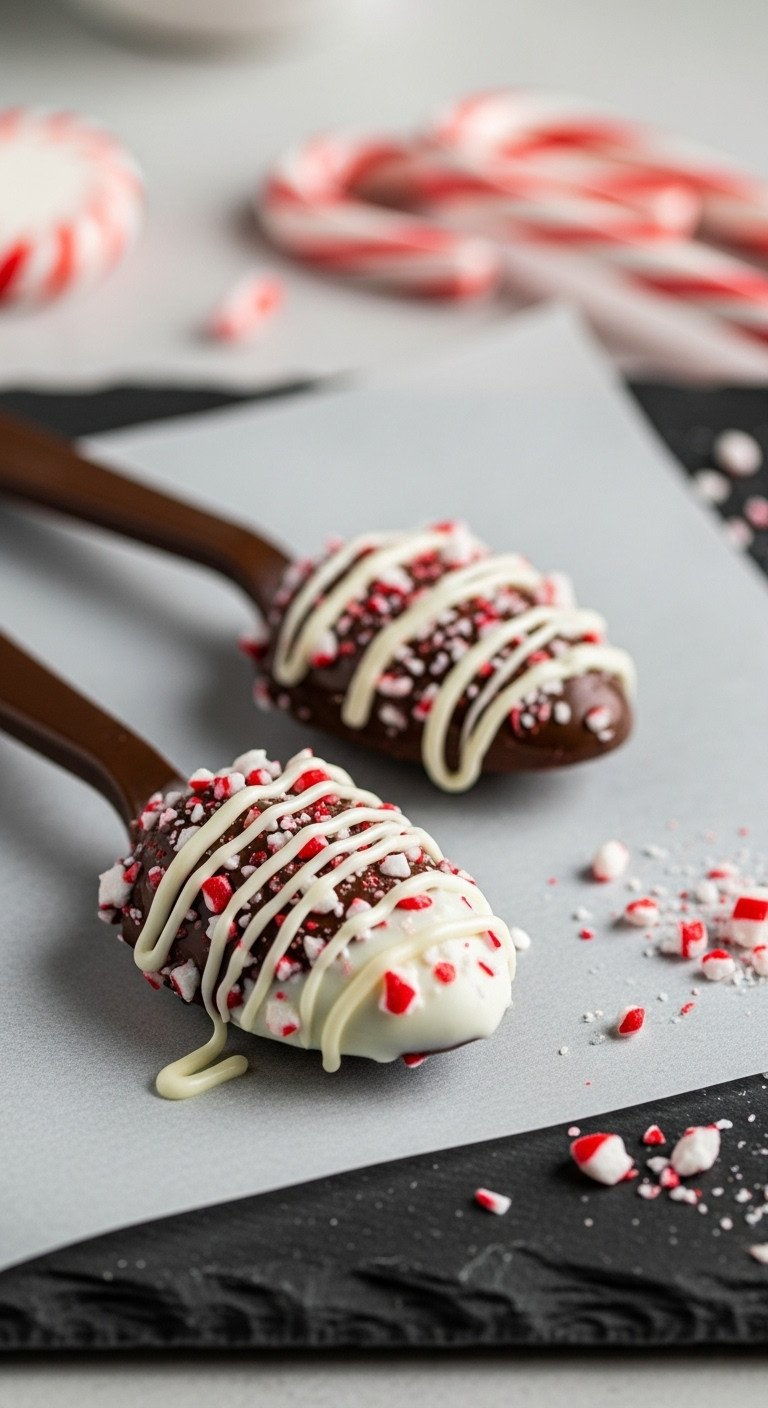
Pin this easy edible gift idea—perfect for hot cocoa!
These hot chocolate spoons are a wonderfully simple edible gift that kids can make for neighbors and teachers. This no-bake craft involves dipping spoons into melted chocolate and then into crushed candy canes. It’s a quick, fun process with a beautiful result that’s perfect for stirring into a warm mug of milk.
What You Need:
- Sturdy plastic or wooden spoons
- Good quality dark or milk chocolate melting wafers
- Candy canes
- A zip-top bag and a rolling pin or mallet
- Parchment paper
Step-by-Step Directions:
- Crush the Candy: Place unwrapped candy canes in a zip-top bag, seal it, and let your kids have fun crushing them into small pieces with a rolling pin or mallet. Pour the crushed candy onto a plate.
- Melt the Chocolate: An adult should melt the chocolate wafers in a deep, microwave-safe cup until smooth.
- Dip the Spoons: Dip each spoon into the melted chocolate, coating the bowl of the spoon completely.
- Coat in Peppermint: Immediately dip the chocolate-covered spoon into the plate of crushed candy canes, pressing gently to coat.
- Let Dry: Place the finished spoons on a baking sheet lined with parchment paper and let the chocolate harden completely.
Pro-Tip: To give as a gift, wrap two or three spoons in a small cellophane bag and tie it with a festive ribbon. Add a tag that says, “Stir into hot milk for a peppermint mocha!”

11. Marshmallow Snowman Sticks
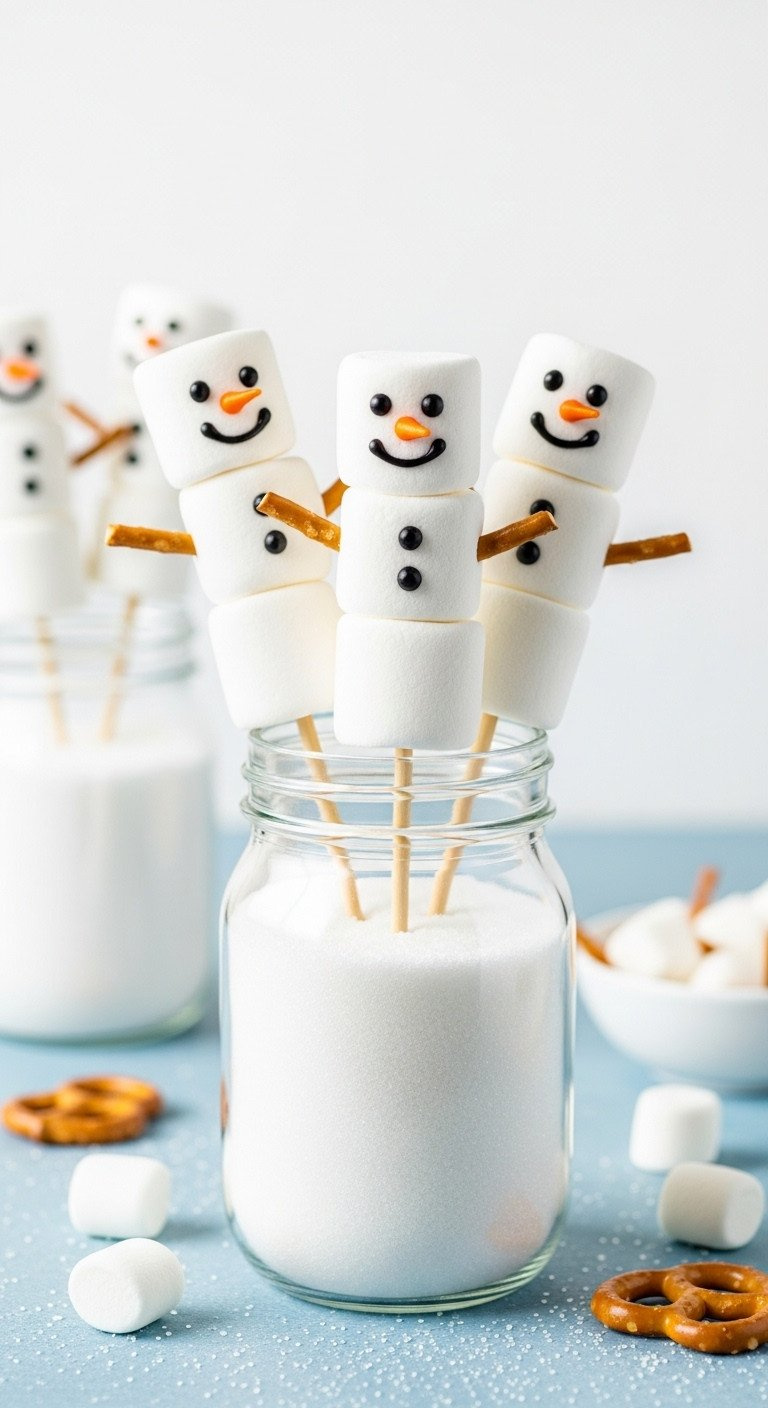
Save this adorable idea for a last-minute classroom treat!
For the ultimate assembly-only treat, these marshmallow snowmen are perfect. This no-bake winter activity requires no heat and no mixing, making it ideal for the very youngest helpers. Kids can practice their fine motor skills by stacking marshmallows, adding pretzel stick arms, and using decorating icing to draw a face.
What You Need:
- Large marshmallows
- Lollipop sticks or sturdy skewers
- Pretzel sticks
- Black decorating icing in a tube with a fine tip
- Orange sprinkles or tiny orange candies for the nose
Step-by-Step Directions:
- Build the Body: Let your child carefully thread three large marshmallows onto each lollipop stick to create the snowman’s body.
- Add the Arms: Break pretzel sticks in half and gently push one into each side of the middle marshmallow to create arms.
- Draw the Face: Use the black icing tube to draw dot eyes and a mouth on the top marshmallow.
- Add the Nose: Carefully press an orange sprinkle or tiny candy into the center of the face for the carrot nose. This requires a little precision, making it a great fine motor skill task for preschoolers.
- Let It Set: Let the icing dry for a few minutes, and your snowmen are ready to enjoy!
Lesson Learned: If the pretzels are breaking the marshmallow, use a toothpick to poke a small starter hole first. The pretzel will then slide in much more easily.
Key Takeaways: Your Quick Guide to Fun Christmas Baking
- Success is in the Prep: Pre-measure all ingredients (mise en place) before the kids join in. It’s the #1 parent tips for less stress.
- Focus on the Fun Parts: Choose recipes where kids can do the best tasks, like rolling dough, decorating, or mixing with their hands. The “Ugly Sweater Cookies” are a perfect example of this.
- No-Bake is Your Best Friend: For toddlers or quick activities, no-bake treats like Reindeer Pretzels and Melted Snowman Bark are guaranteed wins.
- Embrace the Imperfect: The goal is connection and fun, not bakery-worthy perfection. The memories are more important than a perfectly piped line.
- Think Beyond Cookies: Creative projects like Graham Cracker Houses and Hot Chocolate Spoons are fantastic ways to build, create, and make edible gifts.
People Also Ask About Christmas Baking With Kids
What can a 3-year-old actually do to help with baking?
A 3-year-old can be a fantastic helper with simple, safe tasks. They excel at sensory jobs like dumping pre-measured ingredients into a bowl, stirring batter with a large spoon, washing produce, and—most famously—adding sprinkles. Focus on process-oriented tasks rather than precision.
How do you keep the mess under control when baking with kids?
Plan for the mess to minimize the stress. Use an oversized mixing bowl to contain spills, put a cheap plastic tablecloth on the floor for easy cleanup, and have damp cloths ready. Pre-measuring ingredients (mise en place) is the single best way to prevent flour explosions and keep the process tidy.
What are the easiest Christmas treats for a school party?
The best treats for school parties are no-bake, easy to transport, and allergy-friendly. Christmas Tree Rice Krispie Treats and No-Bake Reindeer Pretzels are excellent choices. They are visually festive, can be made in large batches, and are typically nut-free (always check labels).
Is it better to use store-bought dough and icing?
Yes, using store-bought ingredients is a brilliant time-saving tips. It allows you and your kids to skip the complex prep and get straight to the most enjoyable part: cutting shapes and decorating. It’s a perfect way to guarantee a fun experience without the extra work.
Final Thoughts
Remember, the sprinkles on the floor will be swept away, but the smiles and memories you cook up together will last a lifetime. The real magic of Christmas baking with kids isn’t in the perfect cookies; it’s in the shared moments, the laughter, and the start of a beautiful family tradition.
What’s the one holiday treat your family absolutely has to make every single 2026?
Last update on 2026-06-03 at 20:37 / Affiliate links / Images from Amazon Product Advertising API
