As an Amazon Associate BakingBakewareSets.com earns from qualifying purchases.
11 Genius No Bake Christmas Treats To Simplify Your Holiday
Does the thought of holiday baking bring more stress than joy? You’re not alone in feeling overwhelmed by endless ingredient lists and hours spent by the oven. This is where the magic of No-Bake Christmas Treats comes in, a category of festive desserts that skip the oven entirely.
No-Bake Christmas Treats: These are simple, foolproof desserts that rely on chilling or freezing to set, using common ingredients to create stunning holiday sweets in a fraction of the time. In this guide, you’ll discover 11 genius recipes that save you time, reduce stress, and still deliver that homemade holiday magic your family and friends will love.
☰ Table of Contents ▼
show
Feeling Overwhelmed by Holiday Baking? There’s an Easier Way
We’ve all been there. The calendar flips to December, and suddenly the pressure is on to produce trays of perfect Christmas cookies and festive desserts. Between shopping, decorating, and holiday parties, finding the time and energy for complex baking can feel impossible. This seasonal ‘baking burnout’ is real, and it can steal the joy from what should be a wonderful time of year.
But what if you could create dazzling, delicious holiday treats without even turning on your oven? That’s the genius of no-bake desserts. They are the perfect solution for the busy Christmas season. These simple recipes are often quicker, require fewer ingredients, and are practically foolproof, making them ideal for beginner cooks or for making with kids. They allow you to simplify your holiday, freeing up precious time and oven space while still contributing beautiful, homemade goodies to any party, gift tin, or family gathering.
11 Genius No Bake Christmas Treats To Simplify Your Holiday
Ready to embrace a stress-free holiday season? We’ve curated a collection of 11 tested, simple, and incredibly delicious no-bake Christmas recipes that require zero oven time. Each idea is designed for success, with clear step-by-step instructions and pro tips to guide you. From classic chocolate fudge to trendy cookie butter truffles, you’re sure to find a new family favorite that will have everyone asking for the recipe.
1. Classic Oreo Truffles

Save this foolproof 3-ingredient recipe for a last-minute party!
Ingredients:
- 1 package (14.3 oz) regular Oreo cookies
- 8 oz block full-fat cream cheese, softened to room temperature
- 12 oz semi-sweet chocolate baking chips or wafers, for melting and dipping
- Optional: festive sprinkles or 2 extra Oreos, crushed, for topping
Step-by-Step Instructions:
- Crush the Oreos: Add the entire package of Oreo cookies to a food processor and pulse until they become fine crumbs. Reserve 2 tablespoons of crumbs for garnish.
- Mix the Filling: In a large mixing bowl, combine the remaining Oreo crumbs with the softened cream cheese. Mix with a hand mixer or a sturdy spatula until well combined and a thick dough forms.
- Roll the Balls: Use a small cookie scoop to portion the mixture into 1-inch balls. Roll them between your hands until smooth and place them on a parchment-lined baking sheet.
- Chill Thoroughly: Place the baking sheet in the freezer for at least 30 minutes, or until the balls are very firm. This is crucial for easy dipping.
- Dip in Chocolate: Melt the chocolate in a microwave-safe bowl in 30-second increments, stirring until smooth. Use a fork to dip each chilled Oreo ball into the melted chocolate, tapping off the excess.
- Decorate and Set: Place the dipped truffles back on the parchment paper. Immediately top with reserved crumbs or sprinkles before the chocolate hardens. Refrigerate until fully set, about 15-20 minutes.
- Pro-Tip: For the smoothest chocolate coating, add 1 teaspoon of coconut oil or vegetable shortening to your melting chocolate. It helps it melt thinner and coats the truffles more evenly.

2. Foolproof Peanut Butter Balls (Buckeyes)

Pin this classic no-bake recipe for your holiday gift tins!
Ingredients:
- 1 ½ cups creamy peanut butter (conventional, like Jif or Skippy, works best)
- 1 cup unsalted butter, softened
- 4 cups powdered sugar, sifted
- 1 teaspoon vanilla extract
- 12 oz milk chocolate chips or wafers
- 1 tablespoon coconut oil or shortening (optional, for smoother dipping)
Step-by-Step Instructions:
- Mix the Filling: In a large bowl using a stand mixer or hand mixer, beat the peanut butter and softened butter together until smooth and creamy.
- Add Sugar: Gradually add the powdered sugar, one cup at a time, mixing on low speed until fully incorporated. Mix in the vanilla extract. The dough will be thick.
- Roll and Chill: Roll the mixture into 1-inch balls and place them on a parchment-lined baking sheet. Insert a toothpick into the top of each ball. Freeze for at least 30 minutes until very firm.
- Melt the Chocolate: In a deep, microwave-safe bowl, melt the chocolate chips and optional coconut oil in 30-second intervals until smooth.
- Dip the Balls: Holding the toothpick, dip each frozen peanut butter ball into the melted chocolate, leaving a small circle of peanut butter exposed at the top.
- Set and Store: Let the excess chocolate drip off, then place the buckeyes back on the parchment paper. Carefully remove the toothpicks. Refrigerate until the chocolate is firm.
- Lesson Learned: Use conventional, processed peanut butter (not the natural, oily kind). The added stabilizers help the balls hold their shape and prevent them from becoming greasy.

3. Easiest Ever Peppermint Bark

Save this iconic Christmas recipe! It’s perfect for gifting.
Ingredients:
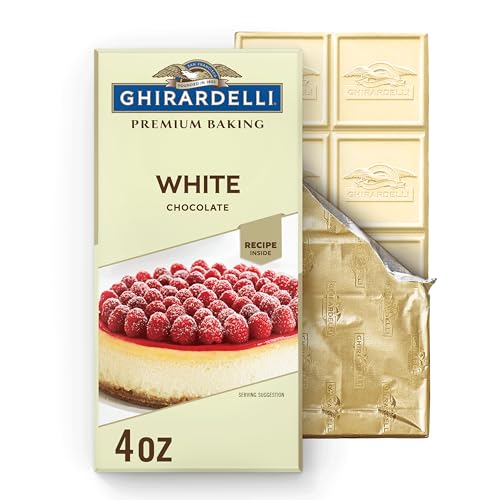
- 12 oz semi-sweet or dark chocolate, chopped (use high-quality bars like Ghirardelli)
- 12 oz high-quality white chocolate, chopped
- ½ teaspoon peppermint extract
- ½ cup crushed candy canes or peppermint candies
Step-by-Step Instructions:
- Prep Your Pan: Line a baking sheet (approximately 9×13 inches) with parchment paper.
- Melt Dark Chocolate: Melt the semi-sweet chocolate in the microwave in 30-second bursts until smooth. Pour it onto the prepared baking sheet and use an offset spatula to spread it into a thin, even layer.
- Set the First Layer: Place the baking sheet in the refrigerator for about 20-25 minutes, or until the chocolate is firm to the touch.
- Melt White Chocolate: Once the dark chocolate is set, melt the white chocolate until smooth. Stir in the peppermint extract.
- Add the Top Layer: Pour the melted white chocolate mixture over the set dark chocolate layer. Spread evenly.
- Decorate and Chill: Immediately sprinkle the crushed candy canes over the wet white chocolate. Gently press them in with your hand. Return to the refrigerator for at least 1 hour, or until completely firm.
- Break and Serve: Once fully hardened, lift the bark out of the pan using the parchment paper and break it into irregular pieces.
- Pro-Tip: To prevent the layers from separating, don’t let the dark chocolate layer get too cold and hard. It should be firm, but not frozen solid. This helps the white chocolate adhere properly.
4. Festive Reindeer Chow (Puppy Chow)

This addicting snack mix is a must-have for holiday movie nights!
Ingredients:
- 9 cups Rice Chex or Corn Chex cereal
- 1 cup semi-sweet chocolate chips
- ½ cup creamy peanut butter
- ¼ cup unsalted butter
- 1 teaspoon vanilla extract
- 1 ½ cups powdered sugar
- 1 cup Christmas-colored M&Ms
- 1 cup mini pretzels (optional)
Step-by-Step Instructions:
- Measure Ingredients: Pour the cereal into a very large mixing bowl. In a 2-gallon zip-top bag, add the powdered sugar.
- Melt Chocolate Mixture: In a medium microwave-safe bowl, combine the chocolate chips, peanut butter, and butter. Microwave for 1 minute, stir well, then continue to microwave in 30-second intervals until the mixture is smooth when stirred. Stir in the vanilla.
- Coat the Cereal: Pour the melted chocolate mixture over the cereal and use a silicone spatula to gently stir until all the cereal is evenly coated.
- Shake with Sugar: Transfer the coated cereal into the zip-top bag with the powdered sugar. Seal the bag securely, removing excess air. Shake vigorously until all the cereal is completely coated in sugar.
- Cool and Add Mix-Ins: Spread the mixture onto a large sheet of parchment paper to cool completely, about 20-30 minutes. Once cool, gently mix in the M&Ms and optional pretzels.
- Pro-Tip: Don’t add the M&Ms while the mixture is still warm, or the candy coating will melt and the colors will smear. Wait until the puppy chow is completely cool to the touch.
5. 5-Minute, 4-Ingredient Chocolate Fudge

You won’t believe this fudge only takes 5 minutes to make. Pin it now!
Ingredients:
- 1 (14 oz) can sweetened condensed milk
- 2 cups (12 oz) semi-sweet chocolate chips
- 1 tablespoon unsalted butter
- 1 teaspoon vanilla extract
- Pinch of salt (optional, to balance sweetness)
Step-by-Step Instructions:
- Prep Pan: Line an 8×8 inch square pan with parchment paper, leaving an overhang on the sides to create a “sling” for easy removal.
- Combine Ingredients: In a medium, heavy-bottomed saucepan, combine the sweetened condensed milk, chocolate chips, and butter.
- Melt and Stir: Cook over low heat, stirring constantly with a silicone spatula, until the chocolate chips are completely melted and the mixture is thick and glossy. This should only take about 3-5 minutes.
- Add Vanilla: Remove from heat and immediately stir in the vanilla extract and optional salt.
- Spread and Chill: Pour the fudge into the prepared pan and spread evenly with your spatula. Refrigerate for at least 2 hours, or until firm.
- Cut and Serve: Once chilled, use the parchment paper sling to lift the fudge out of the pan. Cut into small squares with a sharp, hot knife.
- Lesson Learned: Do not walk away from the pan! This fudge comes together very quickly, and constant stirring over low heat is the key to preventing it from scorching.

6. White Chocolate Cranberry Pistachio Bark

Save this elegant recipe for a sophisticated, easy holiday gift!
Ingredients:
- 16 oz high-quality white chocolate, finely chopped
- ¾ cup dried cranberries
- ¾ cup shelled pistachios, roughly chopped
- Optional: Zest of one orange for a bright, citrusy note
Step-by-Step Instructions:
- Prepare Pan and Toppings: Line a baking sheet with parchment paper. Have your cranberries, pistachios, and optional orange zest ready to go.
- Melt White Chocolate: In a microwave-safe bowl, melt the white chocolate in 30-second increments at 50% power, stirring between each, until smooth. Be careful not to overheat it.
- Mix and Spread: Stir half of the cranberries and pistachios directly into the melted white chocolate. If using, stir in the orange zest now.
- Form the Bark: Pour the mixture onto the prepared baking sheet and use an offset spatula to spread it to about ¼-inch thickness.
- Top and Chill: Sprinkle the remaining cranberries and pistachios evenly over the top. Gently press them into the chocolate. Refrigerate for at least 1 hour, or until completely firm.
- Break Apart: Once solid, lift the bark from the pan and break it into pieces to serve or package as gifts.
- Pro-Tip: Use a high-quality white chocolate that lists cocoa butter as one of the first ingredients. It will melt much more smoothly and have a richer, creamier flavor than compound white chocolate or candy melts.
7. Spiced No-Bake Gingerbread Truffles

Pin this unique recipe for the gingerbread lover in your life!
Ingredients:
- 1 package (14 oz) crisp gingersnap cookies
- 6 oz cream cheese, softened
- ¼ cup powdered sugar
- 2 tablespoons unsulphured molasses
- 1 teaspoon ground cinnamon
- ½ teaspoon ground ginger
- ¼ teaspoon ground cloves
- Optional coating: ½ cup white sanding sugar or melted white chocolate for dipping
Step-by-Step Instructions:
- Make Cookie Crumbs: Pulse the gingersnap cookies in a food processor until they form fine crumbs.
- Combine Ingredients: In a mixing bowl, beat the softened cream cheese until smooth. Mix in the powdered sugar, molasses, and spices.
- Form the Dough: Add the gingersnap crumbs to the cream cheese mixture and mix until a thick, cohesive dough forms.
- Roll and Chill: Roll the dough into 1-inch balls and place them on a parchment-lined baking sheet. Refrigerate for at least 1 hour until firm.
- Coat the Truffles: Once chilled, roll the truffles in sparkling sanding sugar for a simple finish, or dip them in melted white chocolate for a more decadent treat.
- Store: Keep the finished truffles in an airtight container in the refrigerator.
- Lesson Learned: The flavor of the spices will deepen as the truffles sit. They taste even better on the second day, making them a perfect make-ahead option.

8. Salty & Sweet No-Bake Pretzel Bars

The perfect sweet and salty treat! Save this easy bar recipe.
Materials Needed:
- 3 cups mini pretzels, crushed
- ½ cup unsalted butter, melted
- ¼ cup granulated sugar
- 1 (11 oz) bag of soft caramel candies, unwrapped
- 3 tablespoons heavy cream
- 1 ½ cups milk chocolate chips
- 1 teaspoon flaky sea salt (like Maldon) for sprinkling
Step-by-Step Directions:
- Make the Crust: Line an 8×8 inch pan with a parchment paper sling. In a bowl, mix the crushed pretzels, melted butter, and sugar until combined. Press the mixture firmly into the bottom of the prepared pan.
- Chill the Crust: Place the pan in the freezer for 15 minutes to set the crust while you prepare the caramel.
- Melt the Caramel: In a saucepan over low heat, melt the unwrapped caramels with the heavy cream, stirring frequently until smooth and pourable.
- Add Caramel Layer: Pour the melted caramel evenly over the chilled pretzel crust. Refrigerate for another 30 minutes, or until the caramel is firm.
- Add Chocolate Topping: Melt the milk chocolate chips in the microwave until smooth. Pour over the set caramel layer and spread evenly.
- Garnish and Set: Immediately sprinkle the flaky sea salt over the wet chocolate. Refrigerate for a final 30 minutes, or until the chocolate is completely set. Slice into bars and serve.
- Pro-Tip: To crush the pretzels without a food processor, place them in a sturdy zip-top bag and gently crush them with a rolling pin or the bottom of a heavy pan.


Bring back a classic! Pin this nostalgic Church Window Cookie recipe.
Materials Needed:
- 12 oz semi-sweet chocolate chips
- ½ cup unsalted butter
- 1 (10 oz) bag colored miniature marshmallows
- 1 cup chopped walnuts or pecans (optional)
- 1 cup sweetened shredded coconut
Step-by-Step Directions:
- Melt Chocolate and Butter: In a large, heavy-bottomed saucepan, melt the chocolate chips and butter over low heat, stirring constantly until smooth.
- Cool Slightly: Remove the chocolate mixture from the heat and let it cool for about 5-10 minutes. It should be warm, but not so hot that it will instantly melt the marshmallows.
- Combine Ingredients: Gently fold the mini marshmallows and optional nuts into the slightly cooled chocolate mixture until everything is just coated.
- Form the Log: Spread the shredded coconut onto a large piece of wax paper. Pour the chocolate-marshmallow mixture onto the coconut in a rough log shape.
- Roll and Shape: Use the wax paper to help you roll the mixture into a tight, even log, ensuring the outside is completely coated in coconut. Twist the ends of the wax paper to secure it.
- Chill Until Firm: Refrigerate the log for at least 4 hours, or overnight, until it is very firm and solid.
- Slice and Serve: Once firm, unwrap the log and use a sharp knife to slice it into ¼ to ½-inch thick rounds.
- Lesson Learned: Letting the chocolate cool slightly is the most important step. If it’s too hot, your marshmallows will melt, and you’ll lose the pretty “stained glass” effect.

10. No-Bake Eggnog Cheesecake Bites

The taste of Christmas in a tiny, perfect bite! Save this elegant dessert idea.
Materials Needed:
- 1 ½ cups Nilla wafer crumbs (from about 50 wafers)
- 6 tablespoons unsalted butter, melted
- 8 oz cream cheese, softened
- 1 cup powdered sugar
- ⅔ cup thick, store-bought eggnog
- 1 teaspoon vanilla extract
- ¼ teaspoon ground nutmeg
- Whipped cream and extra nutmeg for garnish
Step-by-Step Directions:
- Prep Pan: Line a 24-cup mini muffin pan with paper liners.
- Make the Crust: In a small bowl, combine the Nilla wafer crumbs and melted butter. Place about 1 teaspoon of the mixture into each muffin liner and press down firmly to create a compact crust.
- Make the Filling: In a mixing bowl, beat the softened cream cheese with an electric mixer until light and fluffy. Gradually beat in the powdered sugar.
- Add Flavor: With the mixer on low, slowly stream in the eggnog, vanilla, and nutmeg. Beat until just combined and smooth. Do not overmix.
- Fill and Chill: Spoon the cheesecake filling evenly into the muffin cups, filling them almost to the top.
- Set Completely: Refrigerate the cheesecake bites for at least 4 hours, or preferably overnight, until they are completely firm and set.
- Garnish and Serve: Just before serving, top each mini cheesecake with a small dollop of whipped cream and a light dusting of nutmeg.
- Pro-Tip: For the best texture, use a thick, high-quality, full-fat eggnog. Thinner or low-fat versions may prevent the cheesecake from setting up as firmly.


Jump on the trend! Pin this viral-worthy Biscoff truffle recipe.
Materials Needed:
- 25 Biscoff cookies, finely crushed (about 2 cups of crumbs)
- 1 cup creamy Biscoff cookie butter spread
- ½ cup powdered sugar
- 12 oz high-quality white chocolate, for dipping
- Optional: 2 tablespoons melted Biscoff spread for drizzling
Step-by-Step Directions:
- Mix the Filling: In a medium bowl, combine the Biscoff cookie crumbs, 1 cup of cookie butter spread, and powdered sugar. Mix with a spatula until a thick, uniform dough forms.
- Scoop and Roll: Use a small cookie scoop to create 1-inch balls. Roll them between your hands until smooth and place on a parchment-lined baking sheet.
- Freeze to Firm: Place the truffles in the freezer for 30 minutes. This step is essential to prevent them from falling apart when dipped.
- Melt and Dip: Melt the white chocolate in the microwave until smooth. Using a fork, dip each frozen Biscoff ball into the white chocolate, ensuring it’s fully coated. Tap the fork on the side of the bowl to remove excess chocolate.
- Decorate and Set: Place the dipped truffles back on the parchment paper. If desired, drizzle with a little extra melted cookie butter and sprinkle with a few more Biscoff crumbs before the white chocolate sets.
- Chill: Refrigerate for 20 minutes to allow the coating to harden completely.
- Pro-Tip: To easily drizzle the cookie butter, place it in a small microwave-safe bowl and heat for just 10-15 seconds. This makes it the perfect consistency for drizzling from a spoon or a small piping bag.

Key Takeaways: Your Quick Guide to No-Bake Success
- Embrace the Chill: Your refrigerator and freezer are your best friends. Proper chilling time is non-negotiable for ensuring treats set up firmly and are easy to cut or handle.
- Quality Matters: Since recipes have few ingredients, using high-quality chocolate, butter, and flavorings makes a huge difference in the final taste.
- Parchment is Key: Always line your pans with a parchment paper “sling” to guarantee easy, clean removal of bars and fudge without any sticking.
- Go Beyond Chocolate: While classics are great, don’t be afraid to try festive flavors like gingerbread, eggnog, or cranberry-orange to create a unique and impressive dessert platter.
- Make Ahead & Relax: Most no-bake treats can be made several days in advance and stored in the fridge, saving you time and stress during the busiest holiday week.
FAQs About christmas baking no bake
How long do no-bake Christmas treats last?
Most no-bake treats last for up to one week when stored properly. They must be kept in an airtight container in the refrigerator to maintain freshness and texture. Treats containing cream cheese, like Oreo truffles or no-bake cheesecakes, should be consumed within 3-4 days for best quality and safety.
Yes, the majority of no-bake treats freeze exceptionally well. For best results, first freeze them in a single layer on a baking sheet until solid. Then, transfer them to a freezer-safe bag or container, separating layers with wax paper. They can be stored in the freezer for up to 3 months.
The most common reason is an incorrect ratio of wet to dry ingredients. This could mean too much butter or milk, or not enough powdered sugar, oats, or cookie crumbs. Another possibility is that you didn’t chill them for long enough. Always follow the recipe’s recommended chilling times.
What is the best chocolate for melting in no-bake recipes?
For the smoothest results, use high-quality chocolate baking bars or chocolate wafers (callets). Chocolate chips are designed to hold their shape and contain stabilizers that can make them melt into a thick, hard-to-work-with consistency. Adding a teaspoon of coconut oil can help thin out melted chocolate chips.
Final Thoughts
This holiday season, give yourself the gift of simplicity. With these 11 genius no-bake Christmas treats, you can spend less time stressing in the kitchen and more time making memories with the people you love. Each recipe is a testament to the fact that amazing desserts can be both easy and incredibly delicious.
Now I’d love to hear from you! Which of these no-bake treats are you most excited to try first? Let me know in the comments below
Last update on 2026-07-26 at 08:08 / Affiliate links / Images from Amazon Product Advertising API
