As an Amazon Associate BakingBakewareSets.com earns from qualifying purchases.
A Complete 12 Days Of Christmas Baking Plan For Families
Does the thought of holiday baking bring a mix of joy and sheer panic? You imagine a kitchen filled with festive smells, but the reality is often a chaotic mess of flour, forgotten ingredients, and mounting stress. It’s a classic holiday dilemma we all face.
The 12 Days of Christmas Baking is a festive project designed to create a variety of holiday treats, but it can feel overwhelming without a solid plan. You want to create those cherished family traditions, not a season of stress. This is where a structured, manageable approach makes all the difference.
This complete baking plan is your solution: It provides 12 tried-and-true recipes, a clear schedule, and simple tips to transform your holiday baking from a chore into a joyful and stress-free family memory-maker. We’ll guide you through each day, ensuring you have fun and end up with delicious treats to share.
☰ Table of Contents ▼
show
Feeling Overwhelmed by Holiday Baking? Here’s Your Stress-Free Plan
I remember the year I tried to bake everything for Christmas in one frantic weekend. Flour was everywhere, I ran out of butter twice, and the fun I’d envisioned turned into a race against the clock. That’s when I realized the secret to joyful holiday baking isn’t about doing more; it’s about having a better plan. Over many years, I developed this day-by-day schedule for my own family to spread out the fun and eliminate the chaos. This isn’t just a list of recipes; it’s a tested system for turning a potentially stressful task into a cherished family tradition. It’s about creating moments, not just cookies. This complete plan is designed to help you create a variety of holiday treats for family, friends, and gifts, making your holiday baking experience joyful and stress-free.
Your Complete 12 Days of Christmas Baking Plan for 2026
Here is the full scope of our festive recipe collection. We’ve organized everything you need to make this holiday baking project a success, from classic Christmas cookies to easy edible gifts. To make it even easier, we’ve created a free, printable “Holiday Baking Planner” with a calendar and a consolidated shopping list—our gift to you for a stress-free season.
Our 12 Days of Christmas Baking Plan includes:
1. Classic Cutout Sugar Cookies
2. Rich Chocolate Crinkle Cookies
3. Festive Cranberry Orange Loaf
4. Easy 3-Ingredient Peppermint Bark
5. Chewy Gingerbread People
6. No-Bake Chocolate Peanut Butter Balls
7. Salted Caramel Pretzel Bars
8. Jam-Filled Thumbprint Cookies
9. White Chocolate Peppermint Pretzels
10. Spiced Molasses Cookies
11. Holiday Shortbread Bites
12. Ultimate Fudgy Brownies

Pin this classic recipe to your ‘Christmas Cookies’ board!
We kick off our baking with a timeless classic! This is the perfect recipe for a family decorating day. These cutout sugar cookies hold their shape beautifully and provide the perfect canvas for your creative icing designs.
Materials Needed:
- All-purpose flour, granulated sugar, unsalted butter (room temperature), egg, vanilla extract
- For Icing: Meringue powder, powdered sugar, water, food coloring
- Tools: A rolling pin with thickness rings for even dough
- Tools: Set of festive metal cookie cutters (snowflakes, trees, stars)
- Tools: Heavy-duty aluminum baking sheets that prevent warping
Step-by-Step Directions:
- Cream the softened butter and sugar together in a stand mixer until light and fluffy.
- Beat in the egg and vanilla extract until just combined.
- In a separate bowl, whisk together the flour and salt. Gradually add the dry ingredients to the wet ingredients, mixing on low until a soft dough forms.
- Divide the dough in half, wrap in plastic, and chill for at least 1 hour. This is the secret to preventing spread!
- Preheat oven to 375°F (190°C). Roll out one disc of dough to 1/4-inch thickness on a lightly floured surface.
- Cut out shapes and place them 1 inch apart on a parchment-lined baking sheet.
- Bake for 8-10 minutes, or until the edges are lightly golden. Let cool on the sheet for 5 minutes before transferring to a wire rack to cool completely.
- Once cool, decorate with royal icing and festive sprinkles.
Pro-Tip: For perfectly even cookies, use a rolling pin with thickness guides. It’s a game-changer for getting professional-looking results every time.


Save this fudgy cookie recipe for your holiday baking!
These cookies are a holiday showstopper. With a deep, fudgy chocolate interior and a dramatic, crackled powdered sugar coating, they look as incredible as they taste. They’re a must-have for any Christmas cookie box.
Ingredients Needed:
- Unsweetened cocoa powder (use Dutch-process for a darker, richer flavor)
- Granulated sugar and powdered sugar
- All-purpose flour, baking powder, salt
- Vegetable oil, eggs, vanilla extract
- Tool: A medium (1.5 tbsp) cookie scoop for uniform cookies
Step-by-Step Directions:
- In a medium bowl, whisk together the cocoa powder, granulated sugar, and vegetable oil.
- Beat in the eggs one at a time, then stir in the vanilla.
- In a separate bowl, combine the flour, baking powder, and salt. Stir the dry ingredients into the wet ingredients until just combined.
- Cover the bowl and chill the dough for at least 4 hours or overnight. Do not skip this step!
- Preheat oven to 350°F (175°C). Place powdered sugar in a small bowl.
- Use a cookie scoop to form 1-inch balls of dough. Roll each ball generously in the powdered sugar to coat completely.
- Place on a parchment-lined baking sheet, about 2 inches apart.
- Bake for 10-12 minutes. The cookies will be puffy and cracked. Let them cool on the baking sheet for a few minutes before moving to a wire rack.
Lesson Learned: The secret to a dramatic crinkle is a double roll. Roll the dough ball in powdered sugar, then roll it again right before placing it on the baking sheet for a thick, bright white coating.

3. Day Three: Festive Cranberry Orange Loaf

Save this delicious quick bread recipe for a perfect holiday gift!
It’s time for a break from cookies! This moist and tender quick bread is bursting with the classic holiday flavors of bright orange zest and tart cranberries. It’s wonderful for a festive breakfast and also makes a beautiful edible gift for neighbors and friends.
Materials Needed:
- All-purpose flour, sugar, baking powder, baking soda, salt
- Fresh or frozen cranberries
- One large orange (for zest and juice)
- Butter, egg, milk
- For glaze: powdered sugar and orange juice
- Tool: A sturdy 9×5 inch non-stick loaf pan
Step-by-Step Directions:
- Preheat oven to 350°F (175°C). Grease and flour a 9×5 inch loaf pan.
- In a large bowl, whisk together the flour, sugar, baking powder, baking soda, and salt.
- Gently stir in the cranberries and orange zest to coat them in flour (this prevents them from sinking).
- In a separate bowl, whisk together the melted butter, egg, milk, and fresh orange juice.
- Pour the wet ingredients into the dry ingredients and stir until just combined. Do not overmix.
- Pour the batter into the prepared loaf pan.
- Bake for 55-65 minutes, or until a toothpick inserted into the center comes out clean.
- Let the loaf cool in the pan for 15 minutes before inverting it onto a wire rack to cool completely.
- Once cool, whisk together powdered sugar and orange juice to create a thick glaze and drizzle over the top.
Pro-Tip: To make this loaf extra special for gifting, wrap it in parchment paper and tie it with festive baker’s twine. It looks beautiful and keeps it fresh.

4. Day Four: Easy 3-Ingredient Peppermint Bark

Pin this super easy no-bake recipe for last-minute gifts!
Today is all about simplicity. This classic peppermint bark requires no baking and only three simple ingredients, making it the perfect recipe for a busy day or for when you need a last-minute homemade gift. The contrast of rich dark chocolate, creamy white chocolate, and crunchy peppermint is pure holiday magic.
Ingredients Needed:
- 12 oz semi-sweet or dark chocolate chips
- 12 oz high-quality white chocolate chips or melting wafers
- 1/2 cup crushed candy canes or peppermint candies
- Optional: 1/2 tsp peppermint extract for the white chocolate layer
- Tool: An offset spatula for smooth, even spreading
Step-by-Step Directions:
- Line a baking sheet with parchment paper.
- Melt the semi-sweet chocolate in a microwave-safe bowl in 30-second intervals, stirring until smooth.
- Pour the melted dark chocolate onto the prepared baking sheet and use an offset spatula to spread it into a thin, even layer.
- Place the baking sheet in the refrigerator for about 20 minutes, or until the chocolate is firm.
- Melt the white chocolate in a clean, dry bowl using the same method. If using, stir in the peppermint extract.
- Pour the melted white chocolate over the firm dark chocolate layer and spread evenly.
- Immediately sprinkle the crushed candy canes over the white chocolate, gently pressing them in.
- Let the bark set completely at room temperature for a few hours, or in the refrigerator for 30 minutes. Once firm, break it into irregular pieces.
Lesson Learned: Don’t let the dark chocolate layer get too cold or hard in the fridge. You want it firm, but not so cold that the white chocolate layer separates from it after setting.

5. Day Five: Chewy Gingerbread People

Save this classic chewy gingerbread recipe for a fun decorating day!
No holiday baking list is complete without gingerbread! This recipe is for soft, chewy gingerbread cookies packed with the warm holiday spices of ginger, cinnamon, and cloves. They are incredibly fun to decorate and fill the whole house with the scent of Christmas.
Ingredients Needed:
- All-purpose flour, baking soda, salt
- Spices: ground ginger, cinnamon, cloves, and a pinch of black pepper
- Unsalted butter, softened
- Brown sugar
- One egg
- Unsulphured molasses
- Tool: Gingerbread person cookie cutters
- Tool: Fine-tip piping bags or bottles for detailed icing work
Step-by-Step Directions:
- In a medium bowl, whisk together the flour, baking soda, salt, and all spices.
- In a large bowl, beat the softened butter and brown sugar until creamy. Beat in the egg and molasses.
- Gradually add the dry ingredients to the wet, mixing until a soft dough forms.
- Divide the dough in half, wrap in plastic, and chill for at least 3 hours. This is crucial for easy rolling.
- Preheat oven to 350°F (175°C). Roll dough to 1/4-inch thickness on a floured surface.
- Cut out shapes and place on a parchment-lined baking sheet.
- Bake for 9-11 minutes. The cookies should be set but still soft in the center.
- Let cool on the baking sheet for a few minutes before transferring to a wire rack to cool completely before decorating.
Pro-Tip: For extra chewy cookies with a deeper flavor, let the wrapped dough rest in the refrigerator for a full 24 hours. The spices will meld and the texture will be perfect.

6. Day Six: No-Bake Chocolate Peanut Butter Balls

Save this easy no-bake recipe for the perfect holiday treat!
Another simple, no-bake winner! These chocolate peanut butter balls, also known as Buckeyes, are a guaranteed crowd-pleaser. They are incredibly easy to make, require just a few ingredients, and are a perfect kid-friendly holiday recipe.
Materials Needed:
- Creamy peanut butter (do not use natural, oily peanut butter)
- Powdered sugar
- Unsalted butter, softened
- Semi-sweet chocolate chips
- Optional: 1 tbsp coconut oil or shortening to help thin the chocolate
- Tool: Mini paper liners for serving
Step-by-Step Directions:
- In a large bowl, combine the peanut butter, softened butter, and powdered sugar. Mix until well combined and smooth. The mixture will be thick.
- Roll the mixture into 1-inch balls and place them on a parchment-lined baking sheet.
- Chill the peanut butter balls in the refrigerator for at least 30 minutes until firm.
- While they chill, melt the chocolate chips (and coconut oil, if using) in the microwave in 30-second intervals until smooth.
- Using two forks, dip each chilled peanut butter ball into the melted chocolate, allowing the excess to drip off.
- Place the dipped balls back on the parchment paper.
- Refrigerate until the chocolate is completely set, about 30 minutes. Store in an airtight container in the refrigerator.
Lesson Learned: If your peanut butter mixture is too sticky to roll, add a little more powdered sugar. If it’s too dry and crumbly, add a tiny bit more softened butter.
7. Day Seven: Salted Caramel Pretzel Bars

Pin this sweet and salty bar recipe for your next holiday party!
Get ready for the ultimate sweet and salty treat. These bars feature a crunchy pretzel crust, a thick layer of chewy homemade caramel, and a rich chocolate topping sprinkled with flaky sea salt. They are incredibly addictive and perfect for making in a big batch for parties.
Materials Needed:
- For the crust: Mini pretzels, brown sugar, melted butter
- For the caramel: Unsalted butter, brown sugar, sweetened condensed milk
- For the topping: Chocolate chips, flaky sea salt
- Tool: A 9×13 inch baking pan
- Tool: A heavy-bottomed saucepan for making caramel
Step-by-Step Directions:
- Preheat oven to 350°F (175°C). Line a 9×13 inch pan with parchment paper, leaving an overhang on the sides to lift the bars out later.
- Crush the pretzels into small pieces. In a bowl, mix the pretzel crumbs, brown sugar, and melted butter. Press this mixture firmly into the bottom of the prepared pan.
- Bake the crust for 10 minutes.
- While the crust bakes, make the caramel. In a heavy-bottomed saucepan, melt the butter, brown sugar, and sweetened condensed milk over medium heat. Bring to a boil, stirring constantly, and cook for 5-7 minutes until thickened.
- Pour the hot caramel evenly over the baked pretzel crust.
- Return to the oven and bake for another 12-15 minutes, until the caramel is bubbly.
- Remove from the oven and immediately sprinkle the chocolate chips over the hot caramel. Let them sit for 5 minutes to melt, then spread the chocolate into an even layer.
- Sprinkle generously with flaky sea salt. Let the bars cool completely at room temperature, then refrigerate for at least 2 hours to set before cutting.
Pro-Tip: Use the parchment paper “handles” to lift the entire slab of bars out of the pan before cutting. This makes getting clean, perfect squares so much easier.


Save this classic and beautiful thumbprint cookie recipe!
These elegant little cookies are a holiday classic for a reason. A buttery, shortbread-like base is filled with a sweet dollop of your favorite jam. They look like little jewels on a cookie platter and are wonderfully versatile.
Materials Needed:
- Unsalted butter, softened
- Granulated sugar
- Egg yolk
- Vanilla extract
- All-purpose flour, salt
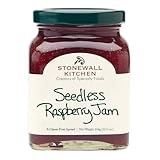
- Your favorite seedless jam (raspberry, apricot, and strawberry are classic choices)
- Optional: Finely chopped nuts for rolling
- Tool: A round 1/2 teaspoon measuring spoon for perfect indents
Step-by-Step Directions:
- Preheat oven to 350°F (175°C). Line baking sheets with parchment paper.
- In a large bowl, beat the softened butter and sugar until light and fluffy. Beat in the egg yolk and vanilla.
- Gradually add the flour and salt, mixing until a soft dough forms.
- Roll the dough into 1-inch balls. If desired, roll the balls in finely chopped nuts.
- Place the balls about 2 inches apart on the prepared baking sheets.
- Use your thumb or the back of a 1/2 teaspoon measuring spoon to gently press an indentation into the center of each ball.
- Bake for 12-15 minutes, or until the edges are lightly golden.
- Remove from the oven and let cool on the baking sheet for a minute. If the indents have puffed up, gently press them down again.
- Fill each indentation with about 1/4 teaspoon of jam. Let cool completely on a wire rack.
Pro-Tip: Fill the cookies with jam after they come out of the oven. This keeps the jam’s color bright and its texture perfect, rather than having it get overly baked and sticky.
9. Day Nine: White Chocolate Peppermint Pretzels

Save this super simple and fun recipe to make with kids!
This is one of the easiest and most fun recipes on the list, perfect for getting kids involved in the kitchen. Salty pretzels are dipped in creamy white chocolate and decorated with festive sprinkles and crushed peppermint. It’s a simple, no-bake treat that’s always a hit.
Materials Needed:
- Pretzel twists or rods
- High-quality white chocolate melting wafers (they melt smoother than chips)
- Crushed peppermint candies
- Assorted festive sprinkles
- Optional: a small amount of coconut oil
- Tool: A tall, narrow glass for easy dipping of pretzel rods
Step-by-Step Directions:
- Line a baking sheet with parchment or wax paper.
- Place the white chocolate wafers in a microwave-safe bowl. Melt in 30-second intervals, stirring in between, until completely smooth. If it’s too thick, stir in 1/2 teaspoon of coconut oil.
- Dip each pretzel about two-thirds of the way into the melted white chocolate, turning to coat.
- Lift the pretzel out of the chocolate and let any excess drip off.
- Place the dipped pretzel on the prepared baking sheet.
- Immediately, before the chocolate sets, sprinkle with crushed peppermint and festive sprinkles.
- Repeat with the remaining pretzels.
- Let the pretzels sit at room temperature or in the refrigerator until the chocolate is completely firm.
Lesson Learned: Work in small batches. The chocolate starts to set quickly, so only dip a few pretzels at a time before stopping to add sprinkles.


Pin this perfectly spiced and chewy molasses cookie recipe!
These old-fashioned cookies are the epitome of holiday comfort. They are deeply spiced, wonderfully soft and chewy, and have a beautiful crackly top from being rolled in coarse sugar. One bite of these tastes just like a cozy Christmas memory.
Ingredients Needed:
- All-purpose flour, baking soda, salt
- Spices: ground ginger, cinnamon, cloves
- Unsalted butter, softened
- Dark brown sugar
- Egg
- Dark, unsulphured molasses
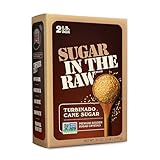
- Coarse sugar (like turbinado) for rolling
- Tool: A quality whisk for combining dry ingredients evenly
Step-by-Step Directions:
- In a medium bowl, whisk together the flour, baking soda, salt, and all spices.
- In a large bowl, beat the softened butter and brown sugar until creamy. Beat in the egg, then the molasses.
- Gradually add the dry ingredients to the wet, mixing until just combined.
- Cover and chill the dough for at least 1 hour.
- Preheat oven to 375°F (190°C). Place the coarse sugar in a small bowl.
- Roll the chilled dough into 1.5-inch balls, then roll each ball in the coarse sugar to coat.
- Place the balls 2 inches apart on a parchment-lined baking sheet.
- Bake for 9-11 minutes. The cookies will puff up and then crack as they cool. Do not overbake for a chewy texture.
- Let cool on the baking sheet for 5 minutes before transferring to a wire rack.
Pro-Tip: Don’t skip rolling the dough balls in coarse sugar. It gives the cookies a beautiful sparkle and a delightful crunchy texture that contrasts perfectly with the chewy center.
11. Day Eleven: Holiday Shortbread Bites

Save this buttery 4-ingredient shortbread recipe—it’s a holiday must!
Sometimes, the simplest things are the best. This classic shortbread recipe uses only four basic ingredients to create the most wonderfully rich, buttery, and crumbly cookie that melts in your mouth. These bites are perfect for gifting and are a holiday must-have.
Ingredients Needed:
- High-quality salted butter, softened (the star of the show!)
- Powdered sugar
- All-purpose flour
- Cornstarch (the secret to a tender texture)
- Optional: Semi-sweet chocolate for dipping
- Tool: A sharp bench scraper or knife for precise cutting
Step-by-Step Directions:
- Preheat oven to 325°F (165°C).
- In a large bowl, beat the very soft butter and powdered sugar until completely smooth and creamy.
- In a separate bowl, whisk together the flour and cornstarch. Add to the butter mixture and mix on low speed until a soft, crumbly dough forms.
- Press the dough evenly into an ungreased 8×8 inch square baking pan. Use the bottom of a measuring cup to get it flat and compact.
- Prick the surface all over with a fork.
- Bake for 30-35 minutes, or until the edges are very lightly golden.
- As soon as it comes out of the oven, use a sharp knife or bench scraper to cut the shortbread into small squares or fingers.
- Let it cool completely in the pan before removing. If desired, dip the cooled bites in melted chocolate.
Lesson Learned: Cut the shortbread while it’s still hot from the oven. If you wait until it cools, it will become too crumbly and won’t cut cleanly.

12. Day Twelve: Ultimate Fudgy Brownies

Save this recipe for the perfect fudgy brownie to end your holiday baking!
We’re finishing our 12 days of baking with a grand finale! This foolproof recipe delivers the ultimate rich, dense, and fudgy brownies from scratch, complete with that classic shiny, crackly top. They are the perfect decadent treat to celebrate the completion of your holiday baking project.
Materials Needed:
- Unsalted butter
- Granulated sugar
- Good quality unsweetened cocoa powder
- Semi-sweet chocolate chips or chopped chocolate
- Eggs
- Vanilla extract, salt, all-purpose flour
- Tool: An 8×8 inch square metal baking pan for best results
Step-by-Step Directions:
- Preheat oven to 350°F (175°C). Line an 8×8 inch metal baking pan with parchment paper, leaving an overhang.
- In a medium saucepan, melt the butter over low heat. Remove from heat and stir in the sugar until well combined.
- Whisk in the cocoa powder and salt until smooth. The mixture will be grainy.
- Let the mixture cool slightly, then whisk in the eggs and vanilla extract one at a time until the batter becomes thick and glossy.
- Stir in the flour until just combined, then fold in the chocolate chips.
- Pour the batter into the prepared pan and smooth the top.
- Bake for 25-30 minutes. A toothpick inserted into the center should come out with moist crumbs, not wet batter.
- Let the brownies cool completely in the pan on a wire rack before lifting out and cutting. This is essential for clean cuts and a fudgy texture.
Pro-Tip: The secret to that shiny, paper-thin crust is to dissolve the sugar completely into the warm butter and to vigorously whisk the eggs until the batter is glossy.

Key Takeaways: Your Quick Guide to a Joyful Holiday Baking Season
Remembering these simple strategies is the key to a stress-free and delicious holiday baking season. Here’s a quick reference to keep you on track.
- Plan Ahead: Don’t just pick recipes; schedule your shopping and baking days. Download our planner to make it easy.
- Read First, Bake Second: Read each recipe all the way through before you start to avoid surprises.
- Chill Your Dough: For cutout cookies like Sugar Cookies and Gingerbread, chilling the dough is the non-negotiable secret to preventing spread.
- Don’t Overbake: For chewy cookies and fudgy brownies, pull them from the oven when they look slightly underdone in the center. They’ll finish baking on the hot pan.
- Cool Completely: Always let your treats cool completely before storing or decorating to ensure the best texture and finish.
FAQs About 12 days of christmas baking
Do I have to bake for 12 days in a row?
No, you absolutely do not need to bake for 12 consecutive days. The “12 Days of Baking” is a fun theme for a holiday project. The best approach is to use the list to plan your baking over a few weekends or evenings in December that work for your family’s schedule. The goal is enjoyment, not a strict deadline.
The best cookies for shipping are sturdy ones that won’t crumble easily. From this list, the Gingerbread People, Spiced Molasses Cookies, and Holiday Shortbread Bites are excellent choices. Avoid mailing delicate cookies or anything with a soft frosting. Pack them snugly in a tin with parchment paper between layers.
How far in advance can I do my holiday baking?
You can start your holiday baking weeks in advance by utilizing your freezer. Most cookie doughs, like the Sugar Cookies and Gingerbread, can be made, wrapped tightly, and frozen for up to 3 months. You can then thaw and bake them fresh when you’re ready. Most baked cookies will stay fresh in an airtight container for about 5-7 days.
Final Thoughts
Ultimately, the 12 Days of Christmas Baking is about more than just the finished treats. It’s about filling your home with festive smells, creating edible gifts made with love, and starting family traditions that will last for years. It’s a project centered on creating joyful memories, not achieving perfection. Embrace the process, enjoy the creativity, and have a wonderfully delicious holiday season.
What is the one holiday recipe your family absolutely must make every single year? Share your traditions in the comments below
Last update on 2026-07-13 at 19:33 / Affiliate links / Images from Amazon Product Advertising API
