As an Amazon Associate BakingBakewareSets.com earns from qualifying purchases.
How To Cook Acorn Squash The Easiest Way Start To Finish
Ever feel a little intimidated by that beautiful, dark green acorn squash at the grocery store? It looks delicious, but its hard skin and awkward shape can make it seem like a lot of work. You’re not alone if you’ve ever wondered what to do with it.
The easiest way to cook acorn squash is to cut it in half, scoop out the seeds, season it, and roast it at 400°F (200°C) until it is tender and caramelized. This guide will walk you through a simple, foolproof method from start to finish. You’ll discover how to turn this fall vegetable into your new favorite side dish.
☰ Table of Contents ▼
show
Why Does Cooking Acorn Squash Seem So Intimidating?
That tough, ridged exterior of an acorn squash can definitely look like a challenge. If you’ve ever struggled to cut a hard winter squash, you know the feeling. The fear of it rolling around on the cutting board is real, and it’s enough to make you walk right past it in the produce aisle.
I used to avoid acorn squash for the same reason—until I discovered this foolproof roasting method that makes it one of my favorite fall vegetables. Roasting transforms its firm flesh into a tender, creamy, and deeply flavorful treat. This simple technique takes all the guesswork out of the process, guaranteeing a perfectly caramelized and delicious result every single time. It’s the perfect cozy and healthy side dish for any autumn meal.
Your 7 Simple Steps to Perfect Roasted Acorn Squash
This is the heart of the guide—a complete, kitchen-tested process that removes all guesswork. By following these seven simple steps, even a total beginner can achieve a perfectly cooked, delicious acorn squash. Each step is designed to be easy, safe, and lead you straight to a fabulous fall side dish.
- Select the Perfect Acorn Squash
- Safely Cut the Squash in Half
- Scoop Out the Seeds and Pulp
- Season for Sweet or Savory Flavor
- Roast for Tender, Caramelized Perfection
- Test for Perfect Doneness
- Serve and Garnish
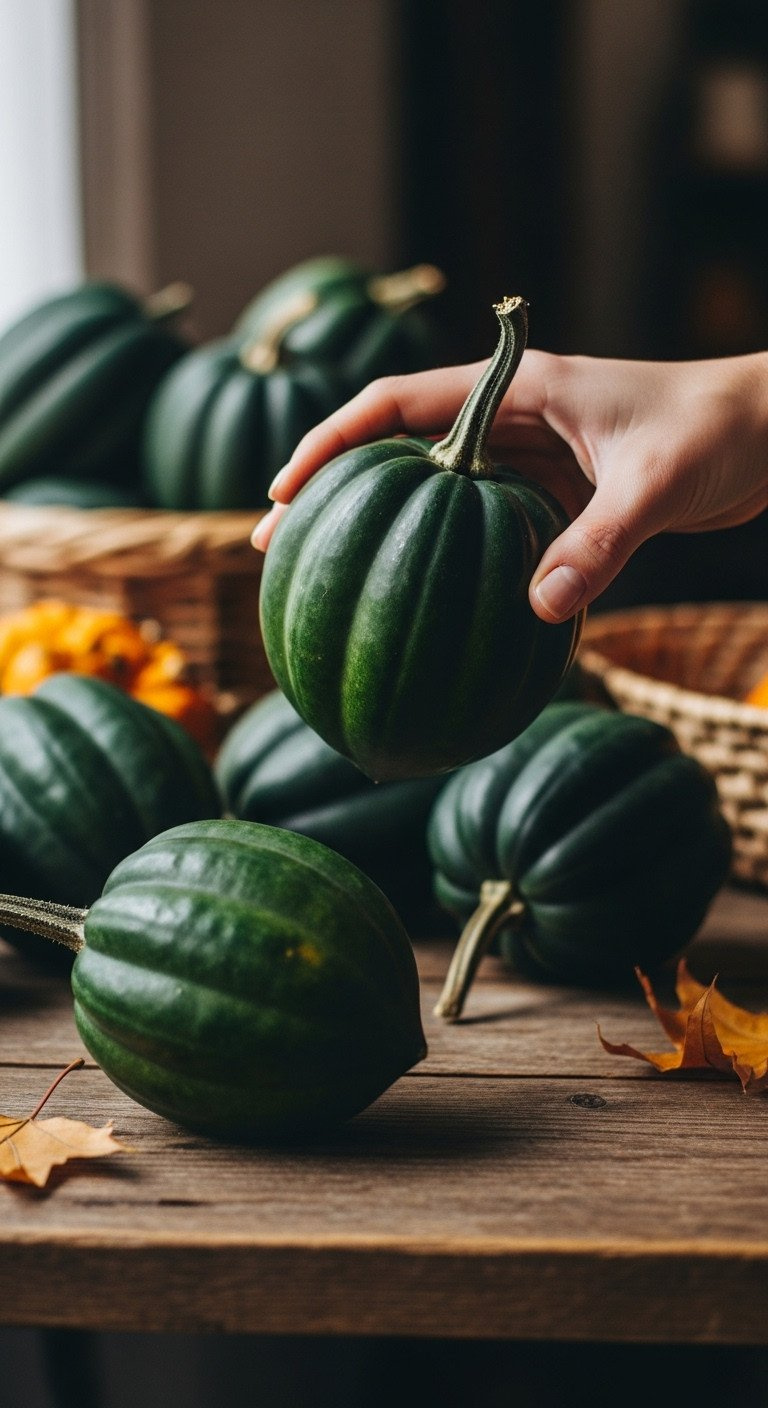
1. Select the Perfect Acorn Squash at the Store
Pin this essential shopping tip for your next grocery run!
A great dish starts with a great ingredient. Choosing the right acorn squash at the grocery store or farmers market is the first step to success. Here’s what you need to know.
What to Look For:
- Weight: The squash should feel heavy for its size. This indicates a high moisture content and fresh flesh.
- Skin: Look for a dull, dark green skin. A shiny skin often means it was picked prematurely.
- Color: A good squash will be mostly green. A mix of green and orange is fine, but avoid squashes that are mostly orange, as they can be overly dry and fibrous.
- Stem: The stem should be firm and dry.
- Surface: Avoid any squashes with soft spots, cracks, or blemishes.
What To Do:
- Pick It Up: Hold the squash in your hand. Compare its weight to others of a similar size. Choose the heavier one.
- Inspect the Skin: Turn it over, checking for a consistent dark green color and a dull finish.
- Press Gently: Press your thumb gently against the skin. It should be firm with no give.
- Check the Stem: Ensure the stem is intact and feels dry, not soft or mushy.
Lesson Learned: Don’t be tempted by the shiniest squash on the pile! For acorn squash, a dull, matte finish is the true sign of ripeness and flavor.

2. Safely Cut the Squash in Half

Save this safety tip! This is the easiest way to cut hard squash.
This is the step that worries most people, but with the right technique, it’s simple and safe. A stable squash is a safe squash.
Tools Needed:
- A Sharp Chef’s Knife: A large, heavy-duty chef’s knife is crucial. A dull knife is more dangerous as it can slip.
- A Sturdy Cutting Board: Use a large board that won’t slide. Place a damp paper towel underneath it for extra stability.
- Microwave (Optional, for extra-hard squash): A microwave can slightly soften the skin, making it much easier to cut.
Step-by-Step Directions:
- Wash and Dry: Thoroughly wash and dry the outside of the squash.
- (Optional) Microwave Trick: If your squash is rock-hard, pierce it a few times with a fork. Microwave on high for 2-3 minutes. Let it cool slightly before handling. This will soften the skin just enough.
- Create a Stable Base: This is the most important step. Slice a thin piece off one of the long sides of the squash.
- Position the Squash: Turn the squash to rest on the new flat side you just created. It should now be stable and not roll on your cutting board.
- Cut in Half: Position your knife in the center, lengthwise. Carefully press down with firm, even pressure to cut the squash in half from the stem to the bottom tip. You may need to use a rocking motion. Avoid cutting directly through the tough stem; cut alongside it.
Pro-Tip: Never hold the squash in your hand while trying to cut it. Always keep it stabilized on a cutting board, and keep your fingers curled away from the blade’s path.

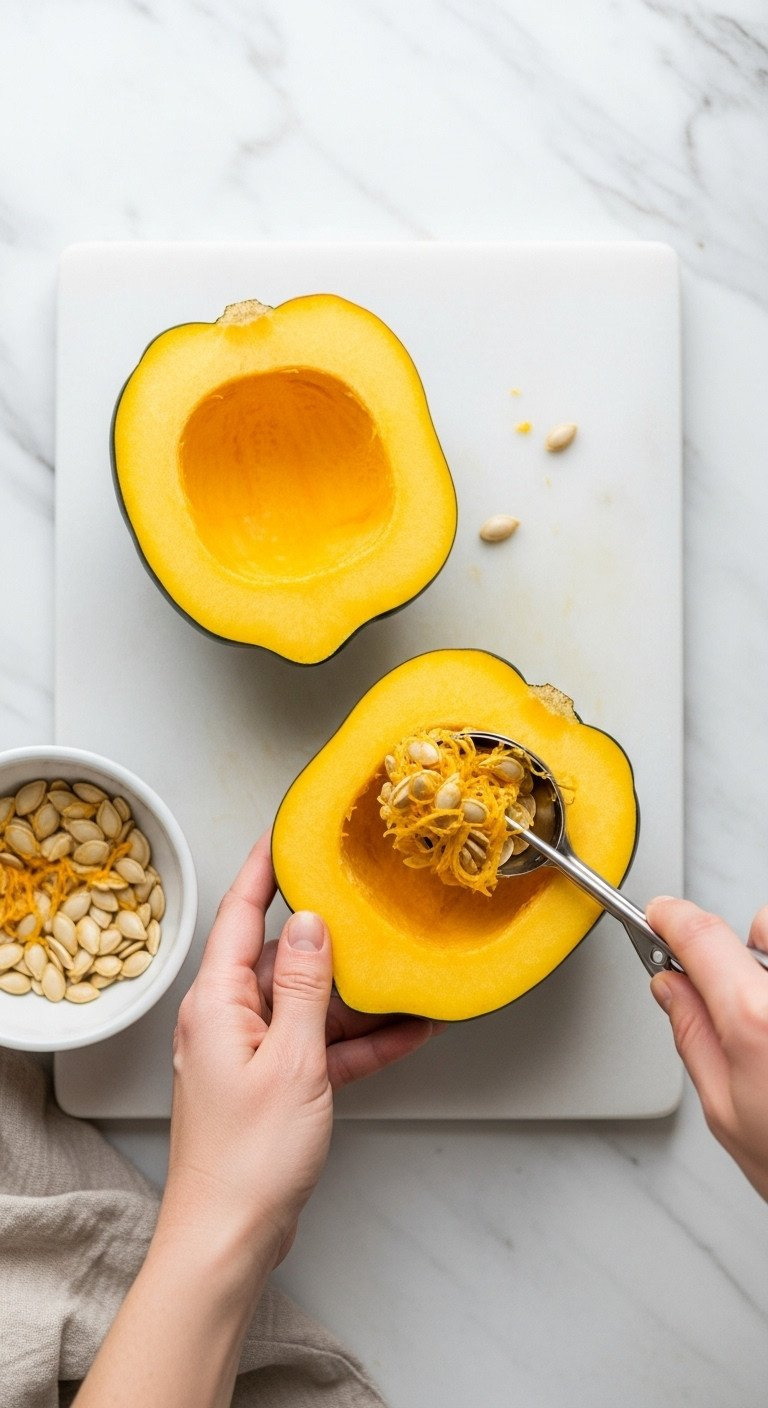
3. Scoop Out the Seeds and Pulp
Pin this tip—and don’t throw away those seeds!
Once the squash is halved, cleaning out the inside is quick and easy. Plus, you get a bonus snack: edible acorn squash seeds!
Tools Needed:
- A Sturdy Metal Spoon: A regular spoon works, but a grapefruit spoon or a solid ice cream scoop with a sharper edge works even better.
- A Bowl: For collecting the seeds and pulp.
Step-by-Step Directions:
- Position the Halves: Place the acorn squash halves cut-side up on your work surface.
- Scrape the Edges: Take your sturdy spoon and use the edge to scrape along the inside of the squash cavity. This will loosen the stringy pulp.
- Scoop Everything Out: Scoop out all the seeds and fibrous strands. Scrape the cavity clean until only the smooth flesh remains.
- Save the Seeds: Separate the seeds from the stringy pulp and place them in a separate bowl. We’ll show you how to roast them later!
Pro-Tip: A grapefruit spoon is the secret weapon for this task. Its serrated edges cut through the stringy pulp effortlessly, making the cleaning process incredibly fast and easy.

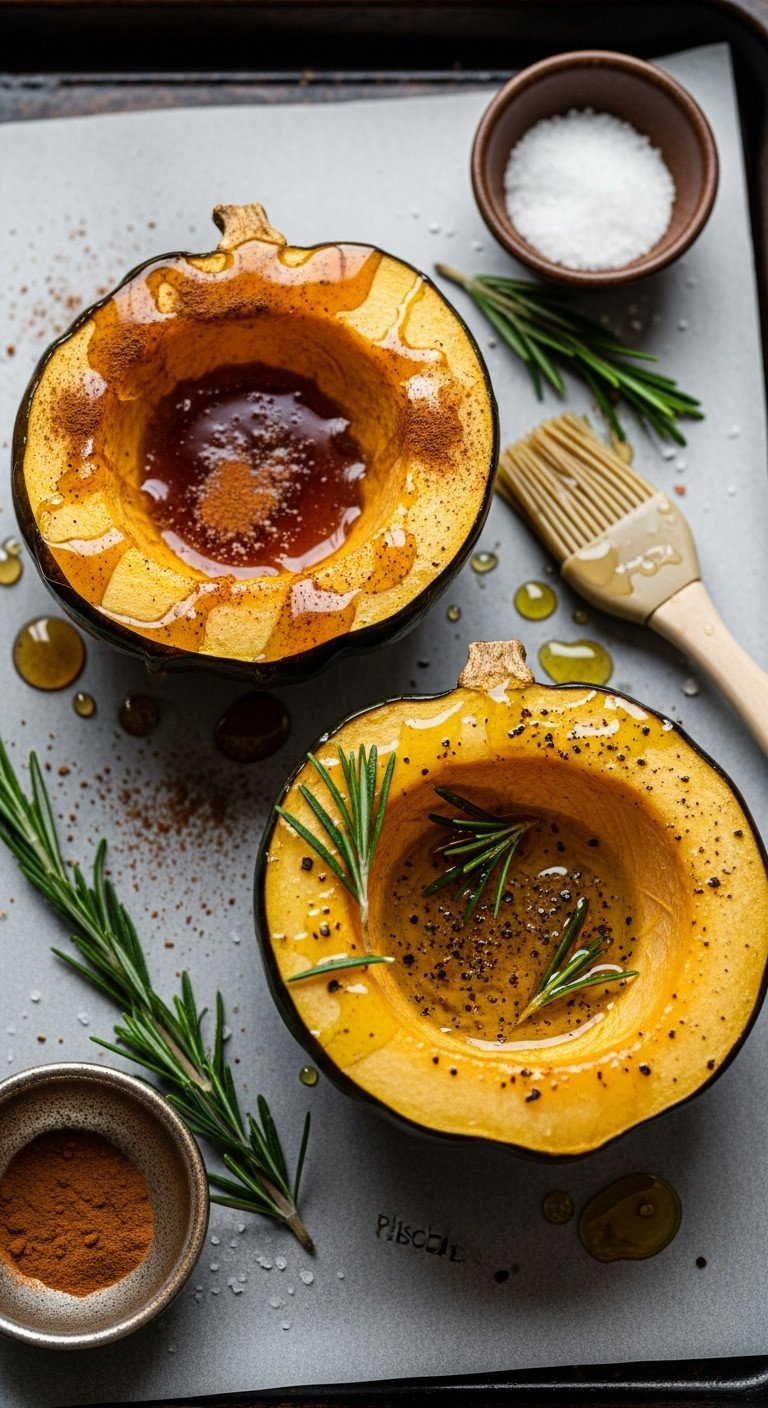
4. Season for Sweet or Savory Flavor
Sweet or savory? Pin your favorite flavor combination!
This is where you get to customize your squash. Its mild, nutty flavor is a perfect canvas for both sweet and savory combinations.
Ingredients Needed:
- For Sweet Squash: Melted butter, maple syrup (or brown sugar), cinnamon, and salt.
- For Savory Squash: Olive oil, salt, black pepper, and herbs like rosemary, thyme, or sage.
- Tool: A silicone pastry brush for even coating.
Step-by-Step Directions:
- Score the Flesh (Optional): For deeper flavor penetration, use a small knife to lightly score the flesh in a crosshatch pattern, being careful not to cut through the skin.
- Brush with Fat: Use your pastry brush to coat the entire cut surface of the squash with either melted butter (for sweet) or olive oil (for savory). This helps the seasonings stick and promotes browning.
- Add Sweet Flavors: Drizzle maple syrup into the cavity and over the flesh. Sprinkle generously with cinnamon and a pinch of salt (salt enhances sweetness!).
- Add Savory Flavors: Sprinkle generously with salt and freshly ground black pepper. Add your favorite dried or fresh herbs.
- Place on Pan: Arrange the seasoned squash halves, cut-side up, on a parchment-lined baking sheet.
Pro-Tip: Don’t skip the salt, even for the sweet version! A small amount of salt balances the sweetness of the maple syrup and brings out the squash’s natural nutty flavor.

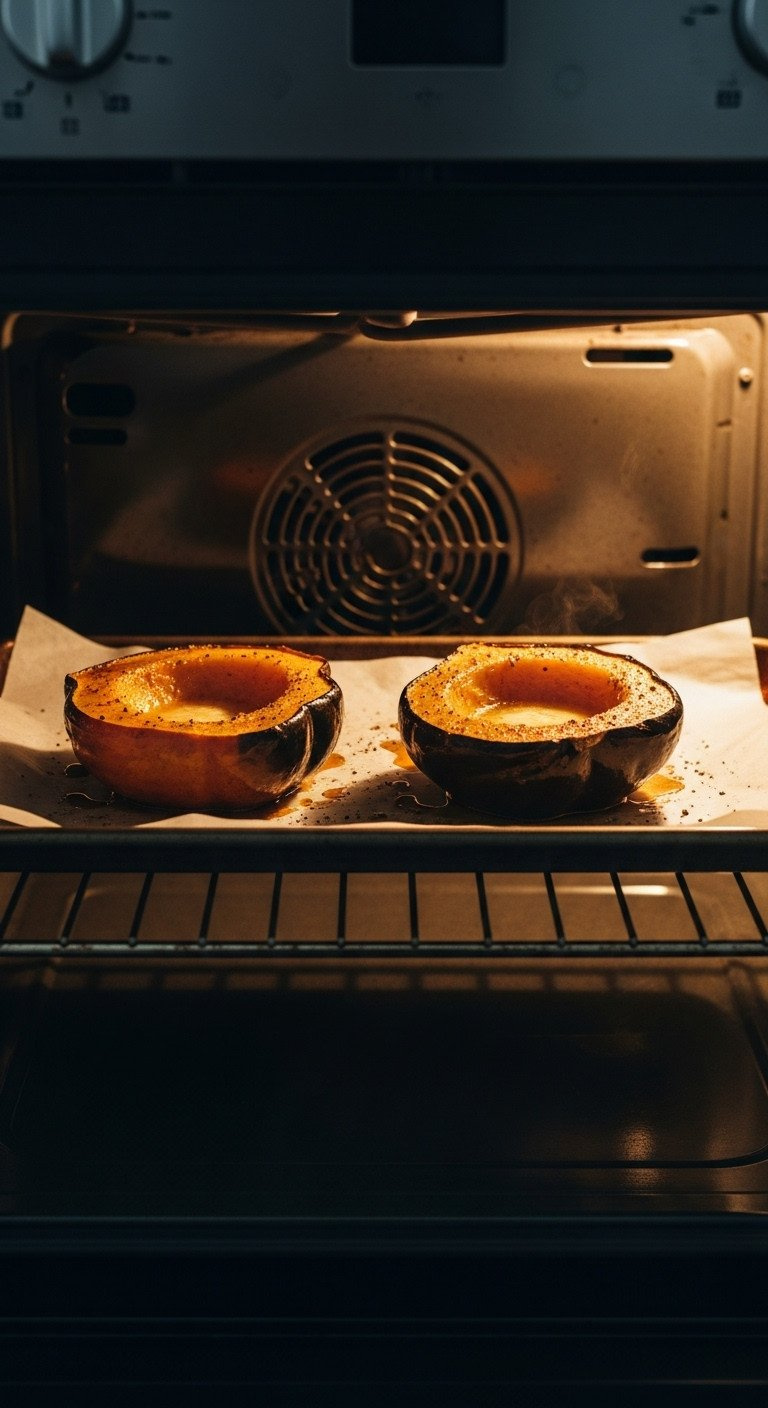
5. Roast for Tender, Caramelized Perfection
The secret to perfect roasting is in the details. Save this guide!
Now for the easy part. The oven does all the work, transforming the hard squash into a tender, delicious treat.
Equipment Needed:
- Oven: Make sure your oven rack is in the center position.
- Rimmed Baking Sheet: To catch any drips.
- Parchment Paper: For easy cleanup and to prevent sticking. A heavy-duty aluminum foil works too.
Step-by-Step Directions:
- Preheat Oven: Preheat your oven to 400°F (200°C). High heat is key for getting that beautiful caramelization without the squash becoming mushy.
- Place in Oven: Place the baking sheet with the seasoned squash into the preheated oven on the center rack.
- Roast: Bake for 45 to 55 minutes. The exact time will depend on the size of your squash.
- Check Halfway: Around the 25-minute mark, you can baste the squash by spooning some of the melted butter or juices from the cavity over the flesh to keep it moist.
Lesson Learned: Many recipes say to roast cut-side down, but for this method, roasting cut-side up the entire time allows the liquid to pool in the center and the edges to get deliciously browned and slightly crispy.

6. Test for Perfect Doneness
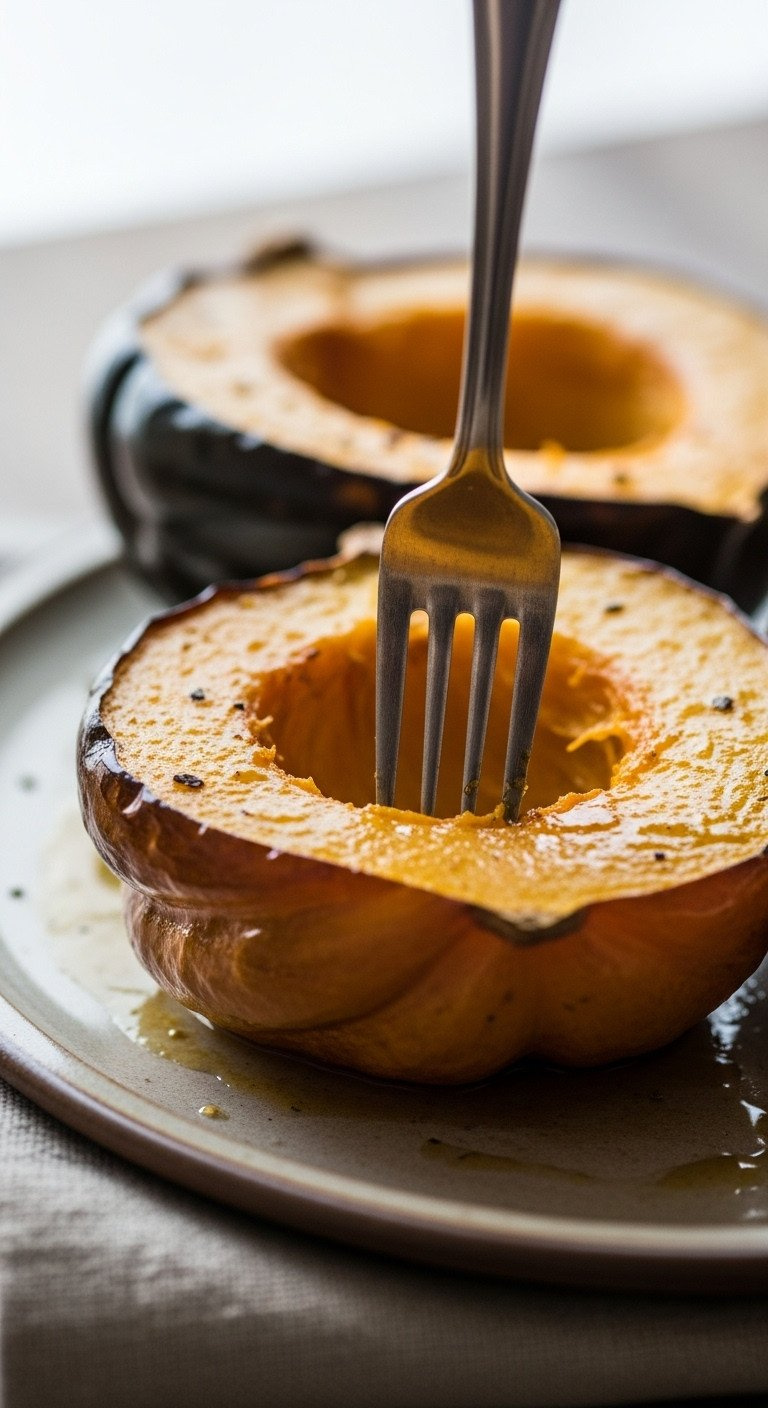
Never serve undercooked squash again! Pin this simple test.
How do you know when it’s perfectly cooked? There’s one simple, foolproof test that never fails.
Tools Needed:
- A fork or a small paring knife.
Step-by-Step Directions:
- Visual Check: Look at the squash. The flesh should be golden brown and the edges should look caramelized and slightly browned. The liquid in the center should be bubbling.
- The Fork Test: Carefully remove the baking sheet from the oven. Insert the tip of a fork or paring knife into the thickest part of the squash flesh.
- Feel for Resistance: If the squash is perfectly cooked, the fork will slide in and out with almost no resistance, like piercing a baked potato.
- Check the Skin: You should even be able to easily pierce the skin with the fork.
- If It’s Not Ready: If you feel any significant resistance, the squash needs more time. Return it to the oven and check again in 5-10 minute increments.
Pro-Tip: Be sure to test the thickest part of the squash, usually near the stem end, as this will be the last part to become tender.

7. Serve and Garnish for a Beautiful Finish
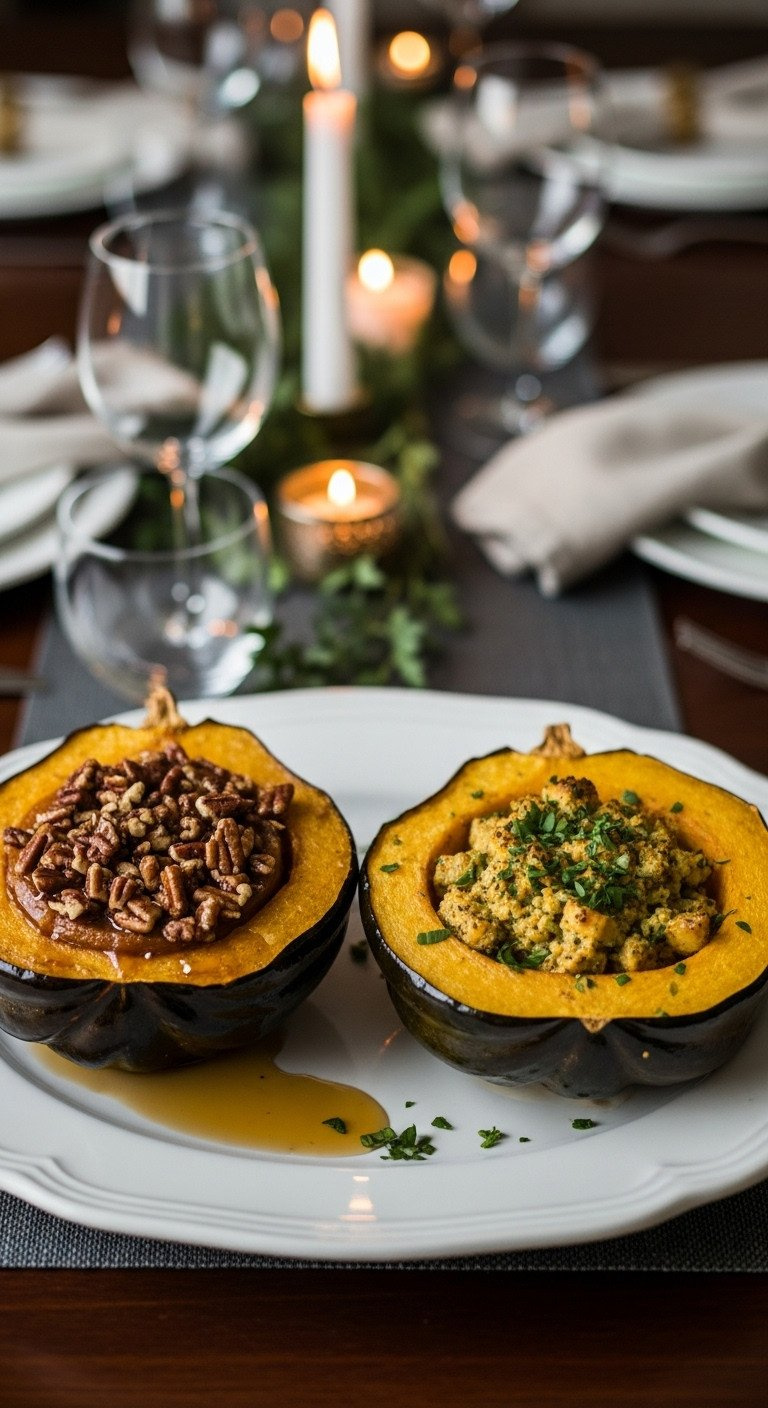
Pin these beautiful serving ideas for your next dinner party!
The final flourish! A simple garnish adds flavor, texture, and makes the dish look as good as it tastes.
Garnish Ideas:
- For Sweet Squash: Toasted pecans or walnuts, a sprinkle of flaky sea salt, or an extra pat of butter melted on top.
- For Savory Squash: Freshly chopped parsley or thyme, a sprinkle of red pepper flakes for heat, or some grated Parmesan cheese.
Serving Directions:
- Let it Cool Slightly: Carefully remove the hot squash from the baking sheet and transfer to a serving platter or individual plates. Let it rest for a few minutes.
- Add Garnishes: Just before serving, sprinkle on your chosen garnishes for extra flavor, texture, and visual appeal.
- Serve Whole or Mashed: You can serve the halves as they are, or scoop the soft flesh out into a bowl and mash it with a fork.
- Pair It Well: Roasted acorn squash is a classic side dish for roast chicken, turkey, and pork chops. The savory version is also delicious alongside a hearty steak.
Pro-Tip: For a truly elegant presentation, spoon any of the delicious caramelized juices from the baking pan back over the squash just before serving.
Key Takeaways: Your Quick Guide to Perfect Acorn Squash
Here are the most important things to remember for perfect roasted acorn squash every time.
- Safety First: Always create a flat, stable base by slicing a thin piece off the side before cutting your squash in half.
- High Heat is Key: Roast at 400°F (200°C) to ensure the squash caramelizes on the outside and becomes tender, not mushy, on the inside.
- Fat is Flavor: Brush the flesh with butter or olive oil before seasoning to help spices adhere and to promote browning.
- Don’t Forget the Salt: A pinch of salt is essential to balance the flavor, even in sweet preparations.
- The Fork Test: The squash is perfectly cooked when a fork slides into the thickest part of the flesh with zero resistance.
People Also Ask About Cooking Acorn Squash
Can you eat the skin of acorn squash?
Yes, you can absolutely eat the skin of acorn squash. When roasted properly, the skin becomes soft and tender enough to eat along with the flesh. It’s also a great source of additional fiber and nutrients, so there’s no need to peel it before or after cooking.
What does acorn squash taste like?
Acorn squash has a mild, subtly sweet, and nutty flavor. Its taste is often compared to a combination of sweet potato, pumpkin, and butternut squash. Because its flavor is not overpowering, it pairs wonderfully with both sweet seasonings like maple syrup and savory ones like herbs and garlic.
Should I roast acorn squash cut side up or down?
For the best texture, roast it cut-side up. While some methods start cut-side down to steam the flesh, roasting it cut-side up for the entire time allows moisture to evaporate, preventing a watery result. This method helps the edges to caramelize beautifully and lets the butter and seasonings pool in the cavity, creating a self-basting sauce.
How do I store leftover cooked acorn squash?
Store leftover roasted acorn squash in an airtight container in the refrigerator for up to 4 days. To reheat, you can place it in the microwave for a minute or two, or warm it in a 350°F oven for about 10-15 minutes until heated through.
Final Thoughts
Cooking acorn squash doesn’t have to be intimidating. With this simple, step-by-step roasting method, you can confidently turn this wonderful winter squash into a delicious, healthy, and beautiful side dish for any occasion. From selecting the perfect one at the store to serving it with a beautiful garnish, you now have all the tools you need.
Now that you have the foolproof method, what will you serve your perfectly roasted acorn squash with? Let me know your favorite pairings in the comments below
Last update on 2026-06-11 at 08:00 / Affiliate links / Images from Amazon Product Advertising API
