As an Amazon Associate BakingBakewareSets.com earns from qualifying purchases.
How To Cook Perfect Jollof Rice That Is Never Soggy
Tired of mushy, bland, or burnt Jollof rice? You’ve come to the right place.
Jollof Rice is a beloved West African one-pot dish, famous for its vibrant color and deep flavor. But getting it right can be frustrating.
The secret to perfect Jollof rice that is never soggy is using long-grain parboiled rice, frying the tomato base until thick to control moisture, and steaming the rice on very low heat under a tight seal. This guide will walk you through the foolproof, tested method for flawless results every time.
☰ Table of Contents ▼
show
Why Does Jollof Rice Go Wrong (and How Will This Recipe Fix It)?
There’s nothing more disappointing than spending time on Jollof rice only for it to turn out soggy, burnt on the bottom, or bland. These common failures happen for very specific reasons. A watery tomato and pepper base, the wrong type of rice, or incorrect heat management are the usual culprits. It’s a dish that’s easy to make, but even easier to get wrong.
This foolproof recipe is designed to eliminate those risks. After years of testing and perfecting the technique my family has used for generations, this method builds in success at every stage. We will tackle the three most critical areas for a flawless outcome:
- The Base: We will cook down the Obe Ata (the stew base) to a thick, rich consistency. This concentrates the flavor and, most importantly, removes the excess water that causes soggy rice.
- The Rice: We will use long-grain parboiled rice. This type of rice is sturdier and more forgiving, ensuring your final dish has perfectly separate, fluffy grains.
- The Technique: We will use a low-and-slow steaming method with a perfect seal. This allows the rice to cook gently in flavorful steam, not boil in water, which is the key to a perfect texture and authentic smokey flavor.
By understanding the why behind each step, you’ll be in complete control, guaranteeing a perfect pot of Jollof rice.
The 7 Foolproof Steps to Perfect, Fluffy Jollof Rice
This step-by-step tutorial is the core of our tested method. Each step in this cooking process builds on the last, creating layers of flavor and ensuring the perfect texture. Follow this sequence precisely, and you’ll master this iconic dish.
1. Create the Aromatic Flavor Base

Pin this essential first step for later!
Ingredients Needed:
- 4 large ripe Roma tomatoes, roughly chopped
- 2 large red bell peppers, deseeded and chopped
- 1 medium onion, chopped
- 1-2 scotch bonnet peppers (or habanero), depending on desired spice level
- 1/2 cup of water (or just enough to get the blender moving)
Step-by-Step Directions:
- Combine: Place all the chopped tomatoes, red bell peppers, onion, and scotch bonnet pepper(s) into a high-powered blender.
- Add Liquid: Pour in just enough water to help the blades catch and turn the mixture. Avoid adding too much water, as you’ll have to cook it off later.
- Blend Until Smooth: Blend on high speed for 1-2 minutes, or until the mixture is completely smooth and pureed. There should be no visible chunks.
Pro-Tip: For a deeper red color, use only the reddest bell peppers you can find. Avoid any that are green or orange, as they will alter the final color of your rice.

2. Fry the Base for Depth & Color

Save this crucial flavor-building technique!
Supplies Needed:
- 1/2 cup vegetable or canola oil
- 1 large onion, finely diced
- 6 oz can of high-quality tomato paste
- The blended pepper base from Step 1
- A heavy-bottomed pot or Dutch oven
Step-by-Step Directions:
- Sauté Onions: Heat the oil in your pot over medium heat. Add the diced onions and sauté for 3-5 minutes until translucent and fragrant.
- Fry Tomato Paste: Add the entire can of tomato paste. Use your spoon to stir and fry it in the oil for at least 5 minutes. The paste will darken from bright red to a deeper terracotta color and release its fragrance. This step is crucial for removing acidity and developing a deep, rich flavor.
- Cook Down the Base: Pour in your blended pepper base from Step 1. Stir everything together and bring to a simmer. Reduce the heat to medium-low and let it cook, stirring occasionally, for 20-25 minutes. The sauce will thicken significantly, and you’ll see a layer of oil separating and rising to the top. This is the sign it’s ready.
Lesson Learned: Do not rush the process of cooking down the base. A watery base is the primary cause of soggy Jollof. You are aiming for a thick, paste-like consistency.

3. Season the Stew Generously

Pin this perfect seasoning blend for authentic flavor!
Ingredients Needed:
- 4 cups of high-quality chicken or beef stock, heated
- 2 teaspoons Nigerian-style curry powder
- 1 teaspoon dried thyme
- 1 teaspoon smoked paprika (optional, for smokiness)
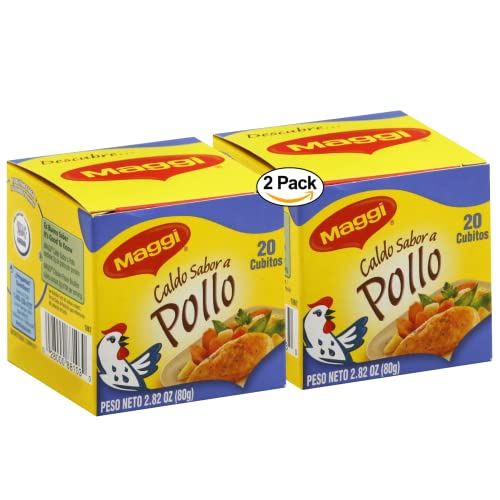
- 2-3 bouillon cubes (Maggi or Knorr), crushed
- 2 bay leaves
- Salt to taste
Step-by-Step Directions:
- Bloom Spices: Add the curry powder, dried thyme, and smoked paprika to the thickened stew. Stir and cook for 1 minute until fragrant. This “blooms” the spices and deepens their flavor.
- Add Liquid & Seasoning: Pour in the hot stock, and add the crushed bouillon cubes and bay leaves. Stir everything together.
- Taste and Adjust: Bring the stew to a simmer and taste it. Add salt until it is well-seasoned. The liquid should taste slightly saltier than you’d prefer, as the rice will absorb a lot of the salt. This is the last chance to adjust the seasoning perfectly.
Pro-Tip: Always use hot stock, not cold. Adding cold liquid to the hot pot will reduce the temperature and can affect the final texture of the rice.
4. Wash and Add the Rice

Save this tip! The secret to fluffy, non-sticky rice starts here.
Materials Needed:
- 3 cups of long-grain parboiled rice
- Fine-mesh sieve or bowl
- Cold water
Step-by-Step Directions:
- Measure: Measure exactly 3 cups of rice.
- Wash Thoroughly: Place the rice in a sieve or a large bowl. Rinse it under cold running water, swishing the grains around with your hands. You will see the water turn cloudy and milky.
- Repeat Until Clear: Continue rinsing and draining until the water runs mostly clear. This removes excess surface starch and is a critical step in preventing mushy rice.
- Combine: Drain the rice very well, then pour it into the simmering, seasoned stew base in the pot. Stir gently until all the rice grains are coated in the stew.
Lesson Learned: Do not skip washing the rice. The 5 minutes it takes is the best insurance against a sticky, starchy mess. Long-grain parboiled rice is highly recommended as it’s more forgiving and holds its structure well.
5. Seal & Steam on Low Heat

Pin this game-changing trick for perfectly steamed rice!
Tools Needed:
- A sheet of heavy-duty aluminum foil large enough to cover the pot
- A tight-fitting lid for your pot
- Optional: A heat diffuser for electric stoves
Step-by-Step Directions:
- Bring to a Simmer: After stirring in the rice, let the mixture come to a gentle simmer. Do not let it boil rapidly. The liquid level should be about the same level as the rice, not significantly above it.
- Create the Seal: Immediately cover the top of the pot with the sheet of aluminum foil, pressing it around the rim to create a seal.
- Cover and Reduce Heat: Place the lid tightly on top of the foil. Instantly reduce the stove’s heat to the lowest possible setting.
- Steam: Let the rice cook undisturbed for 25-30 minutes. DO NOT open the lid or stir the rice during this time. This is when the magic happens; the trapped steam cooks the grains to perfection.
Pro-Tip: If your stove (especially electric) has trouble maintaining a very low heat, use a heat diffuser. It’s an inexpensive tool that sits between the burner and the pot, preventing the bottom from burning.

6. Rest the Rice Off-Heat

Don’t skip this step! Save for the secret to the perfect texture.
Tools Needed:
- A kitchen timer
- A heat-proof surface or trivet
Step-by-Step Directions:
- Turn Off Heat: After 25-30 minutes of steaming, turn off the stove completely.
- Move the Pot: Carefully move the pot from the hot burner to a cool part of the stove or a trivet.
- Rest Undisturbed: Let the pot sit, still completely sealed, for another 10-15 minutes.
- Let Steam Finish the Job: During this resting phase, the residual steam gently finishes cooking the grains, allows them to absorb any remaining moisture, and helps them firm up. This makes the rice less likely to break when you fluff it.
Lesson Learned: Patience is an ingredient. Opening the pot too soon will release the precious steam and can result in slightly undercooked or wet rice. The rest period is not optional for the best results.

7. Fluff to Separate Every Grain

The perfect finish! Pin this for the final, satisfying step.
Tools Needed:
- A fork or a narrow spatula
Step-by-Step Directions:
- Unseal: After the resting period, carefully remove the lid and the layer of aluminum foil. Be mindful of hot steam.
- Start from the Edges: Insert a fork into the side of the rice.
- Lift and Separate: Gently drag the fork from the bottom of the pot to the top, lifting and turning the rice to separate the grains. Do not stir in a circular motion, as this will mash the rice.
- Mix in the ‘Bottom Pot’: As you fluff, gently scrape up some of the coveted, slightly crispy ‘bottom pot’ rice and mix it through for that authentic smokey flavor.
- Serve Immediately: Serve the hot, fluffy Jollof rice with your favorite sides.
Pro-Tip: To get that extra smokey party Jollof flavor, you can turn the heat up to medium-high for the last 2 minutes of the steaming time (Step 5) before turning it off to rest. This intentionally creates a more pronounced, delicious ‘bottom pot’ char.

Jollof Rice SOS: Your Troubleshooting Guide for Perfect Results
Even with the best recipe, things can sometimes go slightly off plan. This guide is your insurance policy. Here are the most common Jollof rice problems and exactly how to solve them.
| The Problem | The Likely Cause & The Foolproof Solution |
|---|---|
| Soggy / Mushy Rice | Cause: Too much liquid, or you stirred the rice while it was steaming. Solution: Always use long-grain parboiled rice. Stick to the rule of thumb where the liquid just covers the rice. Most importantly, once you seal the pot, do not stir it until it’s time to fluff at the very end. |
| Burnt Rice | Cause: The heat was too high during the steaming phase. Solution: Cook on the absolute lowest heat your stove can manage. If your stove runs hot, use a heat diffuser. The goal is gentle steam, not direct, harsh heat. |
| Bland / Flavorless Rice | Cause: You under-seasoned the stew base before adding the rice. Solution: Taste your stew after adding stock and seasonings but before adding the rice. It should taste slightly saltier than you’d like, as the rice will absorb the flavor and salt. Be generous with bouillon and spices. |
| Pale / White Rice | Cause: You didn’t use enough tomato paste, or you didn’t fry it long enough. Solution: Use a whole 6 oz can of quality tomato paste and fry it in the oil for at least 5 minutes until it darkens in color. This step is non-negotiable for a deep, rich red color. |
People Also Ask About Jollof Rice
What is the best rice for Jollof that isn’t soggy?
The best rice for preventing soggy Jollof is long-grain parboiled rice. The parboiling process makes the grains harder and more durable, so they can withstand the steaming process without breaking down and becoming mushy. It ensures each grain remains separate and fluffy.
How do you get the authentic smokey flavor in Jollof rice?
The smokey flavor comes from the ‘bottom pot,’ a technique where the bottom layer of rice is intentionally allowed to toast and char slightly. To achieve this, increase the heat to medium for the last 2-3 minutes of cooking, then turn off the heat and let the pot rest so the smokey aroma infuses the entire dish.
What is the main difference between Nigerian and Ghanaian Jollof?
The primary difference is the type of rice used. Nigerian Jollof traditionally uses long-grain parboiled rice for a firmer, separate grain texture. Ghanaian Jollof often uses more aromatic rice like basmati or jasmine, which results in a softer, more fragrant dish.
Why do you put aluminum foil over the pot?
Aluminum foil creates a perfect, airtight seal that a regular lid might not provide. This is crucial for trapping all the flavorful steam inside the pot. The trapped steam then cooks the rice gently and evenly, ensuring it becomes fluffy without needing excess water, which prevents sogginess.
Final Thoughts
Cooking perfect Jollof rice isn’t about magic; it’s about technique. By understanding the “why” behind each critical step, you’ve moved beyond simply following a recipe to mastering the dish.
Here are the key takeaways for perfect, non-soggy Jollof every time:
* Build a Deep Flavor Base: Cook down your tomato and pepper puree until it’s a thick, rich paste. This concentrates flavor and eliminates the excess water that leads to sogginess.
* Choose the Right Rice: Always opt for long-grain parboiled rice. Its sturdy structure is your best defense against a mushy outcome.
* Master the Steam: Use a tight seal (the foil trick is a game-changer!) and the lowest possible heat. You are steaming the rice, not boiling it.
* Patience is an Ingredient: Do not stir during steaming, and always let the rice rest off the heat for at least 10 minutes. This final step is crucial for the perfect texture.
You now have the knowledge and the method to create Jollof rice that is fluffy, flavorful, and perfectly cooked from top to bottom.
What’s your favorite thing to serve with Jollof rice? Let me know in the comments below
Last update on 2026-06-16 at 10:00 / Affiliate links / Images from Amazon Product Advertising API
