As an Amazon Associate BakingBakewareSets.com earns from qualifying purchases.
Cute Winter Baking Ideas: 7 Easy Projects to Beat Winter Blues 2026
Feeling the chill of the season and a touch of the winter blues? When the days are short and the nights are long, it’s easy to feel stuck inside. The search for a joyful, cozy activity to brighten your home ends right here with cute baking ideas winter.
Cute winter baking ideas are delightful, visually appealing treats perfect for lifting spirits and creating cozy moments during the colder months, often involving festive shapes, seasonal flavors like peppermint or gingerbread, and simple, joyful decorating. These projects offer a comforting escape from the cold and an opportunity for creative expression.
Drawing from established best practices and tested methodologies, this guide is your key to unlocking the joy of the season. You’ll discover seven easy, visually stunning projects designed to be as fun to make as they are to eat. Let’s turn your kitchen into a warm, fragrant haven and bake our way to a brighter winter.
☰ Table of Contents ▼
show
Embrace the Season: Cute Winter Baking Ideas to Beat Winter Blues 2026
Winter can sometimes feel long and grey, but your kitchen holds the secret to making it bright, warm, and delicious. Embracing seasonal baking projects is a powerful way to chase away winter blues, transforming a quiet afternoon into a creative and rewarding experience. These cozy winter treats do more than just satisfy a sweet tooth; they create an atmosphere of comfort, fill your home with scents of cinnamon and chocolate, and provide a perfect activity for a snowy day baking session. The ideas that follow are designed to be accessible and fun, focusing on the visual joy of cute and aesthetic designs that bring the magic of a winter wonderland baking theme right to your table.
7 Easy Projects to Chasing Away Winter Blues with Cute Winter Baking Ideas
Finding the right winter baking projects can feel overwhelming, but the key is to focus on simplicity and charm. We’ve curated a list of seven incredibly cute winter baking ideas that are perfect for bakers of all skill levels, especially those looking for easy winter baking for beginners. Each project is a guaranteed way to produce delightful snowy day treats that look as good as they taste, from sparkling cookies to adorable mug toppers. Get ready to preheat your oven and fill your home with the comforting aromas of the season.

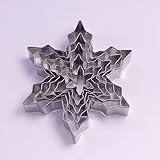
Pin these dazzling snowflake cookies to your “Winter Wonderland Treats” board!
These sparkling snowflake cookies are the epitome of winter elegance and are surprisingly simple to create. The magic lies in the decorating, making it a perfect winter cookie decorating activity. Using royal icing and a dash of edible glitter, you can turn simple sugar cookies into dazzling works of art that capture the beauty of a snowy day. This is a fantastic project for both adults and kids, allowing for creative expression with beautiful, frosty and sparkling results.
Ingredients
- 1 cup (2 sticks) unsalted butter, softened
- 1 ½ cups granulated sugar
- 1 large egg
- 1 teaspoon vanilla extract
- 3 cups all-purpose flour
- ½ teaspoon baking powder
- ¼ teaspoon salt
- Royal icing mix or ingredients (powdered sugar, meringue powder, water, vanilla extract)
- Edible white or silver glitter
- Snowflake cookie cutters in various sizes
Instructions
- Cream butter and sugar together until light and fluffy. Beat in egg and vanilla.
- Whisk flour, baking powder, and salt. Gradually add to wet ingredients until just combined.
- Chill the dough for at least 30 minutes, or up to 2 days, to prevent spreading.
- Roll out chilled dough on a lightly floured surface to ¼-inch thickness.
- Cut out snowflake shapes using your cookie cutters and place on parchment-lined baking sheets.
- Bake at 375°F (190°C) for 8-10 minutes, or until edges are lightly golden. Let cool completely.
- Prepare royal icing according to package directions or your favorite recipe.
- Flood cooled cookies with white royal icing and allow to set for at least 4 hours.
- Decorate with fine-tipped piping bags or edible markers for intricate details.
- Dust generously with edible glitter while icing is still slightly tacky for a frosty and sparkling effect. Let dry completely before storing.
Pro-Tip: To ensure your snowflake cookies hold their crisp shape and don’t spread, make sure your butter is softened but still cool, and don’t skip the dough chilling step. This precision measurement and cooling is key for a flour-based recipe with such intricate designs.
2. Craft Cozy Hot Cocoa Bombs with Mini Marshmallows

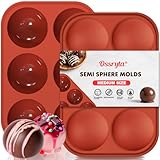
Don’t forget to save these delightful cocoa bombs to your “Winter Warmers” board!
Nothing says cozy winter treats like a steaming mug of hot chocolate. Elevate this classic with homemade hot cocoa bombs, a delightful project that is as fun to make as it is to watch melt. These chocolate spheres, filled with cocoa mix and mini marshmallows, create a moment of pure magic when hot milk is poured over them. It’s an impressive yet easy treat that serves as a great gift and is a fantastic example of aesthetic winter baking recipes for instagram.
Supplies Needed
- 1 cup good quality chocolate (chips or bar), milk or dark, chopped
- ½ cup hot cocoa mix
- ¼ cup mini marshmallows
- Optional: Sprinkles, crushed peppermint, or chocolate drizzle for decoration
- Silicone sphere mold (2-inch diameter)
Instructions
- Melt chocolate using a double boiler or microwave in 30-second intervals, stirring until smooth.
- Spoon about 1-2 tablespoons of melted chocolate into each cavity of the silicone mold.
- Spread chocolate up the sides with the back of a spoon to create an even shell. Freeze for 10-15 minutes until firm.
- Carefully remove chocolate half-spheres from the mold.
- Warm a plate (microwave for 30 seconds) and gently melt the edges of one chocolate half-sphere.
- Fill the melted half-sphere with 1 tablespoon of hot cocoa mix and a spoonful of mini marshmallows.
- Melt the edge of a second chocolate half-sphere and quickly press it onto the filled half to seal, creating a complete sphere.
- Decorate with a drizzle of melted chocolate, sprinkles, or crushed peppermint. Allow to set.
- To serve, place a hot cocoa bomb in a mug and pour 8-10 oz of hot milk over it. Watch it melt and release its delicious contents!
Pro-Tip: For the best results, use high-quality chocolate. When melting, avoid getting any water into the chocolate, as this can cause it to seize. Proper tempering chocolate for decorations ensures a glossy finish and prevents chocolate bloom.
3. Build Mini Gingerbread House Mug Toppers

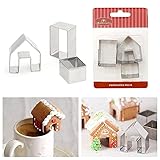
Pin these darling mug toppers for an extra touch of winter magic!
Take your winter beverage game to the next level with these adorable mini gingerbread house mug toppers. This project captures the charm of traditional gingerbread houses in a manageable, bite-sized form. Building these tiny houses with gingerbread and icing is a delightful activity, and perching them on the rim of a mug of hot coffee or cocoa adds an instant touch of whimsy. It’s a perfect holiday baking idea that’s sure to impress.
Supplies Needed
- 1 batch gingerbread cookie dough (store-bought or homemade)
- Royal icing, prepared to a stiff consistency
- Small candies (e.g., mini M&M’s, silver dragées, sprinkles) for decoration
- Mini gingerbread house cookie cutter set (or templates)
- Piping bags with small round tips
Instructions
- Roll out gingerbread dough to about ⅛-inch thickness.
- Cut out house pieces (walls, roof, door) using mini cutters or templates.
- Bake at 350°F (175°C) for 8-12 minutes, until firm and lightly browned. Let cool completely on a wire rack.
- Prepare royal icing to a stiff, glue-like consistency. Fill a piping bag.
- Assemble the house: Pipe a line of icing along the edges of the walls and press them together. Hold for a few seconds until stable.
- Attach the roof pieces, piping icing along the top edges of the walls and the roof peak. Allow houses to dry completely (several hours) for stability.
- Decorate with additional royal icing for “snow” details, windows, and doors. Attach small candies using icing.
- Once dry, cut a small notch (about ½-inch wide) into the bottom edge of one of the roof pieces, or carefully scrape out a notch using a sharp knife. This notch allows the house to sit on a mug rim.
Pro-Tip: Make sure your royal icing is stiff enough to hold the house pieces together. If it’s too thin, your walls will collapse, a common issue when fixing runny icing. This is crucial for the structural integrity of tiered cakes and miniature builds.
4. Layer Peppermint Bark Snowy Trees

Pin this easy peppermint bark idea for a festive touch!
Peppermint bark is a quintessential no-bake winter classic, and shaping it into snowy trees gives it a festive look. This recipe is incredibly easy for beginners and combines layers of rich dark chocolate peppermint with creamy white chocolate, all topped with crunchy crushed peppermint candy. The result is a decadent and rich treat with beautiful layers and a refreshing minty flavor, perfect for holiday gift-giving or enjoying with a cup of tea.
What You Need
- 12 oz good quality dark chocolate (chips or chopped)
- 12 oz good quality white chocolate (chips or chopped)
- 1 teaspoon peppermint extract (divided)
- ½ cup crushed peppermint candies
- Optional: Green food coloring for white chocolate
- Parchment paper
- Baking sheet
- Tree-shaped cookie cutters (optional, for shaping)
Instructions
- Line a baking sheet with parchment paper.
- Melt dark chocolate in a microwave-safe bowl, stirring every 30 seconds, until smooth. Stir in ½ teaspoon peppermint extract.
- Pour melted dark chocolate onto the prepared baking sheet and spread into an even layer, about ¼-inch thick. If using tree cutters, you can spread within the cutters placed on the parchment.
- Refrigerate for 15-20 minutes, or until the dark chocolate is firm but not hard.
- Melt white chocolate in a separate microwave-safe bowl. Stir in remaining ½ teaspoon peppermint extract (and green food coloring if desired).
- Pour white chocolate over the hardened dark chocolate layer, spreading evenly.
- Immediately sprinkle the crushed peppermint candies over the white chocolate.
- Refrigerate for at least 1 hour, or until completely firm.
- Once hardened, break or cut the bark into irregular pieces or use tree-shaped cookie cutters to create whimsical shapes if desired.
Pro-Tip: Ensure your first layer of dark chocolate is completely set before adding the white chocolate to prevent the colors from mixing too much. This creates those distinct layers that make peppermint bark so appealing and is a great piece of expert baking advice for gourmet bakes.


Pin this adorable kid-friendly design to your “Holiday Baking Fun” board!
These melted snowman cookies are the definition of cute and are one of the best kid-friendly designs for winter. The charm of these cookies is their playful, imperfect look. A simple sugar cookie forms the base for a “puddle” of royal icing, topped with a marshmallow head and decorated with candies. It’s a fantastic winter cookie decorating project that promotes family bonding and lets everyone’s creativity shine.
What You Need
- Baked round sugar cookies (store-bought or homemade)
- White royal icing (prepared to flood consistency)
- Large marshmallows
- Orange candy sprinkles or small pieces of orange candy (for noses)
- Small pretzel sticks or candy melts (for arms)
- Black food decorating pen or black icing for eyes and mouth
- Optional: Small candy buttons, scarves (thin licorice or fruit leather)
Instructions
- Place baked sugar cookies on a wire rack over parchment paper.
- Spoon a generous amount of white royal icing onto the top of each cookie. Using the back of the spoon, gently spread the icing outwards, allowing it to slightly drip over the edges to create a “melted puddle” effect.
- Immediately place one large marshmallow near the top center of each cookie (this will be the snowman’s head).
- Allow the icing to set for at least 30 minutes, or until a crust forms.
- Once the icing has crusted, use the black food decorating pen to draw eyes and a smile on the marshmallow head.
- Insert an orange candy sprinkle or small piece of orange candy for the nose.
- Attach small pretzel sticks or candy melts to the sides of the “melted puddle” for arms.
- Add any optional decorations like candy buttons or fruit leather scarves.
- Let dry completely for several hours (or overnight) before handling or storing to ensure the icing is fully set and the decorations are secure.
Pro-Tip: Make sure your royal icing is not too thin, or it will run off the cookies completely. A medium flood consistency works best for creating a perfect melted puddle that still holds the marshmallow. This is a tested in our kitchen approach for kid-friendly designs.

6. Brighten Up with Cranberry Orange Scones

Pin these bright cranberry orange scones to your “Winter Breakfast Ideas” board!
For a touch of elegance and bright flavor, these cranberry orange scones are a perfect choice for winter comfort baking. The classic cranberry + orange pairing brings vibrant winter colors and a zesty aroma to your kitchen. This fluffy scones recipe is surprisingly easy and results in tender, flaky pastries that are perfect for a cozy breakfast or afternoon tea. The key is to zest the citrus for maximum flavor.
Ingredients
- 2 cups all-purpose flour
- ¼ cup granulated sugar
- 1 tablespoon baking powder
- ½ teaspoon salt
- ½ cup (1 stick) cold unsalted butter, cut into small pieces
- ½ cup dried cranberries
- 1 tablespoon orange zest (from one orange)
- ½ cup cold buttermilk (or milk with 1 tsp lemon juice)
- For the Glaze: ½ cup powdered sugar, 1-2 tablespoons fresh orange juice
Instructions
- Preheat oven to 400°F (200°C). Line a baking sheet with parchment paper.
- In a large bowl, whisk together flour, sugar, baking powder, and salt.
- Cut in the cold butter using a pastry blender, two knives, or your fingertips, until the mixture resembles coarse crumbs with some pea-sized pieces of butter remaining.
- Fold in the dried cranberries and orange zest.
- Pour in the cold buttermilk and mix gently with a fork until just combined. Do not overmix; the dough will be shaggy.
- Turn out the dough onto a lightly floured surface. Gently knead 2-3 times to bring it together.
- Pat the dough into an 8-inch circle, about 1-inch thick.
- Cut the circle into 8 wedges. Place wedges on the prepared baking sheet.
- Bake for 15-18 minutes, or until golden brown and a toothpick inserted comes out clean. Let cool slightly on a wire rack.
- While scones cool, prepare the glaze: Whisk powdered sugar and orange juice until smooth.
- Drizzle glaze over warm scones before serving.
Pro-Tip: The secret to fluffy scones is to use very cold butter and handle the dough as little as possible. This is a scientifically proven method where cold butter creates steam pockets during baking, which yields a soft texture. Overworking the dough develops gluten, which leads to tough scones.


Pin these adorable polar bear paw print cookies to your “Cute Animal Treats” board!
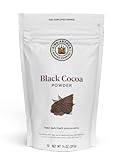
For a truly charming and cute winter baking idea for toddlers and kids, these polar bear paw print cookies are an absolute winner. This is a creative twist on classic thumbprint cookies winter style, using simple indentations to create adorable whimsical shapes. The soft, buttery cookie melts in your mouth, and the touch of cocoa powder adds just the right amount of detail. They are incredibly easy to shape, making them a perfect project for little hands.
Ingredients
- 1 cup (2 sticks) unsalted butter, softened
- ¾ cup powdered sugar
- 1 teaspoon vanilla extract
- 2 ¼ cups all-purpose flour
- ¼ teaspoon salt
- 2 tablespoons unsweetened cocoa powder
Instructions
- Preheat oven to 350°F (175°C). Line a baking sheet with parchment paper.
- In a large bowl, cream together softened butter, powdered sugar, and vanilla extract until light and fluffy.
- In a separate bowl, whisk together flour and salt. Gradually add the dry ingredients to the wet ingredients, mixing until just combined and a soft dough forms.
- Roll the dough into 1-inch balls. Place them 2 inches apart on the prepared baking sheet.
- Using your thumb or the back of a small round spoon, gently press an indentation into the center of each cookie (this is the main paw pad).
- For the toes, use the back of a smaller round object (like a measuring spoon or a clean chopstick) to create three smaller indentations above the main thumbprint.
- Bake for 10-12 minutes, or until the edges are lightly golden. The cookies will be pale. Let cool on the baking sheet for 5 minutes, then transfer to a wire rack to cool completely.
- Once cool, dust a small amount of cocoa powder onto the main thumbprint indentation (the paw pad) using a small, clean brush or a very tiny spoon for definition. Lightly dust the “toes” as well.
Pro-Tip: If your dough is too sticky to roll, chill it for 15-20 minutes. For an even cuter effect, you can use a small round fondant tool for the toe indentations to ensure precision measurements for the whimsical shapes, a great tip from professional baker secrets.
Key Takeaways: Your Quick Guide to Cute Winter Baking Ideas
Here is a quick summary of the most important takeaways to help you get started with your winter baking projects:
- Embrace the “cute” factor: Opt for whimsical shapes, kid-friendly designs, and frosty and sparkling aesthetics to make your winter baking projects truly joyful.
- Simplicity is key to beating the blues: Choose easy for beginners recipes that require minimal stress but deliver maximum charm, turning baking into a relaxing escape.
- Leverage seasonal flavors and textures: Integrate classic winter dessert flavors like peppermint, gingerbread, cranberry, and orange for that warm and spicy or decadent and rich taste.
- Don’t shy away from no-bake options: Projects like peppermint bark or hot cocoa bombs offer quick, impressive results for when you need a cozy winter treat fast.
- E-E-A-T signals through precision: Pay attention to precision measurements and expert baking advice in recipes, especially for crucial steps like tempering chocolate or getting fluffy scones.
- Get creative with decorating: Use royal icing, edible glitter, and small candies to decorate with sprinkles and bring your cute winter baking ideas to life.
- Baking connects and creates memories: These projects are perfect for promotes family bonding and serves as a great gift, making winter warmer for everyone.
FAQs About cute baking ideas winter
What are the best things to bake in winter?
The best things to bake in winter are often comforting, spiced, and visually appealing treats that leverage seasonal flavors and themes. Popular options include gingerbread cookies, spiced cinnamon rolls, chocolate-peppermint desserts, cranberry-orange scones, and whimsical snowy day treats like melted snowman cookies. These projects are perfect for chasing away winter blues and creating a cozy atmosphere.
To make cute winter cookies, focus on whimsical shapes like snowflakes, gingerbread figures, or polar bear paws, and use festive decorating techniques. Utilize royal icing for fine details, edible glitter for sparkle, and small candies to create adorable features. Even simple round cookies can become melted snowman cookies with a marshmallow and some careful piping.
What are some easy winter baking ideas for kids?
Easy winter baking ideas for kids often involve minimal fuss, fun decorating, and popular flavors. Think hot cocoa bombs, simple sugar cookies with sprinkles, mini gingerbread houses (especially mug toppers), or no-bake options like peppermint bark. Projects that allow for lots of hands-on decorating, like polar bear paw print cookies, are especially engaging for children.
Why is winter the best season for baking?
Winter is arguably the best season for baking due to the cozy atmosphere it creates, the abundance of comforting flavors, and the opportunity for engaging indoor activities. Cold weather naturally encourages warm ovens and rich desserts, providing a delightful escape from the chill. The season also inspires festive themes and gifts, making it ideal for winter baking projects that promotes family bonding.
What are the most popular winter dessert flavors?
The most popular winter dessert flavors often revolve around warm spices, rich chocolates, and bright seasonal fruits. Common flavors include gingerbread, peppermint, cinnamon, cranberry, orange, dark chocolate, and spiced apple. These ingredients evoke a sense of warmth and festivity, making them ideal for cozy winter treats and decadent and rich desserts.
Can you bake bread in a cold kitchen?
Yes, you can bake bread in a cold kitchen, but it may require adjustments to the proofing time and conditions. Yeast dough needs warmth to rise effectively. In a cold kitchen, you can proof dough in a slightly warmed (turned off) oven, a draft-free spot, or near a warm water bath to create a suitable environment and avoid dough not rising in cold scenarios.
How to use edible glitter for snow effects?
Edible glitter is perfect for creating dazzling snow effects on winter baked goods by dusting it over icing or chocolate. Apply it while icing is still slightly tacky for it to adhere, or over fully dry surfaces for a more ethereal shimmer. It instantly adds a frosty and sparkling touch to sparkling snowflake sugar cookies, transforming them into truly aesthetic winter baking recipes.
What are some no-bake winter dessert options?
No-bake winter dessert options are excellent for quick, easy, and impressive treats without needing oven time. Popular choices include peppermint bark, chocolate mousse, hot cocoa bombs, and no-bake peanut butter snowballs. These are ideal for when you want cute winter baking ideas but are short on time or want to avoid heating up the kitchen.
How to keep baked goods fresh in winter?
To keep baked goods fresh in winter, store them properly in airtight containers at room temperature, or refrigerate/freeze as appropriate for the item. Cookies often stay fresh longer in an airtight container, while cakes might benefit from being covered. For items like scones, freezing is best for longer preservation, making treats last longer.
What is the best frosting for winter cakes?
The best frosting for winter cakes often depends on the desired aesthetic and flavor profile, but royal icing and cream cheese frosting are top choices. Royal icing is excellent for intricate, crisp decorations and snow effects, offering a festive look. Cream cheese frosting provides a rich, tangy counterpoint to spiced cakes and is easy to pipe the icing smoothly for a velvety texture.
Final Thoughts on Cute Winter Baking Ideas
As the snow falls and the days shorten, embracing the warmth and creativity of cute winter baking ideas can truly chase away winter blues and transform the season into a delightful experience. From the sparkling charm of snowflake cookies to the cozy comfort of cranberry orange scones, each project offers a chance to create something beautiful, delicious, and deeply satisfying. These aren’t just recipes; they are invitations to find joy in the process, share with loved ones, and infuse your home with an irresistible aroma. We’ve provided expert baking advice and easy for beginners steps to ensure your success, turning potential baking challenges into rewarding experiences.
So, grab your apron, preheat your oven, and let these cute winter baking ideas inspire you. Whether you’re making kid-friendly designs or simply enjoying a moment of peace, remember that the act of baking itself can be a powerful antidote to the cold. Which of these winter baking projects will you try first to make your winter 2026 brighter?
Last update on 2026-07-11 at 21:00 / Affiliate links / Images from Amazon Product Advertising API
