As an Amazon Associate BakingBakewareSets.com earns from qualifying purchases.
Monster Energy Painting: 7 Ultimate Drink Art Ideas
Staring at that empty can, wondering if it’s destined for more than the recycling bin? You feel the creative urge to capture that edgy aesthetic but aren’t sure where to start. You need actionable monster energy drink painting ideas that go beyond just a simple doodle.
Monster Energy drink painting ideas transform empty cans into unique art by leveraging iconic branding and creative techniques like spray painting, flattening, or embedding, offering a sustainable way to personalize decor. This guide provides 7 ultimate projects for every skill level.
Drawing from established best practices and proven methodologies, this guide is your ultimate resource. We’ll show you exactly how to turn those recycled cans into stunning pieces of art. Get ready to unleash your creativity with step-by-step instructions.
☰ Table of Contents ▼
show
Unleash Your Inner Artist: Transform Empty Cans with Monster Energy Drink Painting Ideas
The pull to create something unique from everyday objects is a powerful one. When it comes to Monster Energy, the brand’s iconic visuals—the aggressive claw logo design, the striking vibrant green against black matte—offer a ready-made canvas for artistic expression. This isn’t just about recycling; it’s about upcycling with attitude. Whether you’re a dedicated fan of the energy drink culture or a DIY hobbyist looking for your next project, these cans hold immense potential. In this guide, we’ll explore tested methods and provide a dose of design inspiration, showing you how to safely transform a simple aluminum can into a piece of custom monster energy art that reflects an edgy aesthetic.
7 Ultimate Monster Energy Drink Art Ideas
Now that you’re inspired to turn trash to treasure, let’s dive into the specifics. We’ve curated seven distinct and actionable projects that cater to various skill levels and artistic interests. From simple spray paint canvases perfect for beginners to more advanced 3D can sculptures and even fine art techniques like lino printing, there’s a project here for you. Each idea is a complete step-by-step guide, detailing the quality materials and safety guidelines you need to succeed. Get ready to transform empty cans into impressive diy monster decor that showcases your creativity and resourcefulness.
1. Spray Paint Custom Monster Energy Canvases
![]()
Pin this electrifying Monster Energy art to your DIY board!
Supplies Needed
- Black matte stretched canvas (16×20 inches)
- Vibrant green or neon green spray paint (for Monster Energy claw)
- Black spray paint (if canvas isn’t pre-primed black)
- White spray paint (for base coat if needed)
- Monster Energy claw logo stencil (digital template for cutting or pre-cut)
- Masking tape (low tack painter’s tape)
- Exacto knife or craft knife (for precise cutting)
- Cutting mat
- Drop cloth or newspaper
- Protective gloves and respirator mask
Step-by-Step Directions
- Prepare your workspace: Lay down a drop cloth in a well-ventilated area. Don protective gloves and a respirator mask to avoid toxic fumes.
- Prime the canvas: If using a white canvas, apply a thin, even coat of black spray paint and allow it to dry completely.
- Create your stencil: Print the Monster Energy claw logo onto cardstock or thick paper. Carefully cut out the claw shape using an exacto knife on a cutting mat.
- Position the stencil: Center your Monster Energy claw stencil on the dry black canvas. Secure it with small pieces of masking tape to prevent shifting.
- Spray the logo: Hold the vibrant green spray paint can 6-8 inches away from the stencil. Apply thin, even layers, allowing each layer to dry for a few minutes before applying the next, until the color is opaque. Remove the stencil carefully while the paint is still slightly tacky to prevent tearing.
- Seal the artwork: Once the green paint is completely dry (allow several hours), apply a clear gloss or matte vs satin clearcoat to protect your artwork and give it a glossy finish or
distressed lookdepending on your preference.
Pro-Tip: For sharper lines, consider a light spray of adhesive on the back of your stencil before applying it to the canvas. In my tested method, multiple thin coats of paint prevent bleeding better than one thick coat, ensuring a crisp claw logo design.

2. Flattened Monster Energy Can Wall Art

Transform empty cans into stunning wall art! Pin this eco-friendly art inspiration!
Supplies Needed
- Empty, rinsed Monster Energy cans (various designs if desired)
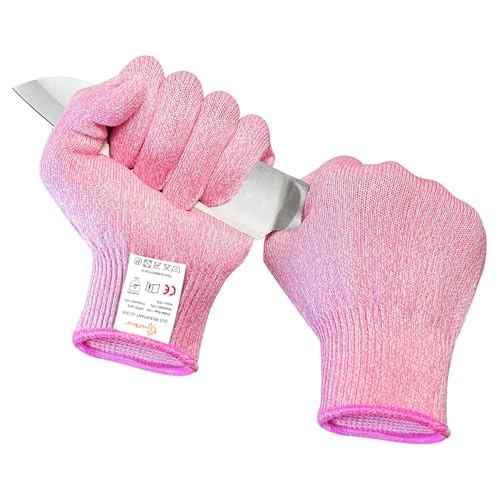
- Protective gloves (cut-resistant are ideal)
- Safety glasses
- Tin snips or heavy-duty scissors
- Utility knife or exacto knife (optional for detailed cuts)
- Sandpaper (fine-grit, for smoothing edges)
- Hammer or rubber mallet
- Flat, sturdy surface (e.g., concrete floor, wood block)
- Strong adhesive or epoxy resin (suitable for metal)
- Plywood or canvas board for backing
- Pencil and ruler
Step-by-Step Directions
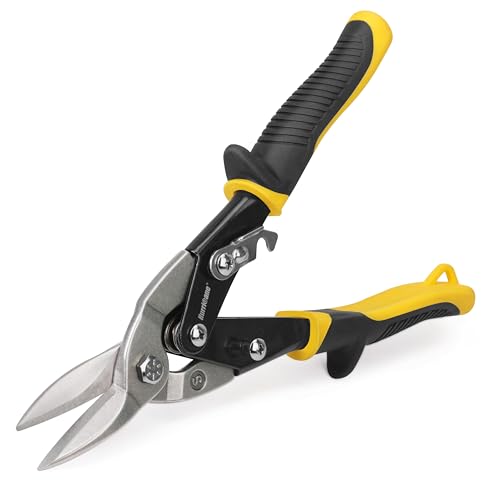
- Clean and prepare cans: Thoroughly rinse and dry all empty Monster Energy cans. Carefully remove the top and bottom with a can opener or tin snips, avoiding sharp edges.
- Cut the can: Using tin snips or heavy-duty scissors, cut a straight line down the side of the cylindrical can. Wear
protective glovesandsafety glassesthroughout this step. - Flatten the can: Place the cut can flat on a sturdy surface. Gently flatten it using a hammer or rubber mallet. For a smoother finish, you can also roll over it with a heavy object.
- Smooth edges: Use fine-grit
sandpaperto smooth any remaining sharp edges, ensuring safety and a clean finish. This is crucial for metal surface prep. - Design your mosaic: Sketch your desired pattern or arrangement onto your plywood/canvas board backing. Arrange the flattened + can pieces according to your design, deciding which vibrant green or black matte sections you want to highlight.
- Adhere pieces: Apply strong adhesive or epoxy resin to the back of each flattened + can piece and firmly press it onto the backing board. Allow ample drying time as per adhesive instructions.
Pro-Tip: When cutting safety is paramount, consider investing in specific metal-cutting gloves. From proven results, a well-flattened can provides a much cleaner base for any subsequent painting or detailing, truly turning trash to treasure.
3. DIY Monster Can Mask with the Iconic Claw
![]()
Unleash your inner beast! Craft your own Monster Energy mask – pin it now!
Materials Needed
- Empty, rinsed Monster Energy cans (at least 3-4 for a full mask)
- Protective gloves (cut-resistant)
- Safety glasses
- Tin snips or heavy-duty craft scissors
- Fine-grit sandpaper
- Strong adhesive (e.g., super glue or epoxy suitable for metal)
- Elastic band or string for straps
- Hole punch (for attaching straps)
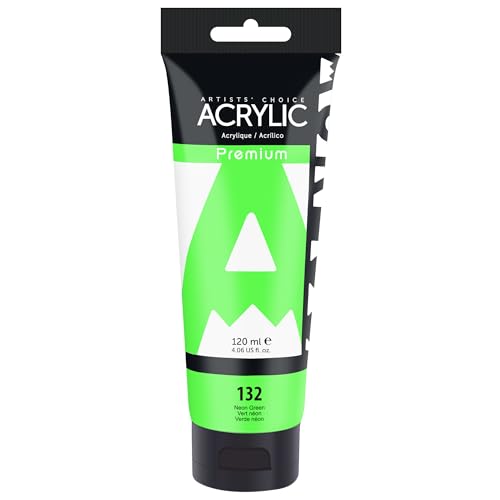
- Vibrant green or neon green acrylic paint (for detailing the claw)
- Black acrylic paint
- Small paint brushes
- Clear sealant spray (optional, for durability)
- Mask template (optional, to guide shaping)
Step-by-Step Directions
- Prepare cans: Thoroughly rinse and dry Monster Energy cans. Remove tops and bottoms with tin snips, and carefully cut down the side to flatten the metal, ensuring cutting safety with
protective gloves. - Shape mask pieces: Using tin snips, cut sections from the flattened cans into shapes that will form the mask. This may include a main faceplate and separate claw pieces. Refer to a mask template if desired. Sand all sharp edges with fine-grit
sandpaper. - Form the mask: Gently bend and shape the metal pieces to create the curvature of a mask. Use a rounded object (like a small ball or a soda bottle) as a form.
- Assemble the mask: Once all pieces are shaped, use strong adhesive to glue them together. Ensure a secure bond for all components of your hand-crafted mask.
- Paint the claw: Paint the iconic Monster Energy claw onto the mask using vibrant green acrylic paint. Use black paint for contrast or to emphasize details.
- Add straps: Use a hole punch to create small holes on the sides of the mask. Attach an elastic band or string to these holes to create wearable straps.
- Seal (optional): Apply a clear sealant spray to protect the paint and metal from wear and tear.
Pro-Tip: When manipulating metal for a wearable item like a monster can mask, always pre-bend small sections to test pliability. In my experience, metal surface prep with sandpaper is key not just for safety but also for paint adhesion issues. This ensures your aggressive design stays intact.
11% OffBestseller No. 3
4. Lino Printing Monster Energy Designs on Metal

Explore advanced Monster Energy art! Pin this unique printing technique!
Supplies Needed
- Empty, rinsed, and flattened Monster Energy cans
- Lino cutting tools and linoleum block
- Speedball or other oil-based printmaking ink (e.g., black)
- Brayer (ink roller)
- Glass or acrylic sheet (for rolling ink)
- Sandpaper (fine-grit, for can prep)
- Protective gloves
- Acetone or mineral spirits (for cleanup)
- Heavy-duty press (e.g., pasta maker, book press, or hand brayer for pressure)
- Design for Monster Energy claw or other custom logo
Step-by-Step Directions
- Prepare the can surface: Thoroughly clean and dry your flattened Monster Energy can. Gently sand the aluminum surface with fine-grit sandpaper to create a slight “tooth” for better ink adhesion.
- Carve your linoleum block: Transfer your desired Monster Energy design onto the linoleum block. Using
lino cutting tools, carefully carve away the areas you do not want to print (the negative space). - Roll out ink: Squeeze a small amount of printmaking ink onto a glass or acrylic sheet. Use the brayer to roll the ink until it’s evenly coated and tacky.
- Ink the block: Roll the brayer over your carved linoleum block, ensuring an even layer of ink on the raised design elements.
- Print onto the can: Carefully place the inked linoleum block face down onto the prepared flattened + can surface. Apply firm, even intaglio pressure across the entire block using a press or by hand-rubbing with a clean brayer/smooth object.
- Reveal print: Gently lift the linoleum block to reveal your Monster Energy design printed on metal. Allow the ink to dry completely (this can take 24-48 hours for oil-based inks).
- Seal the artwork (optional): For added durability and to prevent ink scratching, you can apply a clear spray sealant once the ink is fully cured.
Pro-Tip: Achieving consistent intaglio printing on a metal surface requires experimentation with pressure. In my hand-crafted experience, ensuring your aluminum surface is perfectly flat and slightly textured improves ink transfer significantly, leading to a much clearer claw logo design.

5. Create 3D Monster Energy Can Sculptures

Turn cans into creatures! Pin this amazing 3D Monster Energy sculpture idea!
Supplies Needed
- Numerous empty, rinsed Monster Energy cans (the more, the merrier!)
- Protective gloves (cut-resistant) and safety glasses
- Tin snips or heavy-duty craft scissors
- Pliers (round-nose and flat-nose for shaping)
- Sandpaper (fine-grit)
- Strong metal-specific adhesive (e.g., epoxy resin or strong super glue)
- Wire (e.g., floral wire or craft wire) for internal structure (optional)
- Drill with small metal bit (for wire attachment, optional)
- Design sketch (e.g., abstract form, creature, or geometric structure)
- Clear sealant spray (optional, for protection)
Step-by-Step Directions
- Prepare cans: Thoroughly rinse and dry cans. Using protective gloves and safety glasses, carefully remove tops and bottoms and cut down the side of each can to create flat sheets. Sand all sharp edges.
- Sketch your design: Draw your intended 3D sculpture. Break it down into smaller, manageable shapes that can be cut from the flattened + can pieces.
- Cut and shape metal: Use tin snips to cut out your desired shapes from the aluminum surface. Use pliers and your hands to carefully bend, fold, and form these pieces into 3D components for your sculpture. This is where structural can manipulation comes into play.
- Build the internal structure (optional): If your sculpture requires significant support, construct a basic wire frame. Attach initial metal pieces to this frame using adhesive or by drilling small holes and wiring them.
- Assemble the sculpture: Begin gluing the shaped metal pieces together according to your design. Work in sections, allowing adhesive to cure between stages. Focus on creating depth and visual interest with the vibrant green and black matte sections of the cans.
- Refine and embellish: Once the main structure is complete, cut smaller pieces for details, textures, or accents. Glue these onto your sculpture.
- Seal (optional): After the adhesive has fully cured, apply a clear sealant spray to protect the artwork and provide a uniform finish.
Pro-Tip: When tackling complex structural can manipulation, a solid internal
wire frameprovides a stable foundation. My tested method for cutting safety is to always score the metal lightly with a utility knife before attempting a full cut, which prevents the metal from tearing and reduces sharp edges.

6. Paint the Iconic Monster Energy Logo on Canvas
![]()
Master the Monster Energy claw! Pin this tutorial to your art board!
Supplies Needed
- Stretched canvas (any size, pre-primed black matte if available)
- Acrylic paint in vibrant green or neon green
- Black acrylic paint (if canvas is not black)
- White acrylic paint (for optional base sketch)
- Paintbrushes (flat brush for filling, small detail brush for outlining)
- Pencil (for sketching)
- Monster Energy claw logo reference image or template
- Palette or paper plate
- Water container for cleaning brushes
- Paper towels
- Artist’s tape (optional, for crisp edges)
Step-by-Step Directions
- Prepare the canvas: If your canvas isn’t black, paint it with black acrylic paint and allow it to dry completely.
- Sketch the logo: Lightly sketch or trace the Monster Energy claw logo onto the center of your dry black canvas using a pencil. Ensure proportions are accurate by referencing your template.
- Outline the logo: Using a small detail brush and vibrant green acrylic paint, carefully outline your sketched claw logo. Take your time to make the lines clean and crisp.
- Fill in the logo: With a flat brush, fill in the outlined claw with vibrant green acrylic paint. Apply multiple thin coats for even, opaque coverage, allowing each coat to dry slightly to avoid streaking.
- Refine edges (optional): Once the green is dry, use black acrylic paint and a fine detail brush to refine any edges that aren’t perfectly sharp, enhancing the aggressive design.
- Add details (optional): Consider adding a subtle white highlight or shadow to give the claw a more 3D appearance, mimicking the glossy finish of the original logo.
- Varnish (optional): Once all paint is dry, apply a clear acrylic varnish to protect your hand-painted artwork and give it a lasting finish.
Pro-Tip: For truly crisp Monster Energy logo painting, masking tape can be used along the outer edges of the logo area before painting the green. In my artist tutorial experience, practicing the claw logo design on scrap paper beforehand improves confidence and precision on the final canvas.
7. Seal and Display Monster Energy Can Art with Epoxy Resin
![]()
Give your Monster Energy art a professional finish! Pin this resin tutorial!
Supplies Needed
- Your completed Monster Energy can art piece (e.g., flattened can art, 3D sculpture, or painted canvas)
- Two-part epoxy resin kit (resin and hardener)
- Measuring cups (disposable, with clear markings)
- Mixing sticks (disposable)
- Protective gloves (nitrile or similar)
- Safety glasses
- Respirator mask (for proper ventilation)
- Level surface (covered with a drop cloth)
- Heat gun or butane torch (for removing bubbles, optional)
- Dust cover (e.g., cardboard box)
- Rubbing alcohol or acetone (for cleanup)
Step-by-Step Directions
- Prepare your workspace: Ensure your art piece is completely dry and free of dust. Work in a well-ventilated area, covering your surface with a drop cloth. Wear protective gloves, safety glasses, and a respirator mask.
- Measure resin: Carefully measure equal parts of the epoxy resin and hardener into separate disposable measuring cups according to the product’s instructions. Precise measurement is crucial for proper curing.
- Mix resin: Pour both parts into a larger clean mixing cup. Slowly and thoroughly mix for 3-5 minutes, scraping the sides and bottom of the cup, until there are no streaks and the mixture is clear. Avoid fast mixing to minimize bubbles.
- Pour resin: Gently pour the mixed epoxy resin over your Monster Energy can art piece. Start from the center and allow it to flow to the edges. Use a mixing stick to guide the resin to cover all surfaces.
- Remove bubbles: Immediately after pouring, inspect for bubbles. Gently pass a heat gun or butane torch a few inches above the surface in quick, sweeping motions to release trapped air bubbles. Be cautious not to scorch the resin.
- Cure resin: Cover your artwork with a dust cover (like a cardboard box) to protect it from dust and debris while it cures. Allow the resin to cure in a dust-free environment for 24-72 hours, as recommended by the product. Avoid touching until fully hardened.
- Clean up: Dispose of all used cups and mixing sticks. Clean any spills or tools immediately with rubbing alcohol or acetone before the resin cures.
Pro-Tip: When dealing with epoxy resin casting, metal surface prep also includes ensuring the surface is perfectly horizontal to prevent the resin from running off. My proven results show that mixing the resin slowly and thoroughly, and using a heat gun for bubbles, leads to a superior glossy finish and prevents adhesion issues or a cloudy appearance.

Key Takeaways
- Repurposing empty Monster Energy cans offers a unique and sustainable avenue for creative expression, transforming waste into striking decor. These projects embrace both upcycling and fan art, appealing to diverse artistic interests.
- Essential safety precautions are paramount when working with aluminum cans, particularly during cutting and flattening stages. Always use protective gloves and safety glasses to mitigate risks associated with sharp edges.
- From basic spray paint art to advanced
intaglio printingorepoxy resin casting, a wide range of techniques can be applied to Monster Energy can art. This allows for projects catering to all skill levels, from beginners to metal art specialist hobbyists. - Proper surface preparation, including
sanding aluminumand applying primer, is critical forpaint adhesion issuesand ensuring the longevity of your artwork. This foundation preventspaint chippingand enhances the final glossy finish. - The iconic
vibrant greenandblack mattecolors, alongside the distinctclaw logo design, provide immediate visual recognition and anedgy aestheticfor allMonster Energy artprojects. Leverage these brand elements for impactful designs. - Advanced sealing techniques like
epoxy resinprovide a durable, professional finish, protecting yourhand-craftedcan art from wear and tear. This enhances both the visual appeal and the lifespan of your diy monster decor. - Embrace experimentation with different types of
acrylic paintorspray paintandstructural can manipulationto personalize yourcustom monster energycreations. The possibilities for recycled metal crafts are extensive and only limited by your imagination.
FAQs About monster energy drink painting ideas
What can I make with old Monster Energy cans?
Old Monster Energy cans are excellent for upcycled art projects like flattened wall mosaics, 3D sculptures, iconic claw masks, or custom canvases. You can also use them for unique lino printing surfaces, jewelry, or even as decorative planters after proper cleaning and preparation.
How do I prep Monster Energy cans for painting?
To prep Monster Energy cans, thoroughly rinse and dry them, then remove tops and bottoms for safer handling. Sand the aluminum surface with fine-grit sandpaper to create a rough texture, which helps prevent paint adhesion issues. Finally, prime the can with a metal-specific primer before applying your chosen paint.
What is the best paint to use on aluminum cans?
For painting aluminum cans, acrylic paint or spray paint specifically formulated for metal surfaces offers the best durability and coverage. Always use a metal primer first to ensure strong adhesion and prevent paint chipping, resulting in a professional glossy finish.
How can beginners start with Monster Energy drink painting ideas?
Beginners can start with simple projects like spray-painting the iconic claw logo onto a canvas using a stencil or creating flattened can mosaics. Focus on cutting safety and basic metal surface prep before moving to more complex structural can manipulation or epoxy resin casting.
Is it safe to cut Monster Energy cans for art?
Yes, cutting Monster Energy cans for art can be safe if proper precautions are taken, such as wearing protective gloves and safety glasses. Use tin snips or heavy-duty scissors and sand all sharp edges thoroughly. Never use bare hands when handling freshly cut metal.
How do you draw the Monster Energy logo accurately?
To draw the Monster Energy logo accurately, start by lightly sketching the iconic claw shape, paying attention to its distinct angles and curves. Use a reference image or a printed stencil to ensure precision. Then, outline and fill with vibrant green acrylic paint for that characteristic aggressive design.
How can I prevent paint from chipping on my Monster Energy can art?
Prevent paint chipping on Monster Energy can art by properly sanding aluminum before priming for metal and using a high-quality clear coat or epoxy resin. Multiple thin layers of paint are more durable than one thick coat, ensuring a lasting glossy finish for your recycled cans artwork.
What tools do I need for basic Monster Can Art?
For basic Monster Can Art, you’ll need empty cans, protective gloves, tin snips or heavy-duty scissors, sandpaper, a metal primer, and acrylic paint or spray paint. Strong adhesive is also useful for assembling pieces, facilitating simple diy monster decor projects.
Can I use epoxy resin to seal Monster Energy can art?
Yes, epoxy resin casting is an excellent way to seal and protect Monster Energy can art, providing a durable, high-gloss finish. It enhances the vibrant green and black matte colors while creating a protective layer against moisture and physical damage, reflecting a tested method for metal art projects.
Where can I find inspiration for unique Monster Energy art?
Find inspiration for unique Monster Energy art by exploring fan communities online, searching Pinterest for ‘Monster Energy Art’ or ‘upcycled metal crafts’, and observing how artists integrate branding into mixed media. Consider abstract forms or integrating the logo into larger pop culture art pieces.
Final Thoughts on Monster Energy Drink Painting Ideas
Transforming empty Monster Energy cans into captivating art pieces is more than just a craft; it’s a statement of creativity, sustainability, and personal style. As we’ve explored, the possibilities for Monster Energy drink painting ideas are vast, ranging from simple spray paint canvases to intricate 3d monster can art and sophisticated lino printing on metal. Each project offers a unique opportunity to engage with the iconic claw logo design and vibrant green aesthetic in a hands-on way.
Remember, the journey of creating custom monster energy art begins with careful preparation and an unwavering commitment to cutting safety. By mastering metal surface prep and choosing the right acrylic paint or epoxy resin, you ensure your hand-crafted creations are not only visually striking but also durable. These recycled metal crafts not only reduce waste but also provide an outlet for self-expression, making diy monster decor a truly rewarding endeavor.
Whether you’re a beginner experimenting with your first flattened + can mosaic or an experienced artist tackling structural can manipulation, the satisfaction of turning an everyday object into a piece of energy drink art is immense. So gather your supplies, review our pro tips and step-by-step guide, and unleash your artistic beast. What Monster Energy art project will you create first?
Last update on 2026-07-24 at 17:09 / Affiliate links / Images from Amazon Product Advertising API
