As an Amazon Associate BakingBakewareSets.com earns from qualifying purchases.
Baking Soda Acrylic Paint Ornaments: 7 Easy DIY Ideas
Tired of the same old boring Christmas ornaments? You want that high-end, modern textured look you see in magazines, but don’t want to spend a fortune on new decor. It can be frustrating to find stylish options that don’t break the holiday budget, leaving your tree looking less than festive. This is where baking soda acrylic paint ornaments come to the rescue.
Baking soda acrylic paint ornaments are a DIY craft where a mixture of sodium bicarbonate and acrylic paint is used to create unique textures like matte, stone-like, or even galaxy effects on plain glass or plastic ornaments. This popular upcycling technique gives you a high-end, contemporary look for your holiday decor using simple, budget-friendly materials.
Drawing from proven methodologies and tested ratios, this guide will show you exactly how to achieve professional-looking results. You’ll discover 7 easy DIY ideas, each with step-by-step instructions to transform your ornaments from bland to beautiful. Get ready to create stunning, on-trend decorations that look expensive but are delightfully affordable.
☰ Table of Contents ▼
show
Transform Your Ornaments: Unlock the Magic of Baking Soda Acrylic Paint Ornaments
The secret to achieving that coveted high-end look for your holiday decor is hiding right in your kitchen pantry. By combining baking soda with acrylic paint, you create a wonderfully thick, textural medium that can completely transform any plain ornament. This simple mixture thickens the paint, allowing you to build up a textured surface that mimics everything from rustic terracotta look pottery to a sophisticated matte finish. This DIY method is perfect for anyone looking to upcycle christmas ornaments or create unique, on-trend decor on a budget. It’s a craft that combines basic materials to produce truly extraordinary results, giving your holiday a personal, artisan touch.
7 Easy DIY Baking Soda Acrylic Paint Ornament Ideas to Sparkle Your Season
Ready to get creative? We’ve curated seven distinct and easy-to-follow DIY ideas that showcase the incredible versatility of baking soda paint ornaments. Whether you’re aiming for a minimalist Scandi vibe with stone-like textures or a vibrant, cosmic theme with diy galaxy ornaments, there’s a project here for you. Each idea uses the same core ingredients—baking soda and acrylic paint—but employs different techniques to achieve stunningly different results. These step-by-step guides will walk you through creating everything from a matte finish to a sparkly one, turning plain clear plastic or glass bulbs into custom treasures for your tree.
1. Achieve a Classic Matte Stone-Look on Ornaments

- Pin this genius hack to your ‘Modern Christmas Decor’ board!
This technique is perfect for creating a minimalist, faux ceramic finish on any ornament. By mixing baking soda into neutral-colored acrylic paint, you can easily mimic the sophisticated look of unglazed pottery or smooth stone, turning cheap clear plastic ornaments into elegant decor.
Supplies Needed
- Clear glass or clear plastic ornaments (round or tear-drop shapes recommended for smooth finish)
- Acrylic paint in desired neutral stone-like colors (e.g., warm gray, beige, white, cream)
- Baking soda (sodium bicarbonate)
- Mixing bowls or cups
- Foam brushes or soft flat paintbrushes
- Rubbing alcohol and cotton pads (for prep)
- Optional: Fine-grit sandpaper (for slight distressing after drying)
- Optional: Matte sealer spray (fixative spray)
Step-by-Step Directions
- Prep: Thoroughly clean each ornament with rubbing alcohol to ensure paint adheres to the surface without issues.
- Mix: In a mixing bowl, combine 2 parts acrylic paint with 1 part baking soda. Stir thoroughly until the mixture is a thick consistency but still easily spreadable, free of clumping baking soda. This specific mixture ratio helps create texture.
- Apply: Using a foam brush, apply a thin, even coat of the baking soda paint to the entire outer surface of the ornament. For optimal matte finish and texture, avoid overworking the paint.
- Dry: Hang the ornaments to dry completely, ideally for at least 4-6 hours, or overnight. Ensure proper ventilation to aid slow drying time.
- Second Coat (Optional): If desired, apply a second thin coat for more opaque coverage and deeper texture. Dry again.
- Seal (Optional): Once fully dry, seal with a matte topcoat sealing spray for added durability test and protection against chipping.
Pro-Tip: For a truly authentic stone-like feel, experiment with adding a tiny amount of very fine sand (craft sand) to your baking soda paint mixture. This adds an extra layer of granularity, mimicking natural stone, and elevates your DIY to a professional result. Ensure your proportions maintain paint adhesion.

2. Craft Swirling Galaxy Ornaments

- Save this cosmic DIY to your ‘Out of This World Crafts’ board!
Unleash your inner artist by creating mesmerizing baking soda galaxy ornaments. This method involves pouring a slightly thinned baking soda paint mixture inside a clear ornament, then swirling cosmic colors and fine glitter together to create a nebula effect with a soft, cloudy texture.
Supplies Needed
- Clear plastic or glass ornaments (round recommended for swirling effect)
- Acrylic paint in galaxy colors (dark blue, purple, black, white, silver, pink)
- Baking soda
- Fine glitter (silver, iridescent, or multi-color)
- Optional: Mica powder for added shimmer
- Small squeeze bottles or droppers
- Mixing cups
- Rubbing alcohol (for prep)
- Paper towels
Step-by-Step Directions
- Prep: Clean the inside and outside of the clear plastic ornaments with rubbing alcohol and let dry completely.
- Mix Baking Soda Paint: In separate cups, mix small amounts of each chosen acrylic paint color with a dash of baking soda (about 2 parts paint to 0.5 parts baking soda). The goal is a slightly thickened, not chunky, consistency that will still flow.
- Add Glitter: For selected colors (e.g., black, dark blue), stir in a generous amount of fine glitter or mica powder.
- Pour & Swirl: Carefully pour a small amount of the darkest baking soda paint mixture into the ornament. Gently swirl it around to coat the inside.
- Layer Colors: Drip in small amounts of other galaxy colors and more glitter. Continue to swirl and shake the ornament, allowing the colors to mix and layer naturally to create the cloudy texture and cosmic effect. You can also drip white paint last to mimic stars.
- Drain Excess: Invert the ornament over a paper towel to drain any excess paint mixture.
- Dry: Let the ornaments dry upside down on a drying rack or supported by paper towel rolls for at least 24-48 hours. Ensure full dry time to prevent cracking.
Pro-Tip: To prevent the baking soda paint from becoming too thick for swirling, maintain a slightly thinner consistency than for exterior coating. If it starts to clump, add a tiny drop of water or acrylic polymer medium. For a more intense starry effect, lightly flick white acrylic paint onto the outside of the dried ornament using an old toothbrush.

3. Create Terracotta-Inspired Textured Baubles

- Pin this earthy decor idea to your ‘Rustic Christmas’ board!
Capture the warm, earthy vibe of Mediterranean decor with these terracotta look ornaments. By creating a very thick, almost paste-like mixture of baking soda and terracotta-colored paint, you can achieve a rustic textured surface that transforms a simple plastic bulb into what looks like an authentic clay bauble.
Supplies Needed
- Plain round or teardrop ornaments (any material)
- Acrylic paint in a warm terracotta shade (e.g., burnt orange, muted red-brown)
- Baking soda
- Stiff bristle paintbrush or sponge
- Mixing palette or disposable plate
- Optional: Sandpaper for distressing
Step-by-Step Directions
- Prep: Ensure ornaments are clean and dry. Lightly sand smooth surfaces if paint adhesion is a concern.
- Mix Paint: In a mixing dish, combine 1 part acrylic paint with 1 part baking soda. Stir vigorously until the mixture is very thick consistency, almost like a paste. This high baking soda content is key for the terracotta look.
- Apply Texture: Using a stiff bristle brush or sponge, generously apply the thickened acrylics mixture to the entire ornament surface. Dab, stipple, or drag the brush to create an intentional textured surface with ridges and peaks, mimicking unglazed pottery. Ensure uneven coverage in some areas for authenticity.
- Dry: Hang the ornaments in a well-ventilated area to dry completely for at least 12-24 hours. The thick paint will require longer dry time.
- Optional Distressing: Once fully dry, lightly buff raised areas with fine-grit sandpaper to reveal subtle variations and enhance the rustic appeal.
- Seal: Finish with a clear matte sealant for long-lasting finish and protection.
Pro-Tip: The key to a convincing terracotta look is the granularity levels. A 1:1 ratio of baking soda to paint is a good starting point, but don’t be afraid to add a little more baking soda if you want an even rougher, more porous surface. Test on a small area first to find your ideal texture.

4. Upcycle Dollar Tree Ornaments with a Speckled Finish

- Transform your Dollar Tree finds! Pin this budget DIY now!
This budget friendly christmas ornament diy is all about transformation. Take those inexpensive Dollar Tree ornaments and give them a complete makeover with a modern, speckled finish. A base coat of baking soda paint provides the perfect canvas for flicking on contrasting paint speckles, instantly elevating them from cheap vs expensive.
Supplies Needed
- Dollar Tree ornaments (plastic or glass)
- Acrylic paint in a base color (e.g., cream, light gray, soft green)
- Contrasting acrylic paint for speckles (e.g., dark brown, black)
- Baking soda
- Old toothbrush or stiff bristle brush
- Mixing cups
- Rubbing alcohol (for prep)
- Drop cloth or newspaper
Step-by-Step Directions
- Prep: Clean the Dollar Tree ornaments thoroughly with rubbing alcohol. Ensure they are dry.
- Base Coat Mix: Mix 2 parts base color acrylic paint with 1 part baking soda until smooth. This ensures a thick consistency for good coverage over existing ornament finishes.
- Apply Base: Coat each ornament with 1-2 even layers of the baking soda paint mixture. Allow to dry completely between coats.
- Speckle Mix: In a separate, smaller cup, mix a tiny amount of contrasting acrylic paint with a few drops of water to create a very thin, watery consistency.
- Create Speckles: Lay down a drop cloth or newspaper. Dip an old toothbrush or stiff bristle brush into the thin contrasting paint. Hold the ornament in one hand and, with your thumb, gently flick the bristles of the brush towards the ornament to create a speckled finish. Experiment with distance for different size speckles.
- Dry: Let the ornaments dry thoroughly for several hours.
- Seal (Optional): Seal with a clear matte or satin spray sealant for added protection.
Pro-Tip: When you upcycle christmas ornaments, especially plastic ones from Dollar Tree, a light sanding before applying the baking soda paint can significantly improve adhesion and prevent flaking texture. Always use a non-toxic materials paint if children are involved.

5. Design Frosted Winter Wonderland Ornaments

- Get that gorgeous frosted look! Pin for your ‘Cozy Winter Decor’ ideas!
Create a serene winter scene on your tree with these elegant frosted ornaments. A light application of white or icy blue baking soda paint gives clear plastic ornaments a delicate, granular texture that perfectly mimics the look of freshly fallen snow or a pane of frosted glass.
Supplies Needed
- Clear plastic or glass ornaments (various sizes)
- Acrylic paint in white, light blue, or silver
- Baking soda
- Soft flat paintbrush or foam brush
- Mixing cups
- Rubbing alcohol
Step-by-Step Directions
- Prep: Clean ornaments thoroughly with rubbing alcohol.
- Mix Frosted Paint: In a mixing cup, combine 2 parts acrylic paint (white or light blue) with 0.5-1 part baking soda. Stir until the mixture is smooth with a slightly grainy, but still fluid, thick consistency. This ratio helps create texture for a delicate frosted look.
- Apply Lightly: Using a soft flat brush or foam brush, apply a thin, even coat of the baking soda paint to the entire outer surface of the ornament. For a subtle, frosted appearance, one light coat might be enough.
- Add Fine Sparkle (Optional): While the paint is still wet, sprinkle a tiny amount of very fine glitter (white or iridescent) over the surface for a shimmering ice effect.
- Dry: Hang ornaments to dry in a well-ventilated area for at least 4-6 hours.
- Second Coat (Optional): If a denser frosted look is desired, apply a second thin coat once the first is completely dry.
- Seal (Optional): For long-lasting finish, seal with a clear matte spray.
Pro-Tip: To prevent uneven coverage and achieve a smooth, frosted look, ensure your baking soda paint is mixed well without lumps. If the paint is too thick, add a drop or two of water. If too thin, add a pinch more baking soda. The goal is a delicate texture, not a heavy one.

6. Apply an Ombre Textured Effect to Ornaments

- Master the ombre trend! Pin this stylish DIY!
Combine two trends in one with these gorgeous ombre textured ornaments with baking soda. This technique involves blending multiple shades of baking soda paint on the ornament’s surface to create a seamless color gradient, all while maintaining that signature tactile finish.
Supplies Needed
- Plain round ornaments (glass or plastic)
- Acrylic paint in 2-3 shades of the same color family (e.g., dark blue, medium blue, light blue)
- Baking soda
- Foam blending brushes
- Mixing palette
- Rubbing alcohol
Step-by-Step Directions
- Prep: Clean ornaments with rubbing alcohol and ensure they are dry.
- Mix Paints: In separate sections of your palette, mix each acrylic paint shade with baking soda (approximately 2 parts paint to 1 part baking soda). Adjust for a smooth, thick consistency suitable for blending.
- Apply Darkest Shade: Start at the bottom of the ornament. Using a foam brush, apply the darkest baking soda paint shade in an even coat, covering about a third of the ornament.
- Apply Mid Shade: Immediately above the darkest shade, apply the medium shade, overlapping slightly. Use a clean, dry brush to gently blend the two colors where they meet.
- Apply Lightest Shade: Repeat with the lightest shade at the top, blending where it meets the mid-shade.
- Smooth Transition: Continue to gently blend any harsh lines by dabbing or lightly brushing. The goal is a seamless ombre effect with a consistent textured surface.
- Dry: Hang the ornaments to dry completely, ideally overnight.
- Seal (Optional): For a long-lasting finish, seal with a clear matte spray.
Pro-Tip: Achieving a smooth ombre effect with baking soda paint requires quick work, as the mixture can dry fast. Work in small sections and have all your colors pre-mixed. If paint starts to clump, slightly dilute with a drop of water. Consider starting with the lightest color at the top and working down, as it’s often easier to blend darker colors into lighter ones.

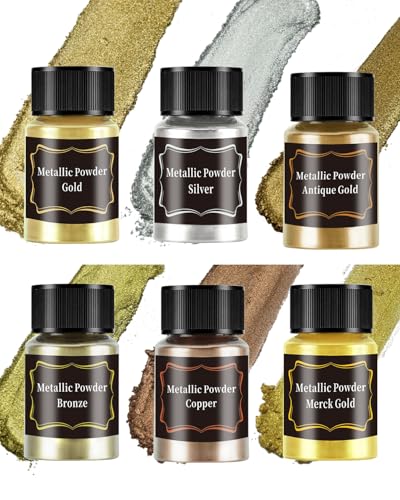
7. Finish Ornaments with a Metallic Dust Look

- Add a touch of luxury! Pin this metallic DIY for your holiday decor!
For a touch of glam, give your ornaments a subtle metallic dust finish. This two-step process involves creating a textured base with baking soda paint and then gently buffing a metallic pigment powder onto the dried surface. The result is a luxurious, aged-metal effect that looks incredibly sophisticated.
Supplies Needed
- Plain ornaments (glass or plastic)
- Acrylic paint in a base color complementary to your metallic dust (e.g., black for silver, brown for gold, muted pink for rose gold)
- Baking soda
- Dry metallic pigment powder or very fine metallic glitter (gold, silver, rose gold, bronze)
- Soft, dry paintbrush (for dusting)
- Small mixing cup
- Clear matte or satin sealant spray
- Rubbing alcohol
Step-by-Step Directions
- Prep: Clean ornaments thoroughly with rubbing alcohol.
- Mix Base Paint: Combine 2 parts base color acrylic paint with 1 part baking soda. Stir to achieve a smooth, thick consistency that will provide a good base textured surface.
- Apply Base: Apply a thin, even coat of the baking soda paint to the entire ornament. Allow to dry completely (4-6 hours).
- Dust Metallic: Once the base coat is thoroughly dry, dip a soft, dry paintbrush into your metallic pigment powder or fine glitter. Gently dust and buff the powder onto the textured surface of the ornament. The texture will help the metallic dust adhere, creating a subtle sheen.
- Build Intensity: Continue applying metallic dust in light layers until you achieve your desired sparkly finish and intensity.
- Seal: Finish with 2-3 light coats of clear matte or satin sealant spray to protect the metallic dust and ensure a long-lasting finish.
Pro-Tip: For optimal adhesion of metallic dust, ensure the baking soda paint base coat is completely dry before dusting. If the dust isn’t adhering well, apply a very thin layer of Mod Podge or clear craft glue first, let it get tacky, then dust. This creates a stronger surface tension for the pigment to bond.
Key Takeaways
- Baking soda and acrylic paint transform plain ornaments into unique, textured decor. This versatile DIY method allows you to achieve various on-trend looks, from matte finish to stone-like and sparkly effects, using readily available materials.
- Mastering the paint-to-baking soda ratio is crucial for desired texture. A 2:1 paint-to-baking soda ratio creates a more subtle texture, while a 1:1 ratio yields a denser, more terracotta look, preventing issues like clumping baking soda.
- Upcycling is a core benefit, especially for Dollar Tree ornaments. This technique provides a budget friendly christmas ornament diy by giving inexpensive or old ornaments a sophisticated, high-end look with minimal effort.
- Proper preparation and drying are essential for a long-lasting finish. Cleaning ornaments with rubbing alcohol and ensuring adequate dry time (often 12-24 hours) prevents cracking paint and ensures your baking soda paint adheres correctly.
- Experiment with techniques like swirling, dabbing, and dusting for diverse finishes. Whether aiming for galaxy ornaments or a speckled finish, vary your application method and consider adding fine glitter or metallic dust for extra flair.
- Sealing your finished ornaments protects the textured surface. A clear matte or satin sealant spray provides added durability test and ensures your beautiful baking soda paint ornaments remain vibrant for years to come.
- Troubleshooting common issues like flaking or bubbling enhances your crafting experience. Understanding paint viscosity adjustment and proper mixing can help you solve problems proactively and achieve professional results.
People Also Ask About Baking Soda Acrylic Paint Ornaments
What does baking soda do to acrylic paint?
Baking soda, when mixed with acrylic paint, acts as a thickening agent and textural additive, transforming the paint into a thick, often matte or granular consistency. This allows crafters to create unique textured surface effects like stone-like, terracotta look, or a cloudy texture suitable for baking soda galaxy ornaments, expanding creative possibilities beyond smooth finishes.
Can you use baking powder instead of baking soda for paint?
No, baking powder is not a suitable substitute for baking soda in paint recipes as it contains additional ingredients like cream of tartar and cornstarch that can alter the paint’s chemistry and texture differently. Baking powder is designed to react with liquid and heat to produce gas, which can cause excessive bubbling or an undesirable consistency in your baking soda paint ornaments.
How much baking soda to add to paint for texture?
The ideal ratio of baking soda to paint for texture varies depending on the desired outcome, but common recommendations range from 2 parts paint to 1 part baking soda for subtle texture, to a 1:1 ratio for a very thick, paste-like consistency. It’s always best to start with less baking soda, gradually mixing and testing on a scrap surface to achieve your preferred textured surface without making the paint too thick or causing clumping baking soda.
Does baking soda paint flake off glass ornaments?
Baking soda paint can flake off glass ornaments if the surface is not properly prepared or if the paint mixture is too thick and brittle. To prevent flaking texture, ensure the glass is thoroughly clean with rubbing alcohol before applying paint, and use a sealant spray after the paint is fully dry. Maintaining a suitable mixture ratio also helps improve adhesion.
How long do baking soda ornaments take to dry?
Baking soda ornaments generally require a longer dry time than standard acrylic paint, often taking 4-24 hours depending on the thickness of the application, humidity, and ventilation. Heavily textured or multi-layered ornaments might need up to 48 hours for a complete cure. Rushing the dry time can lead to cracking paint or a tacky finish, so patience is key.
Can you seal baking soda paint?
Yes, it is highly recommended to seal baking soda paint to protect the textured surface and ensure a long-lasting finish for your ornaments. A clear matte or satin sealant spray works best, applied in several light coats once the paint is completely dry. This prevents chipping, flaking, and provides added durability test to your baking soda acrylic paint ornaments.
Why is my baking soda paint bubbling?
Bubbling in baking soda paint typically occurs if the mixture is stirred too vigorously, trapping air, or if there’s a slight chemical reaction (effervescence in crafts) with paint components, though less common with acrylics. To minimize bubbles in paint, stir slowly and thoroughly, let the mixture sit for a few minutes before applying, and ensure your baking soda is fresh.
How do you make ornaments look like stone with baking soda?
To make ornaments look like stone with baking soda, combine acrylic paint in a neutral, earthy tone (like gray, beige, or white) with baking soda at a 1:1 or slightly higher baking soda ratio for a very dense, textural paste. Apply this thickened acrylics mixture generously, dabbing and stippling to create a rough, stone-like textured surface. A matte sealant spray will enhance the faux ceramic finish.
Can kids make baking soda paint ornaments?
Yes, kids can safely make baking soda paint ornaments, making it a fantastic child-safe crafting activity. Ensure adult supervision, use non-toxic materials (child-safe acrylic paints), and prepare the paint mixture beforehand to simplify the process. This craft allows for creative exploration of baking soda paint texture with minimal mess.
What is the best paint for clear plastic ornaments?
The best paint for clear plastic ornaments, especially when combined with baking soda, is acrylic paint due to its strong adhesion, quick drying time, and wide range of colors. Look for craft acrylics designed for multi-surface use. Proper surface preparation, like cleaning with rubbing alcohol, significantly improves paint adhering to the clear plastic and ensures a durable textured surface.
Final Thoughts on Baking Soda Acrylic Paint Ornaments
You’ve now unlocked the incredible potential of baking soda acrylic paint ornaments to elevate your holiday decor. From rustic terracotta look baubles to sparkling diy galaxy ornaments, this simple yet powerful technique allows you to transform plain, even dollar tree ornaments, into high-end look pieces. By understanding the core principles—the right mixture ratio, proper surface preparation, and patient dry time—you can confidently create texture that mimics stone, frost, or a unique speckled finish. We’ve covered 7 easy DIY ideas, each offering a distinct aesthetic and practical application, ensuring your crafting experience is both rewarding and successful.
Remember, the true beauty of baking soda paint ornaments lies in their versatility and the personal touch they add to your home. Don’t be afraid to experiment with colors, textures, and even the addition of fine glitter or metallic dust to make each ornament truly your own. With the expert tips and step-by-step guide provided, you’re well-equipped to avoid common pitfalls like cracking paint or flaking texture and achieve a long-lasting finish. Get ready to impress your guests and infuse your space with handmade charm this July 2026 season!
Which of these textured christmas ornaments ideas are you most excited to try first? Share your crafting plans in the comments below
Last update on 2026-07-25 at 21:00 / Affiliate links / Images from Amazon Product Advertising API
