As an Amazon Associate BakingBakewareSets.com earns from qualifying purchases.
Baking Soda Rocket: 7 Steps to High-Flying STEM Fun
Ever wonder if you could launch a real rocket right from your backyard? You’re looking for a fun, hands-on science project that’s both exciting and educational, but many seem too complicated or require expensive materials. This is where the simple, high-flying fun of a baking soda rocket comes in.
Making a baking soda rocket involves a chemical reaction between baking soda and vinegar to produce carbon dioxide gas, which builds pressure inside a sealed bottle, ultimately expelling a cork and propelling the bottle into the air. This easy-to-build project offers a fun and educational introduction to physics and chemistry, using simple household ingredients.
Drawing from proven methods and established scientific principles, this guide will walk you through every step. You’ll discover not only how to build and launch your rocket but also how to optimize it for maximum height. Get ready to transform your backyard into a launchpad for some serious STEM fun.
☰ Table of Contents ▼
show
7 Steps to Launch Your Own Baking Soda Rocket for Maximum Fun and Flight
Building your very own homemade rocket experiment is one of the most rewarding STEM education activities you can do. It’s a fantastic science fair project that combines creativity with the core principles of chemistry and physics. This step by step guide to building a bottle rocket is designed to be straightforward, safe, and incredibly fun. We’ll cover everything from gathering your materials to analyzing your rocket’s flight, ensuring you have everything you need to launch a rocket successfully and understand the science that makes it soar.
1. Gather Your Rocket Launch Supplies

Pin this brilliant supplies checklist to your “Science Experiments for Kids” board!
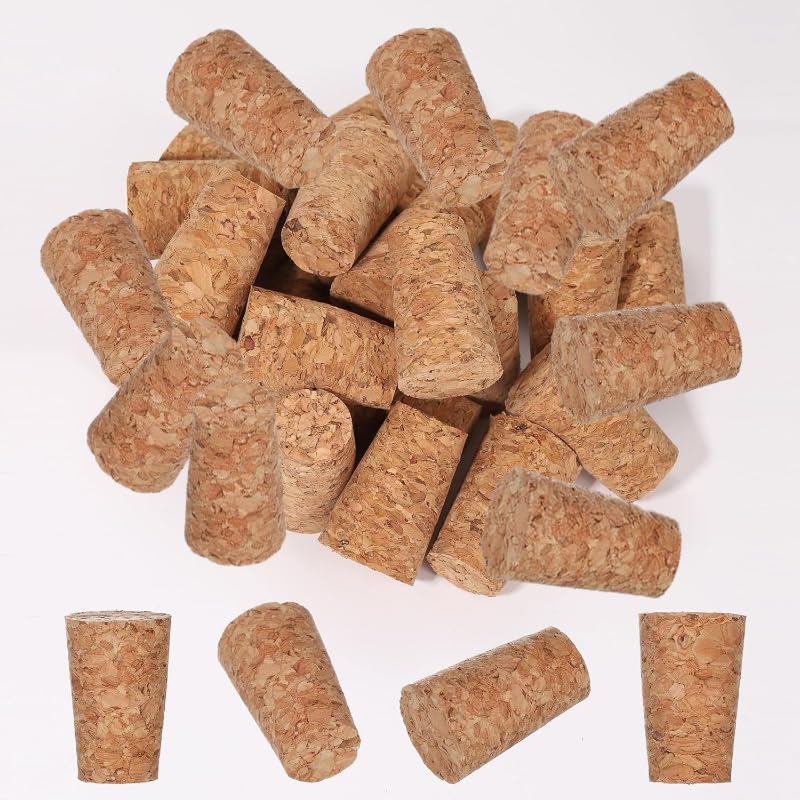
Before you begin your DIY rocket science adventure, you’ll need to gather a few simple materials. Most of these are common household ingredients, making this an accessible and affordable project. The most important items are a sturdy bottle and a cork that seals it perfectly.
Supplies Needed
- An empty plastic bottle (a small 500ml bottle works well for a water bottle rocket, but a 2-liter also works for bigger launches).
- A tightly fitting cork (ensure it creates a strong seal in the bottle opening).
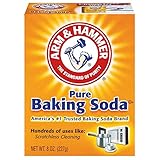
- Baking soda (sodium bicarbonate).
- White vinegar (acetic acid).
- Tissue paper or a paper towel square (to hold the baking soda).
- Measuring spoons (teaspoon, tablespoon).
- Safety goggles (essential for eye protection).
- Funnel (optional, for pouring vinegar).
- Outdoor launch pad (a flat, clear surface).
Step-by-Step Directions
- Collect all your household ingredients and equipment in one place.
- Inspect your chosen plastic bottle for any cracks or weaknesses.
- Test the cork’s fit: It should be snug but removable with firm pressure.
- Put on your safety goggles recommended before proceeding with any other steps.
Pro-Tip: For the highest launching baking soda and vinegar rocket recipe, ensure your cork forms a perfect, airtight seal. A slightly tapered cork often provides the best seal and prevents a leaking cork, which can lead to a no launch scenario.
2. Prepare Your Bottle Rocket Body & Fins

Pin this creative bottle rocket design for your next science fair project!
While not strictly required, adding fins and a nose cone is a crucial step for improving your rocket’s performance. This part of the bottle rocket project is where you can get creative and learn about the basics of aerodynamics. A well-designed rocket is a stable rocket.
Supplies Needed
- Your empty plastic bottle
- Cardboard or craft foam (for fins and nose cone)
- Scissors
- Strong adhesive (e.g., hot glue, duct tape, or waterproof super glue for durability)
- Markers, paints, or stickers (for decoration)
Step-by-Step Directions
- Cut out 3-4 identical triangular or fin shapes from cardboard or craft foam. These will act as stabilizing fins.
- Attach the fins equidistant around the bottom (which will be the top during flight) of your bottle rocket using strong adhesive. Ensure they are straight and firmly secured.
- Create a simple nose cone from cardboard or a small, lightweight plastic cup, and attach it to the bottle’s base (which will be the top when inverted for launch).
- Decorate your rocket! This is a great opportunity for creativity and personalization for your diy rocket science project.
Pro-Tip: Proper fin stabilization is crucial for preventing rocket falls over and achieving a straight, high flying trajectory. Ensure your fins are evenly spaced and securely attached to the bottle.
3. Prepare Your Baking Soda Packet

Learn the secret to a perfect baking soda rocket launch with this simple prep step!
The “fuse” for your rocket is a small packet of baking soda wrapped in tissue paper. This simple trick delays the chemical reaction just long enough for you to seal the bottle and get to a safe distance. This answers the common question, “why use a tissue paper for baking soda?“—it’s all about timing!
Supplies Needed
- Baking soda
- Tissue paper or a small square of paper towel
- Measuring spoons (e.g., 1-2 tablespoons)
Step-by-Step Directions
- Measure out 1-2 tablespoons of baking soda. For your first launch, start with 1.5 tablespoons.
- Place the measured baking soda in the center of a single ply of tissue paper.
- Fold the tissue paper around the baking soda to create a small, compact packet. The goal is to enclose the powder completely but loosely enough for it to dissolve quickly.
- Twist the ends of the tissue paper gently to secure the packet. This packet ensures the baking soda and vinegar reaction doesn’t start too soon.
Pro-Tip: The tissue paper acts as a fuse, providing you with precious seconds to seal the bottle and place it on the ground before the carbon dioxide gas starts rapidly expanding. If your baking soda rocket not launch, it could be that the tissue dissolved too fast or too slow.
4. Optimize Your Baking Soda and Vinegar Ratio

Unlock the secret to highest launching baking soda rocket flights!
Finding the perfect fuel mixture is key to learning how to make a rocket go higher with baking soda? The ratio of vinegar to baking soda directly controls the amount of carbon dioxide gas produced. While a tested ratio is a great starting point, the real fun comes from experimenting with vinegar and baking soda ratios to achieve maximum thrust.
Supplies Needed
- Vinegar
- Baking soda packet (prepared in step 3)
- Plastic bottle
- Measuring cups (for vinegar)
Step-by-Step Directions
- Start with a recommended ratio: For a standard 500ml bottle, try 1.5 tablespoons of baking soda and 1/4 cup (about 60ml) of vinegar.
- Experiment by slightly adjusting these amounts. You might try increasing the vinegar by 10-20ml or the baking soda by half a tablespoon on subsequent launches.
- Observe and record your results. Does more vinegar or baking soda lead to a higher flying rocket?
- Understand that the ideal ratio aims for a complete chemical reaction without excess of either reactant, maximizing the compressed CO2 and subsequent pressure.
Pro-Tip: The stoichiometry of reaction between acetic acid and sodium bicarbonate indicates a roughly 1:1 molar ratio. For practical purposes, a slight excess of vinegar (the acid) often ensures all the baking soda reacts, generating maximum carbon dioxide gas for highest launching potential.

5. Prepare Your Launch Area Safely

Safety first! Find the perfect outdoor space for your baking soda rocket fun.
Safety is the most important aspect of any science experiment. Before you even think about mixing your ingredients, you need to identify where to launch a baking soda rocket safely? This is a mandatory outdoor experiment, and ensuring you have a clear, open space is non-negotiable.
Supplies Needed
- Large, open outdoor space
- Clear boundaries or markers (optional)
- Your assembled baking soda rocket
- Safety goggles (for all participants)
Step-by-Step Directions
- Choose a large, open outdoor space for your launch, such as a grassy field or playground. Ensure there are no overhead obstructions (trees, power lines) or nearby people, animals, or breakable objects.
- Establish a safe launch zone. Mark a perimeter (at least 10-15 feet away from the launch site) where all observers must stand.
- Ensure all participants are wearing safety goggles. This is a safety first priority for your baking soda rocket experiment.
- Confirm that adult supervision required is in place throughout the entire activity.
Pro-Tip: Wind can significantly impact your baking soda rocket‘s trajectory. Choose a day with minimal wind for a more controlled and predictable flight. Always launch away from buildings or roads to prevent unintended landings and ensure outdoor safety.

6. Execute Your High-Flying Rocket Launch

Watch your homemade rocket experiment soar with this crucial launch technique!
This is the moment of truth! The successful launch of your baking soda rocket depends on a quick and coordinated sequence of actions. The goal is to combine the ingredients and seal the bottle before the pressure builds too much.
Supplies Needed
- Your assembled baking soda rocket
- Vinegar (measured for your optimal ratio)
- Baking soda packet (prepared in tissue paper)
- Funnel (optional)
- Your designated safe outdoor launch pad
Step-by-Step Directions
- Carefully pour your measured vinegar into the plastic bottle. Using a funnel can help prevent spills.
- Quickly but gently drop the baking soda packet into the bottle, ensuring it falls into the vinegar without getting stuck to the sides.
- Immediately and firmly press the cork into the bottle opening. Ensure it’s a tight seal.
- Quickly invert the bottle, placing it cork-down on your launch pad.
- Step back immediately to your designated safe zone and watch for the launch. The pressure will build until the cork pops out, launching your baking soda rocket.
Pro-Tip: Timing is critical! The moment the baking soda packet hits the vinegar, the chemical reaction begins. You need to seal and invert the bottle within a few seconds to build sufficient internal pressure for a powerful launch. A slow reaction can lead to a weak launch or a no launch at all.
7. Analyze Your Rocket’s Flight & Iterations

Turn your baking soda rocket launches into a real science fair project!
The launch is exciting, but the learning doesn’t stop there. By observing and analyzing your rocket’s flight, you can turn this fun activity into a genuine scientific experiment + hypothesis exercise. This is what elevates a simple craft into a valuable science fair project.
Supplies Needed
- Notepad and pen or a science journal
- Measuring tape
- Stopwatch or phone timer
- Your baking soda rocket (for re-launching!)
Step-by-Step Directions
- Observe your rocket’s flight path, height, and stability. Did it go straight up, or did it wobble? How high did it reach?
- Record your observations. Note the amounts of baking soda and vinegar used, the bottle size, and a description of the flight.
- Hypothesize what variables could change the outcome (e.g., more baking soda, different fins, warmer vinegar).
- Repeat the experiment, changing only one variable at a time (e.g., use a slightly different ratio of vinegar). This iterative process is key to true science fair project learning.
- Discuss your findings and the physics of flight with your adult supervision required partner, connecting your observations to concepts like Newton’s Third Law and aerodynamic drag.
Pro-Tip: To truly understand how high can a baking soda rocket go?, measure the approximate height using a visual reference or a simple clinometer. This allows for quantitative data-driven results and a more rigorous experiment + hypothesis approach, crucial for a serious science fair project.
The High-Flying Physics and Chemistry of Your Baking Soda Rocket
Have you ever wondered why does a baking soda rocket fly? The thrilling launch you just witnessed isn’t magic—it’s a perfect, small-scale demonstration of fundamental scientific principles. The entire flight is powered by a combination of a simple chemical reaction and one of the most famous laws in physics. Understanding this science is what makes this project so valuable for STEM education.
The Chemical Reaction: Fueling Your Flight
The heart of your rocket is the powerful baking soda and vinegar reaction. When you mix baking soda (a base, or alkaline reactant, called sodium bicarbonate) with vinegar (an acid, called acetic acid), they undergo a classic acid-base reaction. This effervescent reaction instantly creates a huge volume of carbon dioxide gas (CO2), the same bubbles you see in soda. In the open air, this is just a fizzy mess. But inside your sealed bottle, that gas becomes the powerful fuel for your rocket’s propulsion system.
Pro-Tip: The rapid generation of carbon dioxide gas in a confined space is what creates the immense pressure needed for launch. This fizzy rocket principle is a direct demonstration of a basic household chemistry rocket at work.
Newton’s Third Law: Action and Reaction
Once the pressure inside the bottle becomes too great, it forces the bottle‘s cork out with incredible speed. This moment perfectly demonstrates physics, specifically Newton’s Third Law of Motion. The law states that for every action, there is an equal and opposite reaction.
* The Action: The rocket forcefully expels the cork and a plume of carbon dioxide gas downwards.
* The Reaction: The bottle is pushed with equal force in the opposite direction—upwards into the sky!
This simple action-reaction principle is the basis for all rocketry, from your baking soda rocket to the massive rockets used by NASA. The downward thrust generation creates the upward flight.
Pro-Tip: The longer the carbon dioxide gas is forcefully expelled, the greater the impulse and momentum transferred to the rocket. This is why a tightly sealed cork and a strong initial burst are key to a powerful thrust generation.
Advanced Physics of Rocketry (Optional Deep Dive)
For older students or those preparing a detailed science fair project, you can explore even deeper concepts of Newtonian mechanics. The flight of your rocket is also affected by its aerodynamics.
* Center of Gravity: This is the rocket’s balance point. A stable design keeps this point forward.
* Center of Pressure: This is the point where aerodynamic forces act. Proper fin stabilization ensures the center of pressure is behind the center of gravity, preventing the rocket from tumbling.
* Aerodynamic Drag: Air resistance slows your rocket down. A pointed nose cone helps reduce drag.
* Parabolic Trajectory: Due to gravity, your rocket will fly in an arc, not a straight line.
Understanding these advanced concepts allows you to make more precise adjustments to your design for even better performance.
Pro-Tip: For truly accurate flight, the center of pressure (the point where aerodynamic forces effectively act) must be located behind the center of gravity. This ensures the rocket remains stable during its parabolic trajectory and resists tumbling.
Safety First! Important Precautions for Your Baking Soda Rocket Launch
While this is a fun and educational experiment, it’s crucial to remember that you are dealing with a pressurized vessel. Adhering to strict safety rules is non-negotiable to ensure the activity remains a positive learning experience. These high pressure bottle rocket safety tips are essential for every launch.
Your Essential Baking Soda Rocket Safety Checklist
Follow this proven method for safety to create a controlled environment for your launch. This checklist is a critical part of the verified experiment.
Supplies Needed
- All participants must have safety goggles
- A responsible adult must be present (adult supervision required)
- A designated clear outdoor space
Step-by-Step Directions
- Always wear safety goggles recommended before handling any materials or beginning the experiment.
- Ensure adult supervision required at all times.
- Conduct the experiment in a large, open outdoor space away from people, animals, buildings, and breakable objects.
- Do not aim the baking soda rocket at anyone or anything.
- Never look directly into the bottle once the cork has been inserted.
- Use only plastic bottles; glass bottles can shatter under pressure.
- Keep a safe distance from the launch area once the rocket is inverted.
- Do not try to force a cork that is stuck or remove it once pressure has built.
Pro-Tip: While the chemical reaction itself is generally safe, the force generated by the compressed CO2 can be significant. Prioritizing safety first ensures that the baking soda rocket remains a fun and educational activity, not a source of unexpected injury.
Baking Soda Rocket Not Launching? Common Problems & Quick Fixes
It can be frustrating when your rocket sputters instead of soaring. Don’t worry! A no launch scenario is a valuable learning opportunity. Here’s some troubleshooting for the most common issues.
Problem: The Rocket Won’t Launch (No Launch)
If your rocket sits on the pad and does nothing, it’s usually an issue with the reaction or the pressure.
* The Fix: Check your baking soda packet. If the tissue was too thick, the reaction might be too slow or hasn’t started. Gently swirl the bottle (from a safe distance, if possible) to help it mix. Also, ensure your baking soda and vinegar are fresh; old ingredients can be less reactive. Finally, you might have not enough pressure because the cork isn’t sealed tightly enough.
Problem: The Cork Leaks or Pops Out Too Early
If you hear a hissing sound or the cork pops out with a fizzle instead of a bang, you have a seal problem.
* The Fix: This is a classic leaking cork issue. The cork isn’t creating an airtight seal, allowing pressure to escape before it builds to launch levels. Find a more tightly fitting cork. A slightly tapered wine cork often works better than a straight-sided one. You can also try wrapping the cork with a small amount of electrical tape for a snugger fit.
Problem: The Rocket Flies Crooked or Tumbles (Unstable Flight)
If your rocket launches but immediately flips over or flies erratically, the problem is with its aerodynamics.
* The Fix: This is an issue of unstable flight. Your fins are likely the culprit. Make sure you have at least three fins, that they are attached securely, and that they are spaced evenly around the bottle. They should also be perfectly straight. A well-designed nose cone can also help keep the rocket flying straight.
FAQs About Baking Soda Rocket
How do you make a baking soda rocket?
You make a baking soda rocket by combining baking soda and vinegar inside a sealed plastic bottle with a tightly fitting cork. The resulting chemical reaction produces carbon dioxide gas, which builds pressure until the cork is expelled, launching the bottle into the air. Ensure you have adult supervision required and wear safety goggles recommended.
Why does a baking soda rocket fly?
A baking soda rocket flies due to the rapid production of carbon dioxide gas from the chemical reaction between baking soda and vinegar. This gas creates immense pressure inside the sealed bottle. When the pressure becomes too great for the cork to hold, the gas rapidly escapes, propelling the bottle upwards in accordance with Newton’s Third Law of motion.
What is the best ratio for vinegar and baking soda?
For optimal launch of a 500ml bottle rocket, a common effective ratio is 1.5 tablespoons of baking soda to 1/4 cup (60ml) of white vinegar. However, the best ratio for vinegar and baking soda can vary slightly depending on bottle size and desired flight height. Experimenting with small adjustments to this tested ratio will help you achieve the highest launching results.
Is baking soda and vinegar safe for kids?
Yes, baking soda and vinegar are generally safe for kids to use in experiments, but the baking soda rocket project requires strict safety precautions. Safety goggles recommended are essential to protect eyes from the launched rocket and any chemical splashes. Additionally, adult supervision required is paramount, and the launch must always occur in a clear, open outdoor space.
How does a vinegar and baking soda rocket work?
A vinegar and baking soda rocket works by harnessing the gas produced from an acid-base chemical reaction. When acetic acid (vinegar) mixes with sodium bicarbonate (baking soda), it generates carbon dioxide gas. This gas quickly fills the sealed bottle, creating high pressure that ultimately forces the cork out, demonstrating a powerful propulsion system through gas expansion.
What kind of bottle is best for a rocket?
A lightweight plastic bottle, such as a 500ml or 2-liter soda or water bottle, is best for a rocket. Plastic is preferred because it can withstand the internal pressure without shattering, unlike glass. The bottle should be clean, empty, and have an opening that can be securely sealed by a tightly fitting cork.
How much vinegar do you put in a bottle rocket?
For a 500ml bottle, typically 1/4 cup (about 60ml) of white vinegar is a good starting point for a bottle rocket. This amount allows for sufficient reaction with about 1.5 tablespoons of baking soda. You can then adjust this quantity slightly in subsequent experimentation with vinegar and baking soda ratios to find your optimal volume for a high flying rocket.
Does a baking soda rocket need a launch pad?
While not strictly necessary, using a simple launch pad or stand can make the baking soda rocket launch easier and more stable. A DIY launch pad, or even just a flat, clear section of a grassy field, provides a steady surface for inverting the bottle. This setup ensures a more controlled initial trajectory and reduces the risk of the rocket falling over prematurely.
What causes the pressure in a baking soda rocket?
The pressure in a baking soda rocket is caused by the rapid accumulation of carbon dioxide (CO2) gas, which is a byproduct of the chemical reaction. When baking soda and vinegar mix, they produce a significant volume of CO2. As this gas is trapped inside the sealed bottle, it exerts increasing force on the bottle’s inner walls and the cork until the cork can no longer hold, leading to a high-pressure launch.
Can I use lemon juice instead of vinegar?
Yes, you can use lemon juice instead of vinegar in a baking soda rocket, as both are acids that will react with baking soda to produce carbon dioxide gas. Lemon juice contains citric acid, which will create the same effervescent reaction needed for propulsion. The reaction might vary slightly in speed or intensity, so you may need to adjust your ratio of acid to baking soda for optimal results.
Final Thoughts on Baking Soda Rocket
The baking soda rocket is more than just a simple outdoor activity; it’s a dynamic, hands-on lesson in fundamental scientific principles. From the exhilarating chemical reaction that generates carbon dioxide gas to the powerful demonstration of Newton’s Third Law, every launch offers a tangible learning experience. We’ve equipped you with 7 proven steps to build your own high-flying rocket, optimize your baking soda and vinegar ratio, prioritize safety first with adult supervision required, and even troubleshoot common issues.
This homemade rocket experiment is a fantastic gateway to STEM education, encouraging curiosity, critical thinking, and the joy of discovery. Remember that the true value lies not just in the successful launch, but in the process of experimentation with vinegar and baking soda ratios, observation, and analysis. So gather your supplies, review the safety goggles recommended checklist, and prepare for some serious high-flying STEM fun! What new variables will you test to make your baking soda rocket soar even higher?
Last update on 2026-07-25 at 19:19 / Affiliate links / Images from Amazon Product Advertising API
