As an Amazon Associate BakingBakewareSets.com earns from qualifying purchases.
Best Crispy Korean Fried Chicken: Authentic & Easy Recipe at Home
Have you ever wondered how restaurants get that impossible, shatteringly crisp crust on their fried chicken? You follow a recipe perfectly, yet your homemade version ends up disappointingly soft. That frustration of missing the signature crunch is what keeps most home cooks from even trying to make Crispy Korean Fried Chicken.
The secret to incredibly crispy Korean fried chicken is the double-fry method combined with a starch-based coating. First, a lower-temperature fry cooks the chicken through, while a second, higher-temperature fry rapidly dehydrates the crust, making it ultra-crunchy and shatter-proof, even after being glazed with sauce. This process creates that signature light, crackly texture.
Drawing from established best practices and a deep analysis of authentic culinary methods, this guide demystifies the entire process. You’ll learn the proven techniques behind the perfect batter, the science of the double-fry, and how to make glazes that cling without causing sogginess. Get ready to master restaurant-quality Korean fried chicken in your own kitchen.
☰ Table of Contents ▼
show
Why Is Korean Fried Chicken So Incredibly Crispy?
The almost magical crispiness of Korean style fried chicken isn’t an accident; it’s the result of a deliberate and scientific culinary process. Unlike many Western styles that rely on a thick, flour-based batter for a crunchy but heavy crust, the Korean method prioritizes a thin crust that is both light and incredibly strong. This is achieved through two core principles: the coating composition and the frying technique. The coating almost exclusively uses pure starches like potato starch or cornstarch, which fry up lighter and absorb less oil than wheat flour. This creates a brittle, glass-like shell. This specific coating is then subjected to the double fried Korean chicken method, a two-step process that first cooks the chicken gently and then flash-fries it at a high temperature to create that signature shatteringly crisp texture that defines this world-famous dish.
7 Chef-Tested Secrets for the Best Crispy Korean Fried Chicken
Achieving the best Korean fried chicken at home is about mastering a few key techniques, not just following a list of ingredients. These seven secrets represent a complete, chef-tested recipe and a proven technique to transform your chicken from good to unforgettable. We’ll break down every critical step, from choosing the right starch to the final toss in a hand-made glaze. This is your blueprint for making homemade Korean fried chicken that is genuinely ultra-crunchy, juicy, and rivals your favorite restaurant. By understanding the ‘why’ behind each step, you’ll be equipped to troubleshoot and perfect your technique for either classic Korean fried chicken wings or boneless pieces, delivering consistently flawless results every time.
1. Choose the Right Coating: Potato Starch vs. Cornstarch

Pin this essential tip to your ‘Cooking Techniques’ board!
The foundation of an extra crispy crust begins with your choice of coating. While many recipes use flour, the secret to an authentic Korean thin crust lies in using pure starch. The two best options are potato starch and cornstarch, and understanding their differences is key. Potato starch is the preferred choice for a truly light coating that becomes almost glass-like and transparent when fried, yielding a delicate, shatteringly crisp texture. Cornstarch is a fantastic and widely available alternative, producing a slightly thicker, opaque crust that is exceptionally crunchy. A small amount of rice flour can also be added to either for an extra boost of crunch. Ultimately, for the most authentic experience, potato starch wins, but both will deliver a crunchy Korean chicken that is far superior to a flour-based dredge.
What You Need
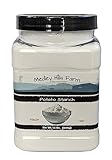
- Potato Starch: Highly recommended for its ability to create a light coating and a shatteringly crisp crust.
- Cornstarch: An excellent alternative that produces a very crunchy Korean chicken texture, slightly thicker than potato starch.
- Fine Rice Flour (Optional): A small amount can be mixed with the starch to enhance crunch.
- Fine Sea Salt & Black Pepper: For seasoning the coating itself.
Steps
- Choose Your Starch: For the most authentic, thin crust, use 100% potato starch. For a slightly heavier but equally ultra-crunchy crust, use 100% cornstarch or a 50/50 blend with potato starch.
- Season the Coating: In a large bowl, whisk together 1 cup of your chosen starch with 1 teaspoon of fine sea salt and ½ teaspoon of black pepper.
- Prepare for Dredging: Ensure your chicken pieces are patted completely dry before coating. This helps the starch adhere properly and prevents a gummy layer.
Pro-Tip: In our testing, potato starch creates a lighter, more delicate, glass-like crust that stays crispy longer, making it the superior choice for an authentic Korean fried chicken experience.
2. Perfect the Batter: A Thin, Wet Mix is Key

Save this secret to making the perfect light and crispy batter!
Forget the thick, pancake-like batters of other fried chicken styles. For Korean fried chicken, the mantra is “thin to win.” The goal is a watery, crepe-like batter + coating that creates an incredibly light, crackly shell rather than a heavy, bready crust. This thin layer is just enough to hold the starch in place and help it crisp up. A crucial ingredient for achieving the perfect airy batter is baking powder. It works as a leavening agent in the hot oil, creating tiny air pockets in the coating that contribute to its lightness and extra crispy quality. Using very cold water or even buttermilk also helps inhibit gluten development, keeping the final crust delicate and brittle, not tough.
What You Need
- Potato Starch or Cornstarch: ½ cup.
- All-Purpose Flour: ¼ cup (just enough for structure).
- Cold Water or Buttermilk: ¾ cup, very cold.
- Double-Acting Baking Powder: 1 ½ teaspoons. This is crucial for the airy batter.
- Egg White (Optional): 1 large, for an even lighter texture.
Steps
- Whisk Dry Ingredients: In a medium bowl, whisk together the starch, flour, and baking powder until thoroughly combined.
- Add Wet Ingredients: Pour in the cold water (or buttermilk) and egg white (if using). Whisk until just combined. The batter should be thin, like crepe batter. Do not overmix; a few small lumps are okay.
- Rest Briefly: Let the batter rest for 5 minutes. This allows the baking powder to start activating.
Pro-Tip: The batter’s purpose is not to form a thick shell, but to create a micro-thin, crackly layer. If your batter seems too thick, add another tablespoon of cold water. A thin batter is the secret to a non-greasy finish.

3. Master the Double-Fry Method for a Shatter-Proof Crust

Pin this crucial double-frying technique for the crispiest chicken ever!
This is the heart of the entire operation: the double fry method. This proven technique is non-negotiable for achieving a truly shatter-proof crust that stays crispy even after being sauced. The process involves two distinct frying stages with a crucial resting period in between. The first fry is done at a lower temperature, with the goal of cooking the chicken through to a safe internal temperature and setting the crust into a pale blonde shell. The chicken is then rested, which allows internal moisture to travel to the surface. The second fry, at a much higher temperature, is a quick, violent blast of hot oil frying that rapidly evaporates this surface moisture, effectively turning the crust into a super-dehydrated, golden brown, and audibly crispy layer.
Supplies Needed
- Deep, Heavy-Bottomed Pot or Dutch Oven: For safe frying and stable heat.
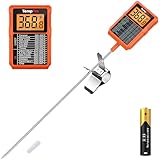
- Deep-Fry or Instant-Read Thermometer: Non-negotiable for temperature controlled frying.
- Wire Cooling Rack: Essential for draining oil and keeping the chicken crispy.
- Tongs or a Spider Strainer: For safely handling the chicken in hot oil.
Step-by-Step Directions
- First Fry (To Cook): Heat oil in your pot to 325°F (163°C). Carefully add a few pieces of coated chicken, ensuring not to overcrowd the pot. Deep-fry for 6-8 minutes, or until the chicken is cooked through and the crust is a pale, light blonde color. The goal here is not browning, but cooking the interior.
- First Rest (To Dehydrate): Remove the chicken from the oil and place it on a wire rack. Let it rest for at least 10 minutes. During this time, moisture from inside the chicken migrates to the surface, setting you up for the second fry.
- Second Fry (To Crisp): Increase the oil temperature to 375°F (190°C). Place the rested chicken back into the hot oil and fry for another 2-3 minutes, until the crust becomes golden brown and audibly crispy.
- Final Drain: Drain the chicken on the wire rack. You will notice it’s significantly crispier and more non-greasy than after the first fry.
Pro-Tip: The double fry method works by cooking the chicken fully in the first, gentler fry, then rapidly evaporating surface moisture in the second, hotter fry. This process of surface dehydration is what creates the shatteringly crisp crust.
4. Craft the Perfect Soy Garlic Glaze (Dakgangjeong Style)

Save this addictive Soy Garlic glaze recipe for your next chicken night!
The classic Soy garlic chicken flavor is an irresistible combination of savory, sweet, and aromatic. This Korean fried chicken glaze is central to the Dakgangjeong style, creating a sticky, glossy coating that perfectly complements the crunchy chicken. The key to a great glaze is balance. You need the deep umami flavor and saltiness from soy sauce, sweetness from brown sugar or honey, a pungent kick from fresh garlic and ginger, and a touch of acidity from rice wine or mirin. Simmering these ingredients together concentrates their flavors and creates a syrupy consistency that clings beautifully to each piece of chicken.
Ingredients
- Low-Sodium Soy Sauce: ½ cup.
- Mirin or Rice Wine: ¼ cup.
- Brown Sugar or Honey: 3 tablespoons, for a salty-sweet balance.
- Minced Garlic: 2 tablespoons (about 4-5 cloves).
- Grated Ginger: 1 tablespoon.
- Sesame Oil: 1 teaspoon, added at the end.
Instructions
- Combine Ingredients: In a small saucepan, combine the soy sauce, mirin, brown sugar (or honey), minced garlic, and grated ginger.
- Simmer to Thicken: Bring the mixture to a gentle simmer over medium heat. Let it bubble for 3-4 minutes, stirring occasionally, until the sauce has thickened slightly and can coat the back of a spoon.
- Finish with Sesame Oil: Remove the pan from the heat and stir in the sesame oil. The residual heat will bloom its aroma. Let the glaze cool slightly before using.
Pro-Tip: For a deeper umami flavor, add 1 tablespoon of oyster sauce to the mix. The key is to reduce the sauce just enough so it becomes a sticky chicken glaze, not a watery liquid.

5. Whip Up a Spicy Gochujang Sauce for an Authentic Kick

Pin this easy spicy Gochujang wing sauce recipe now!
For those who love a bit of heat, the iconic fiery red sauce for Gochujang chicken wings is a must. This glaze is the definition of spicy and sweet, a hallmark flavor profile in Korean cuisine. The star ingredient is Gochujang paste, a fermented Korean chili paste that provides a complex, savory heat that’s more flavorful than just pure spice. This is balanced with honey or corn syrup for sweetness and a glossy texture, soy sauce for umami depth, and rice vinegar for a tangy note that cuts through the richness. A secret ingredient often used is a touch of ketchup, which adds a subtle tang and helps create a beautiful, shiny glaze.
Ingredients
- Gochujang (Korean Chili Paste): ¼ cup. The core of the flavor.
- Honey or Corn Syrup: ¼ cup.
- Soy Sauce: 2 tablespoons.
- Rice Vinegar: 2 tablespoons.
- Minced Garlic: 1 tablespoon.
- Ketchup (Optional Secret Ingredient): 1 tablespoon, for a tangy sweetness and glossy finish.
Instructions
- Combine and Whisk: In a small saucepan, whisk together the Gochujang paste, honey, soy sauce, rice vinegar, and minced garlic.
- Simmer Gently: Bring the sauce to a low simmer over medium-low heat. Cook for 2-3 minutes, stirring constantly, until the flavors meld and the sauce is smooth and slightly thickened. Do not boil, as the sugars can burn.
- Cool Slightly: Remove from the heat and let it cool for a few minutes before tossing with your crispy chicken wings. The sauce will thicken more as it cools.
Pro-Tip: The flavor of Gochujang can vary by brand. Start with the recipe as written, then taste and adjust. If you want more heat, add a teaspoon of Gochugaru (Korean chili flakes). For more sweetness, add a bit more honey.
![Gochujang – Premium Korean Red Chili Paste [ Medium | 1.1 Lb (500G) ] – 0 Fat/ 0 Cholesterol / (40 Calories/Serving) | Spicy & Sweet Savory Fermented Sauce | Great For Bibimbap, Marinades, Stews & Bbq - O’food](https://m.media-amazon.com/images/I/410i4jhhvxL._SL160_.jpg)
6. Keep It Crispy After Saucing: The Tossing Technique

Don’t lose the crunch! Pin this essential saucing technique.
You’ve worked hard to achieve that perfect crunch; the final step is to apply the sauce without ruining your efforts. The question of how to keep fried chicken crispy with sauce is solved with technique, not magic. The cardinal rule is to toss, don’t soak. The goal is a light glaze, not a heavy drenching. This requires speed, the right tools, and the right temperatures. Your chicken should be hot from the second fry, and your sauce should be warm, not piping hot. This temperature difference helps the sauce adhere quickly without steaming and softening the crust. Using a very large bowl gives you the space to toss the chicken efficiently, coating each piece in a thin, even layer while allowing steam to escape.
Supplies Needed
- A Very Large Mixing Bowl: The bigger, the better. This gives you room to toss without crushing the crust.
- Spatula or Tongs: To help move the chicken around.
- Garnishes: Toasted sesame seeds, chopped peanuts, or thinly sliced scallions.
Step-by-Step Directions
- Work Quickly: This is a race against sogginess. Ensure your double fried Korean chicken is hot and your glaze has cooled slightly (it should be warm, not piping hot).
- Sauce the Bowl, Not the Chicken: Pour a moderate amount of your chosen glaze into the bottom of the large mixing bowl.
- Add Chicken and Toss: Add the hot, crispy chicken to the bowl. Using a spatula or by gripping the sides of the bowl, toss the chicken quickly and efficiently to coat it in a thin, even layer of sauce. The goal is to glaze the chicken, not drown it.
- Garnish and Serve Immediately: Once coated, immediately transfer the chicken to a serving platter, garnish, and serve. The crispness longevity is measured in minutes, so don’t let it sit.
Pro-Tip: Never pour sauce over the chicken in a pile. The steam that gets trapped will instantly soften the crust. Tossing in a large bowl ensures air can circulate, preserving that shatteringly crisp texture you worked so hard for.

7. How to Reheat Korean Fried Chicken and Keep it Crispy

Don’t let leftovers go to waste! Pin this reheating hack.
Leftover fried chicken often meets a sad, soggy fate in the microwave. However, knowing how to reheat Korean fried chicken properly can bring it back to its former glory. The key is to use a dry heat method that allows for moisture evaporation, re-crisping the coating rather than steaming it. The absolute best tool for the job is an air fryer, which circulates hot air perfectly to revive the crunch. The oven reheating method is a close second. The one appliance to avoid at all costs is the microwave; its method of heating will turn your masterpiece into a chewy, soft disappointment and avoid soggy chicken should be your top priority.
Tools Required
- Air Fryer: The absolute best tool for reviving crispiness.
- Oven and Baking Sheet: The next best option if you don’t have an air fryer.
- Parchment Paper or Wire Rack: To prevent sticking and allow air circulation.
Step-by-Step Directions
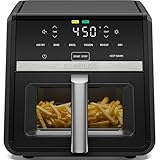
- Air Fryer Method (Best): Preheat your air fryer to 375°F (190°C). Place the chicken in a single layer in the basket. Cook for 3-5 minutes, shaking the basket halfway through, until the chicken is hot and the crust has re-crisped.
- Oven Method (Good): Preheat your oven to 400°F (200°C). Place a wire rack on a baking sheet and arrange the chicken on the rack in a single layer. Bake for 10-15 minutes, or until heated through and crispy. The wire rack is crucial for allowing hot air to circulate underneath.
- The Method to Avoid: Never use a microwave. It will steam the chicken from the inside out, completely destroying the crispy coating and turning it into a soft, chewy disappointment.
Pro-Tip: If the chicken seems a bit dry after reheating, you can make a small, fresh batch of sauce and give it a very light toss right before serving to bring back that glossy, flavorful finish.
The Science of the Crunch: Why This Recipe Works
Understanding the “why” behind the crunch transforms you from a recipe follower into a true technician. The exceptional crispiness of this chicken is rooted in food science, primarily involving three concepts: starch gelatinization, moisture evaporation, and the Maillard reaction. When the starch-based batter hits the hot oil, the starch granules absorb water and swell, a process called gelatinization. In the second, hotter fry, the extreme heat causes rapid dehydration of the surface, forcing water out of this gelled structure and leaving behind a rigid, brittle, and incredibly porous crust. This is why the crust is so light and shatters when you bite into it. Finally, that beautiful golden-brown color and savory, roasted flavor are thanks to the Maillard reaction, a complex chemical reaction between amino acids and reducing sugars that occurs at high temperatures, giving fried foods their irresistible appeal.
Key Takeaways: Your Quick Guide to Perfect Korean Fried Chicken
Here are the most critical points to remember on your journey to mastering homemade Crispy Korean Fried Chicken:
- The Double-Fry is Non-Negotiable: The first fry at a lower temp (325°F) cooks the chicken, while the second at a higher temp (375°F) creates the shatteringly crisp crust. This is the single most important technique.
- Starch is Superior to Flour: For the signature thin crust of Korean style fried chicken, use potato starch or cornstarch. They create a lighter, crispier finish that absorbs less oil.
- A Thin Batter is a Better Batter: The goal is a light, almost watery airy batter, not a thick, heavy coating. This is a key secret to a non-greasy result.
- Temperature Control is Everything: Use a thermometer to heat oil precisely. Drastic temperature drops from overcrowding the pot are the primary cause of soggy chicken.
- Toss Quickly, Serve Immediately: To keep the crust crisp, toss the hot chicken in a slightly cooled sauce in a very large bowl. Never pour sauce over a pile of chicken, and serve it right away.
- Reheat with Dry Heat: An air fryer is the best tool to revive leftovers. The oven is a good second choice. The microwave is the absolute enemy of crispiness.
FAQs About Crispy Korean Fried Chicken
Why is Korean fried chicken so crispy?
Korean fried chicken’s signature crispiness comes from a combination of a starch-based coating and a double-frying technique. The starch (typically potato or cornstarch) creates a thin, brittle crust that absorbs less oil than flour. The first fry cooks the chicken at a lower temperature, and the second, hotter fry rapidly removes surface moisture, resulting in a shatteringly crisp, long-lasting crunch.
What is the best starch for Korean fried chicken?
For the lightest, most delicate, and crispiest crust, potato starch is considered the best choice. It creates an almost glass-like, thin coating. Cornstarch is an excellent and widely available alternative that yields a slightly thicker but still incredibly ultra-crunchy texture. Both are far superior to all-purpose flour for this style of chicken.
How do you keep fried chicken crispy with sauce?
The key is to toss the chicken quickly in a slightly cooled sauce and serve it immediately. Use a large bowl to toss the hot chicken with just enough warm (not hot) sauce to create a thin glaze. This technique minimizes the time the crust is in contact with moisture and prevents trapped steam from making it soggy.
What is the difference between Korean and American fried chicken?
The main differences are the crust and the saucing method. Korean fried chicken uses a thin, crackly crust made from starch that is double-fried for extra crispiness. It’s then often tossed in a sweet, spicy, or savory glaze. American Southern fried chicken typically has a thicker, craggy, seasoned crust made from a flour and buttermilk batter and is usually served without a wet sauce.
Can you make Korean fried chicken in an air fryer?
Yes, you can make a healthier version in an air fryer, though the texture will be slightly different. For an air fryer Korean fried chicken, coat the chicken as instructed and spray generously with oil. Air fry at 380°F (193°C) for 15-20 minutes, flipping halfway. For the “second fry,” increase the heat to 400°F (200°C) for another 3-5 minutes to maximize crispiness before tossing in sauce.
What temperature should the oil be for the double-fry method?
Use two distinct temperatures: 325°F (163°C) for the first fry and 375°F (190°C) for the second fry. The first, lower-temperature fry is designed to cook the chicken all the way through without over-browning. The second, high-temperature fry is a short burst of heat purely designed to create that final golden brown, extra crispy skin.
Why use baking powder in the batter?
Baking powder creates a light, airy, and crispier crust. When the batter hits the hot oil, the baking powder reacts and releases tiny bubbles of carbon dioxide gas. These bubbles create small pockets and increase the surface area of the coating, leading to a delicate, airy batter texture rather than a dense, heavy one.
Can I use flour instead of starch?
You can, but you will not achieve the authentic texture of Korean fried chicken. A flour-based batter will absorb more oil and create a heavier, thicker, and softer crust, more similar to American-style fried chicken. The use of pure starch or a starch-heavy blend is fundamental to the signature light coating and crunch.
What is Dakgangjeong?
Dakgangjeong is a specific type of Korean fried chicken characterized by its sweet and sticky sauce. While the term is sometimes used interchangeably with Korean fried chicken, it technically refers to chicken that has been deep-fried and then coated in a sweet, syrupy glaze. The chicken is often boneless and the sauce typically includes honey or corn syrup.
How do you prevent soggy fried chicken?
To avoid soggy chicken, pat the chicken completely dry, use a thermometer to maintain oil temperature, and don’t overcrowd the pot. Excess moisture is the enemy of crispiness. Furthermore, adding too many pieces at once causes the oil temperature to drop dramatically, leading to the chicken steaming and absorbing oil rather than frying properly. Finally, always rest fried chicken on a wire rack, not paper towels.
Final Thoughts on Your Homemade Korean Fried Chicken Adventure
You now possess the secrets to creating truly restaurant-style Korean fried chicken at home. The magic isn’t in a secret ingredient, but in mastering the proven technique of the starch-based coating and the non-negotiable double-fry method. By controlling your temperatures and understanding the science of the crunch, you can produce a shatteringly crisp chicken with a juicy interior every single time. This isn’t just a recipe; it’s a new skill in your culinary arsenal.
What’s been your biggest challenge with making fried chicken at home? Which sauce—the savory soy garlic or the spicy gochujang—will you try first?
Last update on 2026-05-25 at 11:53 / Affiliate links / Images from Amazon Product Advertising API
