As an Amazon Associate BakingBakewareSets.com earns from qualifying purchases.
Cream Cheese Chicken Enchiladas: Best Easy Family Weeknight Dinner Recipe
Struggling to find a weeknight dinner the whole family genuinely gets excited about? You need a go-to meal that’s quick, comforting, and packed with flavor, but finding one that checks all the boxes can feel like an impossible task. This is where the magic of a perfect Cream Cheese Chicken Enchiladas Recipe comes in.
This cream cheese chicken enchiladas recipe is the best easy family dinner because it uses simple ingredients like pre-cooked rotisserie chicken and a rich, no-fail creamy filling made from softened cream cheese and green chiles. The entire dish comes together in about 20 minutes of prep and bakes into a bubbly, golden-brown masterpiece, delivering a delicious, crowd-pleasing meal with minimal effort.
Drawing from proven culinary methods and family-tested results, this guide breaks down the process into simple, foolproof steps. We’ll show you how to create the ultimate creamy enchilada filling, a key attribute that sets this dish apart from traditional recipes. Get ready to discover the secrets to a perfect, cheesy, and utterly irresistible weeknight dinner.
☰ Table of Contents ▼
show
Why is This the Best Cream Cheese Chicken Enchiladas Recipe?
This isn’t just another recipe; it’s a solution for a perfect easy family weeknight dinner. What makes it stand out is the masterful balance of rich, creamy flavor and incredible simplicity. The core of the dish is the filling, where shredded chicken is enveloped in a luscious mixture of softened cream cheese and sour cream. This combination creates a uniquely smooth and savory texture that isn’t greasy or heavy. By using smart shortcuts like a store-bought rotisserie chicken and canned green enchilada sauce, you get all the rewarding flavor of a slow-cooked meal in a fraction of the time. It’s a kitchen tested and family favorite recipe because it delivers consistently delicious results every single time, making you feel like a kitchen hero on any given Tuesday.
9 Simple Steps to the Best Cream Cheese Chicken Enchiladas
Making exceptional baked chicken enchiladas at home is far easier than you might think. We’ve broken down the entire process into nine clear, manageable actions. These step-by-step instructions will guide you from preparing the irresistibly creamy filling to pulling a perfectly golden brown and bubbly casserole from the oven. Follow along to master this proven method and add a guaranteed winner to your dinner rotation.
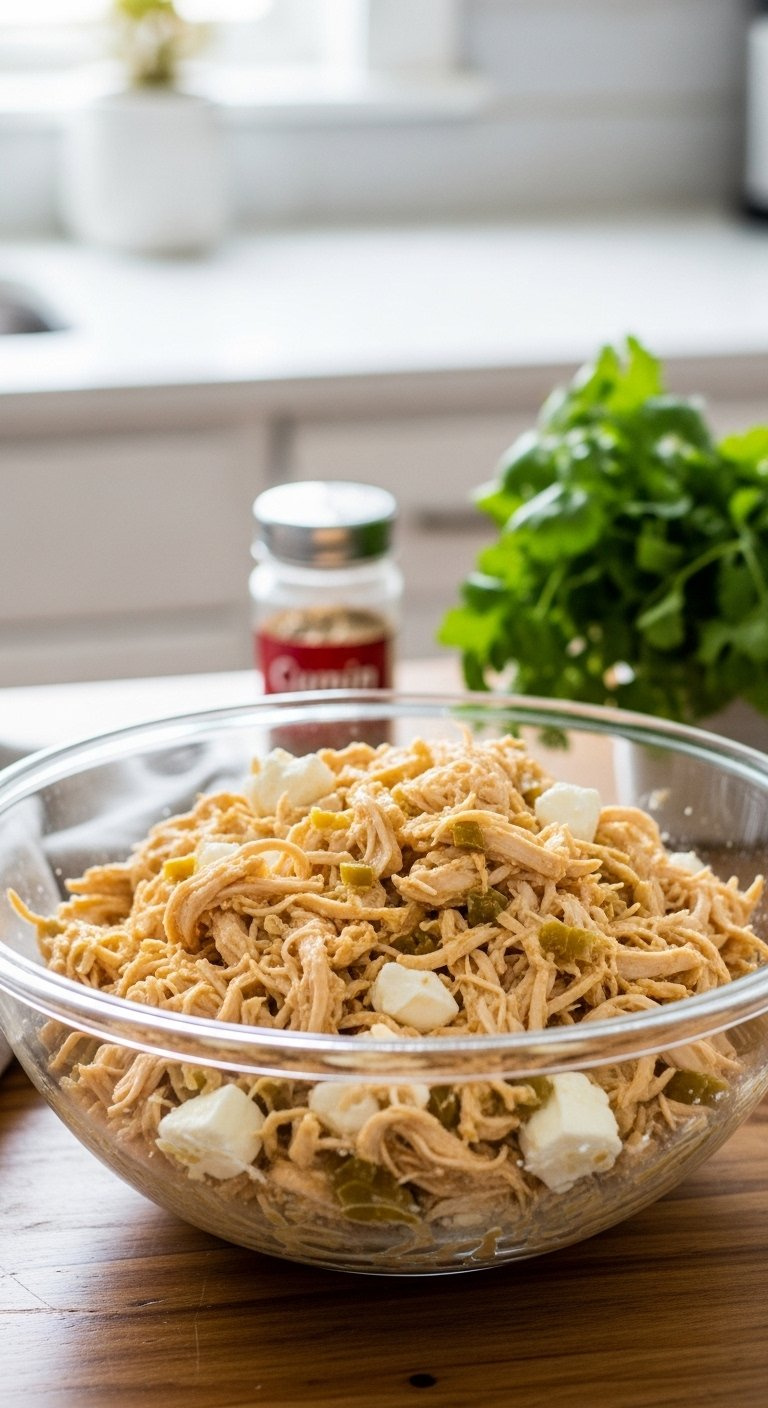
1. Prepare the Irresistibly Creamy Chicken Filling
Pin this easy recipe step to your ‘Weeknight Dinners’ board!
The heart of this dish is the cream cheese enchilada filling. Its rich texture and savory flavor come from combining just a few simple ingredients. The secret to a perfectly smooth, lump-free consistency is using room temperature cream cheese, which allows it to blend seamlessly with the sour cream and spices. This focus on flavor layering, where the spices are mixed into the creamy base before the chicken is added, ensures that every single shred of chicken is coated in deliciousness.
Ingredients
- 3 cups shredded cooked chicken (a store-bought rotisserie chicken is a great time-saver)
- 8 oz. block softened cream cheese, at room temperature
- 1/2 cup sour cream
- 1 (4 oz) can diced mild green chiles, drained
- 1 tsp cumin
- 1/2 tsp garlic powder
- 1/2 tsp onion powder
- Salt and pepper to taste
Instructions
- In a large mixing bowl, combine the room temperature cream cheese and sour cream. Whisk until smooth and no lumps remain.
- Stir in the drained green chiles, cumin, garlic powder, onion powder, salt, and pepper until fully blended.
- Gently fold in the shredded chicken until it is evenly coated with the creamy mixture. Set aside.
Pro-Tip: For a perfect emulsification, ensure your cream cheese is truly softened. If you’re short on time, you can microwave the unwrapped block on a plate for 15-20 seconds to speed up the process and prevent a lumpy filling.

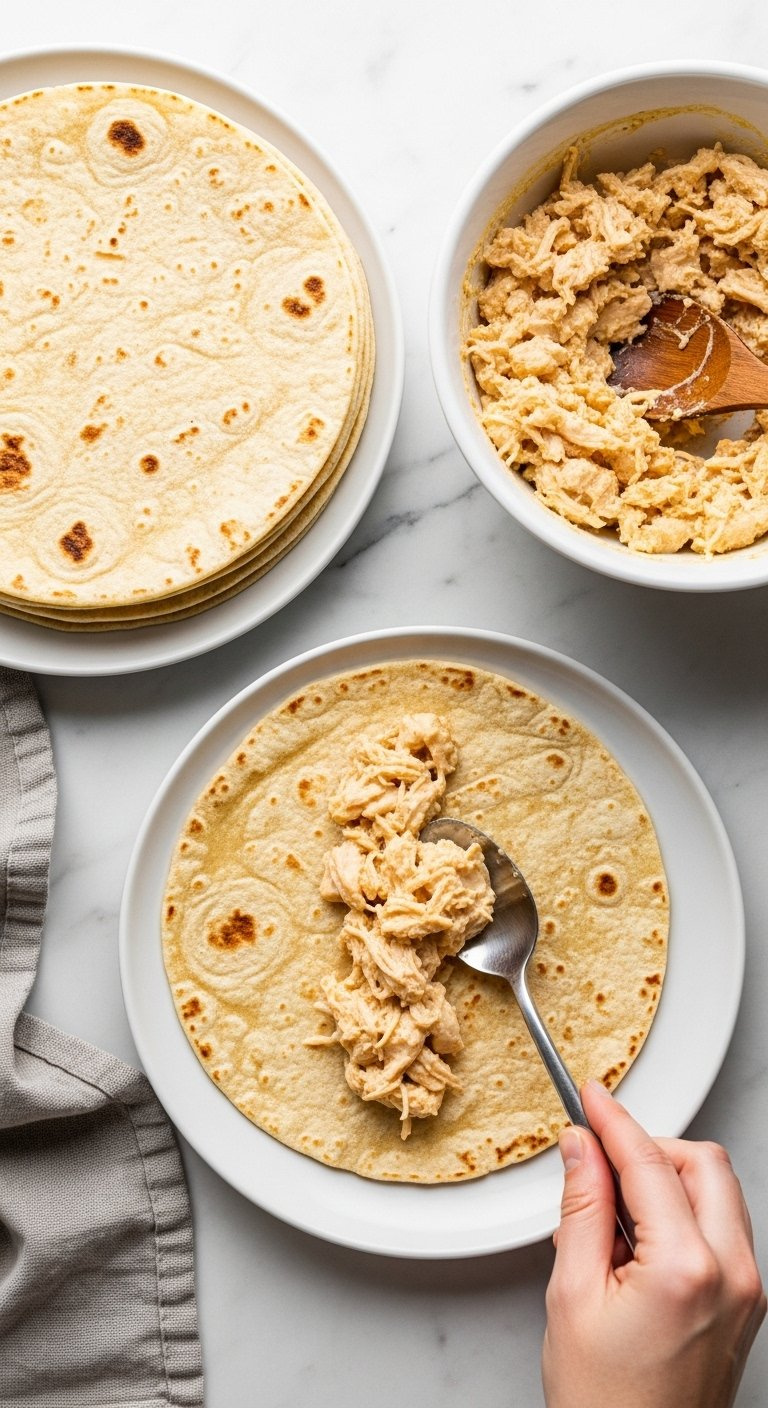
2. Warm and Fill the Tortillas
Never have cracked enchiladas again! Pin this tip for later.
One of the most common frustrations when making enchiladas is having the tortillas tear or crack during rolling. The solution is simple: you must warm them first to improve the tortilla pliability. This step makes them soft and flexible, allowing you to easily roll them around the generous portion of tortillas + filling without any breakage. Whether you choose corn vs flour tortillas, this technique is the key to a perfectly assembled dish.
What You Need
- 10-12 small (8-inch) flour tortillas or corn tortillas
- The prepared cream cheese chicken filling
Steps
- Warm the tortillas to make them soft and pliable. You can do this by wrapping a stack of 5-6 tortillas in a damp paper towel and microwaving for 30-45 seconds.
- Lay one warm tortilla flat. Spread about 1/4 cup of the chicken filling in a line down the center.
- Roll the tortilla up snugly around the filling and place it seam-side down. Repeat with the remaining tortillas and filling.
Pro-Tip: For enhanced flavor and to further prevent soggy tortillas, you can quickly flash-fry corn tortillas in a hot, lightly oiled skillet for about 10-15 seconds per side before filling. This creates a slight barrier against the sauce.
36% OffBestseller No. 2

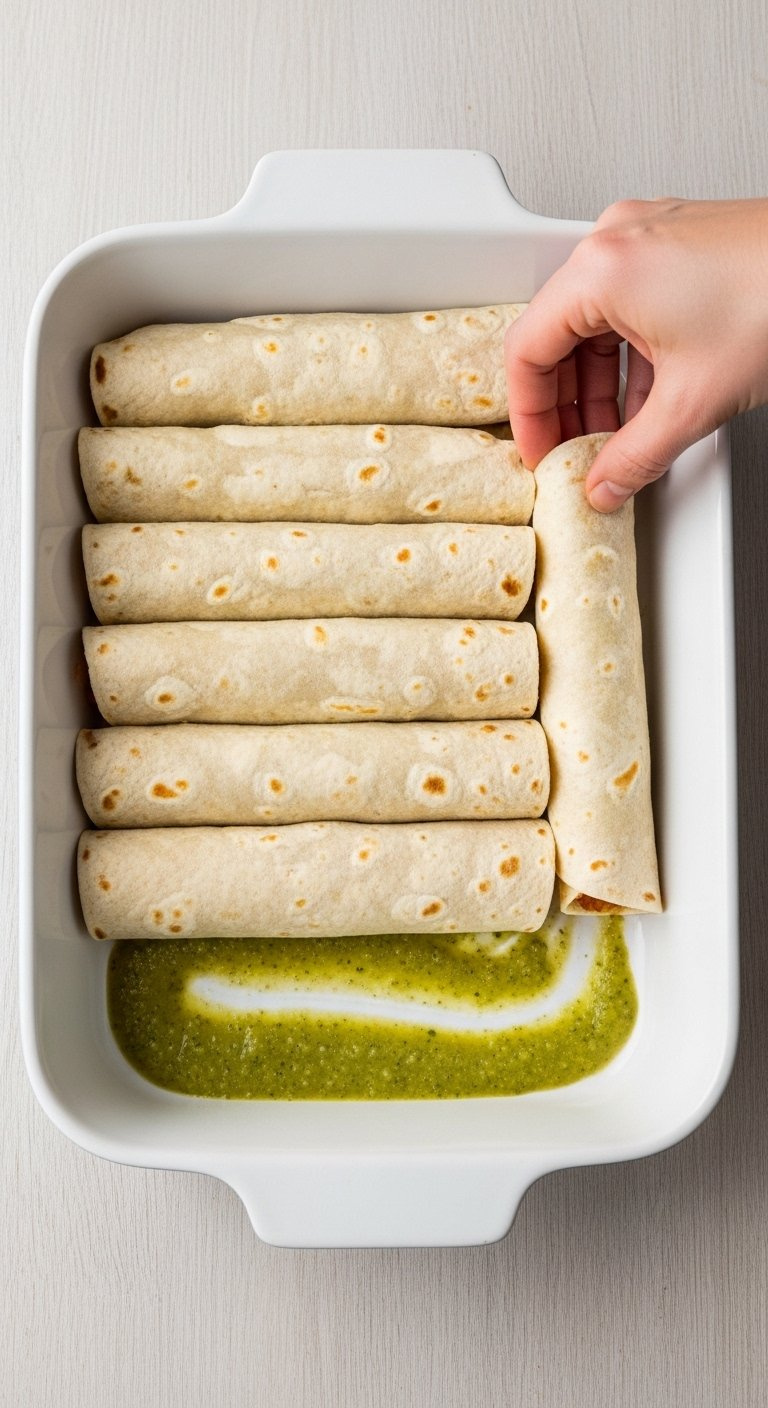
3. Assemble the Enchiladas in the Baking Dish
The secret to non-stick enchiladas is right here. Save this for your next Mexican night!
Proper baking dish preparation is a small step that makes a big difference. Placing the rolled enchiladas seam-side down is crucial to keep them from unrolling during baking. Furthermore, by spreading a thin layer of enchilada sauce on the bottom of the dish first, you not only add an extra layer of flavor but also prevent the tortillas from sticking to the pan, ensuring a clean and easy serving experience.
Supplies Needed
- A 9×13 inch baking dish
- Cooking spray or a small amount of oil
- 1/4 cup green enchilada sauce
- The rolled enchiladas
Directions
- Preheat your oven to 375°F (190°C).
- Lightly grease your 9×13 inch baking dish with cooking spray. Pour about 1/4 cup of the green enchilada sauce into the bottom of the dish and spread it to create a thin, even layer.
- Carefully place each rolled enchilada into the dish, seam-side down. Arrange them snugly next to each other in a single layer.
Pro-Tip: Don’t overcrowd the pan. Using the right size baking dish preparation ensures that heat circulates evenly, allowing the enchiladas to cook through without becoming mushy from steam.

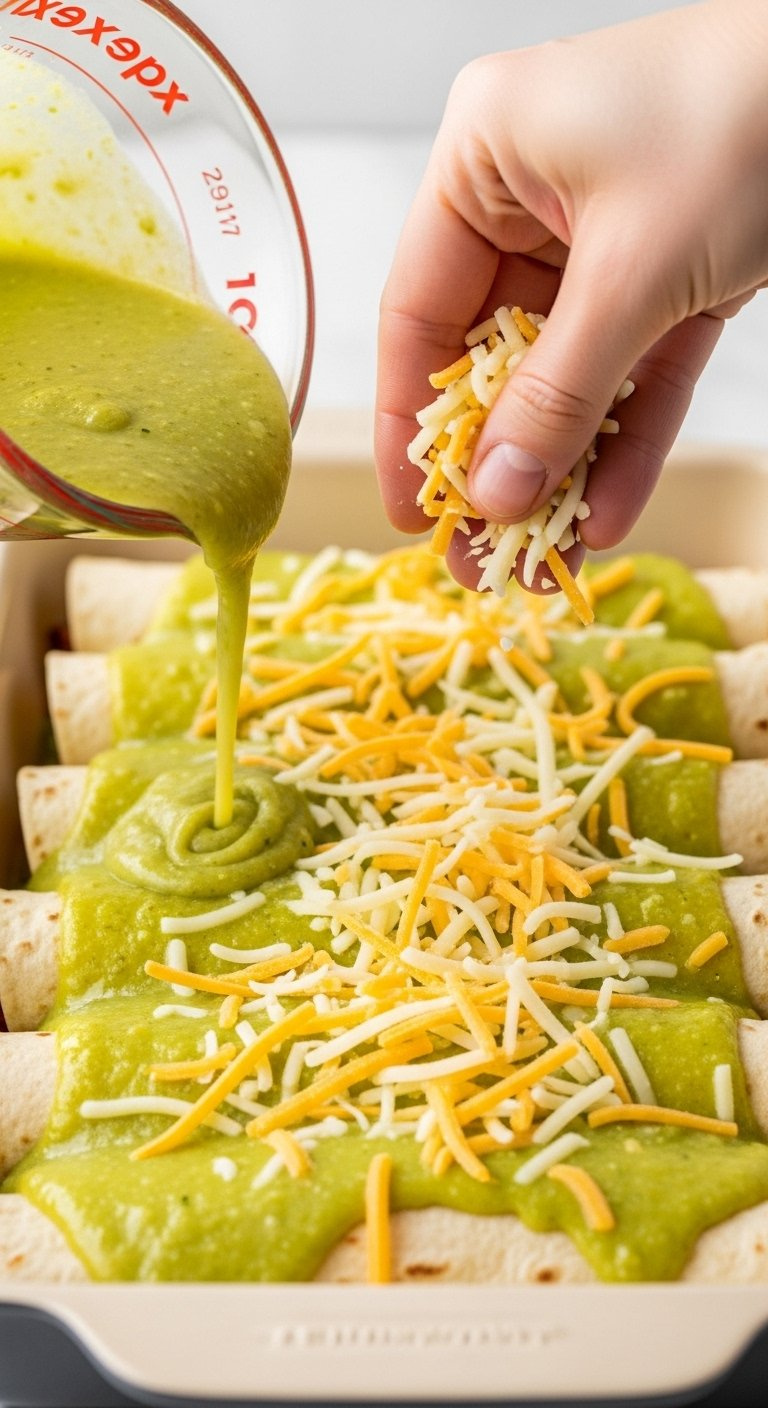
4. Smother with Sauce and Cheese
This is the moment we all wait for! Pin this cheesy goodness.
This is where the magic happens. The assembled enchiladas are smothered in a flavorful green enchilada sauce and then topped with a generous blanket of cheese. Don’t be shy with the Mexican cheese blend; a good amount is essential for achieving that iconic melty, gooey top that everyone loves. For the best meltability and flavor, a blend of Monterey Jack and cheddar cheese is the ideal choice.
What You Need
- Remaining green enchilada sauce (about 1.5 cups)
- 2 cups shredded Mexican cheese blend (a mix of Monterey Jack and cheddar cheese is ideal)
Steps
- Pour the rest of the green enchilada sauce evenly over the top of the rolled enchiladas in the dish, making sure to cover them from end to end.
- Sprinkle the entire 2 cups of shredded cheese evenly over the sauce.
Pro-Tip: For an extra rich and decadent sauce, you can whisk 2 tablespoons of the leftover cream cheese filling into the enchilada sauce before pouring it over the top. This creates an even creamier white sauce effect.

5. Bake to Golden, Bubbly Perfection
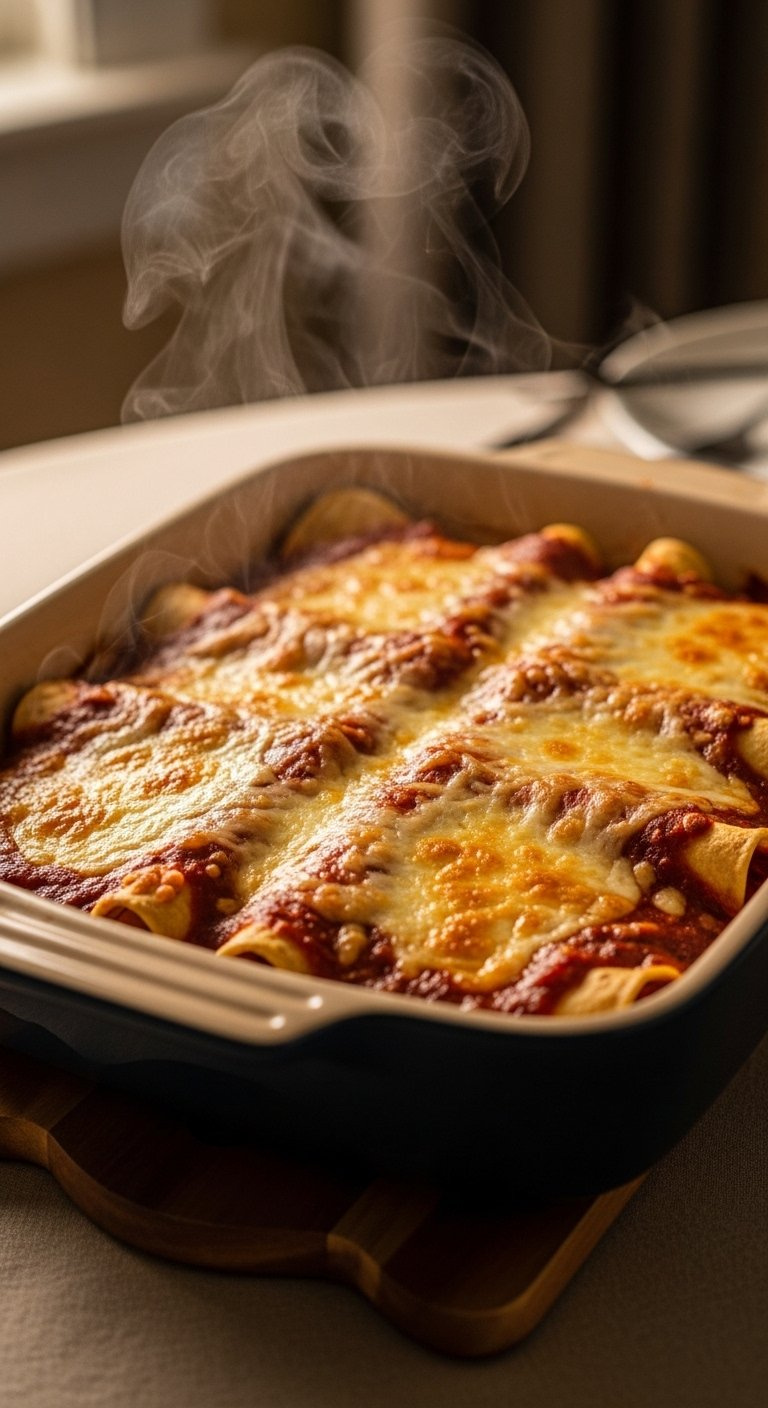
The perfect weeknight dinner is ready! Save this recipe for a guaranteed family-pleaser.
The final transformation happens in the heat of the oven. The goal is to bake until the sauce is hot and bubbly and the cheesy topping is fully melted and turning a beautiful golden brown. A preheated oven temp is key for even cooking. Letting the dish rest for a few minutes after it comes out of the oven is a crucial, often-skipped step that allows the filling to set, making the enchiladas much easier to serve.
Tools Required
- Preheated oven at 375°F (190°C)
- Oven mitts
Process
- Place the uncovered baking dish in the preheated oven.
- Bake for 20-25 minutes, or until the sauce is bubbly and the cheese is completely melted and just beginning to turn golden brown at the edges.
- Carefully remove from the oven and let it rest for 5-10 minutes before serving. This allows the filling to set.
Pro-Tip: If you find your cheese is browning too quickly before the filling is hot, you can loosely tent the dish with aluminum foil for the first 15 minutes of baking, then remove it for the last 5-10 minutes to get that perfect golden brown top.

6. Garnish and Serve Immediately
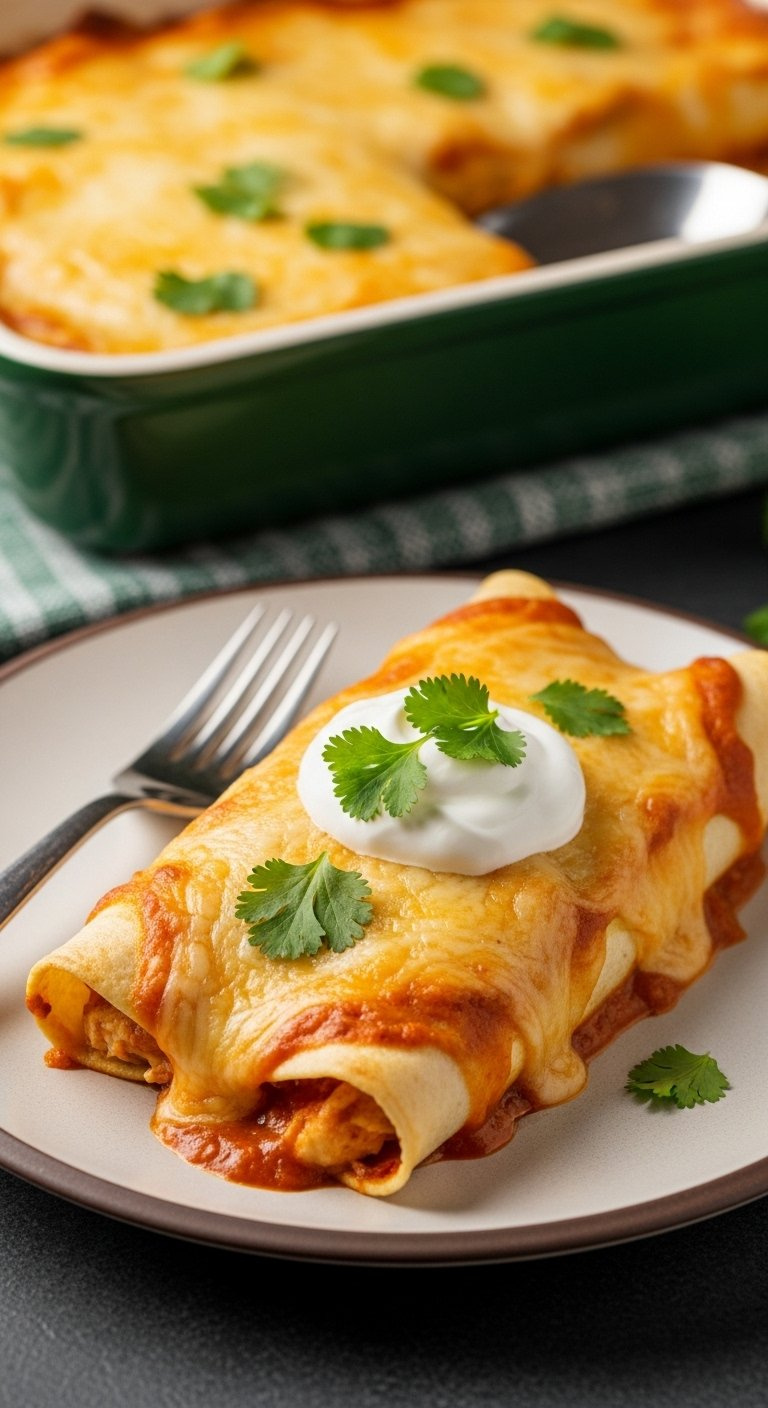
Don’t skip the toppings! They add the perfect finishing touch.
The final flourish of a fresh garnish elevates the dish from great to exceptional. The enchiladas are served with toppings that provide a cool, fresh contrast to the warm, rich casserole. A sprinkle of chopped fresh cilantro adds brightness, while a dollop of sour cream provides a cooling element. These finishing touches are essential for proper flavor profile balancing.
Garnish Options
- Chopped fresh cilantro
- A dollop of sour cream or Mexican crema
- Sliced black olives
- Diced avocado or guacamole
- Sliced jalapeños (for extra spice)
Steps
- After letting the enchiladas rest, use a spatula to lift one or two onto each plate.
- Garnish generously with your favorite toppings.
- Serve immediately while hot and cheesy.
Pro-Tip: A squeeze of fresh lime juice just before serving can cut through the richness of the cream cheese and brighten up all the flavors, providing a perfect acidic balance.

7. Perfect Side Dishes to Serve

Complete your Mexican feast! Pin these easy side dish ideas.
To turn your enchiladas into a full-fledged feast, you need the right accompaniments. When considering what goes well with creamy chicken enchiladas, think about balance. Classic sides like Mexican rice and refried beans are always a perfect match. For something with textural contrast, a crisp and refreshing salad can cut through the richness of the main course. These easy sides for mexican food complete the meal without adding a lot of extra work.
Suggestions
- Classic Pairings: Serve with a generous portion of Mexican rice and refried beans (or black beans).
- Fresh & Light: A simple salad with a zesty cilantro-lime vinaigrette provides a refreshing contrast.
- Quick & Easy: Steamed or grilled corn on the cob is a simple, family-friendly option.
- For Dipping: A bowl of fresh guacamole or salsa and a bag of tortilla chips is always a winner.
Pro-Tip: To keep the meal truly simple, look for high-quality, pre-seasoned canned black beans or quick-cooking rice mixes to minimize your time in the kitchen.

8. How to Store and Reheat Leftovers
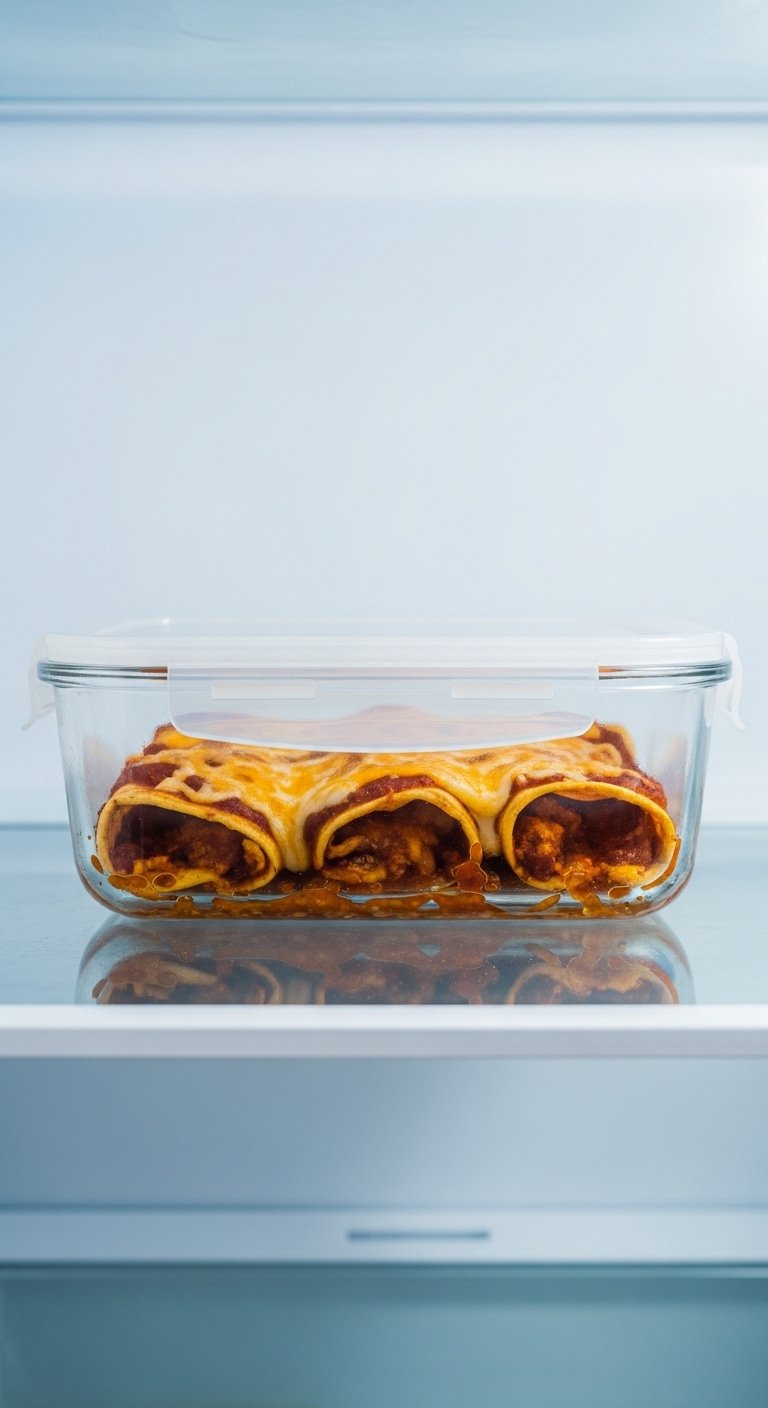
Enjoy this delicious meal all over again! Save these reheating tips.
Knowing how to reheat chicken enchiladas properly ensures your leftovers are just as delicious the next day. The key is to cool the dish completely before storing it to maintain food storage safety. While the microwave offers a quick solution, using the oven is the best method to revive the texture and prevent the tortillas from getting too soft.
Supplies Needed
- Airtight food storage containers
Instructions
- Refrigeration: Allow the enchiladas to cool completely. Store them in an airtight container in the refrigerator for up to 3-4 days.
- Freezing: For longer storage, you can freeze the baked enchiladas. It’s best to freeze them in individual portions for easier reheating. Wrap them tightly or place them in a freezer-safe container for up to 3 months. Note that the texture of the cream cheese sauce may change slightly upon thawing.
- Reheating: The best way to reheat is in an oven at 350°F for 15-20 minutes, or until heated through. You can also microwave individual portions, but the tortilla may become softer.
Pro-Tip: When reheating in the oven, add a splash of water or a little extra enchilada sauce to the dish and cover with foil to prevent the enchiladas from drying out.

9. Easy Recipe Variations & Substitutions
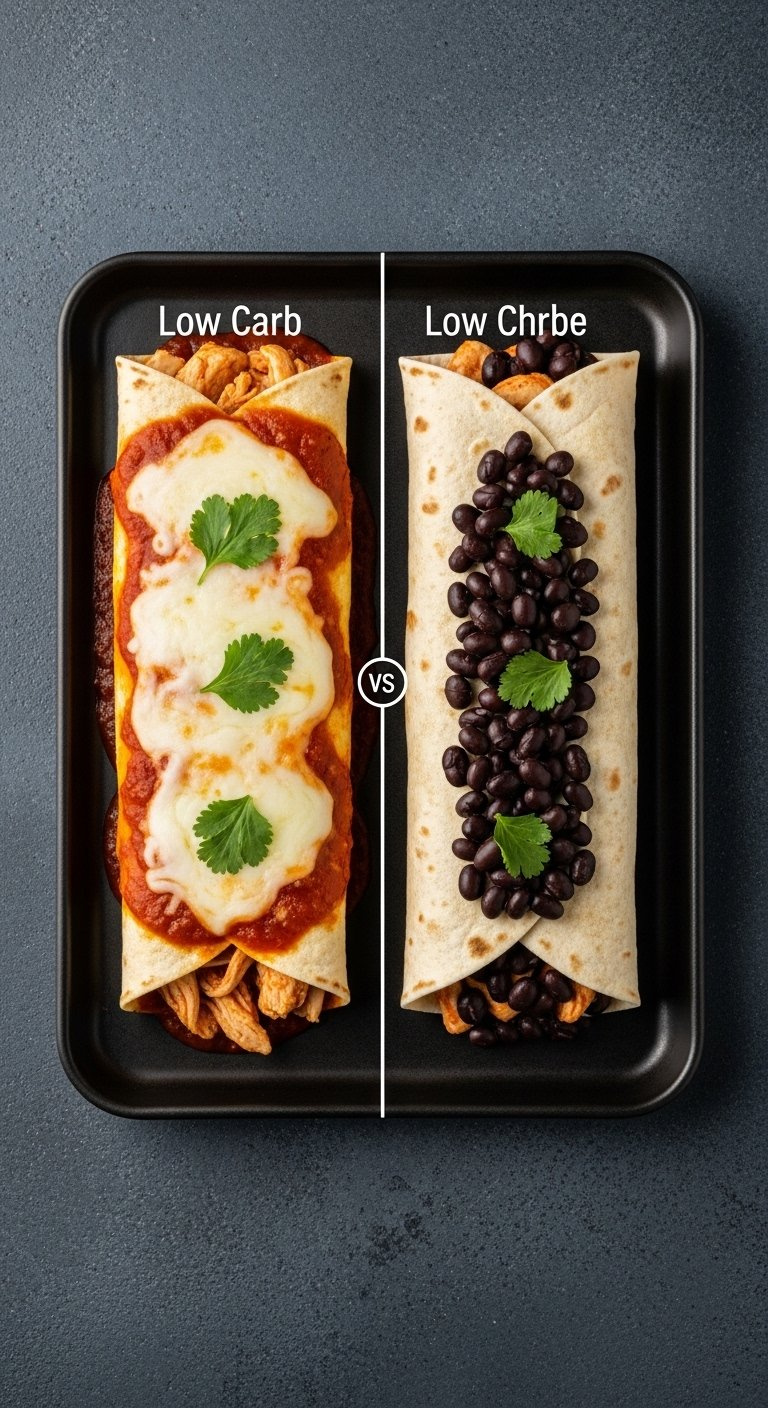
Make this recipe your own! Pin these easy substitution ideas.
One of the best things about this recipe is its versatility. With a few simple swaps, you can easily adapt it to different dietary needs and flavor preferences. Whether you want to make healthier swaps like using a Greek yogurt substitute for sour cream or create a low carb cream cheese chicken enchiladas version, these variations are simple to implement without sacrificing the delicious core flavors of the dish.
Variation Ideas
- Make it Lighter: Substitute plain Greek yogurt for the sour cream and use Neufchâtel cheese instead of full-fat cream cheese.
- Add More Veggies/Fiber: Mix 1 cup of drained and rinsed black beans or corn into the chicken filling.
- Make it Spicy: Use a can of hot green chiles instead of mild, and/or add 1-2 finely diced jalapeños (seeds removed for less heat) to the filling.
- Low-Carb/Keto Version: Swap the regular tortillas for your favorite low-carb or keto-friendly tortillas. Ensure your enchilada sauce is also low in sugar.
Pro-Tip: When making substitutions, always taste your filling before rolling the enchiladas. A Greek yogurt substitute might be tangier, so you may want to adjust seasonings accordingly.

Key Takeaways: Your Quick Guide to Cream Cheese Chicken Enchiladas
- Use Softened Cream Cheese: For the ultimate creamy filling without lumps, make sure your cream cheese is at full room temperature. This is the most critical step for texture.
- Warm Your Tortillas: To prevent soggy tortillas from cracking or tearing, always warm them in the microwave or a skillet until they are soft and pliable before filling.
- Don’t Skip the Sauce on the Bottom: Spreading a thin layer of green enchilada sauce in the baking dish before adding the enchiladas prevents sticking and adds flavor from the bottom up.
- Rest Before Serving: Letting the enchiladas rest for 5-10 minutes after baking is essential. It allows the melty filling to set, making them much easier to serve cleanly.
- Rotisserie Chicken is a Key Time-Saver: This recipe is perfect for an easy weeknight dinner because you can use pre-cooked shredded chicken to drastically cut down on prep time.
FAQs About Cream Cheese Chicken Enchiladas Recipe
Can you freeze cream cheese chicken enchiladas?
Yes, you can freeze cream cheese chicken enchiladas either before or after baking. For best results, assemble the enchiladas in a freezer-safe dish but leave off the sauce and cheese. Thaw in the refrigerator overnight, then add sauce and cheese and bake as directed. If freezing after baking, cool completely first. The texture of the cream cheese sauce may become slightly grainier after thawing but will still be delicious.
Why are my enchiladas soggy?
Sogginess is usually caused by using cold, stiff tortillas or not flash-frying corn tortillas before filling. Cold tortillas don’t create a good barrier and absorb too much sauce. To prevent soggy tortillas, always warm them until pliable. Additionally, smothering them in sauce too far in advance of baking can contribute to sogginess. Assemble just before they go into the oven.
How do you prevent tortillas from cracking when you roll them?
The key is to make the tortillas warm and pliable. Wrap a stack of corn or flour tortillas in a damp paper towel and microwave them for 30-60 seconds. Alternatively, you can warm them one by one for about 10-15 seconds per side in a hot, dry skillet. This flexibility allows you to roll them tightly without any cracking or tearing.
Can I use flour tortillas instead of corn?
Absolutely. This recipe works perfectly with either flour or corn tortillas. Flour tortillas are generally softer and easier to roll without pre-heating as much, resulting in a tender, almost dumpling-like texture. Corn tortillas provide a more traditional, robust corn flavor but require thorough warming to become pliable and can be prone to cracking if not handled correctly.
What goes well with creamy chicken enchiladas?
Creamy chicken enchiladas pair best with sides that offer a fresh or contrasting flavor. Classic pairings include Mexican rice and refried beans. For a lighter option, a crisp green salad with a cilantro-lime vinaigrette, grilled corn, or a fresh avocado and tomato salad are excellent choices to balance the richness of the enchiladas.
Can I make these enchiladas ahead of time?
Yes, you can assemble the enchiladas up to 24 hours in advance. Prepare the filling and roll the tortillas as directed. Place them in the baking dish, cover tightly with plastic wrap or foil, and store in the refrigerator. For best results and to prevent soggy tortillas, wait to add the sauce and cheese until just before you’re ready to bake.
How do I make the filling spicier?
To easily increase the heat, add some spice to the cream cheese filling. You can swap the mild green chiles for a can of hot green chiles or add 1-2 finely minced jalapeños. A dash of cayenne pepper or a few shakes of your favorite hot sauce mixed into the filling also works well to create spicy cream cheese enchiladas.
Can I use Greek yogurt instead of sour cream?
Yes, plain Greek yogurt is an excellent substitute for sour cream. It provides a similar tangy flavor and creamy consistency, often with more protein and less fat. Use it in a 1:1 ratio. This is a great way to make a slightly healthier version of the recipe without sacrificing the creamy texture.
What is the best way to shred chicken?
For a quick and easy method, use a stand mixer with the paddle attachment. While the chicken is still warm, place the boneless breasts in the mixer bowl and run it on low speed for 15-30 seconds. It will shred the chicken perfectly. Alternatively, you can simply use two forks to pull the chicken meat apart.
Should I cover enchiladas with foil when baking?
It is generally best to bake enchiladas uncovered. This allows the cheese to get bubbly and golden brown. If you notice the cheese is browning too quickly before the center is hot, you can then loosely tent the dish with foil for the remainder of the baking time.
Final Thoughts on Your New Favorite Family Dinner
This Cream Cheese Chicken Enchiladas Recipe is more than just a meal; it’s a reliable, tried and true solution for those busy nights when you need a guaranteed win. By combining tender shredded chicken with a rich filling of softened cream cheese and blanketing it all in sauce and melty cheese, you create a dish that’s pure comfort in a pan. The process is straightforward, the ingredients are simple, and the result is a restaurant-quality dinner that will have your family asking for it again and again.
This recipe proves that an easy family weeknight dinner doesn’t have to be boring. It’s a testament to how a few smart techniques—like warming tortillas and resting the dish before serving—can elevate simple ingredients into something truly special.
What’s been your experience with making homemade chicken enchiladas? Which variation will you try first?
Last update on 2026-05-31 at 02:00 / Affiliate links / Images from Amazon Product Advertising API
