As an Amazon Associate BakingBakewareSets.com earns from qualifying purchases.
Easy Fudgy Peanut Butter Brownie Swirl Cookies: Delicious Recipe
Struggling to choose between a rich, fudgy brownie and a sweet, salty peanut butter cookie? It’s the ultimate dessert dilemma, a clash of cravings that demands a delicious resolution. You want one perfect treat that delivers both the intense chocolate satisfaction and the creamy peanut butter comfort you love.
Peanut Butter Brownie Swirl Cookies are the answer: they combine a rich, fudgy brownie cookie base with a creamy peanut butter cookie dough swirled throughout. This easy-to-follow recipe delivers soft-baked, chewy cookies with a beautiful marbled appearance and a decadent, indulgent flavor. It’s the perfect solution for when you can’t decide between two classic desserts.
Drawing from established best practices and a kitchen-tested methodology, this guide goes beyond a simple ingredient list. You are about to discover the essential techniques to master the perfect texture and the stunning visual swirl. Get ready to bake a batch of cookies that are unequivocally the best of both worlds.
☰ Table of Contents ▼
show
Why force a choice between two perfect desserts when you can have them both in a single, decadent bite? This recipe for Peanut Butter Brownie Swirl Cookies is designed to end the debate forever. It masterfully combines two flavors—deep, rich chocolate flavor and sweet, nutty creamy peanut butter—into one cohesive, beautiful confection. The foundation is a fudgy brownie cookie dough, engineered for a moist center and chewy edges, which serves as the perfect canvas for a rich peanut butter swirl. The result is a cookie that not only tastes incredible but also boasts a stunning marbled appearance, making it a showstopper on any dessert platter. This isn’t just a recipe; it’s a guide to creating a truly indulgent experience, a kitchen tested method for achieving that perfect balance of sweet and salty in a soft, chewy package.
Moving beyond the basic recipe, achieving a bakery-quality Fudgy Brownie Peanut Butter Cookie requires mastering a few key techniques. These aren’t just suggestions; they are professional baker tips that directly address the most common failure points, like cookies spreading too thin, a greasy peanut butter swirl, or a dry, cakey texture. The following seven expert techniques focus on the science behind the ingredients and the method, ensuring your final product has the perfect dense brownie texture, a beautiful, distinct swirl, and a deep, rich chocolate flavor. By understanding the ‘why’ behind each step—from ingredient temperature to mixing methods—you can troubleshoot on the fly and guarantee a perfect batch of cookies every time.
1. Master the Swirl Technique with a Toothpick

Pin this simple trick for the perfect marbled appearance!
The secret to a visually stunning cookie is to swirl with a toothpick, not a knife or spoon. The goal is to create a marble effect, not to fully mix the two doughs. Using a toothpick gives you the precision needed to drag the peanut butter mixture through the brownie dough just enough to create elegant ribbons of color and flavor without turning the cookie into a muddy brown mess.
What You Need
- Chilled brownie cookie dough balls
- Chilled peanut butter dough
- A standard wooden toothpick or bamboo skewer
Steps
- Drop small, 1/4 teaspoon-sized pieces of the peanut butter dough onto the top of each brownie dough ball.
- Take the tip of the toothpick and gently drag it through the peanut butter and brownie doughs in a figure-eight or “S” motion.
- Perform this motion only 2-3 times per cookie. The key is to swirl, not to mix the two doughs together.
Pro-Tip: The viscosity for swirling is critical. If your doughs are too warm, they will blend together. If they are too cold, they won’t swirl at all. This is why chilling is non-negotiable for a clean, marbled appearance.

2. Use High-Fat, Dutch-Process Cocoa for a Fudgy Texture

Save this tip! The secret to a truly rich chocolate flavor is the right cocoa.
The choice of cocoa powder is arguably the most important factor in achieving a true fudgy texture. For a deep, rich chocolate flavor and a dense brownie texture, you must use Dutch-process cocoa. Its unique properties are what separate a decadent brownie cookie from a simple chocolate one.
Why It Matters
- Natural Cocoa Powder is acidic and can create a drier, more cake-like crumb.
- Dutch-Process Cocoa Powder has been washed in a potassium carbonate solution to neutralize its acidity. This process, known as Dutch-process alkalinity, results in a smoother, more intense chocolate flavor and a darker color. It is the key to a dense brownie texture.
What To Do
- Select a high-quality cocoa powder labeled “Dutch-process” or “alkalized.”
- Sift the cocoa powder with your flour and other dry ingredients to ensure it is evenly distributed and free of lumps.
- Do not substitute natural cocoa powder in this recipe without adjusting the leavening agent, as it will alter the chemical reaction and final texture.
Lesson Learned: In my kitchen tested trials, recipes using natural cocoa were consistently lighter in color and had a less rich chocolate flavor. The switch to Dutch-process cocoa was the single biggest factor in achieving that desirable deep, fudgy quality.

3. Chill the Dough to Prevent Spreading

Don’t skip this step! Pin this for perfectly thick cookies every time.
If you want thick cookies with a chewy, moist center, you absolutely cannot skip the chilling step. This is the number one way to prevent spreading. Chilling the dough solidifies the fat, which is essential for controlling how the cookie behaves in the heat of the oven.
Why It Matters
- Chilling the dough solidifies the butter. Cold butter takes longer to melt in the oven, which means the cookies spread much less.
- This lack of spread is what creates thick cookies with a moist center and chewy edges, rather than thin, crispy ones.
- It also allows the flavors to meld and deepen, resulting in a more indulgent taste.
What To Do
- Prepare both the brownie dough and the peanut butter dough in separate bowls.
- Cover both bowls tightly with plastic wrap or a reusable lid.
- Chill both doughs in the refrigerator for at least 1 hour, or up to 3 days. Do not skip this step.
Pro-Tip: If your brownie dough is so sticky it’s hard to handle, a 30-minute chill before you even attempt to scoop it can make a world of difference. This is a key tip for avoiding a sticky dough mess.

4. Choose the Right Peanut Butter (and Temperature)

Did you know this? Pin this essential tip for avoiding a greasy mess!
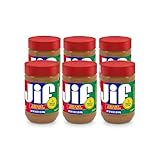
Not all peanut butter is created equal when it comes to baking. To avoid a separated, oily mess and achieve a perfect swirl, you must choose a conventional, no-stir creamy peanut butter. The science behind this choice lies in emulsifiers in baking.
Why It Matters
- Natural Peanut Butter (the kind where the oil separates) has a high fat content that is not emulsified. In the heat of the oven, this oil will leak out, creating a greasy swirl and a crumbly cookie.
- Conventional “No-Stir” Peanut Butter (like Jif, Skippy, etc.) contains emulsifiers that keep the oil suspended. This stability is crucial for a clean swirl and a perfect cookie texture.
What To Do
- Choose a commercial, no-stir creamy peanut butter for this recipe. Save the natural peanut butter for your toast.
- Use the peanut butter straight from the jar at room temperature for the dough. Do not melt it. Melted peanut butter will separate and become greasy.
- For a bit of texture, you can use a “no-stir” crunchy variety, but creamy peanut butter will give you the most beautiful and defined swirl.
Lesson Learned: This is the #1 way to fix a greasy swirl. After testing with five different types of peanut butter, the cookies made with processed, no-stir brands were visually and texturally superior every single time.

For bakery-style cookies every time, pin this essential tool tip!
For consistent, professional results, a cookie scoop is a non-negotiable tool. It is the single best way to ensure uniform size across an entire batch of cookies, which is the secret to even baking. This simple tool elevates your home baking to produce oversized bakery style cookies where every single one is cooked to perfection.
Why It Matters
- Using spoons to portion dough results in cookies of all different sizes. Smaller cookies will burn before the larger ones are even cooked through.
- A cookie scoop ensures every single dough ball is the same size, which is the secret to even baking for the whole batch of cookies.
- It’s also much faster and less messy than using two spoons, especially with a sticky brownie cookie dough.
What To Do
- Select a medium-sized (2-Tablespoon) cookie scoop for large, bakery style PB brownie cookies.
- Scoop the chilled brownie dough, leveling it off against the side of the bowl.
- Release the dough ball onto your prepared parchment paper-lined baking sheet. Space them about 2 inches apart.
Pro-Tip: For extra-easy release, you can dip your cookie scoop in a little bit of cocoa powder between scoops, or give it a quick spray with non-stick cooking spray before you start.

6. Don’t Overbake: Look for Crackly Tops and Set Edges

The secret to a moist center! Pin this tip on how to know when cookies are done.
The line between a perfectly fudgy brownie cookie and a dry, disappointing one is very fine. The most common mistake is to don’t overbake. You must trust the process of carryover cooking and pull the cookies from the oven when they look slightly underdone. This is the only way to guarantee a gooey, moist center.
Why It Matters
- The biggest mistake that leads to dry, cakey brownie cookies is overbaking.
- Cookies continue to bake on the hot pan even after you remove them from the oven. This is called carryover cooking.
- Pulling them out when the center looks a touch underdone is the key to a perfectly gooey, fudgy, and moist center.
What To Do
- Bake for the recommended time (typically 10 to 12 minutes).
- Look for the visual cues: the edges should be set and firm, and the top should be shiny and have fine, crackly tops. The very center should still look soft and slightly wet.
- Remove the baking sheet from the oven and let the cookies cool on the pan for 5 minutes. They will firm up during this time.
- Transfer the cookies to a wire cooling rack to cool completely.
Lesson Learned: Every oven is different. Start checking your cookies at the 9-minute mark. It’s always better to err on the side of slightly underbaked to guarantee that dense brownie texture.

7. Don’t Overmix the Brownie Batter

Pin this simple rule for the ultimate fudgy vs. cakey texture!
To achieve a texture that is fudgy instead of cakey, the single most important rule is to don’t overmix the batter once the flour is added. This step is all about minimizing gluten development, which is the enemy of a tender, melt-in-your-mouth brownie texture.
Why It Matters
- When you mix flour with wet ingredients, you begin to develop gluten.
- A little gluten provides structure, but too much gluten—caused by overmixing—is what makes bread chewy and, unfortunately, makes cookies tough and cakey.
- To achieve a melt-in-your-mouth fudgy texture, you want to minimize gluten development as much as possible.
What To Do
- Once you add the dry ingredients (flour, cocoa powder, etc.) to the wet ingredients, mix on the lowest speed or fold by hand with a spatula.
- Stop mixing the moment you no longer see streaks of flour. The batter will be thick and may not look perfectly smooth, and that’s exactly what you want.
- Remember the rule: Don’t overmix!
Pro-Tip: The science is simple: less mixing equals less gluten, and less gluten equals a more tender, fudgy brownie texture. This is the most common mistake beginner bakers make when a recipe turns out cakey.

The key to a fudgy texture is a high fat-to-flour ratio and minimal gluten development. Using ingredients like melted butter, more chocolate, and less flour contributes to the high fat content. Crucially, you must not overmix the batter after adding flour, as this develops gluten and creates a cakey, tough cookie.
Yes, you can use a brownie mix as a shortcut for the brownie dough portion. Prepare the brownie mix according to the package directions for “fudgy” brownies (usually by using less water or an extra egg yolk). The batter will be thinner, so you must chill it until it’s firm enough to scoop before proceeding with the swirling steps.
Why did my peanut butter swirl sink or disappear?
Your peanut butter swirl likely sank because the peanut butter was too warm or the brownie dough was too thin. Using natural peanut butter that has separated oil can also cause it to melt and disappear. To fix a greasy swirl, use a no-stir commercial peanut butter and ensure both doughs are well-chilled before you swirl with a toothpick.
Shiny, crackly tops are the result of whipping the eggs and sugar together thoroughly until light and pale. This process dissolves the sugar and creates a fine meringue-like layer on the surface of the cookie, which bakes into that classic shiny, paper-thin crust. Don’t skip the creaming step!
Store the cooled cookies in an airtight container at room temperature for up to 4 days. Storing them with a slice of bread can help maintain their soft-baked and chewy texture. Do not refrigerate baked cookies, as it will make them dry and hard.
Yes, this dough freezes beautifully. Scoop the brownie dough balls, add the peanut butter, and perform the swirl. Place the unbaked, swirled cookie balls on a baking sheet and freeze until solid. Transfer them to a freezer bag for up to 3 months. You can bake them directly from frozen, adding 2-3 minutes to the baking time.
Yes, you can substitute the all-purpose flour with a high-quality 1-to-1 gluten-free baking flour blend. Look for a blend that contains xanthan gum. The texture may be slightly different, but they will still be a delicious chocolate peanut butter swirl treat.
Is it better to use creamy or crunchy peanut butter?
For the best visual swirl, creamy peanut butter is superior. Its smooth consistency allows for a cleaner, more defined marbled appearance. However, if you love texture, you can use a “no-stir” crunchy peanut butter; just be aware the swirl might be less distinct.
Why is my brownie dough so sticky?
Brownie cookie dough is naturally sticky due to its high sugar and fat content and relatively low flour content. This is what makes it fudgy! If it’s too difficult to handle, the solution is to chill the dough for at least 30-60 minutes. The cold will firm up the butter and make the dough much easier to scoop.
A brookie typically involves layering cookie dough and brownie batter, while a swirl cookie involves marbling them together. Brookies often have distinct sections of each, baked in a pan and cut into bars. These Peanut Butter Brownie Swirl Cookies are individual drop cookies where the two doughs are intertwined for a beautiful look in every bite.
Final Thoughts
You now have all the expert knowledge needed to create the ultimate Peanut Butter Brownie Swirl Cookies. By focusing on a few key principles, you can guarantee a perfect batch every single time. Remember these critical takeaways:
- Use the Right Ingredients: For a truly fudgy texture and rich chocolate flavor, use high-fat, Dutch-process cocoa powder and a conventional, no-stir creamy peanut butter. These choices prevent a cakey texture and a greasy swirl.
- Chilling is Mandatory: To prevent spreading and develop deeper flavor, you must chill both the brownie and peanut butter doughs for at least one hour. This is the secret to thick cookies with a chewy texture.
- Master the Swirl: Use a toothpick to gently drag the peanut butter dough through the brownie dough in 2-3 motions. The goal is to marble, not mix, to create that beautiful swirled pb brownie recipe look.
- Do Not Overmix: After adding flour, fold the ingredients until just combined. Overmixing develops gluten and is the primary cause of a tough, cakey texture.
- Don’t Overbake: Pull the cookies from the oven when the edges are set and the tops are crackly, but the center still looks slightly soft. They will finish cooking on the hot pan, ensuring a moist center.
Armed with these tips, you’re ready to tackle this fun baking project with confidence. This recipe doesn’t just combine two classic flavors; it creates a new favorite, a truly decadent dessert cookie that’s impressive to look at and even better to eat. Which tip will you focus on during your first batch?
Last update on 2026-06-23 at 02:01 / Affiliate links / Images from Amazon Product Advertising API
