As an Amazon Associate BakingBakewareSets.com earns from qualifying purchases.
No-Bake Samoa Cookies: Girl Scout Inspired Recipe 2026
Ever wished you could enjoy the incredible flavor of Samoa cookies all year long? That craving for chewy caramel, toasted coconut, and rich chocolate is real, but waiting for cookie season can be tough.
To make No-Bake Samoa Cookies, pulse pitted Medjool dates, toasted coconut, and a binder like almond butter in a food processor until a sticky dough forms. This mixture is then shaped into rings, chilled, and finished with a dip in melted dark chocolate and a final chocolate drizzle for a perfect copycat treat.
Drawing from kitchen-tested methods, this guide unlocks the secret to creating a healthier, easier version of this Girl Scout favorite right at home. You will discover how to achieve that authentic flavor and texture without ever turning on your oven. Get ready to master your new favorite snack.
☰ Table of Contents ▼
show
Making Homemade Samoa Cookies is surprisingly simple and unlocks the ability to satisfy that specific craving any time of year. The core of this easy Samoa recipe lies in replacing a complex baked shortbread and cooked caramel with a brilliant, no-oven shortcut. By using the natural sweetness and binding power of Medjool dates, you can create a chewy, caramel-like base that perfectly mimics the texture of the original. This method not only simplifies the process but also creates a healthier, refined sugar-free alternative that’s packed with fiber. The key is to combine these dates with crispy toasted coconut and a simple binder in a food processor, which does all the hard work for you. The result is a delicious, no-oven Samoa cookie that comes together in minutes, ready for its signature dip and drizzle of dairy-free chocolate.
Samoas vs. Caramel DeLites: What’s the Difference?
You’re not imagining it—they are two different names for the same cookie concept. The name you see depends on which bakery supplies your local Girl Scout council. Little Brownie Bakers make Samoas, which are known for a heavier dark chocolate coating, while ABC Bakers produce Caramel DeLites, often noted for a sweeter cookie base. This recipe closely follows the beloved flavor profile of the classic Samoa.
Transforming a few simple ingredients into a decadent, copycat Girl Scout cookie is an art, but it’s one that anyone can master. This section breaks down the essential techniques, from building the classic 5-ingredient cookie to troubleshooting common issues like sticky dough. We’ll cover multiple variations, including a super-simple 3-ingredient healthy version, and provide the pro tips you need to nail the process. These seven secrets are your roadmap to creating perfect, chewy, and delicious No-Bake Samoas every single time, ensuring your results are always impressive.
1. Master the Classic 5-Ingredient No-Bake Samoa

Pin this classic recipe to your ‘Easy Desserts’ board!
Ingredients
- 1 ½ cups unsweetened shredded coconut
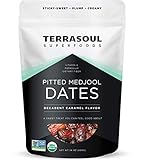
- 1 cup packed, pitted Medjool dates (about 10-12 dates), soaked in hot water for 10 minutes if dry
- 2 tablespoons creamy almond butter
- 1 teaspoon vanilla extract
- ¼ teaspoon fine sea salt
- ½ cup dairy-free dark chocolate chips
Instructions
- Toast the coconut: Spread the coconut on a baking sheet. Bake at 350°F (175°C) for 3-5 minutes, or toast in a dry skillet over medium heat, stirring constantly until fragrant and lightly golden. Set aside.
- Pulse in food processor: In a food processor, combine the pitted dates, 1 cup of the toasted coconut (reserve the rest for coating), almond butter, vanilla extract, and sea salt. Pulse until a sticky, thick dough forms.
- Form into rings: Scoop tablespoon-sized portions of the dough and roll them into balls. Flatten into discs about ½-inch thick. Use the back of a small spoon or a piping tip to press a hole in the center.
- Chill in freezer: Place the formed cookies on a parchment-lined tray and freeze for at least 20 minutes to firm up.
- Melt the chocolate: Melt the dark chocolate chips in a microwave-safe bowl in 30-second intervals until smooth.
- Dip the bottoms: Dip the bottom of each chilled cookie into the melted chocolate and place it back on the parchment paper.
- Drizzle over top: Drizzle the remaining chocolate over the tops of the cookies. Refrigerate until the chocolate is completely set, about 15 minutes.
Pro-Tip: The hygroscopic properties of dates (their ability to attract and hold water) are what make them the perfect natural binder and sweetener. If your dates are dry, a quick 10-minute soak in hot water is a non-negotiable step to ensure a chewy, not crumbly, texture.
2. Simplify with the 3-Ingredient Healthy Version

Need a super simple treat? Pin this 3-ingredient hack!
Ingredients
- 1 cup shredded coconut, lightly toasted
- 1 cup packed, pitted Medjool dates
- ½ cup dark chocolate chips (vegan and refined sugar-free for the healthiest option)
Instructions
- Pulse in food processor: Combine the toasted coconut and pitted dates in a food processor. Pulse until the mixture sticks together when pressed.
- Form into discs: Roll the dough into small balls and flatten them into cookie shapes. You can press a hole in the center for the classic look, or leave them as simple discs.
- Chill to firm: Place the cookies on a parchment-lined plate and freeze for 15-20 minutes.
- Melt and dip: Melt the chocolate chips. Dip the bottom of each cookie in the chocolate and then drizzle the remaining chocolate over the top.
- Refrigerate until set: Return the cookies to the refrigerator for about 10 minutes, or until the chocolate has hardened.
Pro-Tip: For the best 3-ingredient result, the quality of your dates is paramount. Look for soft, plump Medjool dates. If they are even slightly firm, the dough won’t come together properly. This is a perfect example of where ingredient quality replaces ingredient quantity.

3. Achieve the Perfect Mess-Free Chocolate Dip & Drizzle

Pin this pro tip for perfectly drizzled cookies every time!
Tools Required
- 1 cup dark chocolate chips or a chopped chocolate bar
- 1 teaspoon coconut oil (this is the secret!)
- A fork or a small piping bag/ziplock bag
- A wire cooling rack
- Parchment paper
Steps
- Prepare your station: Place a sheet of parchment paper under a wire cooling rack. Arrange your chilled, un-dipped cookies on the rack.
- Melt chocolate with oil: In a small, deep bowl, combine the chocolate chips and coconut oil. Microwave in 20-second bursts, stirring in between, until the chocolate is about 90% melted. Remove and stir until completely smooth. The coconut oil makes the chocolate more fluid and easier to work with.
- Dip the bottoms: Hold a cookie by its edges and dip the bottom flat into the melted chocolate. Let any excess drip off before placing it, chocolate-side down, on the wire rack. The rack allows air to circulate for even setting and prevents a “foot” of chocolate from forming.
- The Fork Drizzle: Dip a fork into the remaining melted chocolate. Wave it quickly back and forth over the cookies on the rack to create thin, even drizzles.
- The Bag Drizzle (for more control): Pour the remaining chocolate into a small ziplock or pastry bag. Snip a tiny corner off and drizzle the chocolate over the cookies in a controlled motion.
- Chill to set: Place the entire cooling rack in the refrigerator for 10-15 minutes until the chocolate is firm to the touch.
Pro-Tip: The key to a professional “snap” in your chocolate without complex tempering is temperature contrast. Your cookies must be very cold (straight from the freezer is ideal) when you dip them in the warm (not hot!) chocolate. This rapid cooling helps the cocoa butter in the chocolate set quickly into a stable, shiny structure.

4. How to Toast Coconut Perfectly (Stovetop vs. Oven)

Never burn your coconut again! Pin this essential kitchen tip.
Supplies Needed
- 1 ½ cups unsweetened shredded coconut (flakes or shredded will work)
- A light-colored skillet (for stovetop) OR a rimmed baking sheet (for oven)
- A spatula or wooden spoon
Stovetop Method (Quicker, Requires More Attention)
- Heat the skillet: Place a dry, light-colored skillet over medium-low heat. A light color helps you see the coconut changing color.
- Add coconut: Add the coconut in an even layer. Do not walk away!
- Stir constantly: Use a spatula to stir and toss the coconut continuously. It will go from white to golden to burnt in a matter of seconds.
- Remove immediately: As soon as the flakes are mostly light golden brown and fragrant (about 2-4 minutes), immediately pour them onto a cool plate to stop the cooking process.
Oven Method (More Hands-Off, More Even)
- Preheat oven: Preheat your oven to 350°F (175°C).
- Spread on sheet: Spread the coconut in a thin, even layer on a rimmed baking sheet.
- Bake and stir: Bake for 5-7 minutes, stirring at the halfway mark, until the coconut is evenly golden brown.
- Cool: Let it cool on the baking sheet. The residual heat will continue to toast it slightly.
Pro-Tip: The delicious nutty flavor of toasted coconut comes from the Maillard reaction, a chemical reaction between amino acids and sugars. The key is gentle, even heat. If your coconut is toasting too quickly or unevenly, your heat is too high. Low and slow wins the race.


Allergy-friendly and delicious! Pin this nut-free Samoa recipe.
Ingredients
- 1 ½ cups unsweetened shredded coconut, toasted
- 1 cup packed, pitted Medjool dates
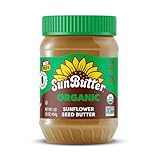
- 2 tablespoons creamy sunflower seed butter (or Tahini for a different flavor profile)
- 1 teaspoon vanilla extract
- ¼ teaspoon fine sea salt
- ½ cup nut-free dark chocolate chips
Instructions
- Follow the classic method: The process is identical to the 5-ingredient classic recipe. Simply substitute the almond butter with an equal amount of sunflower seed butter.
- Pulse ingredients: Combine the dates, 1 cup of toasted coconut, sunflower seed butter, vanilla, and salt in a food processor until a sticky dough forms.
- Form and chill: Shape the dough into rings, place on a parchment-lined tray, and freeze for 20 minutes.
- Dip and drizzle: Dip the bottoms in melted nut-free chocolate, drizzle the tops, and refrigerate until fully set.
Pro-Tip: Sunflower seed butter can have a stronger, more earthy flavor than almond butter. If you find it overpowering, you can add an extra ½ teaspoon of vanilla extract or even a pinch of cinnamon to balance the flavor profile and create a delicious, unique nut-free treat.
6. Fix Crumbly or Sticky No-Bake Dough

Save your cookie dough! Pin this troubleshooting guide.
Supplies Needed
- Your problematic cookie dough
- A food processor
- Extra Medjool dates (if too dry) or extra toasted coconut (if too wet)
- A small bowl of water
Steps
- Diagnose the Problem: If your dough is too crumbly and won’t stick together, it lacks moisture. This is usually because your dates were too dry.
- Fix Crumbly Dough: Add 1-2 more soaked, pitted Medjool dates to the food processor and pulse again. If you’re out of dates, add 1 teaspoon of water or melted coconut oil at a time and pulse until the dough comes together.
- Diagnose the Problem: If your dough is too sticky or “wet” and is difficult to handle, it has too much moisture.
- Fix Sticky Dough: Add 1-2 tablespoons of extra toasted coconut or 1 tablespoon of almond flour/oat flour to the food processor. Pulse until the dough is firm enough to handle.
- Handling Sticky Dough: If the dough is the right consistency but still sticky on your hands, lightly wet your fingertips with water before rolling each ball. This creates a non-stick barrier.
Pro-Tip: Before you even start, assess your dates. A perfect Medjool date for no-bake recipes should be soft, slightly sticky, and pliable. If it’s hard and dry, the soaking step isn’t optional—it’s essential for the structural integrity of no-bake dough.

Keep your cookies fresh! Pin these essential storage tips.
Supplies Needed
- An airtight container
- Parchment paper
Steps
- Refrigerator Storage (For Short-Term): Once the chocolate is fully set, place the cookies in an airtight container. If you need to stack them, separate the layers with a sheet of parchment paper to prevent sticking and protect the drizzle. They will stay fresh in the refrigerator for up to 1 week.
- Freezer Storage (For Long-Term): For longer storage, the freezer is your best friend. Arrange the set cookies in a single layer on a baking sheet and “flash freeze” them for 30 minutes.
- Transfer to Container: Once they are frozen solid, you can transfer them to a freezer-safe airtight container or a ziplock bag. They won’t stick together once flash-frozen.
- Enjoy from Frozen: These cookies are delicious straight from the freezer! They will last in the freezer for up to 3 months.
Pro-Tip: Because these cookies are held together by natural binders like dates and coconut oil, they will soften significantly at room temperature. They are a refrigerator cookie through and through. Always store them chilled for the best chewy texture.
- Dates Are the Engine: The success of your No-Bake Samoa Cookies hinges on soft, plump Medjool dates. They provide the sweetness, fiber, and crucial sticky binding power that replaces traditional caramel.
-
Toast Your Coconut: Never skip toasting the coconut. This simple step is what develops the signature nutty, fragrant flavor and crispy texture that defines a Samoa.
-
Chill at Every Stage: These are refrigerator cookies. Chilling the dough before dipping and chilling the finished cookies to set the chocolate is mandatory for a firm, non-mushy result.
-
Coconut Oil is Chocolate’s Best Friend: Adding a small amount of coconut oil to your melting chocolate creates a smoother, more fluid consistency, making it perfect for a clean dip and a mess-free drizzle.
-
Troubleshoot with Moisture: If your dough is too crumbly, add moisture (a soaked date or water). If it’s too sticky, add a dry ingredient (more toasted coconut). It’s an easy fix!
Your no-bake cookies likely won’t set up if the dough has too much moisture or if they haven’t been chilled long enough. This can happen if your dates were overly wet or if you added too much liquid binder. The solution is to add more dry ingredients, like toasted coconut or a tablespoon of almond flour, to absorb the excess moisture and to ensure you are refrigerating or freezing them until they are completely firm.
Can I make Samoas without a food processor?
Yes, you can make them without a food processor, but it requires more effort. You will need to mince the soaked dates very finely with a knife until they form a paste. Then, in a bowl, use your hands or a sturdy spoon to vigorously mix the date paste with the other ingredients. The goal is to create a homogenous, sticky dough. A food processor is highly recommended for the best and easiest texture.
Are these no-bake Samoas healthy?
These no-bake Samoas are a healthier alternative to the original Girl Scout cookies. They are made with whole-food ingredients and are refined sugar-free, relying on the natural sweetness and fiber of Medjool dates. Depending on your choice of chocolate and binder, they can easily be made vegan, gluten-free, and paleo-compliant. However, they are still a calorie-dense treat and should be enjoyed in moderation.
What is the difference between Samoas and Caramel DeLites?
Samoas and Caramel DeLites are essentially the same cookie sold under different names. The name depends on which bakery produces them for the Girl Scouts in your region. Little Brownie Bakers produce Samoas, which tend to have a higher ratio of dark chocolate. ABC Bakers produce Caramel DeLites, which are known for a more prominent vanilla flavor in the cookie base. This recipe closely mimics the flavor profile of the classic Samoa.
The easiest way to create the signature hole is after you’ve formed the dough into a flat disc. You can use the rounded handle of a wooden spoon, a reusable straw, or the large end of a metal piping tip. Simply press it gently into the center of the cookie to push out a small circle of dough. This step is purely for aesthetics, so you can skip it if you’re in a hurry.
Final Thoughts on Your Homemade Samoa Adventure
You now hold the keys to unlocking one of the most beloved cookie flavors anytime you want. By embracing the simplicity of whole-food ingredients like dates and coconut, you’ve seen how easy it is to create a delicious, satisfying, and healthier copycat recipe for the iconic Samoa. This isn’t just about making a dessert; it’s about empowerment in the kitchen and the joy of recreating a favorite treat on your own terms.
What’s your favorite part about making no-bake treats at home?
Last update on 2026-06-03 at 07:25 / Affiliate links / Images from Amazon Product Advertising API
