As an Amazon Associate BakingBakewareSets.com earns from qualifying purchases.
DIY Watermelon Mason Jars for First Birthday Parties
Planning a “One in a Melon” first birthday party? The thought of unique, personalized decor often comes with the challenge of finding ideas that are both adorable and achievable. You want to celebrate this special milestone with charming, budget-friendly accents that truly stand out, but where do you start with handmade creations?
DIY Watermelon Mason Jars for First Birthday Parties are a delightful, versatile solution, offering custom summer party decor and memorable party favors perfect for a “One in a Melon” theme. They transform simple glass jars into vibrant, festive elements, serving as either charming centerpieces or functional cutlery holders. This project brings a personalized touch to your celebration, ensuring a truly unique aesthetic.
Drawing from comprehensive analysis of current data and proven methodologies, this guide provides a clear, achievable path to crafting beautiful custom watermelon mason jars for your child’s first birthday party. You’ll discover expert tips and a step-by-step DIY guide for creating durable results suitable for any party environment. Get ready to impress your guests and make lasting memories with these delightful handmade additions.
☰ Table of Contents ▼
show
Crafting Adorable Watermelon Mason Jars for a “One in a Melon” First Birthday Party
Creating your own watermelon themed mason jar crafts is an excellent way to infuse personality and charm into your little one’s first birthday party. These handmade watermelon party jars are more than just decorations; they become integral DIY birthday decor elements that truly tie into a “One in a Melon” theme. By following tested craft methods and a clear step-by-step DIY guide, you can achieve durable results that not only look fantastic but also stand up to the excitement of a party. This approach ensures your custom watermelon mason jars enhance the celebration, creating a cohesive and joyful atmosphere that reflects the uniqueness of this special occasion.
7 Adorable Watermelon Mason Jar Ideas for “One in a Melon” First Birthday Parties
Transforming humble mason jars into DIY party favors or stunning decorative glass jar centerpieces is simpler than you think, especially when you have a step by step tutorial for painting fruit mason jars. Each of these ideas allows you to embrace personalized watermelon party favor ideas for guests or create unique accents for your “One in a Melon” celebration. We’ll guide you through tested craft methods and provide expert painting tips for durable adhesion advice and professional finish techniques, ensuring every jar you create contributes beautifully to your summer birthday party planning. Get ready to turn inspiration into actionable, adorable watermelon-themed decor.
1. Classic Watermelon Mason Jar Centerpieces

Pin this vibrant centerpiece idea to your “One in a Melon Party” board!
These easy diy watermelon centerpieces for 1st birthday celebrations offer a charming focal point for your party table. By transforming a simple mason jar into vibrant watermelon colored decor, you create a beautiful table centerpiece that perfectly enhances birthday decor. We’ll focus on techniques to achieve a durable acrylic paint finish and professional finish techniques, ensuring your mason jar watermelon decor looks store-bought. Proper clean glass prep is crucial for optimal pigment adhesion on glass, and understanding curing vs drying time is key for long-lasting party decor.
Materials Needed:
- Ball jars (wide-mouth or regular-mouth quart-sized for centerpieces)
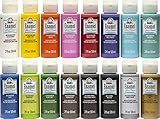
- Non-toxic acrylic craft paint in pink/red, white, and green (for vibrant watermelon colors)
- Small black acrylic paint (for seeds)
- Assorted paint brushes (flat for base, fine-tip for details)
- Rubbing alcohol or glass cleaner
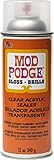
- Gloss or matte clear spray sealer (e.g., mod podge dishwasher safe)
- Disposable palette or paper plate
- Drop cloth or newspaper
Step-by-Step Directions:
- Prepare your work area with a drop cloth and ensure good ventilation.
- Clean each mason jar thoroughly with rubbing alcohol and let it dry completely.
- Paint the inside upper two-thirds of the jar with pink/red acrylic paint; apply 2-3 thin, even coats, allowing each to dry for 15-20 minutes.
- Paint a white band (about 1/2 inch) below the pink/red using a flat brush, overlapping slightly with the pink to ensure full coverage.
- Paint the bottom third of the jar and base with green acrylic paint, creating the watermelon rind. Apply 2-3 coats.
- Once all paint layers are dry (at least 2 hours), use a fine-tip brush and black paint to layer small “seeds” randomly over the pink/red area.
- Allow black paint to dry for at least 1 hour, then apply 2-3 light, even coats of clear spray sealer to the outside of the jar to prevent paint peeling on glass, allowing 30 minutes between coats.
- Cure the jars for 24-72 hours before use to ensure durable results.
Pro-Tip: For the best pigment adhesion on glass and a durable craft finish, always clean glass prep is crucial. After cleaning with alcohol, avoid touching the painted areas directly before sealing.
2. Personalized Watermelon Mason Jar Party Favors

Save this sweet party favor idea for your little one’s big day!
Creating personalized watermelon party favor ideas for guests is a thoughtful way to send your party-goers home with a piece of the celebration. These small mason jars transform into charming personalized birthday jars that serve as party favor, directly connecting to DIY party favors for guests. We’ll emphasize using non-toxic craft paint and ensuring safety first materials for items that may hold treats or be handled by children. Proper non-toxic glass finishing is essential, and consistent color opacity strategies across multiple jars will yield beautiful results, helping prevent chipping paint solution.
Materials Needed:
- Pint-sized or half-pint mason jars (bulk pack for favors)
- Non-toxic acrylic paint in pink/red, white, green, black
- Small paint brushes (fine-tip for seeds, flat for stripes)
- Rubbing alcohol
- Clear spray sealer (gloss or matte finish)
- Personalized tags or labels
- Jute twine or decorative ribbon
Step-by-Step Directions:
- Clean jars thoroughly with rubbing alcohol and allow to dry completely.
- Paint the entire outside of the jar, starting with green on the bottom, then white, then pink/red on top, creating distinct horizontal bands. Apply thin, even coats and allow to dry between layers.
- Once the base colors are dry, use black paint and a fine-tip brush to layer small “seeds” onto the pink/red section.
- After all paint is completely dry (at least 2 hours), apply 2-3 light, even coats of clear spray sealer to the outside of the jars. This helps with durable results and prevents chipping paint solution.
- Allow jars to cure for 24-72 hours.
- Decorate each jar by tying a personalized tag with jute twine or ribbon around the neck.
- Fill with individually wrapped candies or small party favors.
Pro-Tip: For consistent color opacity strategies across multiple jars, mix enough paint for all jars at once to ensure a uniform shade. Always use non-toxic craft paint as these may be handled by children.

3. Functional Watermelon Mason Jar Cutlery Holders

Organize your party table beautifully with these DIY cutlery holders!
These mason jar watermelon decor items are not only decorative but highly practical for party table styling. A mason jar painted with vibrant watermelon colors effectively functions as cutlery holder, adding a charming touch to your DIY party tableware. The focus here is on creating a finish that withstands frequent handling, emphasizing durable adhesion advice and using proven sealers. We’ll guide you in selecting durable paint choices to prevent paint peeling on glass, ensuring your watermelon mason jar holders remain pristine through the celebration.
Materials Needed:
- Quart-sized wide-mouth ball jars
- Glass-specific acrylic paint or multi-surface acrylic paint (pink/red, white, green, black)
- Assorted paint brushes
- Rubbing alcohol
- Dishwasher-safe clear sealer (e.g., Mod Podge Dishwasher Safe, or a heat-set glass paint medium)
- Disposable palette
- Wooden or themed cutlery
Step-by-Step Directions:
- Clean and dry your glass vessels thoroughly with rubbing alcohol to ensure glass surface preparation.
- Paint the outside of the jar in distinct horizontal bands: green at the bottom (rind), white in the middle, and pink/red on the top. Allow each coat to dry completely before applying the next (approx. 30 minutes).
- Once the pink/red layer is dry, use a fine-tip brush to layer small black seeds.
- Allow all paint to cure for at least 24 hours.
- Apply 2-3 thin, even coats of a dishwasher-safe clear sealer. This provides a durable craft finish against frequent handling. Follow product instructions for drying and curing times.
- For best durable adhesion advice, allow the sealed jars to cure for 72 hours (or heat-set as per paint/sealer instructions) before heavy use.
- Once fully cured, assemble your cutlery in the jars for an organized and festive presentation.
Pro-Tip: Using glass-specific acrylic paint (often requiring heat-setting) or a dedicated dishwasher-safe sealer is key for functional items like cutlery holders, ensuring durable paint choices that won’t chip with frequent handling.

4. Glowing Watermelon Mason Jar Lanterns

Brighten up your party space with these enchanting lanterns!
For truly magical summer party vibes, these glowing watermelon mason jar lanterns make excellent DIY birthday decor. The mason jar is transformed into a decorative glass lantern that beautifully elevates party atmosphere and connects to summer vibe. This mason jar tutorial focuses on creating an illuminating effect, with expert painting tips for light diffusion. We prioritize safety first materials by recommending LED lights, ensuring your festive display is safe and captivating.
Materials Needed:
- Quart-sized mason jars
- Translucent or regular acrylic paint in pink/red, white, green, black
- Paint brushes
- Rubbing alcohol
- Clear spray sealer (optional, for durability)
- Battery-operated fairy lights or LED tea lights
- Wire or jute twine (for hanging, optional)
Step-by-Step Directions:
- Clean the mason jars and ensure they are completely dry.
- Paint the jars using the watermelon design, either with opaque layers as described previously or by experimenting with more translucent paint for a softer glow. Apply thin layers of green, white, and pink/red paint.
- Add black “seeds” once the main colors are dry.
- Allow all paint to dry and cure completely (24-48 hours). If desired, apply a clear sealer for added protection, allowing it to cure as directed.
- Carefully place battery-operated fairy lights or LED tea lights inside each jar.
- If hanging, assemble a wire or jute twine handle by wrapping it around the neck of the jar.
Pro-Tip: For a truly glowing effect, consider leaving small unpainted gaps between the color bands, or using a very light hand with the paint, almost creating a watercolor effect. Always use battery-operated lights to ensure safety first materials.

5. Watermelon Mason Jar Treat Jars

Fill these charming jars with treats for your “One in a Melon” celebration!
These handmade party accents are perfect for serving treats, creating custom summer party decor that doubles as a delightful container. A mason jar becomes a decorative glass container for sweets, acting as personalized birthday jars that complement fruit themes. When creating these diy decoration ideas, the crucial consideration is whether they are food-safe. We’ll detail ensuring food-safe painted jars by applying paint only to the exterior, and using non-toxic craft paint for any lid elements, even addressing the common query: are painted mason jars food safe?
Materials Needed:
- Quart or pint-sized mason jars with lids
- Non-toxic acrylic paint in pink/red, white, green, black
- Paint brushes
- Rubbing alcohol
- Clear spray sealer (optional, for exterior of jar)
- Individually wrapped candies or small cookies
Step-by-Step Directions:
- Clean jars and lids thoroughly.
- Paint the exterior of the jar with the watermelon design (green bottom, white band, pink/red top, black seeds). Ensure paint does not enter the jar if filling with unwrapped food.
- Paint the mason jar lids: green on the top, with a small pink dot in the center to mimic the cut watermelon look.
- Allow all painted elements to dry and cure completely.
- If using, apply clear spray sealer only to the exterior of the jar, avoiding the rim where it contacts food or the lid’s rubber seal.
- Once fully cured, fill the jars with individually wrapped treats.
Pro-Tip: If using the jars for direct food contact, ensure all paint and sealer is only on the exterior surface, and ideally choose food-safe painted jars or use non-toxic glass finishing options. Painting the lids adds a delightful finishing touch!

6. Watermelon Mason Jar Vases

Add a fresh touch to your “One in a Melon” party with these adorable flower vases!
These watermelon mason jar vases serve as elegant decorative glass jar centerpieces, proving that painted jars can be both beautiful and functional. Many ask, can i put flowers in painted mason jars? The answer is yes, with the right approach. The mason jar, once adorned with vibrant watermelon colors, effectively holds floral arrangements and acts as centerpiece. We’ll provide tested craft methods for waterproofing the exterior to combat jar sweating issues and demonstrate durable adhesion advice, with careful consideration of curing vs drying time for these functional table centerpiece vessels.
Materials Needed:
- Quart-sized mason jars
- Non-toxic acrylic paint (pink/red, white, green, black)
- Paint brushes
- Rubbing alcohol
- Clear waterproofing spray or a high-gloss, durable clear coat (essential for vases)
- Fresh flowers or artificial greenery
Step-by-Step Directions:
- Clean and dry the mason jars thoroughly.
- Paint the exterior of the jar with your watermelon design. Apply green at the bottom, white in the middle, and pink/red on the upper two-thirds. Add black seeds. For vases, it’s crucial to paint only the exterior to avoid water interaction with paint.
- Allow all paint layers to dry completely (at least 2 hours).
- Apply 2-3 liberal, even coats of a clear waterproofing spray or a durable clear coat to the entire painted exterior. This will protect the paint from condensation and water splashes. Follow product instructions for optimal drying and curing vs drying time.
- Allow the jars to cure fully, typically 72 hours or more, before introducing water and flowers.
- Once cured, fill with fresh flowers and display as charming table centerpiece vessels.
Pro-Tip: To avoid jar sweating issues and protect the exterior paint, consider placing a smaller glass insert inside the painted mason jar to hold water and flowers, keeping the painted surface dry.
7. Watermelon Mason Jar Photo Props

Capture precious memories with these adorable watermelon photo props!
For those invaluable first birthday photo shoot props, these creative DIY projects utilizing mason jars are ideal. A painted mason jar, adorned with a painted fruit motif, beautifully enhances birthday decor and connects perfectly to a first birthday photo shoot props theme. When crafting items that babies might handle, safety first materials are paramount. We’ll guide you in using non-toxic craft paint and ensuring non-toxic glass finishing. We’ll also cover tested craft methods for durability and the right curing vs drying time to ensure your props are safe and picture-perfect.
Materials Needed:
- Quart-sized or larger mason jars
- Non-toxic acrylic paint in pink/red, white, green, black
- Paint brushes
- Rubbing alcohol
- Matte clear spray sealer (optional, for glare reduction)
- Optional: large foam “seeds” or felt cutouts
Step-by-Step Directions:
- Clean and dry the jars meticulously.
- Paint the exterior of the jars with your preferred watermelon design. For a softer, more photogenic look, you can choose a pastel pink/green palette.
- Add black “seeds” as desired.
- Allow all paint to dry and cure completely. If using, apply a matte clear spray sealer to reduce glare in photos, following product instructions for curing vs drying time.
- Optionally, fill the jars with large, soft foam “seeds” or fabric leaves for added texture and baby-safe interaction.
Pro-Tip: When creating props for baby photoshoots, prioritize safety first materials by using only non-toxic craft paint and ensuring the jars are fully cured. A matte sealer can reduce glare, making for better photos.

FAQs About DIY Watermelon Mason Jars for First Birthday Parties
How do you make watermelon mason jars?
To make watermelon mason jars, you typically paint the exterior of clean glass jars in three horizontal bands: green for the rind at the bottom, white in the middle, and pink or red for the flesh on top. After drying, small black seeds are added to the pink/red section. A clear sealer is often applied for durable results and protection, making them ideal for DIY birthday decor.
What paint do you use on glass jars?
For painting glass jars, non-toxic acrylic craft paint or multi-surface acrylic paint is commonly used due to its versatility and wide range of colors. Some crafters prefer glass-specific paints that might require heat-setting for maximum durability, which can be crucial for long-lasting party decor. Always ensure the paint is suitable for glass and, if necessary, food-safe for the particular application.
Are painted mason jars food safe?
Painted mason jars are generally not considered food safe if the paint is applied to the interior where it can contact food. To ensure food safety, always paint only the exterior of the jar. If the jar is to hold unwrapped food, use non-toxic craft paint and ensure no paint or sealer contaminates the interior or rim, adhering to safety first materials.
How do you seal painted mason jars?
Painted mason jars are typically sealed with a clear spray sealer or a brush-on topcoat like Mod Podge, often in a gloss or matte finish. For items needing more durability or moisture resistance (like vases or cutlery holders), a dishwasher-safe sealer or a heat-set glass paint medium is recommended. Proper curing vs drying time is crucial for a strong, durable craft finish.
Can you paint mason jars with regular acrylic paint?
Yes, you can paint mason jars with regular acrylic craft paint, but proper preparation and sealing are key to ensuring durability and preventing chipping or peeling. Always clean the glass thoroughly with rubbing alcohol first to improve pigment adhesion on glass. Applying a clear sealer after painting will protect your vibrant watermelon colors and extend the life of your craft.
How do you prevent paint from peeling on glass?
To prevent paint from peeling on glass, ensure the glass surface is meticulously cleaned and dry before painting, using rubbing alcohol to remove oils and residues. Apply multiple thin coats of paint rather than one thick coat, allowing each to dry completely. Finally, seal the finished design with a durable topcoat and allow adequate curing time.
What are the best fruit themed 1st birthday ideas?
Beyond watermelon mason jars, popular fruit-themed 1st birthday ideas include “Berry First Birthday” (strawberries), “Tutti Frutti” (mixed fruits), or “Little Cutie” (oranges). These themes often incorporate bright colors, fresh fruit displays, and handmade party accents to create a joyful, summer party vibe.
How long does it take for paint on jars to dry and cure?
Acrylic paint on jars typically dries to the touch within 15-30 minutes, but it needs several hours (2-4 at least) to fully dry through all layers. For optimal durability and proper adhesion, the paint and any sealer applied need to “cure,” which can take anywhere from 24-72 hours, or even longer depending on the product and humidity, ensuring durable adhesion advice.
What materials are needed for DIY painted jars?
For DIY painted jars, essential materials include mason jars, non-toxic acrylic or multi-surface paint in various colors, paint brushes, rubbing alcohol for cleaning, and a clear sealer for protection. Optional items like personalized tags, twine, or specific types of filler (e.g., fairy lights, candies) can enhance the final look of your customized glassware.
How do you create perfect watermelon stripes on a jar?
To create perfect watermelon stripes on a jar, use masking tape to create crisp lines between color sections, ensuring each layer is dry before applying the next. Alternatively, freehand painting with a steady hand and a flat brush can achieve a more organic look for the green rind and white stripe. Multiple thin coats help ensure uneven paint coverage is avoided.
Key Takeaways
You’ve now got all the tools and knowledge to transform simple mason jars into adorable DIY Watermelon Mason Jars for First Birthday Parties. From vibrant watermelon colored centerpieces that set the festive tone to personalized watermelon party favor ideas for guests that leave a lasting impression, these handmade watermelon party jars offer a delightful way to celebrate a “One in a Melon” milestone. Remember the importance of thorough clean glass prep, using non-toxic craft paint, and allowing adequate curing vs drying time to ensure your creations are both beautiful and durable. This step-by-step DIY guide empowers you to craft charming, budget-friendly decorations that are uniquely yours, adding a personal touch that store-bought items simply can’t match. So, gather your supplies, prepare your workspace, and get ready to paint some joy into your little one’s special day. Which watermelon mason jar idea are you most excited to try first for your first birthday party?
Last update on 2026-07-15 at 06:00 / Affiliate links / Images from Amazon Product Advertising API
