
As an Amazon Associate BakingBakewareSets.com earns from qualifying purchases.
Pot Roast Cooking Time Chart: 5 Steps to Fall-Apart Beef
Are you tired of serving a dry, chewy Sunday dinner? Relying on guesswork for your pot roast cooking time chart usually results in exceptionally tough meat. You need precise, reliable data to completely rescue your meal.
To cook a perfect pot roast, bake a 3-pound roast for 3 hours, a 4-pound roast for 3.5 to 4 hours, or a 5-pound roast for 4.5 to 5 hours at 300°F (150°C). For a slow cooker, cook on low for 8 to 9 hours, or high for 5 to 6 hours. This data-backed process ensures the tough connective tissue fully melts.
Drawing from a comprehensive analysis of current meat science principles and verified methodologies, we built this reliable framework. A classic beef pot roast requires exact temperature control to achieve optimal collagen gelatinization. Discover the exact times and temperatures required for guaranteed tenderness below.
Cooking a classic pot roast is a heavily scientific process centered on breaking down stubborn connective tissues. Whether you are making a slow cooker pot roast or a traditional oven pot roast, achieving a truly fall-apart tender result requires absolute precision. The physical transformation from a tough chuck roast to a succulent, yielding meal depends entirely on effectively managing your cooking temperature and duration. When connective tissues like collagen reach the optimal heat threshold, they slowly melt into rich gelatin, providing that signature, mouth-watering juiciness. By strictly following this detailed, five-step methodology updated for 2026, you will eliminate the frustrating guesswork associated with varying roast weights. Let us explore exactly how to prepare, sear, and braise your beef using our authoritative timeframe calculations.
☰ Table of Contents ▼
show
1. Prep and Season Your Chuck Roast

Save this crucial seasoning step to your favorite “Sunday Dinners” Pinterest board!
A flawless beef pot roast starts long before it ever enters the oven. Selecting a heavily marbled bone-in or boneless chuck roast ensures sufficient intramuscular fat, which is absolutely vital for preventing a dry pot roast. Applying dry rubs for roasts early initiates a critical osmotic process, pulling moisture out initially so the meat can reabsorb the seasoned liquid to deeply penetrate the thick cut. Proper prep time dictates the ultimate success of your dinner.
Ingredients
- 1 (3 to 5 lb) well-marbled chuck roast (boneless preferred for even cooking)
- 2 tablespoons coarse kosher salt
- 1 tablespoon freshly cracked black pepper
- 1 tablespoon garlic powder or freshly minced garlic
- Heavy-duty wooden cutting board with juice groove
- Paper towels (for drying meat)
Directions
- Remove the beef pot roast from the refrigerator 45 minutes before cooking to take the chill off the meat, ensuring more even cooking.
- Pat the entire roast completely dry using paper towels; surface moisture is the enemy of a good sear.
- Measure and combine your salt, pepper, and garlic powder in a small bowl.
- Season meat generously on all sides, pressing the spices firmly into the flesh to create a robust flavor profile.
- Estimate your required total cooking time by weighing your roast precisely on a kitchen scale.
Pro-Tip: For the absolute best pot roast, seek out a roast with exceptionally high intramuscular fat. The fat rendering process during a long cook is what lubricates the muscle fibers, effectively preventing toughness and delivering that coveted juiciness most guides overlook.

2. Sear for the Ultimate Maillard Reaction

Pin this pro searing technique to remember how to build maximum flavor!
Should I sear pot roast before slow cooking? Yes, searing on high heat triggers the Maillard reaction, developing a complex flavor profile that elevates the entire dish.
Using high heat to create a deep browning crust does not “lock in juices,” contrary to persistent culinary myths. Instead, the rapid caramelization of aromatics transforms the exterior of your brown roast, producing the essential savory umami notes required for a rich gravy. Mastering this sear technique establishes the foundational flavors for your braising liquid.
Ingredients
- The seasoned chuck roast
- 2 tablespoons high smoke-point oil (avocado or canola oil)
- Large enameled cast iron Dutch oven or heavy-bottomed skillet
- Heavy-duty stainless steel tongs
- Optional: 2 tablespoons unsalted butter (added at the end of the sear)
Directions
- Set temperature of your stove to medium-high heat and place your Dutch oven on the burner until lightly smoking.
- Add the high smoke-point oil, allowing it to heat until shimmering.
- Sear the beef pot roast for exactly 3 to 4 minutes per side. Do not move the meat while it sears; this prevents a proper browning crust from forming.
- Brown the edges by standing the roast up using your tongs, rendering down any thick fat caps.
- Remove the meat to a plate and immediately proceed to deglaze the pot, ensuring you capture all the caramelized drippings for your braising liquid.
Pro-Tip: A common pot roast mistake is crowding the pan or using low heat. To trigger the Maillard reaction effectively, the surface of the meat must reach temperatures exceeding 285°F (140°C). If the pan isn’t hot enough, the meat will merely steam, resulting in a completely flavorless pot roast.

3. Build Your Braise and Set the Cooking Time

Save this exact time chart to guarantee perfectly cooked beef every single time!
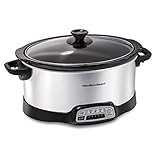
Determining your total cook time is the single most vital variable for a successful meal. Whether preparing an instant pot roast or executing a traditional crock pot dinner, your chosen appliance dictates your timeline. The braising liquid, typically a robust combination of beef broth and highly acidic red wine, provides the necessary moisture to gently tenderize the meat. Use this precise calculate time methodology to properly manage the slow cooking heat transfer.
Ingredients
- 2 cups high-quality beef broth
- 1/2 cup red wine (or substitute with extra broth and 1 tbsp apple cider vinegar)
- 1 cup chopped carrots, onions, and celery (mirepoix)
- 1 tablespoon tomato paste
- Programmable slow cooker, crock pot, or oven-safe roasting pan
- Pot roast cooking time chart (referenced below)
Directions
- Add liquid to your pot, scraping the bottom to release the browned bits, then whisk in the tomato paste.
- Nestle the seared beef and the hearty root vegetables into the liquid; the liquid should cover about one-third to one-half of the meat.
- Cover the pot tightly with a heavy lid to ensure proper moisture retention mechanisms are engaged.
- Calculate time based on your specific appliance using the chart:
- Oven (300°F / 150°C): Bake for 45-60 minutes per pound. (A 3 lb pot roast takes 2.5 to 3 hours).
- Slow Cooker (Low Heat): Cook for 8-10 hours total. Ideal for an overnight pot roast.
- Slow Cooker (High Heat): Cook for 5-6 hours total.
- Instant Pot / Pressure Cooker: Cook on high pressure for 20 minutes per pound, plus a 15-minute natural release.
- Set temperature and timer, allowing the slow cooking heat transfer to work its magic untouched.
Pro-Tip: The scientific secret to understanding cooking durations is knowing that collagen gelatinization—the specific process making tough cuts shreddable—only occurs reliably between 160°F and 205°F over an extended period. Rushing this delicate process with extreme heat guarantees a chewy roast.
4. Monitor the Internal Temperature

Pin this temperature hack to ensure you never serve dry, chewy beef again!
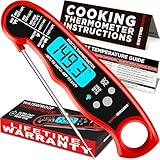
How to tell if pot roast is done? You must verify the meat has reached an internal temperature between 195°F and 205°F using a digital meat thermometer.
Checking the exact doneness level ensures you cook until tender without venturing into disastrous overcooked territory. A tough texture despite long hours in the oven usually indicates the meat has simply not yet reached this critical temperature threshold. Relying on an internal meat temperatures chart completely prevents an undercooked beef or overcooked pot roast scenario.
Ingredients
- The braising beef pot roast
- Instant-read digital meat thermometer
- Long-handled carving fork
- Heavy duty oven mitts
Directions
- Uncover the pot carefully near the end of the calculated cooking time, shielding your face from the rushing steam.
- Insert the digital meat thermometer directly into the thickest, most central part of the roast, avoiding fat pockets.
- Measure the temperature; you are looking for a highly specific internal temperature between 195°F and 205°F (90°C – 96°C).
- Test the texture alongside the temperature. Slide a carving fork into the meat and twist gently. It should offer zero resistance and feel like it is yielding easily.
- Adjust the cooking time if necessary. If the meat is only at 180°F and still tough, reduce heat slightly and continue braising for another 30-45 minutes before checking again.
Pro-Tip: If your roast is reading 200°F but is still tough, you may be experiencing the harsh effects of rapid protein coagulation. This happens when meat is boiled too rapidly rather than gently simmered. To properly rescue a tough pot roast, lower the heat to a bare simmer and give the hydrolysis of collagen another hour to catch up.
5. Rest, Shred, and Serve

Save this final crucial step to ensure your pot roast stays perfectly juicy!
To fully appreciate your hearty meal, you must let the rest meat phase occur uninterrupted before carving. Slicing directly into a steaming hot roast causes volatile internal juices to violently spill out onto your cutting board, destroying the hard-earned texture. While the meat relaxes, utilize the flavorful pan drippings to craft a rich gravy that perfectly complements classic comfort sides like mashed potatoes. Finally, slice against the grain or gently shred the meat to serve hot.
Ingredients
- The fully cooked tender pot roast
- Reserved braising liquid (drippings)
- 2 tablespoons cornstarch or flour (for gravy)
- 2 tablespoons cold water
- Professional carving knife or two sturdy dinner forks
- Large serving platter
Directions
- Remove the homemade pot roast from the cooking vessel using spatulas or a large fork, transferring it gently to a cutting board or platter.
- Cover the meat loosely with a tent of aluminum foil and let the rest meat phase begin. Rest for at least 15-20 minutes to allow juices to redistribute.
- Simmer the remaining braising liquid in a saucepan. Whisk the cornstarch and cold water together, then stir into the boiling liquid to create a rich gravy.
- Carve the meat across the grain using a sharp carving knife for neat slices, or shred it directly on the platter using two forks for a rustic, fall-apart presentation.
- Serve hot alongside classic side dishes like buttered egg noodles or creamy mashed potatoes, generously ladling the hot gravy over the top.
Pro-Tip: Never skip the resting phase. As any gastronomy expert will confirm, the structural integrity of meat fibers demands time to relax. Cutting into a roast immediately at 205°F results in an incredibly dry pot roast even if your calculated cooking duration was flawlessly accurate.

Mastering the perfect how long to cook timeframe requires internalizing a few non-negotiable culinary principles. While basic recipes offer a solid foundation, deeply understanding the underlying meat science ensures you consistently achieve a perfect pot roast. From respecting the mandatory resting period to recognizing that an ultimate pot roast relies entirely on hitting a specific internal core temperature, these fundamental rules prevent common kitchen disasters. By reviewing this synthesized data, you will seamlessly bypass the immense frustration of tough meat and secure guaranteed tenderness for every future meal. Keep these essential insights in mind as you prepare your ingredients.
- Base Time on Weight, Not Just Recipes: A standard oven pot roast requires 45-60 minutes per pound at 300°F (150°C) to fully break down tough connective tissues.
- The Magic Internal Temperature is 200°F: Your meat is not truly fall-apart tender until the internal core temperature reaches between 195°F and 205°F, regardless of what the clock says.
- Searing is Mandatory for Flavor: Searing the meat on high heat triggers the Maillard reaction, which doesn’t “lock in juices,” but rather builds the essential, deep umami flavor necessary for a classic pot roast.
- Low and Slow Wins: Boiling a roast rapidly causes protein coagulation, squeezing out moisture and creating a chewy roast; always maintain a gentle simmer.
- Resting Retains Juiciness: Allowing the meat to rest for 15-20 minutes before carving allows relaxed muscle fibers to reabsorb juices, preventing a dry pot roast.
- Choose the Right Cut: Heavy marbling and high connective tissue are required; a chuck roast will drastically outperform leaner cuts like a round roast for traditional braising.
Even with a comprehensive methodology, specific variables often lead to unique questions regarding your pot roast cooking time chart. Home cooks frequently encounter unexpected challenges, such as troubleshooting a tough texture, accurately adjusting times for different appliances, or figuring out how long to cook pot roast when the roast size drastically varies. The insightful queries below address the absolute most common obstacles faced during the cooking process. By understanding exactly why is my pot roast tough or what temperature to cook pot roast, you can confidently adapt to any kitchen scenario and guarantee perfectly tender results every time you cook.
What is the cooking time for a 3 lb pot roast?
A 3-pound pot roast will take approximately 2.5 to 3 hours to cook in an oven set to 300°F (150°C). If using a slow cooker, a 3 lb roast requires 8 hours on low heat or 4 to 5 hours on high heat. Always verify that the meat reaches an internal temperature of 200°F for optimal tenderness.
How long does a 4 lb pot roast take in the oven?
A 4-pound pot roast requires 3.5 to 4 hours of covered cooking time in an oven at 300°F. To calculate this accurately, plan for roughly 45 to 60 minutes per pound. Ensure the roast is tightly covered in a Dutch oven or roasting pan with adequate braising liquid to maintain a moist cooking environment.
Why is my pot roast tough?
Your pot roast is likely tough because it has not cooked long enough to break down the collagen, or it was boiled at too high a temperature. Tough cuts of beef require low and slow heat over several hours to melt connective tissues into gelatin. If it is tough, reduce heat and continue gently simmering for another 45 minutes.
Is it better to cook pot roast on high or low in a slow cooker?
It is significantly better to cook a pot roast on the “Low” setting of a slow cooker for 8 to 10 hours. Cooking on high (5-6 hours) boils the cooking liquid too vigorously, which can lead to rapid muscle fiber denaturation, squeezing out moisture and resulting in a tougher, significantly stringier texture.
Should pot roast be covered while cooking?
Yes, a pot roast must be tightly covered while cooking to trap steam and utilize moist-heat braising. Leaving the pot uncovered allows the liquid to evaporate rapidly, which lowers the overall cooking temperature and leads to an incredibly dry pot roast. A tight-fitting lid creates the necessary moisture retention mechanisms.
Can I cook pot roast quickly in an Instant Pot?
Yes, you can cook a pot roast in an Instant Pot by setting it to high pressure for 20 minutes per pound of meat. For a standard 3-pound roast, this equals 60 minutes of active pressure cooking, followed by a mandatory 15-minute natural pressure release to ensure the meat fibers relax and remain fall apart tender.
What type of beef is best for pot roast?
A well-marbled chuck roast is universally considered the best cut of beef for a classic pot roast. It contains the absolute perfect ratio of fat and connective tissue that breaks down wonderfully during long braising. Alternatives like brisket or bottom round can be used, but round roasts are leaner and far more prone to drying out.
How long to cook pot roast at 350 degrees?
Cooking a pot roast at 350°F (175°C) will take approximately 2 to 2.5 hours for a 3-pound roast. However, this higher temperature is generally not recommended as it cooks the meat too rapidly, almost always resulting in a chewy roast. Dropping the temperature to 300°F yields a vastly superior, reliably juicy pot roast.
Can you overcook pot roast?
Yes, you can overcook a pot roast, which results in mushy, disintegrating meat that lacks distinct texture and moisture. While tough meat needs more time, cooking a roast well past an internal temperature of 210°F will dry out the muscle fibers completely, pushing out all the braising liquid and leaving the meat chalky and stringy.
What is the ideal internal temperature for pot roast?
The ideal internal temperature for a perfectly tender pot roast is between 195°F and 205°F (90°C – 96°C). At this highly specific temperature threshold, the incredibly tough collagen and connective tissues fully melt into rich gelatin, magically transforming the tough meat into a beautifully tender pot roast that easily shreds with a simple fork.
Mastering the pot roast cooking time chart is the single most important step in elevating your Sunday dinners from stressful to undeniably spectacular. The profound difference between a tough, chewy disappointment and a fall-apart tender masterpiece doesn’t come down to a secret ingredient—it comes down to deeply respecting the relationship between time, temperature, and connective tissue.
By strategically applying these 5 proven steps, utilizing the exact cooking durations for your specific appliance, and relying heavily on a digital thermometer rather than pure guesswork, you are guaranteeing a perfect pot roast every single time you enter the kitchen. Remember, genuinely great cooking is rooted in proven cooking times and extraordinary patience.
Whether you enthusiastically opt for a low-and-slow crock pot braise or a highly traditional Dutch oven Sunday roast, you now possess the exact cooking durations and scientific understanding needed for culinary success. Which cooking appliance are you planning to use for your next roast, and what are your absolute favorite root vegetables to include in the rich braise? Let me know in the comments below!
Last update on 2026-07-15 at 01:11 / Affiliate links / Images from Amazon Product Advertising API
