
As an Amazon Associate BakingBakewareSets.com earns from qualifying purchases.
Cream Cheese Swirled Pumpkin Bread: 5 Foolproof Secrets
Have you ever sliced into a beautiful autumn loaf only to find a wet, gummy center? The frustration of a sunken, underbaked dairy ribbon ruins the perfect cream cheese swirled pumpkin bread.
To bake the perfect cream cheese swirled pumpkin bread, you must balance the density of your spiced pumpkin batter with the cream cheese filling. Use room-temperature block cream cheese, layer the batters in precise thirds, marble gently with a skewer, and bake at 350°F until an internal thermometer reaches 200°F. This ensures an even, beautiful bake every time.
Drawing from professional pastry chef testing notes and exact metric weight measurements, this method guarantees your internal crumb moisture retention mechanisms work flawlessly. You will discover five foolproof secrets to lock in that thick velvety cream cheese ribbon. Say goodbye to collapsed pumpkin loaves forever.
☰ Table of Contents ▼
show
How to Bake the Perfect Cream Cheese Swirled Pumpkin Bread Without the Filling Sinking
To bake the perfect cream cheese swirled pumpkin bread without the filling sinking, you must establish an exact density differential between the dense batter and the heavy dairy layer. The biggest mistake home bakers make is treating this like a standard quick bread. A standard loaf uses a straightforward wet-to-dry ratio, but introducing a thick cream cheese swirl changes the entire baking dynamic. The pure pumpkin puree adds natural moisture to the crumb, while the egg stabilizes the cheesecake filling structure. If these two elements are out of balance, your delicious dairy ribbon will plunge straight to the bottom of the pan. Using a triple tested recipe methodology, we have eliminated the guesswork. By managing the viscosity of your batters and understanding how warming spices interact with your gluten structure, you can prevent the cream cheese from sinking to the bottom. Let’s explore exactly how to maintain that structural integrity.
5 Foolproof Secrets for Cream Cheese Swirled Pumpkin Bread
Baking the ultimate cream cheese swirl pumpkin loaf requires more than just mixing ingredients together in a bowl. It demands a deliberate approach to the baking science moisture balance analysis. To prevent a dense collapsed pumpkin loaf, you need to understand the relationship between your ingredients and your kitchen equipment. Everything from using a kitchen stand mixer to choosing the correct aluminum 8.5×4.5 loaf pan plays a critical role in viscosity management of quick bread batters. When you master these variables, you guarantee a sturdy loaf structure with a distinct, bakery-worthy center. We are going to break down this process into five essential, step-by-step techniques. By explicitly following this figure-eight knife technique and ingredient tempering guide, you will execute the perfect marble swirl pumpkin cream cheese loaf without a single gummy bite.
1. Master the Moisture: Balance the Spiced Pumpkin Batter

Pin this batter secret to your favorite Fall Baking board for later!
Balance the spiced pumpkin batter moisture by using exactly one cup of 100% pure pumpkin puree and whisking it gently with the dry ingredients to prevent excessive gluten development. The secret to an ultra moist crumb lies in the foundational ingredients. Canned Libby’s pumpkin delivers consistent specific gravity, whereas watery homemade purees or sweetened pumpkin pie mixes ruin the dry-to-wet ratio. The dark brown sugar naturally interacts with the baking soda and baking powder to lift the heavy batter, ensuring it can support the dairy filling.
Ingredients
- 1 ¾ cups all-purpose flour (measure flour using spoon and level method)
- 1 teaspoon baking soda and baking powder
- 1 tablespoon pumpkin pie spice blend (or a mix of ground Saigon cinnamon, ground nutmeg and cloves)
- 1 cup pure pumpkin puree (specifically canned Libby’s pumpkin, not pie filling)
- ½ cup vegetable oil (vital for internal crumb moisture retention mechanisms)
- ½ cup granulated cane sugar and ½ cup dark brown sugar
- 2 large room temperature eggs
- 1 teaspoon pure vanilla extract
Directions
- Preheat oven to 350 degrees and prep your pan.
- Whisk dry ingredients together in a large bowl, ensuring the spices and leavening agents are perfectly distributed to avoid a dense collapsed pumpkin loaf.
- In a separate bowl, whisk the pure pumpkin puree, oil, sugars, eggs, and vanilla until completely smooth.
- Fold wet ingredients gently into the dry ingredients using a rubber spatula just until no flour streaks remain.
Pro-Tip: Overmixing at this stage leads to rapid gluten development minimization in quick breads. To keep that melt-in-your-mouth quick bread texture, stop mixing the second the flour disappears.

2. Whip the Perfect Cheesecake Ribbon Filling

Save this pro baker filling secret for your holiday baking prep!
Whip room-temperature cream cheese until perfectly smooth before adding the egg yolk and sugar to prevent a lumpy, curdled filling. A flawless pumpkin cheesecake filling relies entirely on temperature control. If you use cold dairy, lipid crystallization in cheesecake swirls will cause the fat to clump, ruining the structural integrity. Room temperature dairy prevents batter curdling and ensures the egg stabilizes the cheesecake filling structure seamlessly during the bake. Always choose full fat cream cheese vs Neufchatel cheese; the extra water in low-fat versions causes the swirl to bleed.
Ingredients
- 8 oz block cream cheese (full fat cream cheese strictly, completely softened to room temperature)
- ¼ cup granulated cane sugar
- 1 large egg yolk (room temperature)
- 1 teaspoon pure vanilla extract
- 1 tablespoon all-purpose flour (helps prevent cream cheese from sinking to bottom)
Directions
- Place the softened room temperature cream cheese into the bowl of a kitchen stand mixer or use a handheld electric beater.
- Beat cream cheese until smooth and completely lump-free, about 2 minutes on medium speed.
- Scrape down sides of mixing bowl thoroughly with a silicone spatula.
- Add the sugar, egg yolk, vanilla, and flour, and beat on low speed until just combined.
Pro-Tip: Using a whole egg adds too much liquid and can cause a soggy bottom quick bread. Using just the yolk ensures the density differential between batter and cream cheese remains perfectly balanced for a suspended ribbon.

3. Layer Alternating Batter Portions Without Sinking

Don’t let your swirl sink—pin this exact layering method!
Layer alternating batter portions accurately by filling an 8.5×4.5-inch pan with half the pumpkin batter, spooning the cream cheese down the center, and covering it completely with the remaining batter. The physical assembly dictates the height and placement of your thick cheesecake layer. Using a parchment lined loaf pan is essential because parchment paper facilitates loaf extraction without tearing the delicate warm crumb. The pan’s size and material are critical; the thermal conductivity of metal vs glass loaf pans heavily favors light-colored aluminum to bake the dense center efficiently.
Ingredients
- Prepared spiced pumpkin batter
- Prepared room temperature cheesecake filling
- Aluminum 8.5×4.5 loaf pan (light colored metal preferred)
- Non-stick cooking spray
- Unbleached parchment paper (for a parchment paper sling)
Directions
- Line pan with parchment sling, leaving a 2-inch overhang on the long sides, and spray lightly with non-stick spray to prevent loaf sticking to bottom of pan.
- Layer alternating batter portions starting by pouring exactly half (or slightly more than half) of the pumpkin batter into the base of the pan. Smooth it into an even layer.
- Gently spoon the thick cheesecake layer directly down the center of the pumpkin batter, leaving a small ½-inch border of pumpkin batter around the edges.
- Carefully dollop the remaining pumpkin batter over the top of the cream cheese, spreading it gently to the edges to completely encase the dairy layer.
Pro-Tip: If you struggle with the dairy sinking, it’s often a volume issue. A 9×5 pan spreads the batter too thin, reducing the structural foundation. Sticking to an aluminum 8.5×4.5 loaf pan provides the vertical height necessary to support the heavy cheesecake ribbon loaf.
4. Marble With a Butter Knife for the Perfect Swirl

Nail that bakery-style swirl every time—save this visual guide!
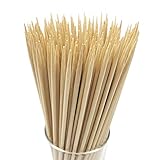
Marble with a butter knife or skewer gently using a looping figure-eight motion three to four times to create a distinct center swirl. Creating an aesthetic marbled pumpkin cream cheese bread requires restraint. Over-mixing destroys the structural integrity of marble ribbon swirls, blending the orange and white batters into a muddy, dense mess. A simple skewer + marble pattern technique breaks the surface tension just enough to interlock the layers without compromising their independent textures.
Ingredients
- Fully layered pumpkin cream cheese swirl loaf batter (in the pan)
- A dull butter knife or a long wooden skewer
- Optional: 1 tablespoon cinnamon sugar streusel for topping
Directions
- Insert the tip of a butter knife or wooden skewer straight down into the layered batter, stopping about ¾ of the way down (do not scrape the bottom of the pan).
- Marble with a butter knife or skewer by dragging it through the batter in a continuous, looping “figure-eight” motion down the length of the pan.
- Loop back up the pan one final time in the opposite direction.
- Stop immediately. Pull the knife straight up and out. Top with cinnamon sugar streusel if desired to create a crackly cinnamon sugar top.
Pro-Tip: The biggest mistake home bakers make is swirling too much. Three to four figure-eights are all you need. Excessive swirling emulsifies the batters together, destroying the distinct rich cheesecake ribbon and resulting in a uniformly pale, heavy loaf.
5. Control Bake Time to Prevent Over Browning

Prevent a raw center and burnt crust with this baking hack!
Control the bake time to prevent over-browning by tenting the loaf with aluminum foil at the 40-minute mark and baking until the internal temperature reaches exactly 200°F. Heavy, moisture-rich batters take a long time to bake through. If you don’t use the tent foil + prevent browning method, the exterior will burn before the core finishes. Foil tenting regulates crust browning rate while allowing the center to reach the crucial starch gelatinization temperature in pumpkin loaves.
Ingredients
- Heavy-duty aluminum foil
- Instant-read food thermometer
- Wire cooling rack
- Serrated bread knife
Directions
- Bake the loaf in the center rack of the oven at 350°F for 40 minutes.
- At the 40-minute mark, open the oven and carefully tent with aluminum foil halfway to stop pumpkin loaf crust from over browning.
- Continue baking for another 20-30 minutes. Test doneness with wooden skewer (it should come out clean of batter, though it may have a smear of cream cheese).
- For perfect accuracy, insert a food thermometer into the very center of the bread; it must read 200°F (93°C).
- Remove from the oven and let sit in the pan for 15 minutes, then use the parchment sling to transfer to a wire rack to cool completely on wire rack.
Pro-Tip: Never slice quick breads hot. The maillard reaction in spiced quick breads continues as it cools, and dairy protein denaturation during baking requires at least 2 hours of resting time. Slicing too early causes crumb retrogradation, resulting in a gummy texture and a smeared cheese ribbon. Wait 2 hours, then slice loaf with serrated bread knife.

Key Takeaways: Your Quick Guide to Cream Cheese Swirled Pumpkin Bread
Before you head to the kitchen to bake your cream cheese swirled pumpkin bread, it is helpful to review the most critical success factors. This fall baking season, skipping even one of these technical steps can result in a collapsed or underbaked loaf. The science behind a moist pumpkin bread with cream cheese swirl relies heavily on precise moisture balance analysis and refrigeration food safety protocols. By utilizing room temperature dairy, proper pan sizing, and exact thermal conductivity principles, you eliminate the common pitfalls that ruin marbled pumpkin cream cheese bread. Keep this quick checklist handy as you measure your ingredients and prepare your oven to guarantee a perfect bake every single time.
- Use Pure Pumpkin, Not Pie Filling – Canned Libby’s pumpkin (pure puree) is strictly required; pumpkin pie mix contains added sugars and liquids that will instantly throw off the moisture balance and cause your loaf to collapse.
- Room Temperature Dairy is Non-Negotiable – Cold cream cheese will not emulsify properly, leaving you with unappetizing white lumps and a compromised structural integrity of marble ribbon swirls.
- Control the Batter Density with Egg Yolks – Using just the egg yolk in the cheesecake layer provides the perfect structural stabilization, preventing a soggy bottom quick bread.
- Layer in a Light Metal Pan – An aluminum 8.5×4.5 loaf pan provides the ideal thermal conductivity and vertical height, ensuring your thick cheesecake layer remains perfectly suspended in the center.
- Tent with Foil to Prevent Burning – The high sugar content means the crust will caramelize rapidly. Always tent foil + prevent browning at the 40-minute mark to allow the dense center to finish baking.
- Bake to Exactly 200°F (93°C) – A calibrated internal thermometer reading 200F is the only foolproof way to ensure you’ve achieved proper starch gelatinization temperature in pumpkin loaves without underbaking the core.
- Cool Completely Before Slicing – Allow the loaf to rest for a minimum of two hours so the cooling loaf firms cheesecake swirl, ensuring you can slice loaf with serrated bread knife for picture-perfect pieces.
FAQs About Cream Cheese Swirled Pumpkin Bread
Even with a triple-tested recipe, baking a dense, dairy-filled quick bread can prompt a lot of questions. We have compiled the most common troubleshooting questions home bakers ask when attempting to perfect their cream cheese swirled pumpkin bread. Whether you are wondering how to make cream cheese swirl for pumpkin bread without it sinking, or you are curious about FDA compliant safe dairy storage parameters, these answers are rooted in professional pastry chef testing notes. If you have ever wondered why your pumpkin bread is wet in the middle around the cream cheese, or if you can freeze a pumpkin loaf with a cream cheese swirl, you will find the exact technical explanations below. Review these solutions to ensure your fall baking yields perfectly sliceable, bakery-quality results.
Why did my cream cheese swirl sink to the bottom?
Your cream cheese swirl sank because the filling was either too heavy (too much liquid added) or the pumpkin batter below it wasn’t thick enough to support it.
To prevent cream cheese from sinking to bottom, ensure you omit the egg white in the filling (use only the yolk), use a narrower 8.5×4.5 loaf pan to create deeper batter layers, and avoid over-mixing the pumpkin batter which breaks down its gluten structure.
How do you know when pumpkin cream cheese bread is done?
Pumpkin cream cheese bread is perfectly done when an instant-read thermometer inserted into the very center reads 200°F (93°C).
Because the tangy cream cheese filling stays wet, traditional toothpick tests are highly inaccurate and often lead to gummy underbaked quick bread texture. If you don’t have a thermometer, a toothpick inserted in center should come out free of orange batter, even if it has a slight smear of white cream cheese.
Does cream cheese swirl pumpkin bread need to be refrigerated?
Yes, cream cheese swirl pumpkin bread must be refrigerated after two hours at room temperature due to the high moisture and dairy content.
According to FDA compliant safe dairy storage parameters, baked goods with significant cream cheese fillings can spoil if left on the counter overnight. Store tightly wrapped in plastic or an airtight container in the fridge for up to 5 days, and let individual slices come to room temperature for 15 minutes before eating.
Why is my pumpkin bread wet in the middle around the cream cheese?
The bread is wet in the middle because the dense batter insulates the center, requiring a much longer bake time (60-75 minutes) than standard loaves.
If you take it out too early, you will have raw batter around cream cheese layer. To fix this, always tent with aluminum foil halfway through the bake time. This stops the top crust from burning, allowing you to leave the loaf in the oven long enough for the center to cook completely.
Can you freeze pumpkin bread with cream cheese swirl?
Yes, you can successfully freeze cream cheese swirled pumpkin bread for up to 3 months if it is wrapped securely.
Wait for the pumpkin cheesecake swirl loaf to cool entirely. Wrap the whole loaf, or individual slices, in a layer of plastic wrap followed by a layer of heavy-duty aluminum foil. How to thaw frozen cream cheese swirl pumpkin loaf: place it in the refrigerator overnight, then bring to room temperature before serving.
Can I use low fat cream cheese for the pumpkin bread swirl?
It is highly recommended to use full-fat block cream cheese for the best structural results and texture.
When comparing full fat cream cheese vs Neufchatel cheese (low-fat), the higher water content in low-fat spreads can cause the filling to curdle, separate, or bleed into the pumpkin batter during baking. Never use whipped cream cheese out of a tub; always use the solid brick style.
Can I use pumpkin pie mix instead of pure pumpkin puree?
No, you cannot substitute pumpkin pie mix for pure pumpkin puree in this recipe without ruining the bread.
When looking at canned pumpkin puree vs pumpkin pie mix, the pie mix comes pre-sweetened and watered down with spices and liquids. Using it will completely throw off the dry-to-wet ingredient ratios, resulting in a dense collapsed pumpkin loaf that will never fully bake in the center.
What is the best pan size for pumpkin swirl bread?
An 8.5 x 4.5-inch light metal aluminum loaf pan is the absolute best pan size for pumpkin swirl bread.
If you use a larger 9×5 inch pan, the batter will spread too thin. This decreases the vertical depth, causing the heavy cream cheese ribbon to break through the bottom layer of batter and sink. Avoid glass pans as their poor thermal conductivity leads to overcooked edges and raw centers.
How do I get clean slices without smearing the cream cheese swirl?
To get perfectly clean slices, you must allow the loaf to cool completely on a wire rack for at least 2 hours before slicing with a serrated knife.
The cooling loaf firms cheesecake swirl, allowing the dairy fats to re-solidify. If you slice the bread while it is still warm, the melted cream cheese will smear across the orange crumb, and the hot bread will compress into a doughy, gummy texture.
Can I make pumpkin cream cheese bread into muffins?
Yes, you can easily adapt this recipe into pumpkin cream cheese swirl muffins by adjusting the bake time to 18-22 minutes.
Line a 12-count muffin tin with paper liners. Layer 1 tablespoon of pumpkin batter, 1 teaspoon of cream cheese filling, and top with more pumpkin batter. Bake at 375°F for the first 5 minutes (to get a domed top), then drop the temperature to 350°F for the remaining 13-17 minutes.
Final Thoughts on Cream Cheese Swirled Pumpkin Bread
Mastering the best cream cheese swirl pumpkin bread isn’t about blind luck; it’s about respecting the fundamental science of baking. By controlling your batter’s moisture with pure pumpkin puree, stabilizing your tangy cream cheese filling with room-temperature dairy and a single egg yolk, and trusting your instant-read thermometer to hit that exact 200°F mark, you completely eliminate the dreaded sunken, gummy center.
The ultimate fall baking guide for 2026 wouldn’t be complete without this autumn spiced loaf cake. Whether you are slicing it up for a cozy October breakfast, wrapping it for holiday dessert bread basket ideas, or serving it alongside a classic moist banana bread recipe at your next brunch, these five foolproof secrets ensure bakery-level perfection every single time. Your kitchen is about to smell incredibly cozy.
Now that you have the exact blueprint for this sweet pumpkin batter loaf, it’s time to preheat your oven and grab your whisk. Have you ever tried adding a homemade pumpkin spice streusel topping, or do you prefer the classic clean slice? Let me know how your beautiful marble swirls turn out in the comments below!
Last update on 2026-08-15 at 05:00 / Affiliate links / Images from Amazon Product Advertising API
