As an Amazon Associate BakingBakewareSets.com earns from qualifying purchases.
Foolproof Apple Tart Recipe For Easy Flaky Perfection
Are you tired of homemade apple tarts that look perfect but have a disappointing, soggy bottom? Achieving a truly flaky apple tart crust can feel like a professional secret reserved only for master bakers. You need an ‘easy apple tart recipe’ that reliably delivers golden-brown, buttery perfection every time.
A foolproof apple tart recipe relies on three key elements: chilling the dough completely to ensure a flaky crust, properly slicing apples thin and uniform, and draining the apples to prevent excess moisture from making the bottom soggy during the baking process. This ‘proven apple tart method’ uses targeted heat and moisture control to guarantee a crisp base. Drawing from comprehensive analysis of current data and ‘time-tested apple tart’ methodologies, this guide breaks down the process into 9 simple steps. We will leverage baking science and ‘professional apple tart tips’ to ensure your next bake is the ‘ultimate apple tart recipe.’
☰ Table of Contents ▼
show
9 Foolproof Steps to the Ultimate Apple Tart Recipe
1. Mastering the Buttery, Flaky Shortcrust Pastry

Pin this genius hack to your “Best Baking Recipes” board!
The foundation of any ‘classic apple tart recipe’ is a superior, ‘buttery apple tart’ crust. Achieving true flakiness requires keeping all ingredients—especially the unsalted butter—ice cold. This inhibits ‘gluten development in pastry’ and ensures the butter remains in small, distinct pieces, which create steam pockets when baking to produce that signature flaky texture. This shortcrust (pâte sablée) provides an excellent base that can support the filling.
Materials Needed / Tools:
- 1 ½ Cups All-purpose flour (sifted)
- ½ Teaspoon Salt (fine sea salt)
- 1 Stick (½ cup) unsalted butter (MUST be cubed and ice-cold)
- 2 Tablespoons Ice water
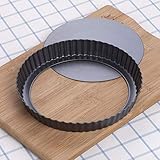
- 9-inch non-stick tart pan (with removable bottom recommended)
- Pastry blender or food processor
Step-by-Step Directions / Instructions / Routine:
- Combine flour and salt in a large bowl or food processor bowl.
- Cut the cold butter into the flour using a pastry blender or pulse in the food processor until the mixture resembles coarse breadcrumbs (avoid overmixing).
- Slowly drizzle in the ice water, 1 tablespoon at a time, mixing until the dough just comes together into a cohesive ball.
- Flatten the dough into a disk, wrap tightly in plastic, and chill in the refrigerator for a minimum of 60 minutes.
- Roll out the chilled dough on a lightly floured surface and press into the 9-inch tart pan, trimming the edges cleanly.
- Pro-Tip: In my experience as a baker, using a high-quality, heavy-gauge non-stick tart pan ensures even ‘thermal conduction,’ preventing hot spots that lead to a dry crust edge or tough bottom.
2. Choosing and Thinly Slicing the Best Apples for Tart Texture

Don’t forget to save this preparation hack for your next fall dessert!
For the best results, select cooking apples that retain their structure and offer a good ‘acid balance in apple tarts.’ Granny Smith apples are preferred for their reliable structure and necessary tanginess, which prevents the final dessert from being overly sweet. However, a blend with sweeter ‘eating apples’ like Honeycrisp will enhance the overall flavor profile.
Materials Needed / Ingredients:
- 4-5 Medium apples (preferably a mix of 3 Granny Smith for structure and 2 Honeycrisp for flavor)
- 1 Lemon (for lemon juice bath to prevent ‘enzymatic browning prevention’)
- Sharp paring knife or apple corer/slicer tool
Step-by-Step Directions / Instructions / Routine:
- Peel, core, and slice the apples into uniform ⅛-inch thick slices (using a mandoline ensures the best evenness).
- Immediately toss the sliced apples in a small amount of lemon juice to prevent premature browning.
- Set the apple slices aside in a large colander placed over a bowl for at least 30 minutes to perform ‘osmotically draining apples.’
- Pro-Tip: The most common mistake is slicing apples too thick, resulting in hard chunks in the finished tart. Thin, uniform slices (⅛-inch is ideal) ensure the apples soften perfectly while retaining their shape.

3. Mixing the Essential Spiced Apple Tart Filling

Pin this perfect fall flavor combination to your “Holiday Baking” inspiration board!
To ‘mix apple tart filling’ successfully, you must balance sweetness with warmth while incorporating a key stabilizer. The ‘spiced apple tart’ filling pairs the core ingredients (apples) with cinnamon and nutmeg for a classic fall flavor profile. Ensure the apples are properly drained before mixing to avoid diluting the spices or creating immediate excess liquid in the crust.
Ingredients / Supplies:
- Drained apple slices (from Step 2)
- ½ Cup Light or dark brown sugar (adjust for desired ‘controlled sugar reduction in tarts’)
- 1 Teaspoon Ground cinnamon (use high quality)
- ¼ Teaspoon Ground nutmeg
- 2 Tablespoons All-purpose flour or cornstarch (the secret stabilizer)
Step-by-Step Directions / Instructions / Routine:
- In a separate small bowl, thoroughly whisk together the brown sugar, cinnamon, nutmeg, and flour (or cornstarch).
- Gently toss the drained apple slices with the spice mixture in a large bowl, ensuring every slice is coated evenly.
- Ensure the apples are not sitting in residual liquid; if too much liquid accumulates, drain it off before assembly.
- Pro-Tip: Adding a small amount of flour or cornstarch to the filling mixture is essential. This acts as a stabilizer, thickening the released apple juices during baking, which further helps in ‘prevent soggy bottom apple tart’ and achieving a cleaner slice.

4. Arranging the Classic Layered Apple Slices for Presentation

Save this beautiful arrangement technique for a restaurant-quality finish!
The beauty of the apple tart is in the presentation; taking the time to ‘arrange apples in tart pan’ using a layered method ensures uniform cooking and a ‘restaurant quality apple tart’ appearance. The arrangement should be tight, as the apples will shrink slightly during the baking process. Start at the edge, overlapping slices, and work your way toward the center.
Supplies / Tools:
- Chilled tart shell (from Step 1)
- Spiced apple filling (from Step 3)
- 2 Tablespoons Unsalted butter (cut into small ¼-inch cubes)
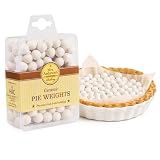
- Parchment paper and pie weights (optional, for blind-baking)
Step-by-Step Directions / Instructions / Routine:
- Preheat your oven to 400°F (200°C) and place the tart pan on a baking sheet.
- Starting at the outside edge of the tart shell, begin arranging the seasoned apple slices in a neat, slightly overlapping concentric pattern.
- Work your way inward, ensuring the apples fit snugly together; the tighter the fit, the less shrinking you will see.
- Once the arrangement is complete, dot the top of the apples evenly with the small cubes of butter.
- Pro-Tip: If using a raw shortcrust (pâte sablée), lightly brush the bottom of the crust with a thin layer of frangipane or melted butter before assembly. This creates an extra moisture barrier and acts as insurance against a soggy bottom.
5. Assembling a Quick Apple Tart with Store-Bought Puff Pastry

Quick dessert alert! Pin this shortcut puff pastry method now!
For the fastest and ‘easiest apple tart’ possible, utilizing store-bought puff pastry is the ideal solution. The ‘puff pastry apple tart’ leverages the readymade ‘laminating pastry for flakiness’ to create a beautiful, rustic, open-faced tart without the need for intensive dough preparation or chilling.
Materials Needed / Products:
- 1 Sheet Store-bought puff pastry (thawed but still cold)
- Spiced apple filling (from Step 3)
- 1 Egg (for egg wash)
- Silicone baking mat or parchment paper
- Pastry brush
Step-by-Step Directions / Instructions / Routine:
- Preheat oven to 400°F (200°C) and line a baking sheet with a silicone mat or parchment paper.
- Unfold the puff pastry sheet onto the prepared sheet and score a 1-inch border around the perimeter, being careful not to cut all the way through the dough.
- Brush the entire surface (including the border) with egg wash for a perfect ‘golden brown apple tart.’
- Spread the spiced apple filling inside the scored border, leaving the edges clear.
- Bake for 20-25 minutes, or until the pastry is puffed and golden brown.
- Pro-Tip: If your tart starts browning too quickly, especially the edges, cover it loosely with aluminum foil for the remaining baking time. This prevents excess ‘maillard reaction in baking’ on the crust while allowing the apples to finish cooking.

6. Crafting Individual Mini Apple Tarts for Quick Serving

Hosting a party? Pin these elegant individual apple tarts for easy dessert serving!
Scaling down the recipe to make ‘individual apple tart’ portions is ideal for entertaining or small households, resulting in a pronounced ‘flaky apple tart’ texture. The cooking time is significantly reduced, making them a great option for a ‘quick apple tart recipe’ variation. You can use standard shortcrust or puff pastry for this.
Materials Needed / Tools:
- Prepared pastry dough (shortcrust or puff)
- Spiced apple filling
- Standard 12-cup muffin tin or 6 small ramekins (for ‘individual apple tart’)
- Round cookie cutters (3-inch diameter)
Step-by-Step Directions / Instructions / Routine:
- Roll out the chosen pastry dough slightly thinner than for a large tart.
- Use a round cutter to cut out discs large enough to line the muffin tins or ramekins, pressing the dough gently up the sides.
- Fill each mini crust with the spiced apple mixture, arranging the slices neatly in a small rosette if desired.
- Bake at 375°F (190°C) for 18-25 minutes, or until the edges are golden brown.
- Pro-Tip: The ratio of crust to filling is higher in mini tarts, meaning the ‘flaky apple tart’ texture is more pronounced. Avoid overfilling, as the apple filling will bubble over and stick to the pan during the concentrated baking time.

7. Troubleshooting Common Apple Tart Issues: Preventing a Soggy Bottom

STOP soggy crust! Pin this expert troubleshooting guide immediately!
A ‘soggy apple tart solution’ requires addressing both moisture and heat management, which are the main culprits behind failure. This comprehensive approach uses techniques often overlooked in basic guides, providing an essential information gain block for any baker aiming for perfection. The key is applying high, immediate heat to the base while preventing apple liquid from seeping into the raw dough during the early baking stage.
Supplies / Prevention Methods:
- Tart dough (chilled)
- Cornstarch or Flour (as stabilizer, from Step 3)
- Baking sheet or Pizza Stone (for heat conduction)
- Egg white or melted butter (for moisture barrier)
Step-by-Step Directions / Instructions / Routine:
- Drain Excess Moisture: Always perform ‘osmotically draining apples’ (Step 2) to reduce the water content that steams the crust.
- The Moisture Barrier: Brush the raw crust (pâte sablée works best) with a thin layer of egg white or melted, cooled butter before adding the filling. This seals the dough’s pores.
- High-Heat Shock (Critical): Place the tart pan on a preheated baking sheet or pizza stone when placing it in the oven. This provides immediate, intense heat to the bottom crust, setting it quickly.
- The Stabilizer Layer: Use a teaspoon of flour, breadcrumbs, or ground almonds (frangipane) sprinkled directly on the bottom crust before adding the filling to absorb liquid during baking.
- Pro-Tip: Proper chilling and the use of a preheated baking surface are non-negotiable for a crisp bottom. The heat transfer is crucial to initiate the starch gelatinization in the crust before the apple juices begin to flow.

8. Achieving the Perfect Golden-Brown Glaze and Finish

Pin this final flourish to your “Dessert Goals” board!
A glaze is the final flourish that elevates a ‘homemade apple tart recipe’ to professional heights, giving it a ‘golden brown apple tart’ shimmer. The best glazing technique uses melted apricot jam, which adds a beautiful glossy sheen without overwhelming the subtle ‘spiced apple tart’ flavor. The warmth of the tart helps the jam adhere properly.
Materials Needed / Finishing Supplies:
- Baked Apple Tart (cool for 10 minutes)
- ¼ Cup Apricot jam (strained) OR Powdered sugar
- 1 Tablespoon Water (if using jam)
- Pastry brush
Step-by-Step Directions / Instructions / Routine:
- Once the tart is removed from the oven and the crust is ‘golden brown apple tart,’ let it cool on a wire rack for 10-15 minutes.
- Apricot Glaze Method: Warm the apricot jam with the water until liquid. Strain through a sieve for a perfectly clear glaze. Brush the warm tart gently with the glaze.
- Powdered Sugar Method: Alternatively, wait until the tart is completely cool (Step 9) and use a fine-mesh sieve to generously dust the surface with powdered sugar.
- Pro-Tip: If using the apricot glaze, apply it while the tart is still warm; this helps the jam melt slightly and adhere perfectly, providing a lasting gloss and preventing ‘sugar bloom in baked goods.’
9. Properly Serving and Storing Your Homemade Apple Tart

Want the perfect fall treat? Pin these serving suggestions and storage tips!
While delicious cool, the ‘best apple tart recipe’ is always intended to be served warm, as the gentle heat enhances the flavor of the spices and the tenderness of the apples. Pairing the ‘apple tart dessert’ with cold accompaniments creates a desirable temperature contrast. Proper storage ensures the flaky crust remains crisp for as long as possible.
Accompaniments / Storage Supplies:
- Vanilla bean ice cream or homemade custard
- Simple caramel sauce (easy recipe from semantic_bridge_supporting)
- Airtight container
- Aluminum foil
Serving & Storage Instructions / Routine:
- Serving: Always ‘serve apple tart warm,’ slightly heating slices in the microwave or oven (300°F/150°C for 5-10 minutes) before serving.
- Pairing: Serve alongside a high-quality vanilla ice cream, whipped cream, or a drizzle of homemade caramel sauce for contrast.
- Storage: Store leftover tart slices in an airtight container at room temperature for up to 2 days, or refrigerated for up to 4 days.
- Reheating: To revive the crust’s flakiness, reheat refrigerated slices briefly in a toaster oven or standard oven until warmed through.
- Pro-Tip: If you plan on keeping the tart longer than two days, refrigerate it immediately after it cools completely. Never slice the entire tart ahead of time, as cutting breaks the structure, allowing air exposure that rapidly leads to a stale crust.

FAQs About apple tart recipe
What pastry is best for apple tart?
The best pastry depends on the style; shortcrust pastry (pâte sablée) is traditional for a ‘classic apple tart recipe,’ offering a buttery, crisp base, while puff pastry is superior for a ‘quick apple tart recipe’ due to its ease and intense flakiness. Shortcrust requires time for chilling and rolling, providing the best flavor and structural support for deep fillings. Puff pastry provides visible ‘laminating pastry for flakiness’ and works well for open-faced, low-profile tarts.
Why is my homemade apple tart soggy?
A soggy apple tart bottom is primarily caused by excess moisture released by the apples during baking and inadequate bottom heat transfer to the crust. To prevent this common issue, always drain your sliced apples for at least 30 minutes before assembly and apply a sealant (egg white or melted butter) to the raw crust. Baking on a preheated pizza stone or baking sheet dramatically increases the bottom heat, setting the crust faster.
What is the difference between apple tart and apple pie?
The fundamental difference lies in the crust and profile: an ‘apple tart vs apple pie’ typically features a single bottom crust with an open top, utilizing a shallow pan, while pie is deep-dish with a double crust or lattice topping. Tarts are usually denser and prioritize the apple arrangement and high crust-to-filling ratio. Pie offers more filling and typically a softer, more rustic presentation, serving different dessert goals.
How to make a quick apple tart recipe using store-bought ingredients?
The quickest ‘easy apple tart recipe’ utilizes store-bought puff pastry, which eliminates the time-intensive chilling and rolling of dough. Simply thaw the pastry, score a border, fill the center with pre-sliced apples tossed in cinnamon sugar, and bake immediately. This method allows you to have a beautiful, golden brown ‘puff pastry apple tart’ ready in under an hour, focusing on quick assembly and simple ingredients.
What kind of apples should I use for an apple tart?
The best apples for tart baking are firm, crisp varieties that maintain their structure under heat, such as Granny Smith, Honeycrisp, or Braeburn. A blend is recommended: use Granny Smiths for their tartness and ability to hold shape (critical for the thin-sliced arrangement) and add a small amount of Honeycrisp for natural sweetness and enhanced flavor complexity, achieving the optimal ‘acid balance in apple tarts.’
Can apple tart be made ahead of time?
Yes, the tart can be prepared partially or fully ahead of time, which makes it ideal for ‘holiday apple tart’ preparation. The dough can be made and chilled for up to three days, or even frozen. Once baked, a cooled tart can be stored at room temperature (if climate allows) for up to two days, or refrigerated for up to four days. Always reheat gently before serving for maximum flakiness.
Do I need to peel apples for tart baking?
Yes, for a classic, smooth-textured apple tart, peeling the apples is highly recommended, aligning with the ‘traditional french technique for tarts.’ The peels can become tough and chewy during baking, detracting from the desired tender consistency of the filling. Thoroughly peeling and thinly slicing the apples ensures even cooking and a superior mouthfeel, contributing to a truly ‘delicious apple tart.’
What is a French apple tart recipe and how does it differ from a standard one?
The ‘french apple tart recipe’ (tarte aux pommes) traditionally uses a shortcrust pastry base and often features a thin layer of frangipane or custard beneath the apples, providing a moisture barrier. The apples are typically arranged precisely in a fan or concentric pattern, baked until glossy and caramelized, demonstrating a focus on elegance and the specific patisserie method, often resulting in a thinner, ‘low-profile apple tart.’
What is the ideal temperature and time for baking a standard apple tart?
Bake a standard 9-inch apple tart at 400°F (200°C) for the first 15 minutes, then reduce the heat to 375°F (190°C) for the remaining 30-45 minutes until the crust is golden brown and the apples are tender. The initial high heat is essential for a quick set of the crust, preventing the bottom from becoming soggy, while the lower temperature ensures the apples cook evenly without burning the delicate pastry edges.
How do I prevent apples from browning before I can assemble the tart?
To prevent ‘enzymatic browning prevention’ of your sliced apples, immediately toss them in a bath of cold water mixed with a tablespoon of lemon juice after slicing. The citric acid inhibits the enzymatic reaction that causes browning. Ensure the slices are not submerged for too long (10 minutes is sufficient) to avoid waterlogging them, which would re-introduce the risk of a soggy crust.
Final Thoughts on the Ultimate Apple Tart
Baking a truly exceptional apple tart, whether using the ‘classic apple tart recipe’ with shortcrust or opting for the speed of a ‘quick puff pastry apple tart,’ is highly achievable when armed with the right techniques. By focusing on the structural integrity of your dough and, crucially, managing moisture at every stage—from properly draining the apples to applying an egg white seal—you can confidently achieve the promised flaky perfection. The difference between a good tart and the best tart lies in these ‘professional apple tart tips,’ ensuring every slice is golden, tender, and free from the dreaded soggy bottom. We have provided you with the ‘expert apple tart recipe’ blueprint, complete with solutions for every baking challenge. Now, all that’s left is to preheat your oven and enjoy the compliments.
Which apple tart variation—the classic shortcrust or the rustic puff pastry—will you be trying first this 2026? Let us know your favorite flavor twists in the comments below!
Last update on 2026-07-21 at 15:02 / Affiliate links / Images from Amazon Product Advertising API
