As an Amazon Associate BakingBakewareSets.com earns from qualifying purchases.
Can You Use a Springform Pan for Cake: Benefits, Tips, and Potential Issues
Can you use a springform pan for cake? If you’ve struggled with removing cakes from traditional pans or are wary of leaks and uneven baking, you’re not alone. Yes, a springform pan is ideal for baking cakes, especially delicate ones like cheesecakes, and offers several advantages over standard pans.
But how do you ensure a flawless bake and avoid common pitfalls? In this guide, we’ll unravel the secrets to mastering springform pans, from preventing leaks to perfecting your cake presentation. Discover tips, tricks, and solutions to elevate your baking game and transform your springform pan into an essential tool for stunning cakes. Dive in to learn everything you need to know and get the most out of this versatile bakeware.
Key Facts:
- Springform pans consist of a removable bottom and sides, making cake removal easier.
- They’re ideal for delicate cakes like cheesecakes, mousses, and tarts.
- Proper preparation and sealing can prevent leaks, a common concern with springform pans.
- Springform pans can be used for both baked and no-bake desserts.
- These pans come in various sizes, affecting baking times and recipe proportions.
☰ Table of Contents ▼
show
What is a Springform Pan?
Ah, the springform pan – a baker’s secret weapon! Let me tell you, when I first discovered this nifty little gadget, it was like finding the holy grail of bakeware. But what exactly is this magical contraption?
A springform pan is essentially a two-piece wonder consisting of a flat base and a removable, form-fitting ring that serves as the side of the pan. The genius lies in its design – the sides can be released and removed from the base, leaving your beautifully baked creation sitting pretty on the bottom piece.
The Anatomy of a Springform Pan
Let’s break it down, shall we?
- The Base: A flat, circular piece that forms the bottom of your cake.
- The Ring: A tall, cylindrical band that wraps around the base.
- The Latch: A nifty little mechanism that keeps the ring snug against the base and releases it when you’re ready.
Think of it as a cake pan with a secret escape hatch for your baked goods!
Materials and Sizes
Now, here’s where it gets interesting. Springform pans come in a variety of materials and sizes, each with its own quirks and perks:
| Material | Pros | Cons |
|---|---|---|
| Aluminum | Excellent heat conductor, lightweight | Can react with acidic ingredients |
| Non-stick | Easy release, simple cleanup | May affect browning |
| Silicone | Flexible, non-stick | Can be wobbly, may affect baking time |
As for sizes, you’ll typically find springform pans ranging from 6 to 12 inches in diameter. My personal favorite? A versatile 9-inch pan – it’s the Goldilocks of springform pans, not too big, not too small, just right for most recipes.
Pro Tip: When choosing your springform pan, give that latch a good test. You want it to close with a satisfying ‘click’ that says, “Don’t worry, I’ve got this cake locked down tighter than Fort Knox!”
Can You Use a Springform Pan for Cake?

You bet your sweet tooth you can! In fact, using a springform pan for cake can be a game-changer. Let me tell you about the time I tried to make my grandmother’s famous triple-layer chocolate cake in a regular pan. It was like trying to perform surgery with oven mitts on – messy, frustrating, and ended with cake chunks everywhere.
But with a springform pan? It’s like the cake gods smiled upon me. Here’s why springform pans are fantastic for cakes:
- Easy Release: No more cake-tastrophes when trying to remove your masterpiece.
- Perfect Presentation: Your cake comes out with clean, straight sides – no crumbling or sticking.
- Versatility: From delicate cheesecakes to sturdy pound cakes, springform pans handle it all.
Types of Cakes Suitable for Springform Pans
Not all cakes are created equal, and some truly shine when baked in a springform pan. Here’s a quick rundown:
- Cheesecakes: The undisputed king of springform cakes. The removable sides make it easy to achieve that perfect, crack-free surface.
- Tortes: Layer cakes with delicate fillings benefit from the gentle removal process.
- Mousse Cakes: These airy delights need the support of the pan’s sides during chilling.
- Deep Dish Pies: Yes, you read that right! Springform pans are great for sky-high apple pies.
But what about good ol’ sponge cakes? According to a lively discussion on Reddit’s AskBaking community, springform pans are absolutely fine for sponge cakes too. Just remember to grease that pan well!
The Springform Advantage
Here’s a little comparison to show you why springform pans can be your cake’s best friend:
| Cake Type | Regular Pan | Springform Pan |
|---|---|---|
| Cheesecake | Difficult to remove, may crack | Easy removal, maintains shape |
| Layer Cake | Requires flipping, risk of breaking | No flipping needed, stays intact |
| Mousse Cake | Challenging to unmold | Sides remove easily, perfect presentation |
Key Takeaway: While you can use a springform pan for just about any cake, they truly excel with delicate, creamy, or multi-layered creations.
https://www.youtube.com/shorts/HU_CQG5cc4E
How to Prepare a Springform Pan for Cake Baking
Alright, baking buddies, let’s roll up our sleeves and get that springform pan ready for some serious cake action! Proper preparation is key to avoiding disasters like leaks or stuck-on cake nightmares. Trust me, I’ve been there, and it’s not pretty.
Choosing the Right Size and Material
First things first – size matters! Here’s a quick guide:
- 6-inch: Perfect for small households or test recipes
- 9-inch: The all-rounder, great for most standard recipes
- 10-inch: Ideal for larger gatherings or when you just need more cake (which is always)
As for material, non-stick is great for beginners, but I personally love a good aluminum pan for even heat distribution.
Greasing and Lining the Pan
Now, let’s make sure that cake doesn’t stick around (pun intended). Here’s my foolproof method:
- Grease the pan generously with butter or cooking spray.
- Cut a circle of parchment paper for the base.
- Grease the parchment paper too – yes, really!
- For extra insurance, dust with flour or cocoa powder (for chocolate cakes).
Pro Tip: For cheesecakes, some bakers swear by wrapping the outside of the pan in aluminum foil. This helps prevent water from seeping in during a water bath bake.
Assembling the Pan Correctly
This might seem like a no-brainer, but you’d be surprised how many cakes have been ruined by a poorly assembled springform pan. Here’s a quick checklist:
- Ensure the base is facing the right way up (the lip should be facing down).
- Lock the sides in place – you should hear a satisfying click.
- Give the pan a gentle shake. If it rattles, reassemble and try again.
Testing for Leaks
Before you pour in that precious batter, let’s do a quick leak test:
- Assemble your pan.
- Fill it with about an inch of water.
- Place it over a clean, dry surface for a few minutes.
- If you see water underneath, it’s time to troubleshoot or consider a new pan.
Remember, a little extra prep time can save you from a world of cake heartbreak later!
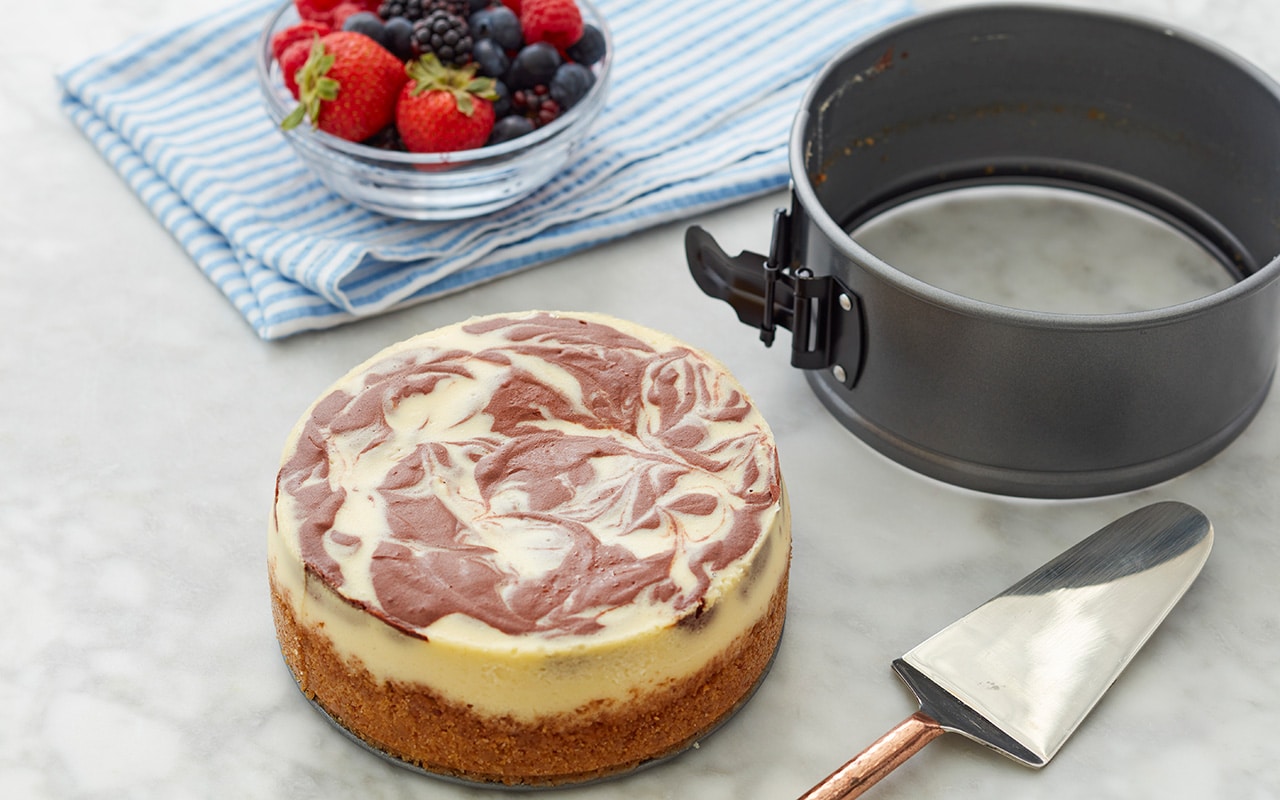
Baking a Cake in a Springform Pan
:max_bytes(150000):strip_icc()/101538143-springform-pan-photo-by-dotdash-meredith-3x2-crop-651659c75a69416086df9339050c52cf.jpg)
Alright, folks, it’s showtime! You’ve got your springform pan prepped and ready, now let’s get that cake in the oven. But hold your horses – baking in a springform pan can be a bit different from your regular cake pan. Let me walk you through it.
Selecting the Right Cake Recipe
Not all cake recipes are created equal when it comes to springform pans. Here are some winners:
- Cheesecakes: The classic springform cake. That creamy texture needs gentle handling.
- Dense cakes: Think pound cakes or fruit cakes. They hold up well in the pan.
- Layered desserts: Tiramisu or icebox cakes are perfect for showcasing in a springform.
Tip: When adapting a recipe for a springform pan, you might need to adjust the baking time. Keep a close eye on that cake!
Baking Time and Temperature Guidelines
Here’s where things get a bit tricky. Springform pans can affect baking times and temperatures. As a general rule:
- Reduce the oven temperature by 25°F (about 15°C) from what the recipe suggests.
- Expect to add 5-10 minutes to the baking time.
But remember, every oven is different. I once baked a cheesecake that took 30 minutes longer than expected – talk about a nail-biter!
Baking Chart for Common Cakes
| Cake Type | Temperature | Approximate Baking Time |
|---|---|---|
| Cheesecake | 325°F (165°C) | 45-60 minutes |
| Pound Cake | 325°F (165°C) | 60-75 minutes |
| Sponge Cake | 350°F (175°C) | 30-40 minutes |
Pro Tip: Always do the toothpick test! Insert a toothpick into the center of the cake. If it comes out clean or with a few moist crumbs, you’re golden!
Cooling and Removing the Cake from the Pan
This is where the magic of the springform pan really shines. But patience is key, my friends. Here’s the process:
- Cool in the pan: Let the cake cool in the pan for about 10-15 minutes. This helps it set.
- Run a knife around the edge: Gently slide a butter knife between the cake and the pan sides.
- Release the latch: Slowly open the springform latch. It’s like unwrapping a present!
- Remove the sides: Carefully lift the sides straight up and away from the cake.
- Final cooling: Let the cake cool completely on the base before attempting to move it.
Caution: For delicate cakes like cheesecakes, you might want to cool them completely in the pan before removing the sides. Trust me, a cracked cheesecake is a sad cheesecake.
Remember, using a springform pan for cakes is all about preserving that perfect shape and presentation. With these tips, you’ll be serving up picture-perfect cakes in no time!
Tips and Tricks for Using a Springform Pan
Alright, baking enthusiasts, gather ’round! I’m about to spill the beans on some game-changing tips and tricks for using your springform pan. These nuggets of wisdom come from years of trial, error, and yes, a few spectacular failures (let’s not talk about the Great Cheesecake Flood of 2018).
Achieving Even Baking with a Springform Pan
Ever cut into a cake only to find it’s a bit… lopsided? Here’s how to ensure even baking:
- Rotate the pan: Halfway through baking, give your pan a 180-degree turn. It’s like giving your cake a little dance!
- Use a baking strip: Wet a strip of old towel, wrap it around the pan, and secure with a safety pin. This helps the cake bake more evenly.
- Invest in an oven thermometer: Oven temperatures can be sneaky liars. An oven thermometer keeps them honest.
Pro Tip: Place your springform pan on a baking sheet. It catches any potential leaks and makes it easier to move the pan in and out of the oven.
Enhancing Cake Presentation and Decoration
Now, let’s talk about making your cake look as good as it tastes:
- Clean edges: After releasing the sides, run a warm, smooth knife around the edge for a crisp look.
- Decorative sides: Line the sides of the pan with patterned acetate for a professional finish.
- Height matters: Choose a pan with higher sides for dramatic, towering cakes.
Remember, springform pans are great for more than just cakes. Get creative with layered desserts, deep-dish pizzas, or even savory dishes!
Troubleshooting Common Issues
Let’s face it, sometimes things go wrong. Here’s how to handle common springform snafus:
Dealing with Sticking
- Prevention: Always grease and line your pan. No exceptions!
- Cure: If your cake sticks, try running a thin knife around the edges and bottom. Worst case? Serve it as a “rustic” dessert. It’s all about confidence!
Handling Leaks Mid-Bake
Oh no, batter leaking everywhere? Don’t panic!
- Place a baking sheet on the rack below to catch drips.
- If it’s just starting, try wrapping the outside of the pan with foil.
- For future bakes, consider a silicone pan or extra-tight sealing.
Key Takeaway: Most springform issues can be prevented with proper preparation and a little extra TLC.
Cleaning and Maintaining Your Springform Pan
Take care of your pan, and it’ll take care of you. Here’s how:
- Hand wash only: Dishwashers can damage the non-stick coating and the spring mechanism.
- Dry thoroughly: Prevent rust by drying immediately after washing.
- Store carefully: Avoid stacking heavy items on top of your pan to prevent warping.
Fun Fact: Did you know that springform pans were invented in the 1950s? They’ve been making bakers’ lives easier for decades!
Frequently Asked Questions (FAQs)
Q: Can I freeze a cake baked in a springform pan?
A: Yes, you can freeze a cake baked in a springform pan. For best results, remove the sides of the pan before freezing, wrap the cake tightly in plastic wrap and aluminum foil, and freeze for up to 3 months. Thaw in the refrigerator before serving.
Q: What types of cake batter work best with a springform pan?
A: Springform pans work best with thicker batters like cheesecake, pound cake, and dense fruit cakes. They’re also great for layered desserts and no-bake cakes. Thinner batters may leak, so it’s best to use a regular cake pan for those.
Q: Is it necessary to use parchment paper in a springform pan?
A: While not always necessary, using parchment paper in a springform pan is highly recommended. It helps prevent sticking, makes cake removal easier, and can catch any potential leaks. For best results, line both the bottom and sides of the pan with parchment paper.
Q: Can I bake a cake in a water bath using a springform pan?
A: It’s generally not recommended to bake a cake in a water bath using a springform pan, as water can seep into the pan and compromise the bake.
