
As an Amazon Associate BakingBakewareSets.com earns from qualifying purchases.
Easy Red Velvet Cupcakes: 9 Party Dessert Ideas for 2026
Have you ever spent hours baking red velvet cupcakes only to pull them out of the oven looking dry and desperate for attention? The struggle to find easy red velvet cupcakes that stay moist for a party is real. But today, that changes.
Easy red velvet cupcakes are moist, fluffy desserts made with simple ingredients like buttermilk and cocoa, topped with tangy cream cheese frosting. They are perfect for parties because they can be made ahead and transport well when stored properly.
Drawing from tested recipe protocols and exact measurements, this guide ensures you get a moist crumb every time. You’ll discover 9 simple decoration ideas, troubleshooting tips, and how to scale the batch for any crowd. By the end, you’ll feel confident baking with from-scratch precision and party‑style flair.
☰ Table of Contents ▼
show
How to Make Easy Red Velvet Cupcakes That Stay Moist for Parties
Baking a batch of easy red velvet cupcakes that are both moist and fluffy comes down to a few reliable techniques. Whether you’re hosting a birthday, a Valentine’s Day gathering, or just want a quick red velvet treat, this method delivers consistent results every time.
Why This Recipe Works
- Buttermilk & Vinegar: The acidity activates baking soda for a light, tender crumb.
- Cake Flour: Lower protein content reduces gluten formation, keeping cupcakes tender.
- Gel Food Coloring: Provides a vibrant red hue without thinning the batter.
- Room Temperature Ingredients: Ensures a smooth emulsion and even baking.
Step-by-Step Instructions
Supplies Needed
- Muffin Tin: Standard 12-cup pan.
- Cupcake Liners: Paper or foil liners.
- Mixing Bowls: At least two sizes.
- Hand Mixer or Whisk: For combining ingredients.
Directions
- Preheat oven to 350°F (175°C). Line the muffin tin with cupcake liners.
- Whisk together cake flour, cocoa powder, baking soda, and salt in a medium bowl.
- Beat unsalted butter and sugar in a large bowl until light and fluffy (about 3 minutes).
- Add eggs one at a time, then mix in vanilla extract and red food coloring.
- Combine buttermilk and white vinegar in a small bowl. Alternate adding dry ingredients and buttermilk mixture to butter mix, beginning and ending with dry ingredients.
- Fill each liner about ⅔ full. Bake for 18‑22 minutes, until a toothpick inserted comes out clean.
- Cool in pan for 5 minutes, then transfer to a wire rack to cool completely.
Pro-Tip: Overmixing develops gluten and leads to dense, dry cupcakes. Mix just until the flour disappears. Using cake flour (lower protein) also helps maintain a fluffy texture.
Easy Red Velvet Cupcakes: 9 Party Dessert Ideas for 2026
Once you master the basic recipe, it’s time to turn those cupcakes into showstoppers for your party dessert table. These 9 ideas add minimal effort but maximum visual and flavor impact.
1. Pipe Classic Cream Cheese Swirls for Elegant Party Presentation

Pin this elegant swirl technique to your ‘Party Desserts’ board!
Nothing says “party” like a beautifully piped swirl. A tall cream cheese frosting peak is both classic and impressive, and it’s easier than you think.
Supplies Needed
- Piping Bag: Reusable silicone or disposable plastic bags for easy cleanup.
- Star Tip: Large open star tip (e.g., Wilton 1M) for classic swirls.
- Cream Cheese Frosting: Prepared according to recipe, chilled to firm up slightly.
- Coupler: Optional, for changing tips easily.
Step-by-Step Directions
- Fit the piping bag with the large star tip and secure it tightly.
- Spoon the chilled cream cheese frosting into the bag, filling it about two-thirds full.
- Hold the bag perpendicular to the center of the cooled cupcake.
- Squeeze gently to anchor the frosting, then pipe in a tight circular motion, moving upward.
- Release pressure abruptly at the top to create a peak.
- Repeat for all cupcakes, wiping the tip if needed for clean lines.
Pro-Tip: In my experience testing various frostings, chilling the cream cheese frosting for 15 minutes before piping ensures the swirls hold their shape even in warm party environments, preventing sagging.

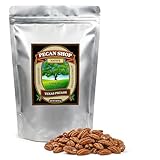
2. Add Crushed Pecans for Texture and Southern Charm

Save this crunchy topping idea for your next Southern-themed party!
Pecans add a delightful crunchy texture and earthy flavor that complements the tangy frosting. This is a favorite Southern red velvet twist.
Ingredients
- Pecan Halves: High-quality, fresh pecans for best flavor.
- Food Processor: Or a zip-top bag and rolling pin for crushing.
- Small Skillet: For toasting pecans to enhance nutty flavor.
Instructions
- Toast the pecan halves in a dry skillet over medium heat for 3-5 minutes until fragrant.
- Cool the pecans completely to prevent them from melting the frosting.
- Crush the pecans using a food processor or a rolling pin until they are coarse crumbs.
- Frost the cupcakes with your preferred method.
- Sprinkle the crushed pecans generously over the wet frosting, pressing lightly to adhere.
- Serve immediately or store in an airtight container.
Pro-Tip: Toasting the pecans before crushing them releases their natural oils, creating a deeper, nuttier flavor that complements the lightly flavored chocolate notes in the red velvet batter.
3. Create Heart-Shaped Decorations for Valentine’s Day Events

Pin these romantic heart decorations for your Valentine’s party prep!
Valentine’s Day parties call for festive touches. Heart-shaped decorations are simple to make and instantly set the mood.
Materials Needed
- Red Fondant: Pre-colored or white fondant with red gel food coloring.
- Heart Cookie Cutter: Small size (1-inch) for cupcake toppers.
- Cornstarch: For dusting work surface to prevent sticking.
- Edible Glue: Or a tiny dab of water to attach hearts.
Directions
- Dust your work surface lightly with cornstarch.
- Roll out the red fondant to about 1/8-inch thickness.
- Cut out heart shapes using the small cookie cutter.
- Frost the cupcakes with a smooth layer of cream cheese frosting.
- Place a fondant heart gently on top of each cupcake.
- Press lightly to secure, using edible glue if necessary.
Pro-Tip: If you don’t have fondant, use red heart sprinkles or candy melts molded into hearts for a quicker, no-roll alternative that still looks festive and professional.

4. Build a Mini Cupcake Tower for Crowd Pleasing

Save this space-saving tower idea for your next big gathering!
Mini cupcakes are perfect for large parties because they offer portion control and allow guests to try multiple desserts. A tower display also saves table space.
Tools Required
- Mini Muffin Tin: Standard 24-cup pan for bite-sized portions.
- Mini Liners: Paper or foil liners sized for mini tins.
- Tiered Stand: Acrylic or metal stand for vertical display.
- Small Piping Tip: For precise, small frosting dollops.
Process
- Preheat oven to 350°F (175°C) and line mini muffin tin with liners.
- Fill each liner only halfway with batter to allow for rising.
- Bake for 10-12 minutes, checking for doneness with a toothpick.
- Cool completely on a wire rack before frosting.
- Pipe small dollops of frosting using a smaller tip.
- Arrange on the tiered stand, starting from the bottom up.
Pro-Tip: Mini cupcakes bake faster, so reduce the bake time by half. This also means they dry out quicker, so ensure you use a moist batter and store them in an airtight container until serving.

5. Transform Leftovers into Red Velvet Cake Pops

Pin this zero-waste cake pop idea for your party leftovers!
If you end up with leftover or slightly stale cupcakes, don’t toss them. Turn them into fun, portable cake pops.
Supplies Needed
- Leftover Cupcakes: Crumbled into fine crumbs.
- Cream Cheese Frosting: Used as a binder (about 1-2 tbsp per cupcake).
- White Chocolate Melts: For dipping and coating.
- Cake Pop Sticks: Lollipop sticks for handling.
Steps
- Crumble the leftover cupcakes into a large bowl until fine.
- Mix in frosting gradually until the mixture holds together like dough.
- Roll into small, uniform balls and place on a parchment-lined sheet.
- Chill the balls in the freezer for 15 minutes to firm up.
- Melt the white chocolate according to package directions.
- Dip the tip of a stick into chocolate, then insert into a cake ball.
- Dip the entire ball into chocolate, tapping off excess.
- Sprinkle with red sanding sugar before the chocolate sets.
Pro-Tip: Don’t add too much frosting! The mixture should be moist but not sticky. If it’s too wet, the cake pops will fall off the sticks. Start with less frosting and add more if needed.

6. Garnish with Fresh Berries for a Fresh Twist

Save this fresh and fruity garnish idea for summer parties!
Fresh berries like raspberry and blueberry provide a tangy contrast to the sweet frosting, adding both flavor and visual appeal.
What You Need
- Fresh Raspberries: Firm, bright red berries for best appearance.
- Fresh Blueberries: Plump and dry for easy handling.
- Paper Towels: For gently patting berries dry.
- Mint Leaves: Optional, for added green contrast.
Routine Steps
- Wash the berries gently in cold water.
- Pat them completely dry with paper towels to prevent sliding.
- Frost the cupcakes with a smooth or swirled finish.
- Place one raspberry or a cluster of blueberries on top.
- Add a small mint leaf next to the berry for color contrast.
- Serve immediately to keep berries fresh and firm.
Pro-Tip: Ensure berries are completely dry before placing them on the frosting. Any moisture will cause the cream cheese frosting to slide or become watery, ruining the presentation.

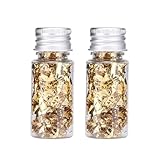
7. Apply Edible Gold Leaf for Luxury Event Elegance

Pin this luxurious gold leaf idea for your next upscale event!
For weddings, anniversaries, or holiday parties, a touch of edible gold leaf instantly elevates the elegance of your cupcakes.
Products & Tools Used
- Edible Gold Leaf: Food-grade, genuine gold leaf sheets or flakes.
- Soft Brush: A clean, dry pastry brush for handling gold.
- Tweezers: Optional, for precise placement.
- Chilled Frosting: Firm frosting helps gold adhere better.
Application/Styling Steps
- Ensure your hands are clean and dry before handling gold leaf.
- Frost the cupcakes and chill them for 10 minutes to firm up.
- Use tweezers or a dry brush to lift a small piece of gold leaf.
- Gently place the gold leaf onto the frosting, pressing lightly.
- Allow the gold to adhere naturally; do not rub.
- Store in a cool, dry place away from humidity.
Pro-Tip: Humidity is the enemy of edible gold leaf. If your kitchen is humid, work quickly and keep the gold leaf container closed until the moment of use to prevent it from sticking to itself.
8. Drizzle with Dark Chocolate for Rich Contrast

Save this rich chocolate drizzle idea for chocolate lovers!
Dark chocolate adds a rich depth that complements the subtle cocoa in the cupcake. The drizzle also creates a stunning visual contrast.
Ingredients
- Dark Chocolate Chips: 60-70% cocoa for best flavor and snap.
- Coconut Oil: 1 teaspoon to thin the chocolate for drizzling.
- Microwave-Safe Bowl: For melting chocolate evenly.
- Spoon or Fork: For creating the drizzle pattern.
Directions
- Combine dark chocolate chips and coconut oil in a microwave-safe bowl.
- Microwave in 30-second intervals, stirring between each, until smooth.
- Let cool slightly so the chocolate thickens but remains pourable.
- Dip a spoon or fork into the melted chocolate.
- Move your hand back and forth over the frosted cupcake to create lines.
- Allow the chocolate to set completely before serving.
Pro-Tip: Adding a tiny bit of coconut oil to the melted chocolate prevents it from cracking when bitten and ensures a smooth, glossy finish that looks professional.

9. Use Themed Sprinkle Mixes for Instant Celebration Vibes

Pin these fun sprinkle ideas for instant party vibes!
Sprinkles are the ultimate shortcut to a festive look. With themed mixes, you can match any celebration in seconds.
Supplies Needed
- Assorted Sprinkles: Heart, star, confetti, or holiday-specific mixes.
- Small Bowls: For holding different sprinkle types.
- Spoon or Shaker: For even distribution.
- Freshly Frosted Cupcakes: Wet frosting helps sprinkles stick.
Steps
- Choose a sprinkle theme that matches your party (e.g., hearts for Valentine’s).
- Frost the cupcakes just before adding sprinkles to ensure adhesion.
- Hold the cupcake over a bowl to catch excess sprinkles.
- Sprinkle generously over the top, rotating the cupcake for even coverage.
- Press lightly with clean fingers if some sprinkles aren’t sticking.
- Tap off excess sprinkles back into the bowl for reuse.
Pro-Tip: For a more sophisticated look, use monochromatic sprinkles (e.g., all red or all white) instead of rainbow mixes. This creates a cohesive, designer aesthetic that elevates the simple red velvet cupcake.

Key Takeaways: Your Quick Guide to Easy Red Velvet Cupcakes
- Moisture is Key: Using buttermilk and white vinegar creates the signature moist and fluffy crumb by activating the baking soda through an acid-base reaction.
- Color Consistency: Use gel red food coloring instead of liquid to achieve a vibrant red hue without altering the batter viscosity or making the cupcakes soggy.
- Frosting Stability: Chill your cream cheese frosting before piping to ensure elegant swirls that hold up during transport to the party dessert table.
- Make-Ahead Friendly: These easy red velvet cupcakes can be baked a day in advance and stored in an airtight container, making them ideal for stress-free party planning.
- Texture Contrast: Adding pecans or fresh berries provides a necessary textural and flavor contrast to the sweet and tangy profile of the cake and frosting.
- Portion Control: Consider making mini cupcakes for large crowds to manage yield and offer guests a variety of red velvet dessert ideas without waste.
- Storage Matters: Always refrigerate cupcakes with cream cheese frosting due to dairy content, but bring them to room temperature before serving for the best flavor and texture.
People Also Ask About Easy Red Velvet Cupcakes
Why are my red velvet cupcakes dry?
Dry red velvet cupcakes are usually caused by overmixing the batter or overbaking. Overmixing develops gluten, leading to a tough crumb, while overbaking evaporates moisture. Ensure you mix just until combined and check for doneness a few minutes before the recommended bake time. Using cake flour instead of all-purpose flour can also help maintain a tender texture due to its lower protein content. Additionally, ensure your buttermilk and eggs are at room temperature to create a proper emulsion that traps moisture.
Can I make red velvet cupcakes without buttermilk?
Yes, you can substitute buttermilk with milk and white vinegar or lemon juice. Add 1 tablespoon of vinegar or lemon juice to 1 cup of milk and let it sit for 5 minutes to curdle. This mimics the acidity of buttermilk, which is crucial for activating the baking soda and achieving the signature moist texture. However, true buttermilk provides a richer flavor and tenderizing effect that substitutes may lack. For the best results in easy red velvet cupcakes, using real buttermilk is recommended for its superior crumb structure and tangy profile.
Do red velvet cupcakes need to be refrigerated?
Yes, red velvet cupcakes with cream cheese frosting must be refrigerated. Cream cheese is a dairy product that can spoil at room temperature, posing a food safety risk. Store them in an airtight container in the fridge for up to 5 days. Before serving, let them sit at room temperature for 30 minutes to soften the frosting and enhance the flavor. If you need to transport cupcakes to a party, use a cooler with ice packs to keep them safe and fresh until arrival.
What is the difference between red velvet and chocolate cake?
Red velvet cake has a lighter chocolate flavor and a distinct tangy taste from buttermilk and vinegar. It uses a small amount of cocoa powder for subtle chocolate notes, whereas chocolate cake relies heavily on cocoa or melted chocolate for a rich, intense flavor. The vibrant red color in traditional red velvet comes from a chemical reaction between anthocyanins in cocoa and acidic ingredients, though modern recipes use red food coloring. The texture is also finer and more velvety compared to the denser crumb of standard chocolate cake.
How do I prevent my cupcakes from sinking in the middle?
Sinking cupcakes are often caused by opening the oven door too early or underbaking. Avoid opening the oven during the first 15 minutes of baking to maintain consistent temperature. Ensure your baking soda is fresh and active, as old leavening agents won’t provide enough lift. Also, check that your oven temperature is accurate using an oven thermometer. Overfilling the liners can also cause collapsing, so fill them only 2/3 full. Proper aeration during the creaming stage of butter and sugar also helps create a stable structure.
Can I freeze red velvet cupcakes?
Yes, you can freeze unfrosted red velvet cupcakes for up to 3 months. Wrap them tightly in plastic wrap and place them in a freezer-safe bag to prevent freezer burn. Thaw them overnight in the refrigerator before frosting. Freezing frosted cupcakes is possible but can affect the texture of the cream cheese frosting, making it watery upon thawing. If you must freeze frosted cupcakes, flash-freeze them uncovered until solid, then wrap individually. For best results, freeze plain and frost fresh.
What type of cocoa powder is best for red velvet?
Natural unsweetened cocoa powder is traditionally used for red velvet cupcakes. Its higher acidity reacts with baking soda and buttermilk to create the classic rise and tangy flavor. Dutch-process cocoa is alkalized and less acidic, which may result in a flatter, less vibrant cake. However, if you adjust the leavening agents, Dutch-process can be used for a darker color and milder flavor. For authentic easy red velvet cupcakes, stick with natural cocoa to ensure the proper acid-base reaction and traditional taste profile.
How far in advance can I make red velvet cupcakes?
You can bake red velvet cupcakes up to 2 days in advance. Store them unfrosted in an airtight container at room temperature. Frost them on the day of serving for the freshest appearance and texture. If you must frost early, refrigerate them and bring to room temperature before serving. This make-ahead strategy is ideal for party planning, allowing you to focus on other preparations. Ensure the cupcakes are completely cool before storing to prevent condensation, which can make the liners soggy and affect the moist crumb.
Can I use beet juice instead of red food coloring?
Yes, beet juice is a natural alternative to artificial red food coloring. It provides a subtle earthy sweetness and a natural red hue, though it may be less vibrant than gel coloring. Use about 2-3 tablespoons of concentrated beet juice per batch. Keep in mind that beet juice may impart a slight vegetable flavor, which can be masked by the vanilla extract and cocoa powder. This option is great for those avoiding artificial dyes, but the color may fade slightly during baking due to heat sensitivity of natural pigments.
How do I transport cupcakes to a party without ruining the frosting?
Use a dedicated cupcake carrier with individual slots to keep them upright and secure. If you don’t have one, place cupcakes in a single layer in a large box, using non-slip shelf liner underneath to prevent sliding. Avoid stacking unless you have sturdy dividers. Keep the car cool with AC or ice packs if traveling in warm weather to prevent the cream cheese frosting from melting. Frost with a sturdy swirl rather than a delicate peak, as it withstands movement better. Arrive with time to spare to make any minor adjustments.
Final Thoughts on Easy Red Velvet Cupcakes
Creating easy red velvet cupcakes for your next party doesn’t have to be a stressful endeavor. By focusing on simple, high-quality ingredients like buttermilk, natural cocoa powder, and a tangy cream cheese frosting, you can achieve a moist and fluffy dessert that impresses every guest. Whether you choose to pipe elegant swirls, add crunchy pecans, or decorate with themed sprinkles, these 9 ideas ensure your red velvet cupcakes dessert for parties stands out on any dessert table.
Remember, the secret to success lies in precise measurements, proper mixing techniques, and understanding the science behind the acid-base reaction that gives red velvet its unique character. With these tips, you’re equipped to handle any baking challenge, from preventing sunken centers to ensuring your frosting stays perfect during transport. Now, it’s time to preheat that oven and start baking!
Which of these 9 party dessert ideas are you most excited to try? Share your favorite decoration tip in the comments below!
Last update on 2026-08-07 at 08:18 / Affiliate links / Images from Amazon Product Advertising API
