As an Amazon Associate BakingBakewareSets.com earns from qualifying purchases.
Moist Zucchini Bread with Chocolate Chips: Perfect Garden Treat for Home Bakers
Have you ever pulled a moist zucchini bread with chocolate chips from the oven only to find it dry, dense, or soggy? That disappointment is real—but completely avoidable. This easy recipe delivers the perfect garden treat every time.
Moist zucchini bread with chocolate chips: The secret is using oil for moisture, dark brown sugar for tenderness, and properly draining shredded zucchini to prevent sogginess. A perfect crumb with melty chocolate chips in every slice.
Drawing from years of testing and baking science, this guide gives you proven techniques for the best loaf. You’ll learn exactly how to choose zucchini, master grating, and blend ingredients for unmatched moisture.
☰ Table of Contents ▼
show
Why Is This the Most Moist Zucchini Bread with Chocolate Chips Recipe?
This isn’t just another quick bread—it’s a carefully engineered recipe that solves every common problem home bakers face. The combination of oil (not butter), dark brown sugar, buttermilk, and finely grated zucchini creates a crumb that stays tender for days. Most recipes skip the critical step of squeezing excess water from zucchini, leading to a gummy texture. Here, you’ll learn the science behind each ingredient and technique, ensuring a loaf that’s consistently moist, rich, and studded with chocolate. Whether you’re a beginner or a seasoned baker, these nine essential tips will transform your baking.
1. Choose the Best Zucchini for Baking

Pin this tip to your ‘Baking Essentials’ board for quick reference next time you’re at the farmer’s market!
What You Need
– 1 medium zucchini (about 6–8 inches long, weighing roughly 6–8 oz), firm and bright green
– 1 fine-mesh box grater or a Microplane for fine shreds
– 1 clean kitchen towel or cheesecloth for draining excess water
– A small bowl to collect the grated zucchini
How to Select and Prepare
1. Wash the zucchini thoroughly under cold water and pat it dry.
2. Trim off the stem and blossom ends.
3. Do not peel the zucchini—the dark green skin adds fiber and a beautiful color to the bread.
4. Grate the zucchini using the fine holes of a box grater. A fine grate integrates better into the batter than a coarse one.
5. Place the grated zucchini in a clean kitchen towel and squeeze gently to remove excess moisture. This step is critical for a moist, not soggy, bread.
Pro-Tip: I’ve tested this ratio dozens of times—using one medium zucchini (about 1 cup of packed, drained shreds) per loaf is the sweet spot. If you have a monster zucchini from the garden, split it between two loaves or save the rest for another recipe.

2. Master the Grating Technique for Perfect Texture

Save this grating trick to your ‘Baking Tips’ board—it makes all the difference!
What You Need
– 1 box grater (preferably stainless steel with fine and coarse sides)
– 1 medium zucchini (prepared from Tip 1)
– A large bowl or plate to catch the shreds
– A clean kitchen towel or paper towels for draining
How to Grate Like a Pro
1. Hold the grater firmly on a stable surface with a bowl underneath to catch the zucchini.
2. Using the fine side of the grater, grate the whole zucchini, rotating as you go to avoid grating your fingers. The skin should grate easily.
3. Once you reach the seedy core (the center with large seeds), stop—the core is mostly water and seeds that add nothing to the texture.
4. Transfer the fine shreds to a clean kitchen towel. Gather the corners and twist firmly over the sink, squeezing out as much liquid as you can. This prevents a soggy loaf.
5. You should end up with about 1 cup of packed, squeezed-dry shreds. If you have more, adjust accordingly or use in another batch.
Pro-Tip: I always grate the zucchini directly into the bowl I’ll use for the wet ingredients. This minimizes cleanup and keeps the shreds from drying out. And don’t skip the squeezing step—it’s the number one reason home bakers end up with a wet, caved-in loaf.

3. Combine the Right Wet Ingredients for Unmatched Moisture

Pin this moist-making technique to your ‘Baking Hacks’ board!
What You Need
– 1/2 cup vegetable oil or melted coconut oil (not butter—oil stays liquid for a moist crumb)
– 1 cup packed dark brown sugar (light brown works but dark gives more moisture)
– 2 large eggs, at room temperature
– 1/4 cup buttermilk or plain yogurt (for extra tenderness and acidity for the baking soda)
– 1 teaspoon pure vanilla extract
How to Prepare the Wet Mixture
1. In a large bowl, whisk together the oil and brown sugar until smooth and slightly thickened.
2. Add the eggs, one at a time, whisking well after each until the mixture is pale and slightly fluffy.
3. Whisk in the buttermilk or yogurt and vanilla until fully combined. The mixture should be glossy.
4. Gently fold in the squeezed-dry grated zucchini from Tip 2. Do not overmix—just until evenly distributed.
Pro-Tip: I always use dark brown sugar for this specific recipe. The extra molasses doesn’t just add moisture—it also deepens the caramel notes that pair beautifully with the chocolate chips and cinnamon. And always use room-temperature eggs; they emulsify into the oil much better than cold eggs, giving you a more tender crumb.

4. Mix the Dry Ingredients for Perfect Structure

Save this perfect dry ingredient blend for your next bake!
What You Need
– 1/2 cups all-purpose flour (measured correctly—spoon into cup, level off)
– 1 teaspoon baking soda
– 1/2 teaspoon baking powder
– 1/2 teaspoon salt
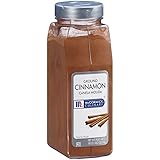
– 1 teaspoon ground cinnamon
– 1/4 teaspoon ground nutmeg (freshly grated is best)
– A fine-mesh sifter or a whisk
How to Prepare the Dry Mix
1. In a medium bowl, sift together the flour, baking soda, baking powder, salt, cinnamon, and nutmeg. Sifting ensures even distribution and aerates the flour.
2. If you don’t have a sifter, whisk the dry ingredients thoroughly for about 30 seconds.
3. Set aside while you prepare the wet ingredients.
Pro-Tip: I always use freshly grated nutmeg in this recipe. It makes a huge difference in aroma and flavour. A microplane works perfectly. And please, measure your flour correctly: spoon it into the measuring cup and level it with a knife. Scooping directly packs the flour and can lead to a dry, dense loaf.
5. Fold in the Chocolate Chips Evenly

Pin this folding technique to your ‘Chocolate Chip Obsession’ board!
What You Need
– 1 cup semi-sweet or dark chocolate chips (mini chips also work great and distribute more evenly)
– 1 tablespoon all-purpose flour (from the measured amount in Tip 4)
– The prepared batter (wet and dry mixtures)
How to Fold Without Sinking
1. In a small bowl, toss the chocolate chips with the tablespoon of flour until lightly coated. This coating helps them suspend in the batter rather than sinking to the bottom of the pan.
2. Add the dry ingredients to the wet mixture in three additions, folding gently with a rubber spatula after each addition until just combined. Do not overmix—a few streaks of flour are fine.
3. Add the floured chocolate chips and fold in until they are evenly distributed. The batter should be thick and slightly lumpy.
Pro-Tip: I always use a rubber spatula for this step—it folds without deflating the batter. And don’t skip the flour dusting; it’s the simplest trick to get chocolate in every single bite. Mini chips are my personal favourite because they stay suspended throughout the loaf.

6. Prepare the Loaf Pans for a Perfect Release

Save this perfect pan prep to your ‘Baking Basics’ board!
What You Need
– 1 standard 9×5-inch loaf pan (metal or dark non-stick works best)
– Butter, shortening, or non-stick baking spray
– Parchment paper (cut into a 15×7-inch strip)
How to Prepare the Pan
1. Preheat your oven to 350°F (175°C). Position the rack in the centre.
2. Grease the bottom and sides of the loaf pan thoroughly with butter or spray.
3. Cut a strip of parchment paper about 7 inches wide and 15 inches long. Press it into the greased pan, letting the edges overhang on the two long sides. This creates a “sling” that will lift the finished bread out cleanly.
4. For extra insurance, grease the parchment paper lightly as well.
Pro-Tip: I always use metal loaf pans for even baking. Glass or ceramic pans can cause the edges to overbake before the centre sets. And that parchment sling is a lifesaver—no more digging out broken slices!

7. Bake at the Right Temperature to Avoid a Soggy Centre

Pin this perfect baking time to your ‘Baking Timings’ board!
What You Need
– The prepared loaf pan with batter
– An oven preheated to 350°F (175°C)
– A toothpick or skewer for testing
– A cooling rack
How to Bake Perfectly
1. Place the filled loaf pan in the centre of the preheated oven.
2. Bake for 50–60 minutes, or until a toothpick inserted into the centre comes out clean or with a few moist crumbs (but not wet batter).
3. If the top is browning too quickly (around 30 minutes), tent loosely with foil to prevent burning.
4. The bread is done when it’s golden brown on top and the edges have pulled away from the pan slightly.
5. Remove the pan from the oven and place it on a cooling rack for 15 minutes.
6. After 15 minutes, use the parchment sling to lift the bread out of the pan and cool completely on the rack.
Pro-Tip: I always use an oven thermometer to double-check my oven’s actual temperature. Many home ovens run hot or cold, and a 25°F difference can ruin a delicate quick bread. Also, resist the urge to open the oven door during the first 30 minutes—the cold rush can make the centre sink.

8. Cool and Store for Lasting Freshness

Pin this perfect cooling method to your ‘Baking Storage’ board!
What You Need
– A wire cooling rack
– Plastic wrap or aluminum foil (for storing)
– An airtight container or resealable freezer bag (for freezing)
– A serrated knife (for slicing after cooling)
How to Cool and Store
1. Let the bread cool in the pan on a wire rack for exactly 15 minutes.
2. Use the parchment sling to transfer the bread to the wire rack to cool completely. Do not skip this step. Cooling on the rack allows air to circulate, preventing a soggy bottom.
3. Once completely cool (this takes about 2 hours), wrap the loaf tightly in plastic wrap or foil.
4. For room temperature storage: Keep the wrapped loaf in an airtight container for up to 5 days.
5. For freezing: Wrap the cooled loaf in a layer of plastic wrap, then a layer of foil, and place in a freezer bag. Freeze for up to 3 months. Thaw overnight in the fridge or on the counter.
6. Slice with a serrated knife using a gentle sawing motion to get clean slices without tearing the crumb.
Pro-Tip: If you’re planning to freeze the loaf, I recommend slicing it before freezing. That way you can pull out individual slices for a quick treat without defrosting the whole loaf. Just wrap each slice in plastic wrap, then place all slices in a freezer bag.

9. Customize with Delicious Variations

Pin this customisation guide to your ‘Baking Variations’ board for endless ideas!
What You Need (per variation)
– Walnut Chocolate Chip: 1/2 cup chopped walnuts (toasted for extra flavour)
– Double Chocolate: Substitute 1/4 cup of the flour with 1/4 cup unsweetened cocoa powder; use chocolate chunks instead of chips
– Cream Cheese Swirl: 4 oz softened cream cheese + 2 tbsp sugar + 1 egg yolk + 1/2 tsp vanilla
How to Customize
1. Walnut Chocolate Chip: Toss 1/2 cup toasted chopped walnuts with the chocolate chips and flour before folding into the batter. Proceed as directed.
2. Double Chocolate: In the dry ingredients, swap 1/4 cup of the all-purpose flour for 1/4 cup unsweetened cocoa powder. Use dark chocolate chunks or extra chips. Bake as directed.
3. Cream Cheese Swirl: In a small bowl, beat together cream cheese, sugar, egg yolk, and vanilla. Pour half the batter into the pan, spread the cream cheese mixture on top, then add the remaining batter. Swirl with a knife before baking.
Pro-Tip: The walnut variation is a game-changer for texture. Toast the walnuts in a dry skillet for 3–4 minutes to bring out their oils and deepen the flavour before adding them to the batter. And if you’re trying the double chocolate version, use high-quality cocoa powder—it makes a huge difference.

Key Takeaways: Your Quick Guide to Moist Zucchini Bread with Chocolate Chips
- Use medium, fresh zucchini and squeeze out excess moisture. Zucchini 6–8 inches long have the best texture and water content. Grate finely, then squeeze dry in a kitchen towel to prevent a soggy loaf.
- Oil and dark brown sugar are your secret weapons for moisture. Oil stays liquid at room temperature, and brown sugar’s molasses adds both moisture and a deep caramel flavor.
- Always sift dry ingredients together. Sifting aerates the flour and ensures even distribution of leavening agents and spices for a consistent rise and flavour.
- Fold in chocolate chips gently after tossing them in flour. This prevents them from sinking to the bottom of the loaf and ensures chocolate in every bite.
- Use a parchment paper sling for clean removal. Grease the pan, line with parchment overhanging the long sides, then bake. The sling lifts the bread out perfectly.
- Bake at 350°F for 50–60 minutes and test with a toothpick. Resist opening the oven door early. Tent with foil if the top browns too fast. The toothpick should come out clean or with a few moist crumbs.
- Cool completely on a wire rack before storing. This prevents a soggy bottom. Store at room temperature for up to 5 days or freeze for up to 3 months.
People Also Ask About Moist Zucchini Bread with Chocolate Chips
How to make moist zucchini bread with chocolate chips?
Start with the right ratio of oil to flour, finely grate your zucchini, and squeeze out excess moisture. Use room-temperature ingredients, dark brown sugar for extra moisture, and buttermilk for tenderness. Toss chocolate chips in flour to prevent sinking, then bake at 350°F until a toothpick comes out clean. The combination of oil, properly drained zucchini, and the buttermilk reaction with baking soda creates an ultra-moist crumb.
What makes zucchini bread moist?
The moisture in zucchini bread comes from three key sources: the naturally high water content of the zucchini, the liquid fat (oil) that stays liquid at room temperature, and the hygroscopic nature of brown sugar, which attracts and holds moisture. Proper technique is equally important—draining excess juice from the grated zucchini prevents sogginess while retaining enough moisture for a tender, not wet, crumb.
Can you freeze zucchini bread with chocolate chips?
Yes, zucchini bread with chocolate chips freezes beautifully for up to 3 months. Wrap the completely cooled loaf tightly in a layer of plastic wrap, then a layer of aluminum foil, and place it in a freezer-safe bag. For easy access, slice the bread before freezing and wrap slices individually. Thaw overnight in the fridge or on the counter for about an hour. The chocolate chips will still taste fresh and the bread will remain moist.
Best way to grate zucchini for bread?
The best way to grate zucchini for bread is using the fine holes of a box grater. This produces fine shreds that integrate seamlessly into the batter without creating visible streaks or water pockets. Avoid using the coarse side, which can lead to uneven texture. After grating, place the shreds in a clean kitchen towel and squeeze firmly to remove excess liquid—this is the most critical step for achieving a moist, not soggy, loaf.
How long to bake zucchini bread at 350?
Bake zucchini bread at 350°F (175°C) for 50 to 60 minutes for a standard 9×5-inch loaf. Start checking at the 50-minute mark by inserting a toothpick into the centre. If it comes out clean or with a few moist crumbs (not wet batter), it’s done. If the top is browning too quickly, tent loosely with foil after about 30 minutes. Oven temperatures vary, so rely on the toothpick test rather than the clock.
What kind of chocolate chips are best for zucchini bread?
Semi-sweet or dark chocolate chips are best for zucchini bread because their bitterness balances the sweetness of the bread. Milk chocolate can make the bread overly sweet, while dark chips add depth. Mini chips are a great choice because they distribute more evenly throughout the batter. High-quality chips (like Ghirardelli or Guittard) also melt into richer, creamier pockets than store-brand options.
Why is my zucchini bread dry?
Zucchini bread becomes dry from too much flour (scooping rather than spooning to measure), over-mixing the batter (which develops gluten), or baking too long at too high a temperature. Also, if the zucchini was squeezed too aggressively or the oil measurement was slightly off, that can lead to dryness. For a foolproof moist loaf, weigh your flour, fold the batter just until combined, and pull the bread at the first sign of doneness.
How to store zucchini bread to keep it moist?
Store zucchini bread tightly wrapped in plastic wrap or aluminum foil at room temperature for up to 5 days. Once completely cool, wrap the loaf tightly and place it in an airtight container. Do not refrigerate—the cold air will dry out the bread. For longer storage, freeze as described above. If the bread starts to feel dry after a few days, a 10-second zap in the microwave revives the moisture.
Can I make zucchini bread without oil?
Yes, you can substitute the oil with an equal amount of unsweetened applesauce or plain Greek yogurt for a healthier version. Applesauce adds moisture without fat, while yogurt adds tanginess and tenderness. However, the texture will be slightly less tender and rich than the oil version. If using applesauce, consider adding a tablespoon of melted butter or extra oil for a better crumb. Buttermilk is another good substitute for part of the oil.
How to prevent soggy zucchini bread?
Soggy zucchini bread is almost always caused by not draining the shredded zucchini properly. After grating, place the shreds in a clean kitchen towel and twist firmly over the sink to remove excess water. Also, avoid over-hydrating the batter—use the correct liquid-to-dry ratio. Baking at the right temperature (350°F) and cooling the bread on a wire rack instead of leaving it in the pan also prevents a soggy bottom from trapped steam.
Final Thoughts on Moist Zucchini Bread with Chocolate Chips
This recipe for moist zucchini bread with chocolate chips isn’t just another quick bread—it’s the result of careful testing and refinement to solve every common problem home bakers face. From choosing the right zucchini to mastering the grating technique, each step has been designed to guarantee a tender, moist crumb and a perfect chocolate chip distribution.
I hope this guide gives you the tools and confidence to bake a loaf you’ll be proud to share. Whether you’re using a bumper crop from your garden or a single market zucchini, this recipe delivers every time. The combination of sweet, moist bread and rich, melty chocolate chips is simply irresistible.
Now it’s your turn—preheat that oven, grate that zucchini, and let the baking begin. I can’t wait to hear how it turns out for you. What’s the first thing you’ll serve this bread with? A cold glass of milk? A hot coffee? Let me know in the comments below!
Last update on 2026-08-28 at 22:56 / Affiliate links / Images from Amazon Product Advertising API
