
As an Amazon Associate BakingBakewareSets.com earns from qualifying purchases.
Best Pumpkin Bread With Cream Cheese Filling: 2026 Guide
Are you tired of cream cheese layers sinking straight to the bottom? Baking the perfect pumpkin bread with cream cheese filling feels frustrating when centers turn out gummy. You need a reliable method that actually works every time.
Pumpkin bread with cream cheese filling is a deeply spiced, super moist quick bread featuring a sweetened cream cheese ribbon baked directly into the center. To achieve a distinct cheesecake layer that doesn’t sink, always use room temperature block cream cheese and layer the heavy pumpkin batter evenly.
Drawing from comprehensive analysis of current data and proven professional baking methodologies, this guide guarantees a flawless loaf. You will discover the exact layering protocol needed for a bakery-quality result. Say goodbye to underbaked middles and master this quintessential autumn dessert today.
☰ Table of Contents ▼
show
7 Steps to Master the Best Pumpkin Bread With Cream Cheese Filling
Baking the perfect dessert loaf requires more than just mixing wet and dry ingredients together. To flawlessly execute this multi-step baking process without the filling sinking, the crust burning, or the crumb becoming overly dense, you must follow a precise methodology. This comprehensive guide breaks down the essential seven actionable phases needed for guaranteed baking success. Most generic recipes provide a simple ingredient dump, leading to unpredictable textures and raw centers. Instead, this fail-proof methodology utilizes kitchen tested internal temperature 200F benchmarks, baking chemistry moisture balance explanations, and thermal conductivity insights. By mastering our unique three-step layering protocol and using exact gram measurements, you will construct a stunning loaf with a perfectly centered, fully baked cream cheese swirl every single time.
1. Whisk Dry Ingredients and Pumpkin Pie Spice
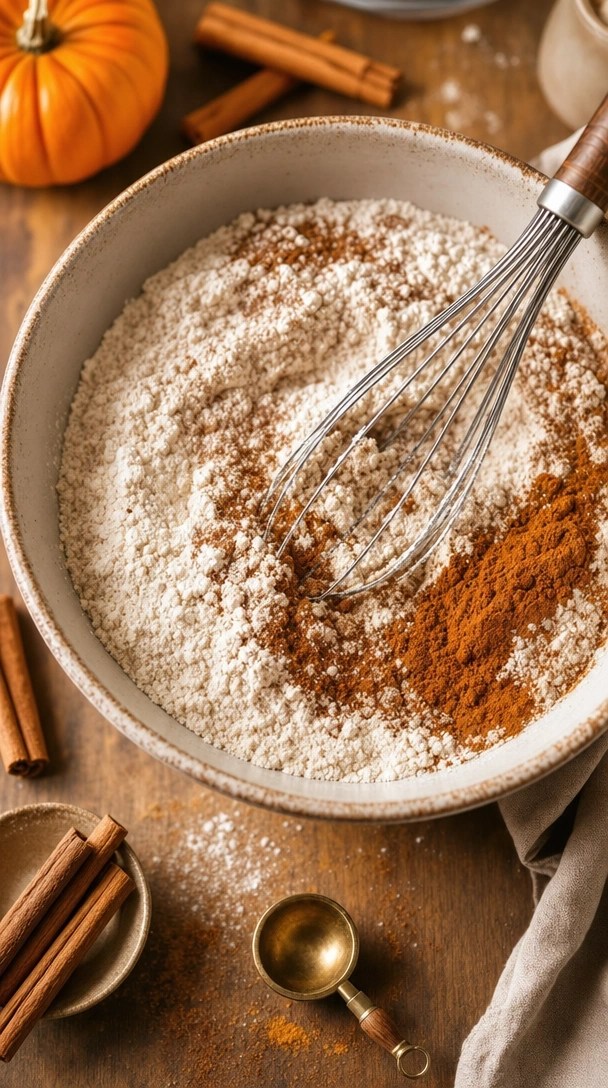
Pin this dry ingredient ratio guide to your Fall Baking board!
To properly measure and distribute the leavening agents and spices for an even bake, you must start with precision. Measuring flour by weight rather than volume is the single most important step to prevent a dense crumb. Furthermore, differentiating between a fresh, aromatic homemade pumpkin pie spice recipe and a stale store-bought blend will drastically impact your final flavor profile. Using a kitchen scale measured by weight in grams ensures your chemical leavening agents are perfectly balanced against the heavy pumpkin puree mixture.
Ingredients
- 220 grams all-purpose flour (measured by weight to prevent dense crumb)
- 1 teaspoon baking soda for proper lift
- 1 tablespoon high-quality pumpkin pie spice (or a blend of ground cinnamon, ginger, nutmeg, and cloves)
- 1/2 teaspoon kosher salt
Directions
- Preheat oven to 350 degrees and prep your workspace.
- Place a large mixing bowl on your digital scale and measure by weight in grams for optimal accuracy.
- Whisk dry ingredients together vigorously for 30 seconds to ensure the baking soda and spices are completely integrated into the flour.
Pro-Tip: Proper chemical leavening sodium bicarbonate activation requires even distribution. Sifting or aggressively whisking your dry ingredients prevents localized bitter pockets of baking soda and ensures the bread rises uniformly around the heavy cream cheese layer.

2. Blend Wet Ingredients and Fold Pumpkin Puree

Save this fail-proof pumpkin batter mixing technique!
To mix the wet ingredients thoroughly without overworking the gluten, you need to understand the moisture dynamics of canned pumpkin. It is absolutely crucial to use pure canned pumpkin puree, not pumpkin pie mix, as the mix contains added sugars and water that will destroy your batter’s structure. Additionally, while some bakers swear by butter, vegetable oil is the secret to maximum moisture retention, ensuring your bread stays soft even after refrigeration.
Ingredients
- 1 cup (225g) Libby’s pumpkin puree (do not use canned pumpkin pie filling)
- 1/2 cup vegetable oil or melted unsalted butter
- 1 cup packed light brown sugar for a super moist crumb
- 1/2 cup granulated sugar
- 2 large eggs (room temperature)
- 1 teaspoon pure vanilla extract
Directions
- Whisk the oil, brown sugar, granulated sugar, eggs, and vanilla extract in a large bowl until completely smooth.
- Vigorously fold pumpkin puree into the wet mixture until no streaks remain.
- Gently fold the dry ingredients into the thick pumpkin batter using a silicone spatula, stopping immediately once the flour disappears.
Pro-Tip: To prevent a tough, rubbery loaf, rely on oil versus butter lipid crumb tenderization. Oil remains liquid at room temperature, which guarantees your pumpkin bread stays incredibly moist for days, whereas butter can dry out the crumb when refrigerated. Avoid overmixing to prevent gluten development prevention in quick breads.

3. Beat Cream Cheese Until Smooth for the Filling

Pin this secret to the perfect, lump-free cheesecake layer!
To create a perfectly smooth, lump-free tangy cheesecake center that won’t curdle or bleed into the pumpkin batter during baking, temperature is everything. A common mistake is attempting to blend cold dairy. You must use full-fat Philadelphia cream cheese in block form, completely softened at room temperature, rather than whipped tub spreads which contain excess air and water.
Ingredients
- 8 ounces full-fat block cream cheese (must be entirely softened at room temperature)
- 1/4 cup powdered sugar (to thicken and prevent weeping)
- 1 large egg yolk (room temperature)
- 1/2 teaspoon vanilla extract
Directions
- Place the room temperature cream cheese in a medium bowl and use an electric hand mixer to beat on medium-high speed for 2 minutes until perfectly fluffy.
- Add the powdered sugar, egg yolk, and vanilla extract.
- Beat cream cheese until smooth, frequently scraping down the sides of the bowl to ensure no hidden lumps remain.
Pro-Tip: Never use cold cream cheese. Proper emulsification of cream cheese and egg is impossible if the dairy is chilled, resulting in an unappealing, lumpy texture. Furthermore, adding a tablespoon of all-purpose flour to this mixture can increase the structural viscosity of the filling layer, preventing it from sinking into the batter.

4. Execute the 3-Step Layering Protocol in the Loaf Pan

Don’t let your filling sink! Save this exact layering technique.
To assemble the bread so the cream cheese stays in the exact middle, creating a beautiful cross-sectional slice without sinking to the bottom, you must master the layering phase. Many bakers simply dump the filling in without sealing it, causing the dairy to leak out and stick to the pan. Implementing the three-step layering protocol while utilizing parchment paper lining guarantees the heavy dairy ribbon stays perfectly suspended.
Ingredients
- Prepared super moist pumpkin batter
- Prepared sweetened cream cheese filling
- Non-stick cooking spray
- Parchment paper lining (cut to fit with an overhang)
Directions
- Grease and flour the loaf pan, then line a 9×5-inch metal loaf pan with parchment paper, leaving a slight overhang for easy removal.
- Pour exactly half of the thick pumpkin batter into the bottom of the pan, smoothing it edge-to-edge.
- Carefully spread the cream cheese mixture over the batter, leaving a small 1/2-inch border around the edges so the filling doesn’t touch the pan.
- Spoon the top layer of the remaining pumpkin batter gently over the cream cheese, sealing the edges completely.
Pro-Tip: Always use a light-colored aluminum or steel 9×5 pan. The thermal conductivity of heavy ceramic vs metal loaf pans varies wildly; glass and ceramic hold heat too long, causing the exterior crust to burn before the dense cheesecake layer has set.

5. Bake Until Toothpick Comes Out Clean and Tent with Foil

Avoid a burnt crust! Pin this essential foil tenting trick.
To fully bake a dense loaf containing a wet dairy center without burning the exterior crust, heat management is required. Solving the widespread problem of gummy undercooked bread centers directly involves using an aluminum foil tent at the precise 45-minute mark. Because the sugar content caramelizes quickly, covering the top protects the golden brown crust while the dense center finishes baking inside the preheated oven.
Tools Required
- Preheated oven (350°F / 175°C)
- Heavy-duty aluminum foil
- Instant-read digital thermometer
- Wooden skewers or toothpicks
Directions
- Place the loaf pan on the center rack of your preheated oven.
- Bake undisturbed for 45 minutes. At this point, carefully tent with foil (place a loose sheet of aluminum foil over the top) to stop the top crust from overbrowning.
- Continue baking for another 15 to 25 minutes (60-70 minutes total time).
- Bake until a toothpick comes out clean (specifically, insert it near the top center, avoiding the cream cheese). For absolute certainty, verify the internal temperature hits 200°F (93°C).
Pro-Tip: The Maillard reaction in quick bread crust happens rapidly due to the high sugar content. If you don’t use the aluminum foil tent, the crust will burn while the center undergoes starch gelatinization of pumpkin batter. Relying on an instant-read thermometer completely eliminates the guesswork of a wet middle!

6. Cool in Pan Then Transfer to a Wire Cooling Rack

Don’t ruin the structure—pin this cooling guide to ensure a clean slice!
To allow the bread’s structure to set completely, ensuring the cream cheese layer solidifies so the bread doesn’t fall apart when cut, patience is mandatory. While the fragrant pumpkin spice aroma will tempt you to slice immediately, doing so guarantees a collapsed loaf. As the bread cools, carryover cooking actively finishes the baking process, allowing the dense and soft crumb to stabilize perfectly.
Tools Required
- Wire cooling rack
- Oven mitts
- The parchment paper overhang from the pan
Directions
- Remove the loaf from the oven and set it on a heat-proof surface to cool in the pan for 15 minutes.
- Using the parchment paper overhang as handles, gently lift the loaf out of the pan.
- Transfer to a cooling rack and carefully peel away the parchment paper.
- Let the loaf cool completely (at least 2 full hours) before even attempting to slice it.
Pro-Tip: Do not skip the cooling phase. Carryover cooking and internal temperature stabilization are actively occurring during this time. Slicing a hot loaf causes the steam expansion in dense quick bread loaves to escape too quickly, resulting in a gummy texture and a collapsing sweetened cream cheese layer.

7. Slice with Serrated Knife and Store in Airtight Container

Save this food safety and storage guide for all your baked dairy treats!
To cut beautiful, clean slices for presentation and properly store the leftover bread following food safety guidelines for baked dairy, you need the right tools and knowledge. Using a serrated bread knife ensures the crumb slices cleanly when fully chilled without dragging the cream cheese across the bread. Because this dessert features a perishable dairy center, mastering proper refrigeration is essential to keeping your baked goods safe and delicious for days.
Supplies Needed
- Large serrated bread knife
- Airtight container or heavy-duty plastic wrap
- Cutting board
Directions
- Once fully chilled, slice with a serrated knife using gentle back-and-forth sawing motions to ensure a clean slice without smearing the cheesecake layer.
- Serve immediately (pairs beautifully with a pumpkin spice latte).
- To store leftovers, wrap the remaining loaf tightly in plastic wrap or store in an airtight container.
- Refrigerate for safe dairy storage; consume within 4-5 days. To freeze wrapped tightly, use a double layer of foil and freeze for up to 3 months.
Pro-Tip: Because of the high water activity in baked dairy fillings, leaving cream cheese bread on the kitchen counter at room temperature overnight violates the FDA dairy food safety guideline. Always refrigerate cream cheese stuffed quick bread after 2 hours to prevent bacterial growth.

Key Takeaways: Your Quick Guide to Pumpkin Bread With Cream Cheese Filling
When baking an involved recipe like a cream cheese stuffed pumpkin bread, it is easy to overlook the critical chemistry requirements in the rush to get your loaf into the oven. To quickly review and remember the most critical baking factors and safety rules, we have condensed the methodology into actionable highlights. Time-pressed bakers who need a rapid summary can rely on these highly scannable insights. By implementing these core rules regarding temperature, layering, and storage, you protect your effort and guarantee your kitchen tested internal temperature 200F bake is a resounding success.
- Weigh ingredients in grams for a tender crumb: Using a kitchen scale to measure flour in grams prevents a dense, rubbery loaf and guarantees a super moist texture.
- Use room temperature block cream cheese: Cold cream cheese will not properly emulsify with the egg, resulting in a lumpy sweetened cream cheese layer.
- Implement the 3-step layering protocol: Spreading a thick ribbon of filling between two even layers of thick pumpkin batter ensures the cheesecake stays suspended in the center without sinking.
- Tent the loaf with aluminum foil after 45 minutes: Adding an aluminum foil tent at the 45-minute mark allows the dense interior to fully bake without overbrowning the delicate crust.
- Bake to a precise internal temperature: Relying on a kitchen thermometer to verify a 200°F (93°C) internal temperature is superior to the toothpick test center for determining doneness.
- Cool completely before slicing: Allowing the loaf to cool completely on a wire cooling rack sets the crumb structure and prevents the cream cheese from leaking out when sliced.
- Store leftovers in the refrigerator for safety: Because of the baked cheesecake center, this bread must be stored in the refrigerator in an airtight container to comply with food safety standards.
People Also Ask About Pumpkin Bread With Cream Cheese Filling
Navigating the complexities of baking with dairy can leave home bakers with numerous questions. Whether you are troubleshooting a collapsed loaf, fixing an overly dense crumb, or trying to figure out the best way to store your leftovers safely, understanding the culinary science behind this recipe is essential. Below, we address the most common uncertainties regarding ingredient swaps, troubleshooting failures, and FDA storage requirements to ensure your baking experience is completely stress-free. By reviewing these targeted solutions, you can confidently avoid standard baking pitfalls and consistently produce bakery-quality results.
Does pumpkin bread with cream cheese filling need to be refrigerated?
Yes, pumpkin bread with cream cheese filling must be refrigerated because the baked dairy center is considered a perishable food item.
According to FDA dairy food safety guidelines, baked goods containing high-moisture cheese fillings should not sit at room temperature for more than two hours. Store the bread in an airtight container in the fridge, where it will safely keep its moist, dense and soft texture for up to 5 days.
Why did my cream cheese filling sink in pumpkin bread?
Your cream cheese filling sank because the pumpkin batter underneath wasn’t thick enough to support the weight of the dairy layer.
To prevent sinking, ensure you are using pure pumpkin puree (which has less water than homemade) and avoid over-mixing your batter. Additionally, beating a tablespoon of flour into the cream cheese mixture increases its structural viscosity, helping it stay perfectly suspended as a thick ribbon layer in the center of the loaf.
Can you use pumpkin pie mix instead of pumpkin puree?
No, you should never substitute pumpkin pie mix for pure canned pumpkin puree in this recipe.
Pumpkin pie mix is already heavily sweetened and flavored with spices, which will severely unbalance the chemical leavening and sugar ratios in your batter. Using the mix will result in an overly sweet, gummy, and collapsing quick bread loaf. Always check the can to ensure the only ingredient is 100% pure pumpkin.
How to make cream cheese filling for pumpkin bread not runny?
To keep the cream cheese filling from becoming runny, you must use full-fat block cream cheese and add powdered sugar.
Whipped cream cheese or low-fat tub varieties contain excess water and air, which release during baking and cause a watery, runny center. The cornstarch naturally found in powdered sugar acts as a binder, thickening the sweetened cream cheese and stabilizing the emulsion alongside the egg yolk.
How do you know when pumpkin bread with cream cheese filling is done?
The most accurate way to know the bread is done is when an instant-read thermometer inserted into the center reads 200°F (93°C).
While you can use the traditional toothpick test by inserting a wooden skewer near the top center (avoiding the cream cheese layer), the dense nature of a cheesecake stuffed loaf makes visual cues unreliable. A digital thermometer guarantees a perfectly baked, tender crumb without any gummy spots.
Can you freeze pumpkin bread with cream cheese filling?
Yes, cream cheese filled pumpkin bread freezes beautifully for up to 3 months if wrapped correctly.
To prevent freezer burn, ensure the loaf is completely cooled. Wrap the entire loaf (or individual slices) tightly in a layer of plastic wrap, followed by a heavy-duty layer of aluminum foil. When you are ready to enjoy it, thaw the frozen bread overnight in the refrigerator before serving.
What is the difference between pumpkin bread with filling vs frosting?
Pumpkin bread with filling features a cheesecake-like layer baked directly inside the loaf, while frosting is applied to the outside after baking.
The internal cream cheese layer requires an egg to set properly inside the oven and provides a dense, tangy contrast hidden within the spiced crumb. Conversely, cream cheese frosting relies heavily on butter and powdered sugar for external spreadability and is substantially sweeter.
Why is my pumpkin bread wet in the middle around the cream cheese?
A wet middle around the cream cheese is typically caused by slicing the bread while it is still hot, or severely underbaking the loaf.
Steam expansion in dense quick bread loaves needs time to settle. When you slice a hot loaf, the trapped steam immediately condenses into water, creating a soggy bottom crust and a gummy ring around the dairy layer. Always utilize carryover cooking by letting the loaf cool on a wire rack for two hours.
Can you use low fat cream cheese for pumpkin bread filling?
Using low-fat cream cheese is not recommended because its high water content can cause the filling to curdle and bleed into the batter.
Full-fat block cream cheese provides the necessary milk fats to create a rich and creamy, stable cheesecake tunnel. Low-fat alternatives lack the structural integrity required to withstand high oven temperatures, often leading to weeping (syneresis) and a ruined loaf texture.
How to prevent cream cheese filling from curdling in bread?
To prevent the filling from curdling, every dairy ingredient—especially the cream cheese and the egg—must be completely softened at room temperature.
When cold cream cheese hits a room-temperature egg, the fat solidifies unevenly, breaking the emulsion and creating a lumpy, curdled batter. Beating room-temperature ingredients ensures a velvety texture and a seamless, bakery style loaf presentation.
Final Thoughts on Pumpkin Bread With Cream Cheese Filling
Baking the ultimate pumpkin bread with cream cheese filling doesn’t have to be an intimidating gamble. By shifting away from standard dump-and-bake methods and embracing professional techniques—like weighing your flour in grams, utilizing the 3-step layering protocol, and relying on an instant-read thermometer—you eliminate the guesswork entirely. You are no longer crossing your fingers hoping the center isn’t raw; you are actively engineering a super moist, flawlessly structured cream cheese stuffed autumn loaf.
The magic of this recipe lies in the contrast: the warmly spiced, deeply flavorful pumpkin crumb acting as a cozy blanket around the rich, tangy cheesecake center. Remember that patience is your final, most crucial ingredient. Allowing the loaf to cool completely and properly refrigerating it ensures that every single slice is as pristine, visually striking, and delicious as a high-end bakery showcase.
Now that you have the blueprint for the best fall pumpkin bread with cream cheese filling, it’s time to preheat your oven and fill your kitchen with the incredible aroma of autumn spices. We want to hear about your baking success! Are you planning to serve this incredible dessert loaf for a holiday brunch, or will you be enjoying a quiet slice with your morning coffee? Let us know in the comments below!
Last update on 2026-09-14 at 21:30 / Affiliate links / Images from Amazon Product Advertising API
