As an Amazon Associate BakingBakewareSets.com earns from qualifying purchases.
11 Genius Easy Halloween Recipes & Fun Party Food Ideas 2026
Tired of complicated Halloween recipes that lead to more frights than fun in the kitchen?
You need simple Halloween recipes that are festive, quick, and kid-friendly. The real challenge is finding ideas that look amazing without requiring hours of effort or professional baking skills, leaving you feeling stressed during a season that should be all about enjoyment.
Simple Halloween Recipes are culinary preparations for the October 31st celebration that prioritize ease, using minimal ingredients, no-bake methods, and quick assembly. This guide gives you 11 genius, tested ideas that deliver maximum spooky impact with minimal effort. Get ready to create memorable treats that will delight everyone at your party.
☰ Table of Contents ▼
show
Your 2026 Guide to Frightfully Easy & Delicious Halloween Party Food
Welcome to your stress-free solution for this year’s Halloween celebration! We know the pressure is on to create fun, themed food, but who has the time for complex culinary projects? That’s why we’ve curated this list of 11 genius and simple Halloween recipes. Based on years of holiday cooking experience, each idea is chosen for its clever shortcuts, visual appeal, and delicious results. Forget the kitchen nightmares; these easy halloween party food ideas are all about fun, festive, and frightfully simple preparation.
1. Hot Dog Mummies (Kid-Friendly Savory Fun)

Pin this genius tips to your ‘Dream Halloween Party’ board!
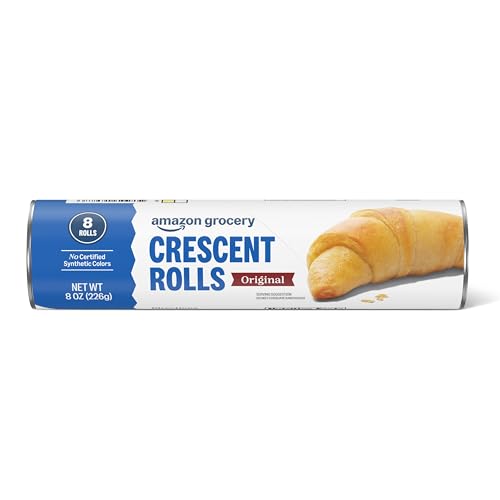
These spooky finger foods are a classic for a reason. Using pre-made crescent roll dough makes this savory halloween food incredibly quick to assemble, and they’re a guaranteed hit with kids and adults at any Halloween party.
Ingredients Needed:
- 1 package (8 count) hot dogs (all-beef or your preferred brand)
- 1 can (8 oz) refrigerated crescent roll dough (like Pillsbury Crescent Rolls)
- Mustard or edible candy eyes (for decoration)
Step-by-Step Directions:
- Preheat your oven to 375°F (190°C) and line a baking sheet with parchment paper.
- Unroll the crescent roll dough and separate it into 8 triangles. Use a pizza cutter or knife to cut each triangle lengthwise into 3-4 thin strips, creating 24-32 strips total.
- Starting at one end of a hot dog, wrap a dough strip around it like a mummy’s bandage, leaving a small space near the top for the “face.” Continue wrapping, slightly overlapping the dough, until the hot dog is mostly covered. Use 2-3 strips per hot dog.
- Place the wrapped hot dogs on the prepared baking sheet.
- Bake for 12-15 minutes, or until the dough is golden brown and the hot dogs are heated through.
- Remove from oven and let cool slightly. Use mustard to draw on little “eyes” or carefully attach edible candy eyes before serving.
- Pro-Tip: For extra crispiness, lightly brush the dough with an egg wash (one egg beaten with a tablespoon of water) before baking.
2. Melted Witch Bark (No-Bake Sweet Treat)

Save this clever organization idea!
This spooky chocolate bark is the ultimate no bake halloween treat. With just a few bags of colorful candy melts and some fun sprinkles, you can create a visually stunning dessert that looks like it took hours, but actually comes together in minutes.
Ingredients Needed:
- 12 oz (approx. 2 cups) green candy melts (e.g., Wilton Bright Green Candy Melts)
- 6 oz (approx. 1 cup) purple candy melts
- 6 oz (approx. 1 cup) black candy melts
- Assorted Halloween sprinkles
- Edible candy eyeballs
Step-by-Step Directions:
- Line a large baking sheet (approx. 10×15 inches) with parchment paper.
- Melt the green candy melts in a microwave-safe bowl in 30-second intervals, stirring after each, until smooth. Be careful not to overheat.
- Pour the melted green candy onto the prepared baking sheet and spread it evenly with an offset spatula or the back of a spoon to about 1/4-inch thickness.
- In separate small bowls, melt the purple and black candy melts following the same microwave method.
- Drizzle spoonfuls of the melted purple and black candy melts over the green base. Use a toothpick or skewer to gently swirl the colors together to create a marbled effect, without overmixing.
- Immediately scatter Halloween sprinkles and press candy eyeballs onto the warm bark before it sets.
- Refrigerate for at least 30-60 minutes, or until completely firm.
- Once firm, break the bark into irregular pieces. Store in an airtight container at room temperature for up to 2 weeks, or in the refrigerator if your home is warm.
- Pro-Tip: To prevent candy melts from seizing (getting clumpy), make sure your bowls and spatulas are completely dry before melting. A tiny bit of water can ruin the texture.

3. Graveyard Dirt Cups (Individual No-Bake Desserts)

Pin this individual spooky dessert idea!
These individual pudding cups are a kid friendly halloween party food classic. Layering chocolate pudding with crushed Oreo cookies creates the perfect “dirt” effect, and gummy worms peeking out add a creepy-crawly touch that kids adore.
Ingredients Needed:
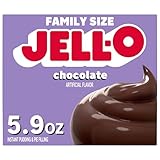
- 1 package (3.9 oz) instant chocolate pudding mix (e.g., Jell-O Instant Chocolate Pudding)
- 2 cups cold milk
- 1 package (14.3 oz) Oreo cookies, finely crushed (e.g., in a food processor or Ziploc bag with a rolling pin)
- 1 container (8 oz) whipped topping, thawed (e.g., Cool Whip)
- Gummy worms or other creepy candy (for decoration)
- 8-10 small clear plastic cups or mason jars
- Optional: rectangular shortbread cookies (for “tombstones”)
Step-by-Step Directions:
- In a large bowl, whisk together the instant chocolate pudding mix and cold milk for 2 minutes until thickened. Let it sit for 5 minutes.
- Gently fold in the thawed whipped topping until well combined.
- Begin layering: Add about 1 tablespoon of crushed Oreos to the bottom of each cup.
- Spoon a layer of the chocolate pudding mixture over the cookies.
- Add another layer of crushed Oreos, then another layer of pudding. Continue layering until the cups are full, ending with a layer of crushed Oreos on top (your “dirt”).
- Insert a few gummy worms into the “dirt” so they look like they’re crawling out.
- If using, carefully press a rectangular shortbread cookie into the top layer of “dirt” to create a “tombstone” effect.
- Chill in the refrigerator for at least 30 minutes before serving.
- Pro-Tip: For an extra decadent treat, add a layer of chocolate fudge sauce or chocolate shavings between the pudding layers!
4. Spooky Spiderweb Dip (Easy Savory Appetizer)

Save this party-perfect Halloween dip!
Transform your favorite store-bought guacamole or hummus into an easy halloween appetizer with this simple trick. A bit of sour cream and a toothpick are all you need to create an impressive spiderweb design, making this a perfect quick halloween savory snack.
Ingredients Needed:
- 1 large container (12-16 oz) prepared guacamole or hummus (store-bought for ease)
- 1/2 cup sour cream or plain Greek yogurt
- Optional: Pinch of black food coloring (if using sour cream/yogurt for darker lines)
- Crackers, tortilla chips, or assorted veggie sticks for serving
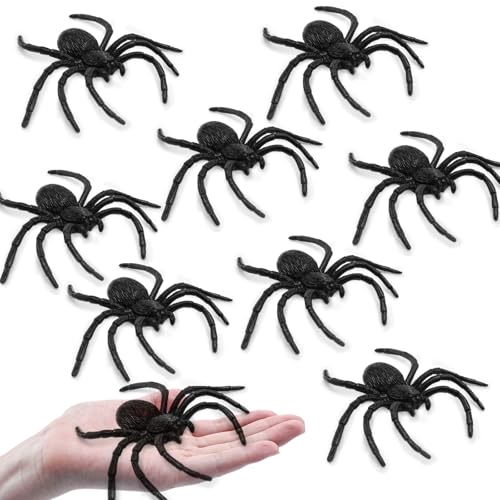
- Optional: Small plastic spider decorations
Step-by-Step Directions:
- Spread the guacamole or hummus evenly into a shallow, round serving dish or plate.
- Place the sour cream (or Greek yogurt) into a small Ziploc bag and snip off a tiny corner, or use a piping bag with a small round tip.
- Starting from the center of the dip, pipe concentric circles of sour cream outwards, leaving about an inch between each circle.
- Take a toothpick and, starting from the center, drag it outwards in a straight line through the sour cream circles to the edge of the dip. Repeat this process every inch or so around the entire dip, creating a spiderweb effect.
- For an extra spooky touch, place a small plastic spider on the edge or in the center of the web.
- Serve immediately with your favorite crackers, tortilla chips, or fresh vegetables.
- Pro-Tip: If you want more contrast for the web, mix a tiny drop of black food coloring into a separate tablespoon of sour cream before piping to create darker, more defined web lines.
5. Ghost Banana Pops (Healthier No-Bake Treat)

Pin this healthy Halloween treat for kids!
Looking for healthy halloween treats that are still fun? These ghost banana pops are the perfect answer. This easy fruit halloween snack requires just a few ingredients and is a fantastic way to offer a healthier option amidst all the candy.
Ingredients Needed:
- 3-4 ripe but firm bananas
- 1 cup white chocolate chips or white candy melts (e.g., Ghirardelli White Chocolate Baking Chips)
- 1 teaspoon coconut oil (optional, for smoother melting)
- Edible candy eyeballs
- Wooden popsicle sticks
- Parchment paper
Step-by-Step Directions:
- Peel the bananas and cut each in half. Carefully insert a popsicle stick into the cut end of each banana half.
- Place the banana halves on a parchment-lined baking sheet and freeze for at least 30 minutes, or until firm. This helps the chocolate stick better.
- In a microwave-safe bowl, melt the white chocolate chips with coconut oil (if using) in 30-second intervals, stirring after each, until smooth.
- Dip each frozen banana pop into the melted white chocolate, turning to coat completely. Let any excess chocolate drip off.
- Immediately place two candy eyeballs on each banana pop before the chocolate sets.
- Return the banana pops to the parchment-lined baking sheet and freeze for at least 1 hour, or until the chocolate is fully set.
- Serve directly from the freezer, as they can get messy if left out too long.
- Pro-Tip: If you prefer to avoid chocolate, you can dip the bananas in plain or vanilla Greek yogurt and then add the candy eyes before freezing for an even healthier option!


Save this quick and easy monster cookie recipe!
It doesn’t get much simpler than these 5-ingredient monster cookies. By using store-bought cookie dough and frosting, you can focus on the fun part: decorating! This is a perfect kid friendly halloween snack to make with little helpers.
Ingredients Needed:
- 1 package (16.5 oz) refrigerated sugar cookie dough (or your favorite homemade recipe for extra love)
- 1 container (16 oz) vanilla frosting (e.g., Duncan Hines Creamy Vanilla Frosting)
- Gel food coloring (green, purple, orange)
- Assorted edible candy eyeballs (various sizes work best)
- Halloween sprinkles (optional)
Step-by-Step Directions:
- Preheat oven to 350°F (175°C). Place parchment paper on a baking sheet. Slice the refrigerated cookie dough into 1/4-inch thick rounds and place them 2 inches apart on the prepared baking sheet.
- Bake for 10-12 minutes, or until the edges are lightly golden. Let cookies cool completely on a wire rack.
- Divide the vanilla frosting into 3 small bowls. Add a few drops of green food coloring to one bowl, purple to another, and orange to the third. Stir each until the color is vibrant and uniform.
- Once cookies are completely cool, spread a generous amount of colored frosting onto each cookie.
- Immediately place 2-3 (or more!) candy eyeballs onto each frosted cookie to create quirky monster faces. Add sprinkles if desired.
- Let the frosting set slightly before serving or storing in an airtight container at room temperature.
- Pro-Tip: To prevent the candy eyeballs from melting into the frosting, ensure your cookies are completely cool before frosting them. The residual heat can cause the eyes to droop or bleed color.

7. Witches’ Brew Punch (Simple Spooky Drink)

Save this easy Halloween drink recipe!
Every party needs a festive beverage, and this Witches’ Brew punch is one of the easiest halloween drinks you can make. Simply combine a few store-bought juices and sodas, then add gummy worms for a creepy-crawly effect.
Ingredients Needed:
- 2 liters lemon-lime soda (e.g., Sprite, 7UP), chilled
- 1 (64 oz) bottle Hawaiian Punch Green Berry Rush (or similar green fruit punch), chilled
- 1 can (46 oz) pineapple juice, chilled
- 1 bag of gummy worms or other spooky gummy candies
- Optional: Lychee fruits stuffed with blueberries (for “eyeballs”)
- Optional: Dry ice (use with caution, never ingest directly)
Step-by-Step Directions:
- In a large punch bowl or beverage dispenser, combine the chilled lemon-lime soda, green fruit punch, and pineapple juice. Stir gently to combine.
- Add plenty of gummy worms and other spooky candies to float in the punch. For “eyeballs,” drain canned lychee fruits, stuff a blueberry into each, and float them in the punch.
- If using dry ice for a spooky fog effect: Place a few small chunks of dry ice in a separate, sturdy bowl (preferably ceramic or metal) within the larger punch bowl (or directly in the punch if using a large, wide-mouthed bowl). Ensure dry ice is handled with gloves and never allow anyone to ingest it.
- Serve immediately. The dry ice effect will last for about 15-20 minutes, so you may need to replenish if the party is long.
- Pro-Tip: To keep the punch cold without diluting it, freeze some of the green punch in an ice mold with gummy worms inside, then add these themed ice cubes to your Witches’ Brew!

8. Pretzel Rod Mummies (Sweet & Salty No-Bake Snack)

Pin this easy Halloween snack tips!
This sweet and salty treat is a perfect 5 ingredient halloween idea. Dipping crunchy pretzel rods in melted white candy melts and adding candy eyes creates an adorable and delicious mummy effect with minimal effort.
Ingredients Needed:
- 1 bag (12-14 oz) pretzel rods (e.g., Snyder’s of Hanover Pretzel Rods)
- 1 package (12 oz) white candy melts or white chocolate chips
- Edible candy eyeballs
- Parchment paper
Step-by-Step Directions:
- Line a baking sheet with parchment paper.
- In a microwave-safe bowl, melt the white candy melts in 30-second intervals, stirring after each, until completely smooth.
- Dip each pretzel rod about two-thirds of the way into the melted white chocolate, leaving a small space uncovered for the “face.”
- Lay the dipped pretzel rods on the parchment-lined baking sheet. While the chocolate is still wet, place two candy eyeballs on the “face” area of each pretzel rod.
- Once all pretzel rods are dipped and have eyes, allow the chocolate to set slightly (about 5-10 minutes).
- Using a spoon or a small piping bag (snip off a tiny corner of a Ziploc bag), drizzle additional melted white chocolate back and forth across the “mummy” body of the pretzel rods to create bandage lines.
- Let them set completely at room temperature or in the refrigerator for 10-15 minutes until firm. Store in an airtight container.
- Pro-Tip: If your candy melts are too thick, add a teaspoon of coconut oil or vegetable shortening to thin them out for easier dipping and drizzling.

9. Jack-o’-Lantern Stuffed Bell Peppers (Healthier Savory Meal)

Save this healthy and fun Halloween dinner idea!
For a healthy halloween dinner that’s still incredibly festive, look no further than these Jack-o’-Lantern stuffed peppers. A simple carving transforms an ordinary stuffed pepper into a spooky meal that’s both nutritious and fun for the whole family.
Ingredients Needed:
- 4-6 large orange bell peppers
- 1 lb ground beef or turkey (or 1 can (15 oz) lentils, drained and rinsed, for vegetarian)
- 1 cup cooked rice (leftover rice works great!)
- 1 (15 oz) can diced tomatoes, drained
- 1/2 cup shredded cheddar cheese, plus more for topping
- 1/4 cup chopped onion (optional)
- 1 clove garlic, minced (optional)
- 1 teaspoon Italian seasoning
- Salt and pepper to taste
- 1/2 cup water or broth
Step-by-Step Directions:
- Preheat oven to 375°F (190°C). Carefully slice bell peppers in half lengthwise and remove seeds and membranes. Using a small paring knife, carve simple jack-o’-lantern faces into one side of each pepper half.
- In a large skillet, cook ground meat (or sauté onions/garlic if using lentils) over medium heat until browned. Drain any excess fat. Stir in cooked rice, diced tomatoes, 1/2 cup cheddar cheese, onion, garlic, Italian seasoning, salt, and pepper.
- Arrange the carved pepper halves in a 9×13 inch baking dish. Fill each pepper half generously with the meat/rice mixture.
- Pour 1/2 cup water or broth into the bottom of the baking dish (this helps steam the peppers and keeps them moist).
- Cover the baking dish loosely with foil and bake for 30 minutes.
- Remove foil, sprinkle additional shredded cheese on top of each pepper, and bake uncovered for another 10-15 minutes, or until cheese is melted and bubbly and peppers are tender.
- Serve hot.
- Pro-Tip: To make carving easier and safer for kids (with supervision!), use mini cookie cutters (e.g., small triangles for eyes/nose) to press into the pepper, then carefully cut them out.
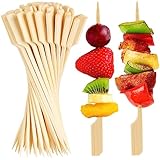
10. Eyeball Caprese Skewers (Simple Savory Appetizer)

Pin this elegant spooky appetizer!
These Eyeball Caprese Skewers are a perfect example of sophisticated yet simple halloween party finger food. With no cooking required, this fresh and healthy spooky snack comes together in minutes and adds a touch of creepy elegance to your appetizer spread.
Ingredients Needed:
- 1 package (8 oz) fresh mozzarella balls (bocconcini), drained
- 1 pint cherry tomatoes, halved
- 1 small can (2.25 oz) sliced black olives, drained
- Fresh basil leaves
- Wooden cocktail skewers or small appetizer picks
- Balsamic glaze (store-bought for ease, or homemade reduction)
Step-by-Step Directions:
- Prepare the “eyeballs”: Take each mozzarella ball and place a single slice of black olive on top to resemble a pupil. You might need to gently press it to adhere.
- Assemble the skewers: Thread a cherry tomato half onto a skewer, followed by a basil leaf, then a mozzarella “eyeball.” Repeat the tomato and basil if desired.
- Arrange the assembled skewers on a serving platter.
- Just before serving, drizzle a light amount of balsamic glaze over the skewers, allowing it to drip slightly for a “bloody” effect.
- Serve immediately.
- Pro-Tip: For an extra creepy touch, use a red gel food coloring pen to draw tiny “bloodshot” veins on the mozzarella balls around the olive pupil!
11. Bloody Brain Dip (Cream Cheese & Chili Savory Dip)

Pin this gruesome party dip for a scare!
For a truly creepy halloween dip that will be the talk of the party, this Bloody Brain Dip is a must-try. The savory cream cheese base is easy to shape, and warm chili poured over the top creates a gruesome “bloody” effect that’s perfect for an adult-focused gathering.
Ingredients Needed:
- 2 (8 oz) blocks cream cheese, softened
- 1/2 cup sour cream
- 1 packet taco seasoning mix (e.g., Old El Paso Taco Seasoning)
- 1 (15 oz) can chili (no beans or with beans, your preference), heated
- Red gel food coloring (optional, to enhance “blood” color)
- Crackers, tortilla chips, or crusty bread for serving
Step-by-Step Directions:
- In a medium bowl, beat the softened cream cheese, sour cream, and taco seasoning together with an electric mixer until smooth and fluffy.
- Transfer the cream cheese mixture to a serving platter or shallow dish. Using a spatula or your hands (wearing food-safe gloves), carefully shape the mixture into an oval or rounded “brain” shape.
- Using the back of a spoon or a dull knife, gently create indentations and ridges on the surface of the “brain” to mimic the convolutions of a real brain.
- Heat the chili in a saucepan over medium heat or in the microwave until warm. If desired, stir in a tiny drop of red gel food coloring to intensify its “bloody” appearance.
- Just before serving, carefully pour the warm chili over the “brain” shape, allowing it to cover the surface and seep into the crevices.
- Serve immediately with crackers, tortilla chips, or crusty bread for dipping.
- Pro-Tip: You can make the cream cheese base ahead of time and chill it. Add the warm chili just before serving for the best visual effect and temperature contrast.

FAQs About halloween recipes simple
What are the easiest Halloween treats to make?
The easiest Halloween treats often involve no-baking, few ingredients, and simple assembly. Think melted chocolate bark, pretzel rod mummies, or monster rice krispie treats. These prioritize speed and minimal cooking, making them perfect for last-minute preparation or involving kids.
How can I make Halloween food look spooky without much effort?
Achieve spooky visuals effortlessly by utilizing edible candy eyeballs, strategically placed chocolate syrup for “blood,” crushed dark cookies for “dirt,” or simple black and orange food coloring. Themed cookie cutters can also simplify designs, transforming basic ingredients into festive Halloween creations.
Are there any healthy simple Halloween recipes?
Yes, focus on fruit-based options for healthy and simple Halloween treats. Popular choices include “ghost” banana pops, “spider” apple slices with peanut butter, or “pumpkin patch” veggie trays with dip. These offer festive fun with nutritional benefits, appealing to health-conscious guests.
Can kids help make these simple Halloween recipes?
Absolutely! Many simple Halloween recipes are ideal for kids to help with various tasks. They can assist with stirring, decorating cookies, adding candy eyes, or arranging ingredients. Always supervise closely, especially when dealing with hot items or sharp kitchen tools, to ensure a fun and safe experience.
Final Thoughts
Halloween doesn’t have to be a nightmare in the kitchen! With these 11 genius, easy Halloween recipes, you have everything you need to whip up a spooktacular feast or simply some fun treats for the family. Embrace the joy of the season without the stress, creating memorable moments and delicious food that everyone will love. Which of these frightfully simple ideas will you try first for your 2026 Halloween celebration?
Last update on 2026-06-24 at 03:01 / Affiliate links / Images from Amazon Product Advertising API
