As an Amazon Associate BakingBakewareSets.com earns from qualifying purchases.
11 Foolproof Ways To Cook Eggs For Perfect Results
Tired of breakfasts that don’t quite work out? We’ve all faced the frustration of rubbery eggs or broken yolks.
Cooking eggs is a basic culinary skill. Yet, getting them perfect can feel surprisingly difficult. It often leads to disappointing meals and a messy pan.
Perfect eggs come down to two simple things: controlling your heat and knowing your timing. This guide gives you 11 foolproof methods, ensuring you get flawless results every single time, even if you’re a beginner.
☰ Table of Contents ▼
show
Tired of Rubbery Scrambled Eggs and Broken Yolks?
We’ve all been there. You set out to make a simple, satisfying meal, but you end up with scrambled eggs that are dry and tough, a fried egg with a broken yolk, or a hard-boiled egg that’s impossible to peel. It’s enough to make you give up and just grab a bowl of cereal. But what if you could make perfect, protein-rich eggs every single time? This guide is your answer. It’s packed with 11 foolproof, step-by-step methods that take the guesswork out of egg cookery, from creamy scrambled eggs to jammy soft-boiled eggs. Get ready to cook with confidence.
11 Foolproof Ways To Cook Eggs For Perfect Results Every Time
Mastering these foundational techniques will boost your confidence in the kitchen and unlock endless meal possibilities. Each of the following 11 methods is broken down into simple, repeatable steps designed for success. Whether you have two minutes or twenty, there’s a perfect way to cook an egg waiting for you.
1. The Perfect Scrambled Eggs (Creamy & Custardy)

Save this secret to the creamiest scrambled eggs!
What You Need:
- 2 large eggs
- 1 tbsp whole milk or heavy cream (optional, for richness)
- 1 tsp unsalted butter
- Pinch of salt and black pepper
- An 8-inch non-stick skillet with a heavy, even-heating base
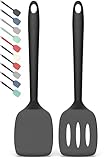
- A flexible, heat-resistant silicone spatula
Step-by-Step Directions:
- Whisk Vigorously: Crack eggs into a bowl. Add milk (if using) and salt. Whisk vigorously for a full 30 seconds until the mixture is pale yellow, completely uniform, and slightly frothy. This incorporates air for a fluffier texture.
- Melt Butter Gently: Place your non-stick skillet over medium-low heat. Add the butter and let it melt completely until it’s foamy but not browned.
- Cook Low and Slow: Pour the egg mixture into the pan. Let it sit for about 15-20 seconds until the edges just begin to set.
- Stir Constantly: Using your silicone spatula, continuously stir the eggs, making small, sweeping motions across the bottom of the pan. This creates small, soft curds.
- Remove Early: When the eggs are about 90% cooked—still looking slightly wet and glossy—remove the pan from the heat. The residual heat will finish cooking them to perfection.
- Serve Immediately: Season with fresh black pepper and serve right away.
Pro-Tip: The secret to creamy, not rubbery, eggs is gentle heat. High heat makes the proteins seize up and squeeze out water. If the pan seems too hot, lift it off the burner for a few seconds as you stir.
2. Classic Fried Eggs (4 Ways)

Pin this guide to finally master every type of fried egg!
What You Need:
- 1 large egg
- 1 tsp butter or cooking oil
- Salt and pepper to taste
- A high-quality small non-stick or well-seasoned cast iron skillet
- A thin, flexible spatula (fish spatula works great)
Step-by-Step Directions:
- Preheat Pan: Heat your skillet over medium-low heat. Add butter or oil and let it heat up until the butter is foaming or the oil shimmers.
- Add the Egg: Crack the egg into a small bowl first (this prevents shell pieces and broken yolks). Gently slide the egg into the hot pan. Season the top with salt and pepper.
- Cook to Your Liking (Choose one):
- For Sunny-Side Up: Cook for 2-3 minutes without flipping. The whites should be completely opaque and set, while the yolk remains liquid.
- For Over Easy: Cook for 2 minutes, then gently slide your spatula under the egg and flip it. Cook for just 30 seconds on the other side. The yolk will be very runny.
- For Over Medium: Cook for 2 minutes, flip, and cook for about 1 minute on the other side. The yolk will be soft and jammy, not fully liquid.
- For Over Hard: Cook for 2 minutes, flip, and press down gently with your spatula to break the yolk. Cook for another 1-2 minutes until the yolk is completely cooked through and firm.
Lesson Learned: Cracking your egg into a separate small bowl before sliding it into the pan is the single best way to prevent a broken yolk. It gives you more control and avoids the panic of fishing out shell fragments from a hot pan.

3. Flawless Boiled Eggs (3 Ways)

Never guess your boiled egg timing again! Save this chart.
What You Need:
- Eggs (as many as you like)
- A saucepan large enough to hold eggs in a single layer
- Water
- A large bowl filled with ice and water (ice bath)
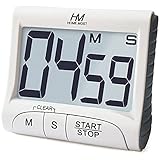
- A reliable kitchen timer or your phone
Step-by-Step Directions:
- Boil Water First: Fill your saucepan with enough water to cover the eggs by at least an inch. Bring the water to a full, rolling boil over high heat.
- Gently Add Eggs: Using a slotted spoon, carefully lower your eggs one by one into the boiling water. Lowering them gently prevents the shells from cracking.
- Set Your Timer: Once the eggs are in, immediately set your timer for the desired doneness.
- For Soft-Boiled (runny yolk): 6 minutes
- For Jammy/Medium-Boiled (custardy yolk): 8 minutes
- For Hard-Boiled (firm yolk): 11 minutes
- Prepare Ice Bath: While the eggs cook, make sure your ice bath is ready.
- Shock in Ice Water: As soon as the timer goes off, use the slotted spoon to immediately transfer the eggs from the boiling water into the ice bath.
- Cool Completely: Let the eggs cool in the ice bath for at least 10 minutes. This step is crucial! It stops the cooking process (preventing a green yolk) and makes them much easier to peel.
- Peel with Ease: Gently tap the cooled egg on the counter to crack it all over, then peel under cool running water.
Pro-Tip: For the easiest peeling, use eggs that are at least a week old. Very fresh farm eggs are notoriously difficult to peel because the membrane clings tightly to the shell.
4. Elegant Poached Eggs

Save this foolproof method for perfect poached eggs at home!
What You Need:
- 1 very fresh egg
- 1 tsp white vinegar
- A deep saucepan or pot
- A fine-mesh sieve or strainer
- A slotted spoon
Step-by-Step Directions:
- Strain the Egg: This is the game-changing secret! Crack your egg into a fine-mesh sieve set over a small bowl. The thin, watery part of the egg white will drain away, leaving only the firm white that holds its shape. Let it strain for about a minute.
- Prepare the Water: Fill your saucepan with about 4 inches of water and add the vinegar. Bring it to a bare simmer over medium heat. You should see tiny bubbles on the bottom, but the water should not be boiling.
- Create a Vortex: Use a spoon to stir the simmering water in one direction to create a gentle whirlpool or vortex.
- Drop the Egg: Gently tip the strained egg from the sieve into the center of the vortex. The motion will help the egg white wrap around itself.
- Cook for 3 Minutes: Let the egg cook undisturbed for exactly 3 minutes for a set white and a perfectly runny yolk.
- Remove and Drain: Carefully lift the poached egg out of the water with a slotted spoon. Gently blot it on a paper towel to remove excess water before serving.
Lesson Learned: Using the freshest eggs possible is key for poaching. Fresh eggs have firmer whites that hold their shape much better than older eggs. The strainer trick helps even if your eggs aren’t farm-fresh.

5. The Diner-Style Omelet

Pin this easy recipe for a perfect fluffy omelet every weekend.
What You Need:
- 2 or 3 large eggs
- 1 tbsp water or milk
- 1 tbsp butter
- 1/4 cup fillings of your choice (shredded cheese, diced ham, sautéed mushrooms, etc.)
- Salt and pepper
- An 8 or 10-inch non-stick omelet pan
- A silicone spatula
Step-by-Step Directions:
- Prep Fillings: Make sure all your fillings are cooked and ready to go. The omelet cooks too quickly to cook raw fillings inside it.
- Whisk Eggs: In a bowl, whisk the eggs, water/milk, salt, and pepper until just combined. Don’t over-whisk; you don’t want it as frothy as scrambled eggs.
- Heat the Pan: Melt the butter in your non-stick pan over medium heat, swirling to coat the entire bottom. The butter should be hot and foamy.
- Cook the Base: Pour the egg mixture into the pan. As the edges begin to set, use your spatula to gently push the cooked portions toward the center, tilting the pan so the uncooked egg flows underneath. Repeat this for about 1-2 minutes until most of the egg is set but the top is still slightly moist.
- Add Fillings: Sprinkle your fillings over one half of the omelet.
- Fold and Serve: Gently slide your spatula under the unfilled half and fold it over the filled half. Let it cook for another 30 seconds for the cheese to melt, then slide it out of the pan and onto a plate.
Pro-Tip: Don’t overcrowd your omelet with fillings. Too many fillings will make it heavy and difficult to fold cleanly. About 1/4 to 1/3 cup of total fillings is perfect for a 2-egg omelet.
6. The Simple Baked Frittata

This easy frittata is perfect for brunch or meal prep. Save it!
What You Need:
- 6 large eggs
- 1/4 cup milk or cream
- 1/2 tsp salt, 1/4 tsp pepper
- 1 tbsp olive oil
- 2 cups of cooked fillings (e.g., sautéed onions, spinach, cooked sausage, roasted vegetables)
- 1/2 cup shredded or crumbled cheese (cheddar, feta, goat cheese)
- A 10-inch oven-safe skillet (cast iron is perfect)
Step-by-Step Directions:
- Preheat Oven: Position a rack in the middle of your oven and preheat to 400°F (200°C).
- Sauté Fillings: If your fillings aren’t already cooked, heat the olive oil in your oven-safe skillet over medium heat and cook them until tender. Spread them evenly across the bottom of the skillet.
- Whisk Egg Mixture: In a large bowl, whisk together the eggs, milk, salt, and pepper until smooth. Stir in the cheese.
- Combine in Skillet: Pour the egg mixture evenly over the fillings in the skillet.
- Cook on Stovetop: Cook on the stovetop for 2-3 minutes, without stirring, just until the edges of the frittata begin to set.
- Bake in Oven: Transfer the entire skillet to the preheated oven. Bake for 10-15 minutes, until the frittata is puffed up, golden brown, and the center is set (a knife inserted in the center comes out clean).
- Rest and Serve: Let the frittata rest in the skillet for 5 minutes before slicing and serving.
Lesson Learned: Don’t skip the initial stovetop step! Setting the edges on the stove before baking ensures the frittata cooks evenly and doesn’t end up with a soggy bottom.

7. Delicate Shirred (Baked) Eggs

An elegant and easy breakfast idea. Pin it for your next special morning!
What You Need:
- 2 large eggs
- 2 tsp butter, softened
- 2 tbsp heavy cream
- Salt and pepper
- Optional: chopped fresh herbs (chives, parsley), a sprinkle of Parmesan cheese
- Two 6-ounce ramekins or small oven-safe dishes
Step-by-Step Directions:
- Preheat Oven: Preheat your oven to 375°F (190°C).
- Prep Ramekins: Use the softened butter to generously grease the inside of each ramekin. This adds flavor and prevents sticking.
- Add Cream and Eggs: Drizzle 1 tbsp of heavy cream into the bottom of each buttered ramekin. Carefully crack one egg into each dish, trying not to break the yolk.
- Season: Season the top of each egg with a pinch of salt and pepper. You can also add a sprinkle of cheese or herbs at this stage.
- Bake: Place the ramekins on a small baking sheet and bake for 10-12 minutes. The whites should be just set, but the yolks should still be jiggly and runny.
- Serve Immediately: Carefully remove from the oven and serve immediately with toast points for dipping into the creamy, runny yolk.
Pro-Tip: For an extra-gentle cooking method (and to prevent the bottoms from overcooking), place the ramekins in a larger baking dish and pour hot water into the dish until it comes halfway up the sides of the ramekins. This water bath (bain-marie) ensures even cooking.

8. Basted Eggs with Steamed Tops

The secret to a runny yolk without flipping! Save this technique.
What You Need:
- 1 large egg
- 1 tsp butter or oil
- 1 tbsp water
- Salt and pepper
- A skillet with a tight-fitting lid
Step-by-Step Directions:
- Heat Pan and Fat: Heat the butter or oil in the skillet over medium heat until shimmering.
- Add Egg: Gently crack the egg into the skillet and season with salt and pepper.
- Fry Uncovered: Cook the egg for about 1 minute, until the edges of the white are set and opaque.
- Add Water and Cover: Pour the 1 tbsp of water into the pan (around the egg, not on it). Immediately cover the skillet with the lid.
- Steam Cook: Let the egg cook for another 1-2 minutes. The trapped steam will cook the top of the egg and the yolk’s surface, creating a thin white film. The yolk underneath will remain perfectly liquid.
- Serve: Once the whites are fully set and the yolk has a hazy film, slide it onto a plate and serve.
Lesson Learned: Use a glass lid if you have one! It allows you to watch the egg cook and remove it at the exact moment the yolk reaches your preferred level of doneness without any guesswork.

9. Velvety Chinese Steamed Eggs

Discover the silkiest, most delicate eggs you’ve ever had. Pin this recipe!
What You Need:
- 2 large eggs
- Warm water (or unsalted chicken stock)
- 1/2 tsp salt
- Toppings: soy sauce, sesame oil, chopped scallions
- A heatproof bowl, a fine-mesh sieve, and a steamer setup (a pot with a lid and a steaming rack)
Step-by-Step Directions:
- Measure Water: The key to a silky texture is the liquid ratio. After cracking your eggs into a measuring cup, note the volume. You will need 1.5 times that volume in warm water. For 2 large eggs (about 1/2 cup), you’ll need 3/4 cup of warm water.
- Gently Whisk: In a bowl, gently beat the eggs with the salt. Try not to incorporate too much air. Slowly whisk in the warm water until just combined.
- Strain the Mixture: Pour the egg mixture through a fine-mesh sieve into your heatproof serving bowl. This step removes bubbles and ensures a super-smooth finish. Skim off any remaining bubbles on the surface.
- Cover and Steam: Cover the bowl loosely with foil or a small plate (this prevents condensation from dripping onto the custard). Place the bowl on a rack inside your steamer pot, which should have about 2 inches of simmering water. Cover the pot.
- Steam Gently: Steam on medium-low heat for 12-15 minutes, or until the custard is just set but still has a slight wobble in the center.
- Garnish and Serve: Carefully remove the bowl from the steamer. Drizzle with soy sauce, sesame oil, and top with scallions before serving warm.
Pro-Tip: Using warm (not hot or cold) water helps the custard set more evenly. And do not skip the straining step—it is the most important part for achieving that signature silky, flawless texture.
10. Quick Microwave Scrambled Eggs

The fastest way to make eggs! Pin this for busy mornings.
What You Need:
- 2 large eggs
- 2 tbsp milk
- 2 tbsp shredded cheese (optional)
- Salt and pepper
- A large, microwave-safe coffee mug
- A fork
Step-by-Step Directions:
- Coat the Mug: Spray the inside of the mug with non-stick cooking spray or wipe it with a little butter to prevent sticking.
- Whisk in Mug: Crack the eggs directly into the mug. Add the milk, salt, and pepper. Whisk thoroughly with a fork until the mixture is well-combined and bubbly.
- Microwave – First Round: Place the mug in the microwave and cook on high for 45 seconds. The eggs will start to set around the edges.
- Stir: Remove the mug and stir the eggs well with the fork, scraping the cooked portions from the sides.
- Microwave – Second Round: Return the mug to the microwave and cook for another 30-45 seconds, depending on your microwave’s power. The eggs should be almost fully cooked but still slightly moist.
- Add Cheese and Rest: Stir in the cheese, if using. Let the eggs sit for 1 minute to finish cooking from the residual heat before eating directly from the mug.
Lesson Learned: Don’t overcook! Microwave eggs can go from perfect to rubbery in seconds. It’s always better to undercook them slightly and let them rest for a minute, as they will continue to cook after you take them out.

11. Trendy Pesto Eggs

The viral breakfast tips you have to try! Save this Pesto Eggs idea.
What You Need:
- 2 tbsp basil pesto (good quality, with plenty of oil)
- 2 large eggs
- Optional toppings: ricotta cheese, chili flakes, honey, toast for serving
- A small non-stick skillet
Step-by-Step Directions:
- Heat the Pesto: Spoon the pesto into your non-stick skillet and spread it into an even layer. Heat over medium heat for about a minute until it starts to sizzle and become fragrant. The oil in the pesto will begin to separate.
- Crack the Eggs: Crack your eggs directly into the pan on top of the simmering pesto.
- Fry to Perfection: Cook the eggs for 2-3 minutes, just like you would a sunny-side up egg. The whites will set, and the pesto underneath will help create delicious, crispy, lacy edges.
- Season and Serve: The pesto is already salty, so you may not need extra salt. Sprinkle with chili flakes if desired.
- Plate It: Serve the pesto eggs over a slice of toasted sourdough, perhaps spread with a layer of creamy ricotta cheese for the ultimate breakfast.
Pro-Tip: Use a pesto that has a good amount of olive oil. If your pesto is very thick and pasty, the eggs are more likely to stick. You can add an extra drizzle of olive oil to the pan if needed.

Key Takeaways: Your Quick Guide to Perfect Eggs
| Technique | Golden Rule | Best For… |
|---|---|---|
| Scrambled | Low, gentle heat is your best friend. Stir constantly for creamy, remove early. | A quick, comforting, and customizable breakfast. |
| Fried | Control your heat and know when to flip (or not flip) for the perfect yolk. | Topping toast, burgers, or grain bowls. |
| Boiled | Trust your timer and always use an ice bath immediately after cooking. | Meal prep, salads, and on-the-go snacks. |
| Poached | Strain your egg first and use barely simmering water with a splash of vinegar. | Elegant brunch dishes like Eggs Benedict. |
People Also Ask About Cooking Eggs
Why do my eggs always stick to the pan?
Eggs stick due to a combination of incorrect heat and insufficient fat. Your pan is either not hot enough when you add the eggs, or it’s too hot, causing the proteins to bond instantly. To prevent sticking, use a non-stick pan, preheat it properly over medium or medium-low heat, and use enough butter or oil to coat the surface.
What’s the secret to easy-to-peel hard-boiled eggs?
The secret is a two-part process: use older eggs and shock them in an ice bath. Eggs that are at least a week old peel more easily than farm-fresh ones. Immediately transferring the cooked eggs from boiling water to a bowl of ice water for 10 minutes causes the egg white to contract, helping it separate from the shell membrane.
How do I avoid the green ring around my hard-boiled egg yolk?
The green ring is a harmless result of overcooking. It’s a chemical reaction between iron in the yolk and sulfur in the white. To prevent it, stick to a precise cooking time (11 minutes for hard-boiled) and immediately move the eggs to an ice bath to stop the cooking process completely.
Is it safe to eat eggs with a runny yolk?
For maximum safety, the USDA recommends cooking eggs until both the whites and yolks are firm. This minimizes the risk of foodborne illness from bacteria like Salmonella. However, many people enjoy runny yolks. The risk is very low for healthy individuals but is higher for children, the elderly, pregnant women, and those with compromised immune systems.
Final Thoughts
Congratulations! You now have a complete toolkit of 11 foolproof ways to cook eggs. Remember, the key to it all is simply managing your heat and your time. Don’t be afraid to experiment to find your personal favorite.
What’s the first method you’re going to try? Let us know how it turns out in the comments below
Last update on 2026-07-23 at 13:32 / Affiliate links / Images from Amazon Product Advertising API
