As an Amazon Associate BakingBakewareSets.com earns from qualifying purchases.
How to Cook Tuna Steak Sear to Medium Rare Perfection
Have you ever spent good money on a beautiful, thick tuna steak, only to watch it turn dry, gray, and tough in the pan? That feeling of disappointment is common, but it doesn’t have to be your reality. You can achieve that perfect, restaurant-quality sear with a tender, pink center at home.
The key to a perfect medium-rare tuna steak is a rapid, high-heat sear on a bone-dry surface. For a 1.5-inch thick steak, this means cooking it for only 90 to 120 seconds per side in a screaming hot pan, followed by a mandatory 10-minute rest to lock in juices. This simple method prevents the lean protein from overcooking.
Drawing from proven culinary methodologies and food safety principles, this guide breaks down the exact process. We’ll cover everything from sourcing the right cut to the final, perfect slice. You’ll learn the non-negotiable steps that guarantee a tender, flavorful result every time.
☰ Table of Contents ▼
show
Are You Ruining Your Tuna Steak? The Secret to Medium-Rare Perfection
The single greatest fear when you cook tuna steak is overcooking it. That transformation from a vibrant red to a dull, chalky gray happens in an instant. This is because tuna is an incredibly lean protein with very little fat, meaning it dries out rapidly when its internal temperature climbs past 140°F. The secret to avoiding this culinary tragedy isn’t a complex marinade or a fancy tool; it’s precision and an understanding of high-heat cooking.
The Six-Minute Secret to a perfect tuna steak lies in a simple formula tested by culinary science. It all comes down to controlling time and temperature. The goal is to create a deep brown crust through the Maillard reaction without allowing that intense heat to penetrate too far into the steak. For a standard 1.5-inch thick steak, the entire process—from hitting the pan to being ready to slice—takes about six minutes of cooking and ten minutes of resting. By pulling the steak off the heat when the very center is still cool, at an internal temperature of 125°F, you allow for “carry-over cooking.” This is the residual heat that continues to cook the steak during the resting period, bringing it to a perfect, warm, pink medium-rare.
9 Actionable Steps to Sear Tuna Steak to Medium Rare Perfection
Achieving a flawless, medium-rare ahi tuna steak is less about a complicated recipe and more about executing a few critical steps with precision. This step-by-step tutorial demystifies the process, focusing on the techniques used by professional chefs to guarantee a delicious crust and a tender, juicy interior. From choosing the right fish to the final slice, these nine actionable steps are your foolproof guide to success, whether you’re using a cast iron skillet or a grill. All steps are optimized for both flavor and safety, adhering to USDA guidelines for consuming rare fish.
1. Sourcing & Thawing: Choosing Sushi-Grade Ahi Tuna
Pin this essential preparation step to your ‘Healthy Dinner Ideas’ board!
Ingredients & Tools Needed:
- 2 Tuna Steaks (1-1.5 inches thick, sushi-grade Ahi or Yellowfin)
- Medium Bowl for rapid thawing
- Cold Running Water (for quick thaw)
- Sharp Kitchen Knife (for initial trimming if needed)
Step-by-Step Directions:
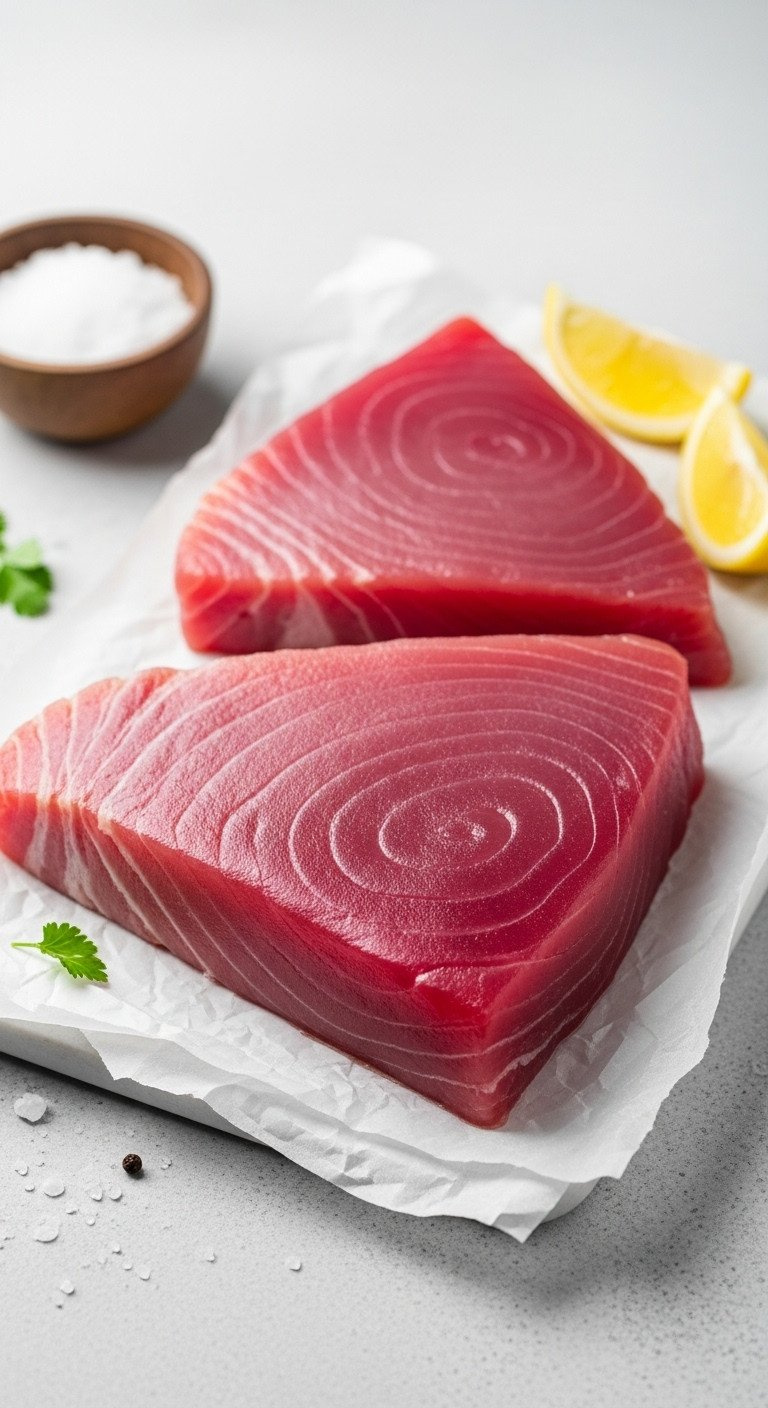
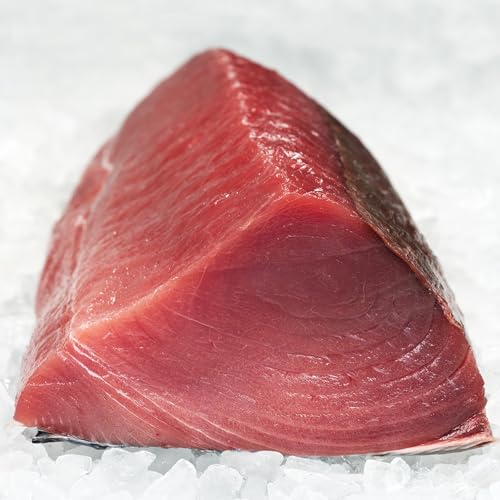
- Source Safely: Purchase tuna labeled ‘sushi-grade’ or ‘sashimi-grade’ if intending to cook rare or medium-rare, as this ensures it has been flash-frozen to kill parasites.
- Check Quality: Confirm the tuna is a vibrant, deep red color with no brown or gray spots; the steak should feel firm to the touch.
- Thaw Rapidly: If frozen, place the steaks (still in their sealed vacuum packaging) into a bowl of cold running water for 5-10 minutes until flexible but still very cold. Never use hot water or microwave.
- Confirm Thickness: Ensure the steaks are 1 to 1.5 inches thick; this is the optimal size for achieving a medium-rare center before the outside overcooks.
Pro-Tip: If you cannot find sushi-grade tuna, cook the steaks to a safer internal temperature of 145°F (medium/well-done) to eliminate any potential health risks, though the texture will be drier.
2. The Non-Negotiable Prep: Patting Dry and Seasoning

Save this step: Don’t skip drying your fish!
Ingredients & Tools Needed:
- High-Quality Paper Towels or Clean Kitchen Linen
- Coarse Kosher or Sea Salt
- Freshly Cracked Black Pepper
- Optional: Togarashi or White/Black Sesame Seeds (for crust)
Step-by-Step Directions:
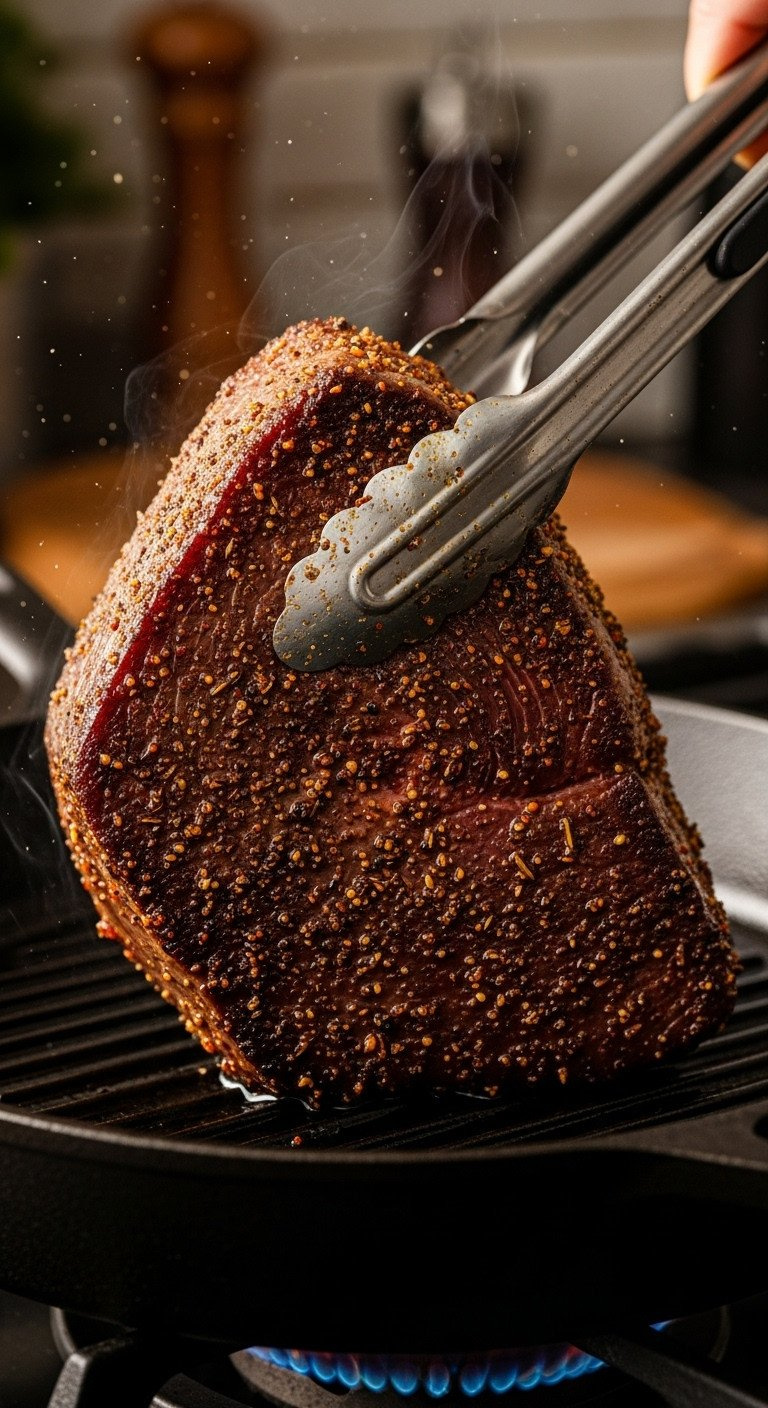
- Remove Surface Moisture: This is the most critical preparation step. Use paper towels to pat the entire surface of the tuna steak aggressively until it is completely bone dry. Any residual moisture will steam the surface rather than sear it.
- Prepare Seasoning: Mix coarse salt and black pepper (and sesame seeds, if using) generously on a plate or shallow dish.
- Season Immediately Before Cooking: Right before placing the tuna in the hot pan, generously coat all sides of the steak in the seasoning mixture, pressing lightly to adhere. Do not season too early, as salt will draw moisture out, re-wetting the surface.
- Keep Cold (Optional): If there is any delay before searing, keep the prepared steaks in the refrigerator, removing them only when the pan is fully preheated.
Pro-Tip: For an extra layer of flavor and texture, use a dry rub containing toasted sesame seeds, chili flakes, and garlic powder, applying it heavily to create a thick crust that protects the inside.
3. Selecting the Right Oil and Preheating the Cast Iron Skillet

Need perfect tuna? You need perfect heat! Save this high-heat guide.
Ingredients & Tools Needed:
- Heavy Cast Iron Skillet or Stainless Steel Pan
- 2 Tablespoons High Smoke Point Oil (Grapeseed, Refined Avocado, or Canola)
- Tongs (non-puncturing)
Step-by-Step Directions:
- Choose Your Oil: Select a neutral oil with a smoke point above 450°F. Never use butter or extra virgin olive oil as they will burn at the required high heat.
- Preheat the Pan: Place the cast iron skillet over medium-high to high heat for 5 to 10 minutes. The pan must be scorching hot to retain heat once the fish is introduced.
- Add Oil: Pour 2 tablespoons of high smoke point oil into the hot pan. The oil should immediately shimmer slightly, but not smoke heavily. If the oil smokes profusely, the pan is too hot—remove it from the heat for 30 seconds before proceeding.
- Temperature Check: The goal is a surface temperature around 500°F (300°F minimum for Maillard reaction). Wait until the oil is just on the verge of smoking.
Lesson Learned: Insufficiently preheated pans are the number one cause of sticking and poor sear crusts. Always give cast iron 10 minutes to properly retain heat.

4. Executing the High-Heat Sear (The 2-Minute Rule)
Master the sear! Save this guide for the perfect crust.
Ingredients & Tools Needed:
- Prepared and Seasoned Tuna Steaks
- Preheated Cast Iron Skillet
- Timer or Stopwatch (essential)
Step-by-Step Directions:
- Place the Steaks: Using tongs, carefully lay the steaks into the hot oil, ensuring there is sizzling contact. Do not overcrowd the pan; cook one steak at a time if necessary.
- Sear Side One (90 to 120 Seconds): Start your timer immediately. Sear the first side for 90 seconds (for rare) to 2 minutes (for medium-rare) without touching or moving the steak. This develops the crucial crust.
- Flip and Repeat: Flip the steak using tongs and sear the second side for the exact same amount of time (90 seconds to 2 minutes). The total cook time should be approximately 3 to 4 minutes.
- Sear the Sides (Optional): If you have very thick steaks (1.5 inches), briefly sear the narrow edges for 15 seconds each to ensure a fully cooked crust perimeter.
Pro-Tip: If cooking thin steaks (under 1 inch), reduce your searing time to only 45-60 seconds per side, as the high heat transfers much faster.

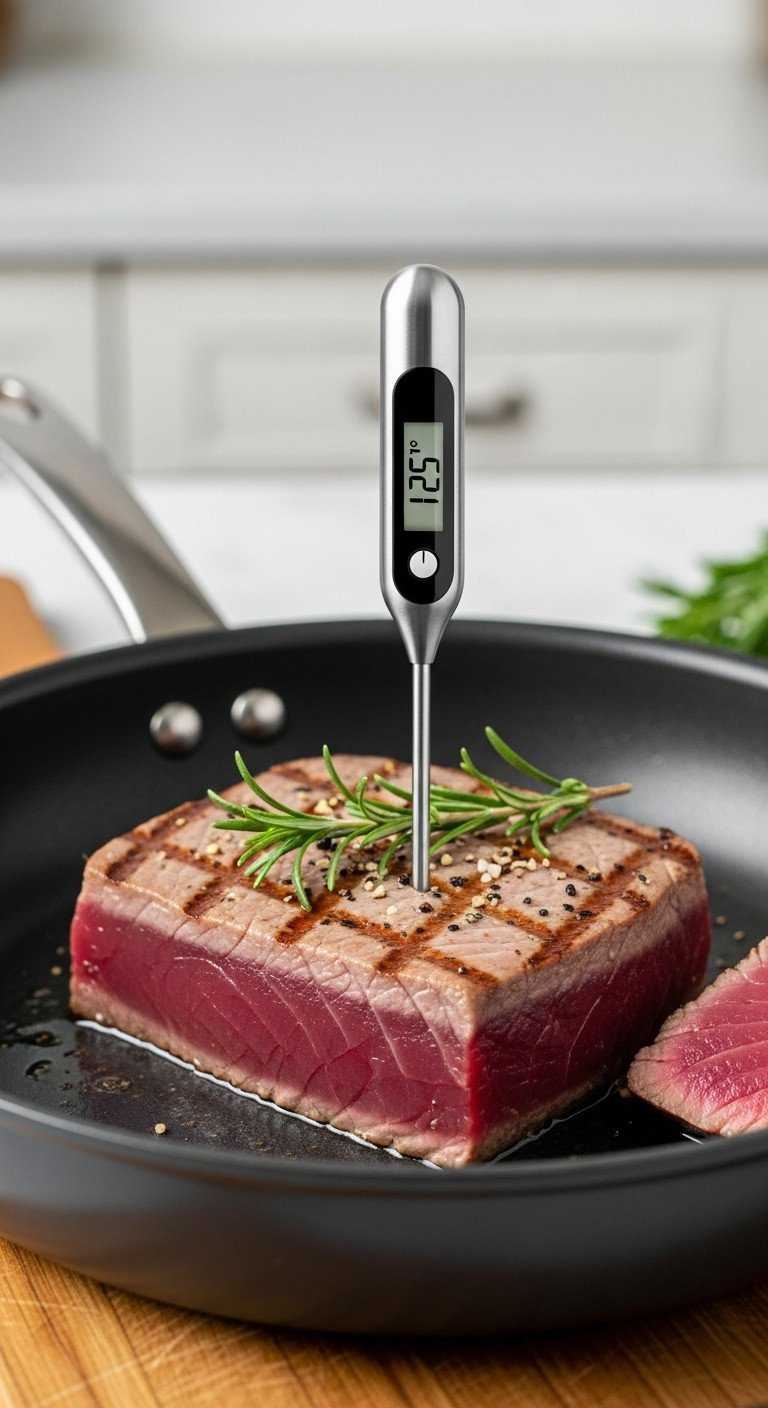
5. Verifying Medium-Rare Doneness with a Thermometer (125°F)
Don’t guess! Save this temperature chart for safe, perfect fish.
Ingredients & Tools Needed:
- Instant-Read Digital Thermometer
Step-by-Step Directions:
- Check Immediately: Once the 2-minute sear per side is complete, immediately remove the steak from the pan and insert the instant-read thermometer horizontally into the thickest part of the steak.
- Target 120-125°F: For medium-rare perfection, the thermometer should register between 120°F and 125°F.
- Rare (115°F): If you prefer your tuna steak rare, remove it closer to 115°F internal temperature.
- Account for Carry-Over Cooking: Remove the tuna steak 5°F below your desired final temperature (e.g., remove at 120°F to reach 125°F during rest) to prevent overshooting the target.
- Avoid Visual Guessing: Rely on temperature over visual cues (like the firmness test) as the primary indicator for safety and accuracy, especially for medium-rare preparation.
Pro-Tip: If the temperature is too low, return the steak to the pan for 15-30 second intervals until the target is met. If too high, proceed immediately to resting (Step 6).

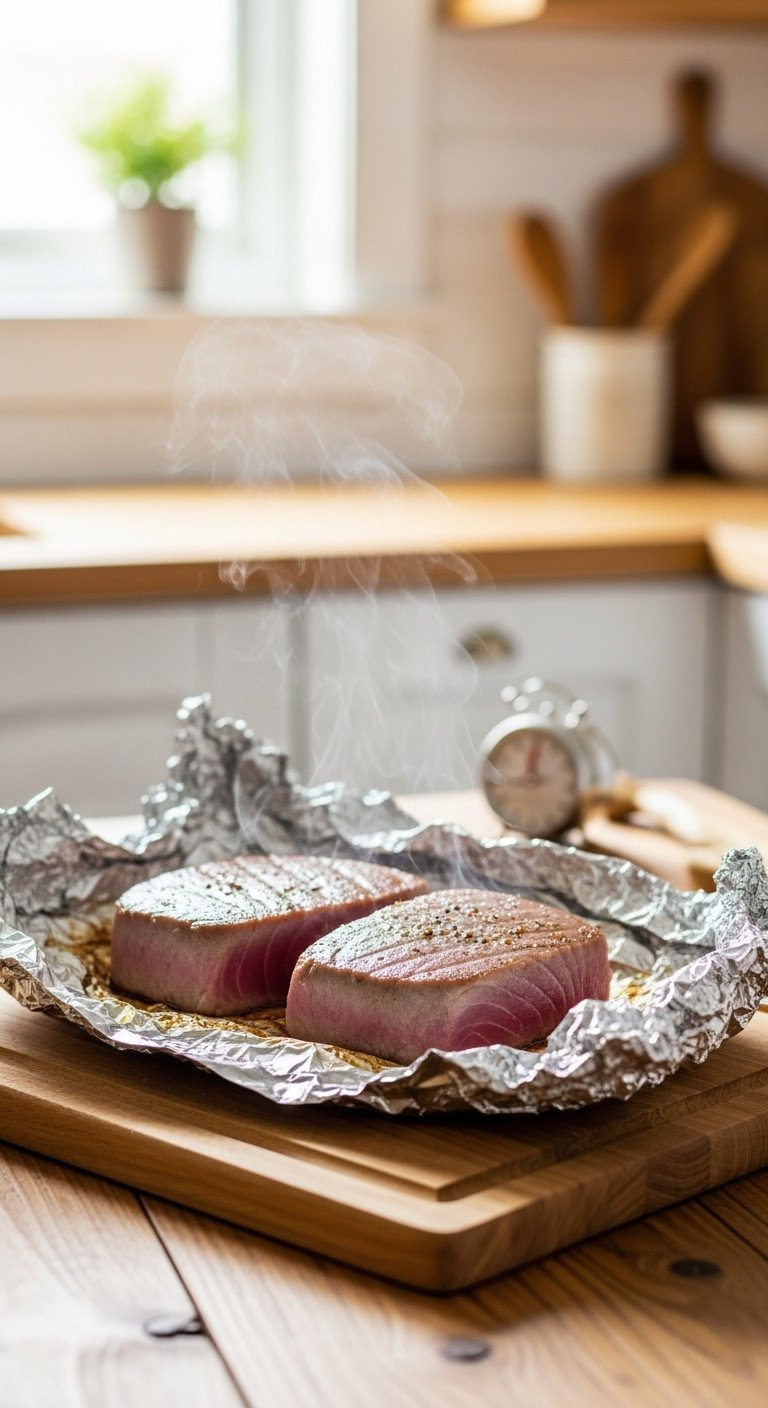
6. The Crucial 10-Minute Resting Period
Don’t skip this! Resting ensures your tuna is juicy, not dry.
Ingredients & Tools Needed:
- Seared Tuna Steaks
- Cutting Board or Plate
- Aluminum Foil (to tent loosely)
Step-by-Step Directions:
- Remove and Transfer: Immediately transfer the seared tuna steaks from the hot pan to a clean cutting board or plate.
- Tent Loosely: Cover the steaks loosely with a piece of aluminum foil. Do not wrap tightly, as this will steam the crust; the goal is to trap warmth, not moisture.
- Set the Timer: Allow the steaks to rest for a mandatory 5 to 10 minutes.
- Science of Resting: During this time, the concentrated juices are reabsorbed into the muscle fibers. Without resting, the high pressure caused by searing will force all the moisture out when you slice the steak.
- Monitor Juices: After resting, you should see only minimal (or no) pooling of juices beneath the tuna.
Lesson Learned: Because tuna is so lean, it retains heat (and moisture) less effectively than beef. The full 10-minute rest is especially critical for this protein to remain tender and juicy.
7. High-Heat Grilling Method: Achieving a Perfect Char

Unlock the smoky flavor! Save this quick grilling technique.
Ingredients & Tools Needed:
- Prepared and Seasoned Tuna Steaks
- Grilling Tongs
- Grill Brush and Oil (for grates)
- Charcoal or Gas Grill (pre-set to high heat)
Step-by-Step Directions:
- Preheat the Grill: Clean and heavily oil your grill grates. Preheat the grill to the highest possible temperature (ideally 550°F+). Use the two-zone grilling method if possible, creating an ultra-hot direct zone.
- Oil the Steaks: Brush the seasoned tuna steaks lightly with high smoke point oil right before placing them on the grate; this helps prevent sticking and promotes the char.
- Cook Short and Fast: Place the steaks directly over the hottest part of the heat. Grill for 1.5 to 2 minutes per side for a 1.5-inch steak (125°F internal).
- Immediate Rest: Transfer the steaks immediately to a clean plate or cutting board and tent loosely with foil for 10 minutes (Step 6). Do not skip the rest, as high grilling heat is very aggressive.
Pro-Tip: If you notice flare-ups that threaten to burn the crust, move the steaks temporarily to the cooler, indirect heat zone of the grill until the flare-up subsides, then return to direct heat.

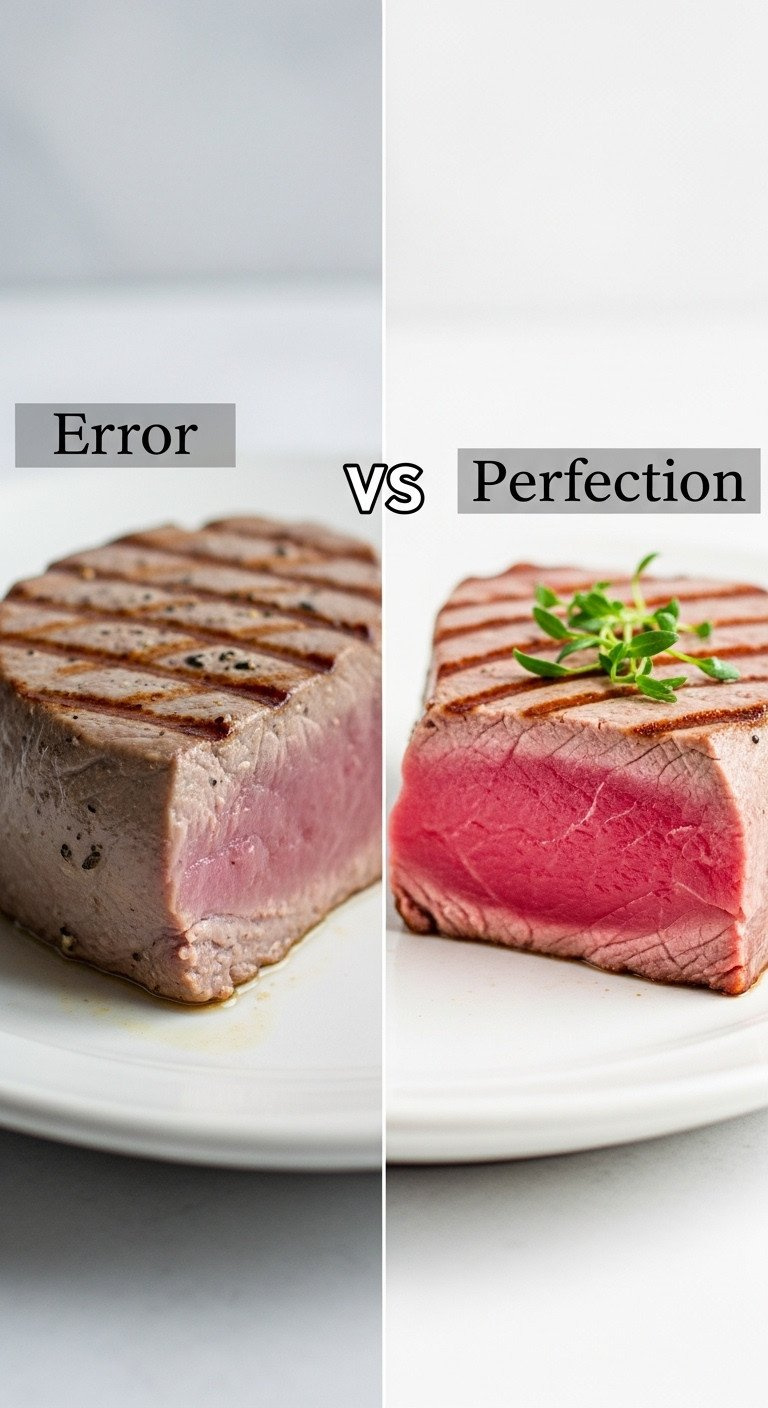
8. Fixing Common Errors: Why Your Tuna Steak is Dry or Gray
Tired of dry fish? Find out the common mistakes and how to fix them!
Materials Needed:
- Instant-Read Thermometer
- Extra Paper Towels
- Clean Plate
Step-by-Step Directions:
- Problem: The Tuna is Dry and Gray: Root Cause: Overcooked, exceeding 140°F internal. Solution: Next time, remove the steak at 120°F (accounting for carry-over) and be religious about the 10-minute rest period.
- Problem: No Sear, Just Steamed: Root Cause: The steak was wet, or the pan was not hot enough. Solution: Ensure the steak is bone dry (Step 2) and preheat the cast iron for a full 10 minutes over high heat (Step 3).
- Problem: Tuna is Sticking to the Pan: Root Cause: The pan was not preheated long enough before the oil was added, or the pan was overcrowded. Solution: Use a well-seasoned cast iron or stainless steel pan; only place the fish in when the oil is shimmering hot; do not cook more than two steaks at once.
- Problem: Burnt Crust, Raw Center: Root Cause: Using an oil with a low smoke point (like olive oil) or using too much heat for too long. Solution: Switch to grapeseed or refined avocado oil and use only 90 seconds of high heat per side.
Lesson Learned: Overcrowding the pan immediately drops the temperature and releases steam, which inhibits the Maillard reaction. Cook in batches for superior results.

9. Slicing Against the Grain and Final Plating
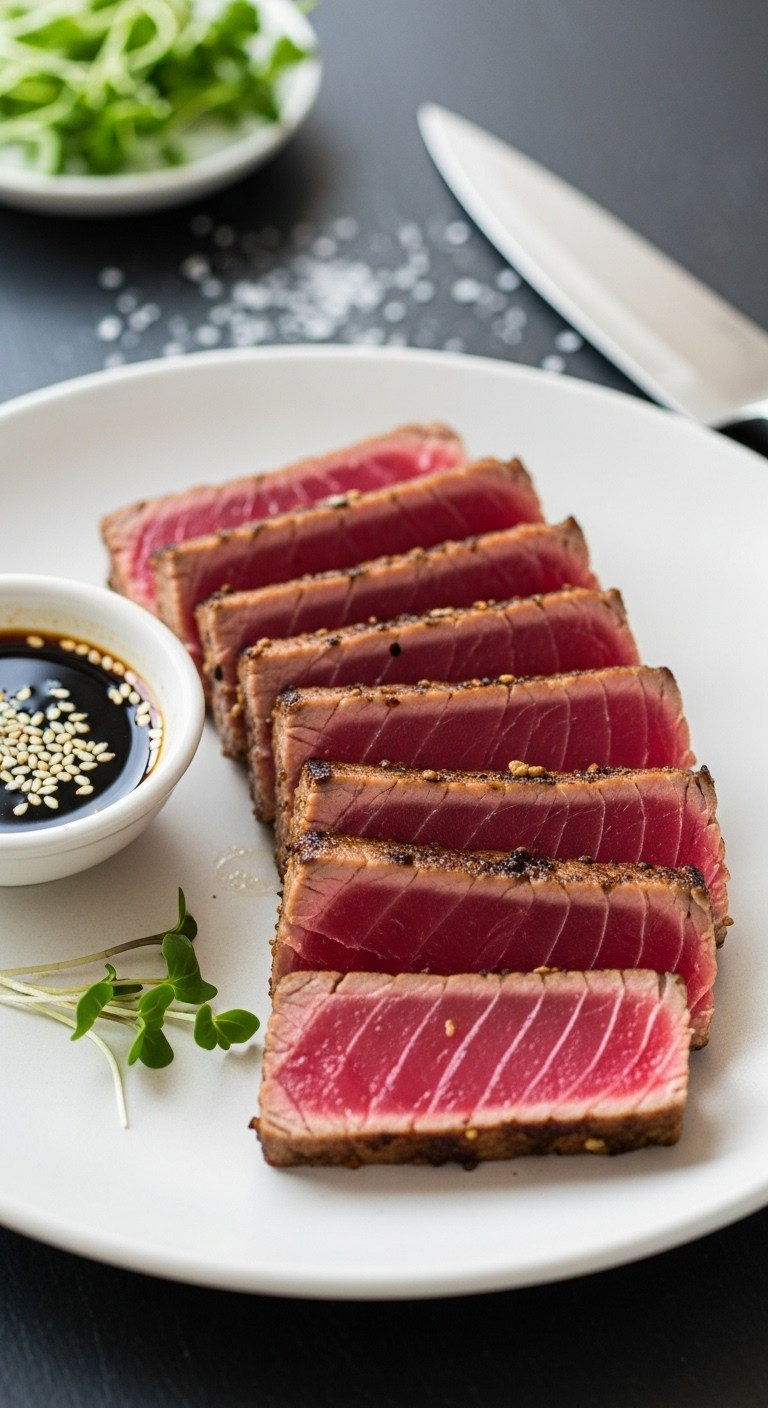
Achieve restaurant-quality presentation! Save these plating secrets.
Ingredients & Tools Needed:
- Fully Rested Tuna Steak
- Very Sharp Chef’s Knife
- Serving Platter or Plate
- Optional: Lemon-Butter Sauce or Soy-Ginger Glaze
Step-by-Step Directions:
- Locate the Grain: Look closely at the steak to identify the direction of the muscle fibers (the grain).
- Slice Against the Grain: Using a long, smooth stroke (do not saw), slice the steak against the grain into 1/4 to 1/2-inch thick pieces. This shortens the muscle fibers, ensuring maximum tenderness.
- Fanning Presentation: Arrange the slices on the plate, slightly fanned out, showcasing the vivid color gradient from the dark sear to the rare pink center.
- Pair Simply: Serve immediately with complementary side dishes like warm rice pilaf, blanched green beans, or a simple avocado salad. Drizzle with a light dressing or dipping sauce.
Pro-Tip: Wipe the knife blade clean between slices to ensure a neat, professional-looking cut that doesn’t drag seasoning residue across the pink center.

Key Takeaways: Your Quick Guide to Perfect Doneness
| Doneness Level | Internal Temperature (Before Rest) | Cook Time (1.5″ Steak, Per Side) | Color Profile | Texture Profile |
|---|---|---|---|---|
| Rare | 115°F | 60–90 seconds | Deep Red/Purple Center | Silky, very tender |
| Medium-Rare | 120°F–125°F | 90–120 seconds | Vibrant Pink Center | Tender, slightly firmer |
| Medium | 130°F–135°F | 2–3 minutes | Mostly pink/Gray Edges | Firm, starting to dry |
| Well-Done (Avoid) | 145°F+ | 4+ minutes | Gray throughout | Dry, tough, flaky |
People Also Ask About Tuna Steak Searing and Safety
What is the safest internal temperature for tuna steak?
For optimal texture (medium-rare), 125°F is the culinary target, provided the tuna is sushi-grade and has been handled correctly. However, the USDA recommends cooking all fish to 145°F for absolute safety, particularly for high-risk groups. When eating rare or medium-rare tuna, strict sourcing and handling hygiene are non-negotiable.
Why does my tuna steak turn gray when I cook it?
Gray tuna is caused by overcooking, which denatures the protein myoglobin (responsible for the red color), resulting in a dry, firm, and tough texture. To prevent this, remove the steak from the heat as soon as the center reaches 120-125°F, and rely on the high heat of the sear and the resting period to finish the cooking process.
Can I use olive oil to sear tuna in a pan?
No, standard olive oil has a low smoke point and will burn and create a bitter, acrid flavor when exposed to the high heat required for searing. Always use a neutral oil with a high smoke point, such as grapeseed, refined avocado, or canola oil, which can safely withstand temperatures over 450°F without smoking excessively.
How long should I rest tuna steaks after they come off the grill?
Tuna steaks, regardless of whether they are pan-seared or grilled, require a mandatory resting period of 5 to 10 minutes. High-heat cooking forces juices to the center; the rest allows those juices to redistribute throughout the muscle fibers, ensuring the final product is tender and moist when sliced.
Final Thoughts
Mastering the tuna steak sear is not about complex ingredients or equipment; it is entirely about heat management and respecting the precision of time. By consistently following the two-part preparation steps—ensuring the steak is dry and the pan is screaming hot—and removing your tuna exactly at 120-125°F, you guarantee that beautiful medium-rare stripe every time. Now that you have the knowledge and the tools, which high-heat technique—the quick pan-sear or the smoky grill—will you try for dinner tonight?
Last update on 2026-06-12 at 23:00 / Affiliate links / Images from Amazon Product Advertising API
