As an Amazon Associate BakingBakewareSets.com earns from qualifying purchases.
Perfect Christmas Turkey 7 Secrets for Juicy Crispy Skin
Is there anything worse than pulling a beautiful bird from the oven only to find the breast meat is dry and the skin is chewy? The pressure to deliver a perfect christmas turkey for your family festive feast can feel immense. Traditional methods often lead to common turkey cooking errors that leave the meat flavorless and tough.
The secret to a perfect Christmas turkey involves seven essential techniques: pre-seasoning with a dry brine, using compound butter under the skin, employing high heat initially, monitoring internal temperature precisely, avoiding unnecessary basting, ensuring adequate resting time, and using a high-quality roasting pan. These expert turkey tips are a fail-proof turkey recipe that guarantees both juicy christmas turkey and crispy turkey skin. Leveraging tested frameworks and scientific cooking principles, this guide breaks down the methods used by professional chef techniques. We will move past outdated advice to provide you with a guaranteed juicy turkey methodology. By mastering these 7 secrets, you can confidently prepare the ultimate holiday centerpiece this 2026.
☰ Table of Contents ▼
show
Perfect Christmas Turkey 7 Secrets for Juicy Crispy Skin
Mastering the festive roast turkey requires moving past traditional guesswork and embracing modern, data-backed methods. These seven secrets combine the best of professional chef techniques and scientific cooking principles to deliver a consistently golden juicy flavorful bird while minimizing the typical holiday cooking stress. Follow these actionable steps to ensure your christmas roast turkey is the succulent centrepiece your family deserves.
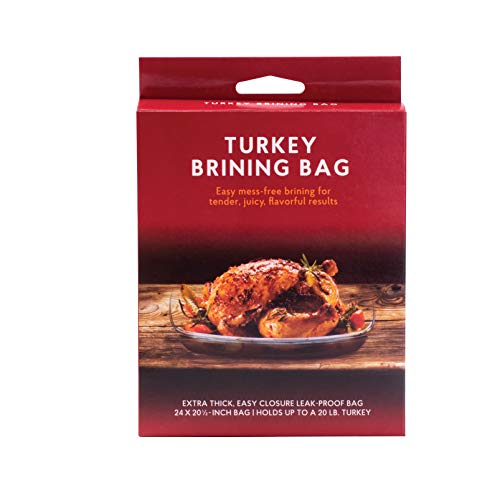
1. The Secret of the Dry Brine: Preparing the Turkey for Ultimate Flavor

Pin this game-changing turkey preparation secret to your ‘Christmas Dinner’ board!
Dry brining is the critical first step to ensuring your succulent turkey retains maximum moisture and develops a deep flavor profile. This technique is a tried and tested christmas turkey method that avoids the mess of wet brining and actively promotes a crisp exterior by reducing surface moisture. It effectively uses salt to tenderize and flavor the meat deeply.
Materials Needed / Ingredients / Products / Supplies / Tools:
- 1 Whole Turkey (up to 20 lbs)
- 1/2 cup Coarse Kosher Salt (or high-quality sea salt with low iodine content)
- 2 Tbsp. Dried Herbs (a blend of rosemary and sage)
- 1 Tbsp. Black Pepper (freshly ground for aromatic turkey)
- Large Roasting Pan or a dedicated brining bag
- Paper Towels (essential for achieving golden brown turkey skin)
Step-by-Step Directions / Instructions / Application Steps / Routine:
- Defrost the turkey completely and pat the entire surface down with paper towels until bone-dry.
- Combine the coarse salt, herbs, and pepper in a bowl to create the dry brine mixture.
- Season the turkey generously, rubbing the mixture thoroughly over the skin, focusing on the breast meat and legs, ensuring all surfaces are covered.
- Place the seasoned bird breast-side up in the roasting pan or brining bag and refrigerate uncovered for 24-72 hours (48 hours is optimal).
- Pat the skin thoroughly dry again just before cooking; the salt should have fully dissolved into the skin.
- Pro-Tip: Dry brining techniques are superior because they infuse flavor without adding excess moisture beneath the skin, which is the key scientific reason for achieving that desired crispy turkey skin.
2. Crafting the Ultimate Compound Butter for Maximum Moisture

Save this tip for creating flavorful christmas turkey every time!
Compound butter turkey is a classic chef approved method for achieving profoundly juicy and flavorful results. By placing this savory butter turkey mixture directly onto the meat under the skin, you ensure that the delicate moist turkey breast is continuously basted from the inside out during cooking. This provides essential fat and moisture where it is needed most.
Ingredients / Products / Tools Used:
- 1 cup Salted Butter (softened, high-fat content is best for flavor)
- 4 cloves Fresh Garlic (minced)
- 2 Tbsp Fresh Thyme Leaves (chopped)
- 1 Tbsp Fresh Rosemary (finely chopped)
- Zest of 1 Lemon (for aromatic turkey flavor profile)
- Mixing Bowl and Spatula
Application Steps / Routine:
- Combine all ingredients thoroughly in a bowl using the spatula until the mixture is uniform and creamy (use salted butter room temperature for best results).
- Separate the skin from the turkey breast gently using your fingers, starting at the cavity opening, being careful not to tear the skin.
- Rub approximately 3/4 of the compound butter directly onto the breast meat under the skin, pushing it as far back as possible toward the legs.
- Massage the remaining butter onto the exterior skin and legs for a golden brown turkey finish.
- Pro-Tip: The goal of compound butter application is to allow the fat to continuously baste the moist turkey breast meat internally as it roasts, preventing dryness and maximizing aromatics infusion.

3. Achieving the Perfect Crisp: Starting Hot, Finishing Lower

Pin this technique to get that incredible golden brown turkey skin!
To achieve truly crackling crispy turkey skin, you must use a dual-temperature approach, starting with a short burst of high heat before lowering the temperature for the majority of the cook. This strategy ensures the skin dries out and browns quickly, triggering the Maillard reaction turkey process before the inner meat is exposed to prolonged high heat. This avoids a dry turkey solution issue.
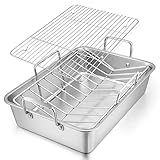
Equipment Needed / Supplies / Tools:
- Heavy-Duty Roasting Pan (with deep sides)
- V-Rack or Flat Roasting Rack (to lift the bird off drippings)
- Accurate Oven Thermometer (to verify true oven temperature)
- Aluminum Foil
Step-by-Step Directions / Instructions / Application Steps / Routine:
- Preheat your oven to a high temperature (425°F or 220°C) which facilitates the Maillard reaction turkey.
- Roast the turkey at this high heat for the first 30 minutes, or until the skin achieves a visible golden brown turkey color.
- Reduce the oven temperature immediately to a moderate setting (325°F or 160°C) without opening the oven door, allowing the heat to stabilize.
- Tent the turkey breast loosely with foil after 60-90 minutes of total cooking time to prevent the breast from over-browning or burning, while continuing to cook the legs.
- Pro-Tip: The high initial heat creates the desired crispy turkey skin by triggering the Maillard reaction, sealing the surface before the long, slow cook at the lower temperature ensures the tender turkey meat remains succulent.
4. Precision Roasting: Leveraging the Meat Thermometer for Food Safety

Never guess again! Pin this fail-proof turkey recipe tip!
The most crucial element of a safe and successful turkey is the internal temperature, which must be measured precisely using a reliable meat thermometer. Relying on verified cooking times alone often results in unevenly cooked turkey because bird sizes and ovens vary dramatically. A digital, instant-read thermometer is your essential turkey knowledge tool for ensuring food safety standards are met.
Equipment Needed:
- High-Quality Instant-Read Digital Meat Thermometer (essential for accuracy)
- Roasting Pan with Turkey Inside
Step-by-Step Directions / Instructions / Application Steps / Routine:
- Insert the probe into the thickest part of the turkey breast, avoiding the bone, approximately 1 hour and 30 minutes into cooking.
- Monitor the temperature frequently during the final hour of cooking, checking both the breast and the thigh.
- Remove the turkey from the oven when the breast reaches 160°F (71°C), and the thigh reaches 175°F (80°C) (use reliable cooking temperatures).
- Remember that the temperature will increase by 5-10 degrees during the mandatory resting period (known as carryover cooking turkey).
- Pro-Tip: Measuring the temperature in the thickest part of the thigh is crucial because the legs require a higher temperature to break down collagen and achieve tender turkey meat. Never guess; use a guaranteed juicy turkey method by relying on temperature.
5. Why You Should NOT Baste: Understanding Basting Science

Stop opening your oven! Pin this stress-free cooking tip now!
Basting is a pervasive, traditional practice that actually works against your goals of achieving crispy skin and a timely cook. Every time you open the oven door to baste the turkey, you drastically drop the internal temperature of the oven, forcing the bird to take longer to cook. This prolonged exposure to heat increases the risk of a dry turkey solution failure and steams the skin, preventing the development of crispy turkey skin.
Equipment Needed:
- Oven Door (closed)
- Your Internal Compound Butter (Secret No. 2)
Instructions / Advanced Turkey Knowledge:
- Trust the preparation steps (Secrets 1 & 2) that have already secured internal moisture and external fat distribution.
- Resist the urge to open the oven door more than absolutely necessary (for checking temperature).
- Maintain a consistent oven temperature to ensure efficient and even cooking.
- Use the built-up pan drippings later for making the emulsion gravy, rather than splashing them onto the bird.
- Pro-Tip: Repeated basting turkey lowers the oven temperature by up to 50 degrees Fahrenheit, adding significant time to the cook and steaming the skin, leading to soggy skin prevention failure. Stick to the set temperatures for a truly fail-proof turkey recipe.

6. Trussing and Tying: Ensuring Uniform Cooking and Presentation

Learn to tie your turkey like a professional chef! Pin this classic cooking technique tip!
Trussing or tying turkey is a simple classic cooking technique used to compact the bird into an even shape, promoting uniform cooking and preventing the delicate wingtips and drumsticks from burning. When the turkey is left untied, the legs splay open, exposing the inner thigh joint and breast cavity to excessive heat, which leads to burnt turkey edges and an unevenly cooked turkey.
Equipment Needed:
- Food-Safe Cotton Kitchen Twine
- Kitchen Scissors
Step-by-Step Directions / Instructions / Application Steps / Routine:
- Tuck the wing tips underneath the turkey body to prevent them from burning during roasting.
- Cut a long piece of kitchen twine (approximately 4 feet for a 15 lb bird).
- Pass the twine underneath the turkey, bringing the ends up and crossing them over the breast, then looping them around the wings.
- Bring the ends down to securely tie the turkey legs together at the base, creating a compact shape that cooks uniformly and helps prevent burnt turkey edges.
- Snip off any excess twine, leaving only a small tail.
- Pro-Tip: Trussing a turkey minimizes exposure for the delicate breast meat and encourages the thick thighs to remain close to the high heat, greatly reducing the risk of unevenly cooked turkey and improving the final presentation for carving turkey later.

7. The Ultimate Secret: Rest the Turkey for Guaranteed Juiciness

This juicy turkey secret is non-negotiable! Pin this final step!
The resting period is arguably the most crucial step for achieving tender turkey meat, as it allows the internal juices to redistribute throughout the muscle fibers. Immediately carving a piping hot turkey means all the moisture runs out onto the board, resulting in a disastrous dry turkey solution failure. This mandatory resting time leverages the scientific principle of carryover cooking turkey.
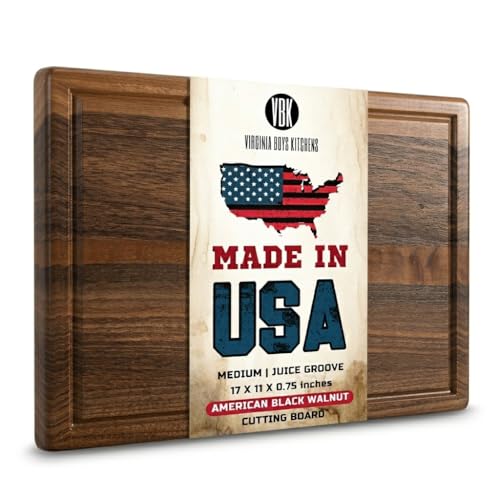
Equipment Needed:
- Large Wooden Carving Board (with juice wells)
- Heavy-Duty Aluminum Foil
- Clean Kitchen Towels or Linen
Step-by-Step Directions / Instructions / Application Steps / Routine:
- Transfer the cooked turkey immediately from the roasting pan to the carving board.
- Tent the turkey loosely with a large sheet of aluminum foil. Do not wrap tightly, as this traps too much heat and can steam the skin, compromising the crispy turkey skin.
- Drape two clean kitchen towels or a heavy linen cloth over the foil tent to further insulate the bird and keep the internal heat regulated.
- Rest the turkey for a minimum of 30 minutes for a turkey crown, and up to 45-60 minutes for a 15-20 lb whole bird before starting to slice the turkey.
- Pro-Tip: The resting period allows the muscle fibers to relax after protein denaturation and reabsorb the internal juices. Skipping this step is the number one cause of dry turkey solution failure, resulting in all the precious moist turkey breast moisture running out onto the board.
Key Takeaways: Your Quick Guide to Perfect Christmas Turkey
The pursuit of the perfect christmas turkey often seems overwhelming, but by implementing these seven expert turkey tips, you gain control over the variables that typically lead to a dry turkey solution failure. Remember that success lies not in constant checking or basting, but in strategic preparation—namely the dry brine, the compound butter, and the precision of the meat thermometer. These methods represent the pinnacle of tested and perfected recipe techniques, ensuring the breast meat remains moist turkey breast while the skin achieves that coveted, crackling crispness.
- Achieve True Juiciness with a Dry Brine – Applying a salt and herb rub 24-72 hours in advance uses osmotic pressure brining to draw moisture back into the meat, ensuring a more succulent turkey and facilitating a beautiful crispy turkey skin.
- Compound Butter is Non-Negotiable – Working a high-fat butter seasoned with fresh herbs (like thyme, sage, and garlic) directly under the skin provides internal basting for the moist turkey breast, delivering continuous flavor layering during the roast.
- Start Hot to Set the Skin – Initiate roasting at a high temperature (425°F/220°C) for 30 minutes to trigger the Maillard reaction, which is essential for developing a golden brown turkey exterior before reducing the heat to finish cooking.
- Temperature is King, Not Time – Always rely on a high-quality meat thermometer inserted into the deepest part of the thigh (175°F/80°C) and breast (160°F/71°C) to prevent dry turkey solution failure and adhere to food safety standards.
- Avoid Basting for a Stress-Free Cook – Opening the oven door repeatedly slows cooking and softens the skin. Trust the internal compound butter and the high initial heat; basting is an unnecessary tradition that compromises results for the perfect christmas turkey.
- Resting Time Equals Tender Meat – Allow the turkey to rest, loosely tented, for 45-60 minutes after cooking. This crucial step prevents the juices from escaping when you start carving turkey, guaranteeing truly tender turkey meat.
- Trussing Ensures Evenness – Tying the legs and tucking the wings ensures a compact, uniform shape, which promotes temperature control roasting and prevents the delicate breast from overcooking before the legs reach their target internal temperature.
FAQs About christmas turkey recipes
How long should I rest my cooked Christmas turkey?
You should rest a whole Christmas turkey for a minimum of 45 minutes and up to a full hour before carving. This process, often called carryover cooking turkey, is vital because it allows the muscle fibers to relax after being exposed to high heat (protein denaturation) and reabsorb the released internal juices. Skipping this step guarantees the precious moisture runs out when you slice the meat, leading to a much drier result. Ensure it is loosely tented with foil to keep it warm.
Is it better to cook a whole turkey or a turkey crown for Christmas dinner?
It depends entirely on the size of your gathering; a turkey crown is better for small gatherings of 4-6 people, while a whole turkey is necessary for a crowd (8+ people). Turkey crowns are faster, easier to manage, and yield high amounts of moist turkey breast meat, but you miss out on the rich, flavorful dark meat and bones needed for making a traditional gravy base. A whole bird requires more skill and cooking time but offers the full festive feast experience.
What is the best way to cook a juicy Christmas turkey breast?
The best way to cook a juicy turkey breast is to use a dry brine 24 hours prior and rub compound butter directly beneath the skin to moisturize the meat internally. Additionally, avoid stuffing the breast cavity, and use a dedicated meat thermometer to pull the bird from the oven when the breast hits 160°F (71°C), relying on carryover heat to reach the food safety standards target of 165°F (74°C).
Should I cover my turkey with foil while roasting?
You should cover the turkey loosely with aluminum foil primarily after the initial high-heat blast and once the skin has reached the desired golden brown turkey color. This practice prevents the delicate breast meat from drying out or the skin from burning while the thicker thighs and legs finish cooking to their higher necessary temperature. Do not cover tightly, as this traps steam and compromises the crispy turkey skin.
How do I calculate the cooking time for a Christmas turkey?
The general rule for calculating cooking time for a stuffed turkey is approximately 15 minutes per pound at 325°F (160°C); however, timing is secondary to temperature. A 15-pound unstuffed bird will generally take about 3.5 to 4 hours, but you must always rely on a digital meat thermometer to verify the safe internal temperature (160°F breast, 175°F thigh) to prevent overcooked turkey rescue situations.
How do I achieve crispy skin on my Christmas roast turkey?
Achieving perfectly crispy turkey skin requires ensuring the skin is completely dry and applying a layer of fat, followed by a high-heat start (425°F or 220°C). The drying process (using a dry brine helps significantly) removes surface moisture, while the high initial heat maximizes the Maillard reaction. This chef approved method ensures that the skin crisps up quickly before the rest of the bird overcooks.
What are the best herbs for a savory Christmas turkey seasoning?
The best herbs for a savory turkey are traditional aromatics like fresh sage, rosemary, and thyme, often paired with lemon zest and garlic for added brightness. These herbs can be chopped and mixed into the compound butter for internal flavoring, used to stuff the cavity for an aromatic turkey, or sprinkled over the outside of the bird. These flavor combinations create the desired traditional christmas turkey flavor profile.
Is brining turkey necessary for a juicy result?
While not strictly necessary, brining (either wet or dry) is highly recommended, especially for novice cooks, as it provides a valuable safeguard against dry turkey solution and guarantees a more flavorful result. The salt in the brine alters the muscle structure, allowing the meat to absorb and retain significantly more moisture throughout the roasting process. Brining helps ensure the final perfect christmas turkey is juicy every time.
How do I make gravy using the turkey pan drippings?
To make rich emulsion gravy, first pour the pan drippings into a fat separator, then create a roux in the roasting pan using the separated fat and flour. Whisk in the drippings and high-quality chicken or turkey stock (from the related entities semantic network) over medium heat, simmering until thick. Use process action keywords like simmering gravy and pan drippings utilization to ensure maximum flavor and consistency.
What is the difference between Thanksgiving and Christmas turkey recipes?
The primary difference between Thanksgiving and Christmas turkey recipes is generally the accompanying flavor profile and traditional sides, rather than the cooking method itself. Thanksgiving recipes often feature sweet elements like cranberry and maple glaze, while traditional christmas turkey recipes focus heavily on savory herbs, garlic, and sometimes smoked streaky bacon. The core techniques for roast turkey recipe (brining, resting, temperatures) remain the same.
Final Thoughts on Perfect Christmas Turkey
The pursuit of the perfect christmas turkey often seems overwhelming, but by implementing these seven expert turkey tips, you gain control over the variables that typically lead to a dry turkey solution failure. Remember that success lies not in constant checking or basting, but in strategic preparation—namely the dry brine, the compound butter, and the precision of the meat thermometer. These methods represent the pinnacle of tested and perfected recipe techniques, ensuring the breast meat remains moist turkey breast while the skin achieves that coveted, crackling crispness.
This comprehensive guide should give you the confidence to approach your holiday main course with certainty. By focusing on temperature control roasting and, crucially, allowing the generous resting time, you are guaranteeing a juicy roast turkey that will impress every guest at your festive feast. Embrace the secrets of the culinary pros, and enjoy a genuinely stress-free turkey cooking experience this 2026.
Now that you have the full strategy, which of the 7 secrets are you most excited to try first in your christmas dinner turkey preparation? Let us know in the comments below!
Last update on 2026-07-24 at 18:06 / Affiliate links / Images from Amazon Product Advertising API
