As an Amazon Associate BakingBakewareSets.com earns from qualifying purchases.
How To Make a Juicy Christmas Turkey That Is Never Dry
Have you ever felt that wave of panic on Christmas morning? The fear of spending hours on a beautiful turkey, only to serve a dry, disappointing meal.
A Roast Turkey Recipe is a set of instructions for cooking a whole turkey, but it’s often the source of major holiday stress. You’re not alone in worrying about getting that perfect, juicy result for your family.
The secret to a juicy Christmas turkey is a three-part process: a multi-day dry brine, roasting to the correct internal temperature of 165°F in the breast, and letting it rest for at least 30 minutes before carving. This guide will walk you through every simple step. You’ll learn the foolproof method for a perfect bird every time.
☰ Table of Contents ▼
show
Tired of Dry, Disappointing Holiday Turkey? Here’s the Secret to a Perfect Bird
The pressure to deliver a perfect holiday meal is real. So many traditional christmas turkey recipes are complicated or unreliable, leaving you with a dry, flavorless bird that nobody truly enjoys. After years of testing, this is the one method I trust for a perfectly moist and flavorful turkey every single Christmas. It all comes down to two simple secrets that guarantee success.
The first is a simple dry brine—a magic method using just salt and spices that seasons the meat deeply and locks in moisture. The second is mastering the art of the rest, a crucial but often-skipped step that ensures all those delicious juices stay in the meat, not on your cutting board. By focusing on these two key techniques, this foolproof recipe removes the guesswork and stress, promising you a holiday centerpiece you’ll be proud to serve.
Your 7 Foolproof Steps to the Juiciest Christmas Turkey Ever
Consider this your complete roadmap to holiday success. We’ve broken down the professional method into 7 manageable steps. We’ll not only tell you what to do, but why it’s important, giving you the confidence of a seasoned chef. By following these steps in order, even a first-time cook can produce a perfect, mouth-watering turkey that will be the star of your Christmas dinner.
1. Thaw & Prep Your Turkey for Success

Save this crucial first step to your ‘Holiday Cooking’ board!
What You Need:
- 1 whole turkey (12-15 lbs), fully thawed (plan 1 day in fridge per 4-5 lbs)
- A clean, sanitized sink or a large brining bag
- Ample paper towels
- Soap and hot water for cleanup
Step-by-Step Directions:
- Calculate Thaw Time: Plan ahead! A 15 lb turkey needs 3-4 full days to thaw in the refrigerator. Never thaw at room temperature.
- Unwrap Safely: Place the turkey in a clean sink or a large pan to catch any juices. Carefully remove the packaging.
- Remove Giblets: Reach inside the main cavity and the neck cavity to remove the neck and the packet of giblets. Save these for making gravy later.
- Rinse & Pat Dry: Rinse the turkey inside and out with cold water. Then, use paper towels to pat the entire surface and inside of the cavity completely dry. This is the #1 secret to crispy skin!
- Sanitize Everything: Thoroughly wash your hands, the sink, and any surfaces the raw turkey touched with hot, soapy water to prevent cross-contamination.
Pro-Tip: For the absolute crispiest skin, after patting the turkey dry, place it on a rack over a baking sheet and let it air-dry, uncovered, in the refrigerator for at least 8 hours or overnight.

2. Apply the Magic Dry Brine for Flavor & Moisture

Pin this game-changing tip for the juiciest turkey ever!
What You Need:
- 1/2 cup kosher salt (Diamond Crystal brand is recommended for its texture)
- 2 tablespoons brown sugar
- 1 tablespoon black pepper, freshly ground
- 1 tablespoon dried sage
- 1 teaspoon dried thyme
- A large roasting pan with a wire rack
Step-by-Step Directions:
- Mix the Brine: In a small bowl, combine the kosher salt, brown sugar, black pepper, dried sage, and dried thyme. Mix thoroughly.
- Season Generously: Place your completely dry turkey on the wire rack in the roasting pan. Sprinkle the dry brine mixture evenly all over the outside of the turkey—top, bottom, legs, and wings. Be generous!
- Season the Cavity: Use about a tablespoon of the mixture to season the inside of the main cavity.
- Refrigerate Uncovered: Place the turkey, uncovered, in the refrigerator for at least 24 hours and up to 3 days. The longer it brines, the more flavorful and juicy it will be. Do NOT cover it; this helps the skin dry out for maximum crispiness.
Lesson Learned: Don’t be alarmed if the turkey looks a bit wet after a few hours. That’s the magic of osmosis at work! The salt is drawing out moisture, which then dissolves the salt and gets reabsorbed into the meat. Do not rinse the brine off before roasting.

3. Create the Christmas Herb Butter & Season

Save this flavor-boosting technique for your holiday recipes!
What You Need:
- 1/2 cup (1 stick) unsalted butter, softened to room temperature
- 1/4 cup fresh herbs, finely chopped (a mix of sage, rosemary, and thyme is classic for Christmas)
- 4 cloves garlic, minced
- Zest of one orange
- Kitchen twine, 100% cotton and oven-safe
Step-by-Step Directions:
- Make Herb Butter: In a bowl, combine the softened butter, chopped fresh herbs, minced garlic, and orange zest. Mix until well combined.
- Prepare the Bird: Take the turkey out of the fridge. Don’t wipe off the brine. Gently work your fingers between the skin and the breast meat, separating them to create a pocket. Be careful not to tear the skin. Do the same for the thigh meat.
- Apply the Butter: Take about two-thirds of the herb butter and push it into the pockets you created, spreading it as evenly as possible over the breast and thigh meat.
- Butter the Skin: Rub the remaining butter all over the outside of the turkey skin.
- Truss the Legs: Cross the legs and tie them together securely with kitchen twine. Tuck the wing tips under the body of the turkey. This helps it cook more evenly.
Pro-Tip: Making the herb butter a day or two in advance allows the flavors to meld, resulting in an even more delicious turkey.

4. Prep the Pan with Aromatics for a Flavorful Gravy

Don’t skip this step for the best gravy of your life! Pin it now.
What You Need:
- 1 large yellow onion, quartered
- 2 large carrots, cut into 2-inch chunks
- 2 celery stalks, cut into 2-inch chunks
- 1 head of garlic, sliced in half crosswise
- A few sprigs of fresh thyme and rosemary
- 2 cups chicken or turkey broth
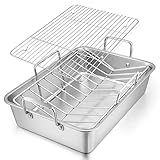
- A sturdy, heavy-duty roasting pan with a V-rack or flat rack
Step-by-Step Directions:
- Create an Aromatic Bed: Scatter the chopped onion, carrots, and celery on the bottom of the roasting pan.
- Stuff the Cavity: Place the sliced head of garlic and the fresh herb sprigs inside the main cavity of the turkey. This will perfume the meat from the inside as it cooks.
- Add Liquid: Pour the chicken or turkey broth into the bottom of the pan around the vegetables. This prevents the drippings from burning and creates a steamy environment.
- Position the Turkey: Place the turkey, breast-side up, on the wire rack inside the roasting pan. The rack is essential for allowing air to circulate, ensuring the bottom of the turkey roasts, not steams.
Lesson Learned: Do not add potatoes or other root vegetables you plan to eat to the bottom of the pan. They will absorb too much fat and become greasy. These aromatics are for flavor only and will be discarded after making gravy.
5. Roast to Golden-Brown Perfection (The Right Way)

Pin this image! The thermometer is the most important tool in your kitchen.
What You Need:
- A reliable oven
- An instant-read digital meat thermometer (this is non-negotiable)
- Aluminum foil
Step-by-Step Directions:
- Preheat Oven: Arrange an oven rack in the lower third of your oven and preheat to 425°F (220°C).
- Initial High-Heat Roast: Place the turkey in the preheated oven and roast for 30 minutes at 425°F. This initial blast of high heat helps to render the fat and create crispy skin.
- Reduce Heat & Continue Roasting: After 30 minutes, reduce the oven temperature to 350°F (175°C). Continue roasting, estimating about 13-15 minutes per pound for total cook time. For a 15 lb turkey, this will be another 2.5 to 3 hours.
- Check for Browning: If the breast skin starts to get too dark before the turkey is cooked, loosely tent it with a piece of aluminum foil.
- Check Temperature: About 30 minutes before you think it’s done, start checking the internal temperature. Insert the thermometer into the thickest part of the thigh, avoiding the bone. It should read 175-180°F. Then check the thickest part of the breast; it MUST read at least 165°F. This is the only way to know it’s done safely.
Pro-Tip: For ultimate peace of mind, use an oven-safe probe thermometer that stays in the turkey and alerts you when it reaches the target temperature. This prevents you from opening the oven door frequently, which causes heat loss.

6. Master the Art of Resting (The Most Crucial Step)

Don’t skip the rest! Save this essential tip for juicy meat every time.
What You Need:
- A large, clean cutting board (preferably with a juice groove)
- Heavy-duty aluminum foil
- Patience!
Step-by-Step Directions:
- Transfer the Turkey: Once the turkey reaches the correct temperature, carefully transfer it from the roasting pan to a large cutting board. This frees up the pan to make your gravy.
- Tent Loosely with Foil: Create a loose tent with aluminum foil and place it over the turkey. Do not wrap it tightly, as this will steam the skin and make it soft. The tent just helps retain some heat.
- Let It Rest: Let the turkey rest at room temperature for a minimum of 30 minutes. For a larger bird (15+ lbs), 45-60 minutes is even better. It will stay piping hot.
- Understand the Science: While resting, the muscle fibers relax and reabsorb all the flavorful juices that were pushed to the center during cooking. Slicing too early causes those juices to run out onto the cutting board, resulting in dry meat.
Lesson Learned: Your turkey is not getting cold. It’s actually continuing to cook! This is called “carryover cooking,” and the internal temperature will rise another 5-10 degrees while it rests. This is why you pull it from the oven at 165°F, not higher.

7. Carve Like a Pro for a Perfect Presentation

Save this guide for a beautiful holiday table!
What You Need:
- Your rested turkey
- A sharp, long carving knife or a good electric knife
- A carving fork to stabilize the bird
- A large platter for serving
Step-by-Step Directions:
- Remove the Legs & Thighs: Cut through the skin connecting the leg to the body. Pull the leg outward and press down firmly to pop the thigh joint. Cut through the joint to remove the entire leg and thigh piece. Repeat on the other side. Separate the drumstick from the thigh at the joint.
- Remove the Wings: Pull each wing away from the body and cut through the joint.
- Carve the Breast: Find the breastbone running down the center. Make a long, deep cut down one side of the breastbone. Then, starting from the outside, slice downward toward the bone, releasing beautiful slices of breast meat. Repeat on the other side.
- Arrange on Platter: Arrange the carved dark meat (thighs and legs) and the sliced white meat (breast) artfully on a warm platter. Garnish with fresh herbs for a festive touch.
Pro-Tip: Any juices that collect on the carving board are pure gold. Pour them into your gravy just before serving for an extra boost of flavor.

Key Takeaways: Your Quick Guide to a Perfect Christmas Turkey
- Brine is Non-Negotiable: A 2-3 day dry brine is the easiest way to guarantee flavorful, juicy meat. Season generously and let it rest uncovered in the fridge.
- Temperature, Not Time: Your meat thermometer is your best friend. Ignore the clock. The turkey is done only when the breast hits 165°F (74°C).
- Rest is Best: Letting the turkey rest for at least 30 minutes before carving is the single most important step for ensuring a juicy result. Do not skip this.
- Dry Skin = Crispy Skin: Patting the turkey completely dry before seasoning is the secret to that perfectly golden-brown, crispy skin everyone loves.
People Also Ask About Cooking a Christmas Turkey
How long does it take to cook a 15 lb Christmas turkey?
A 15 lb unstuffed turkey will take approximately 3 to 3.5 hours to roast at 350°F (175°C). However, this is only an estimate. You must always rely on an instant-read thermometer to confirm doneness. The breast must reach 165°F and the thigh should be 175-180°F.
Should I cover my turkey with foil while roasting?
Yes, you may need to cover the turkey breast loosely with foil, but only partway through cooking. If you notice the skin on the breast is becoming deeply browned before the internal temperature is reached, tenting it with foil will prevent it from burning while the rest of the bird finishes cooking.
Do I really need to let the turkey rest?
Absolutely. Resting is the most critical step for a juicy turkey. A minimum of 30 minutes is required. This allows the juices, which have been forced to the center by the oven’s heat, to redistribute throughout the meat. Slicing it too early will cause all that flavor and moisture to spill onto your cutting board.
How do I get my turkey skin super crispy?
The key to crispy skin is eliminating moisture. First, pat the turkey completely dry with paper towels after rinsing. Second, perform a multi-day dry brine uncovered in the refrigerator, which further dries out the skin. Finally, rubbing the skin with a high-fat substance like butter ensures it browns and crisps beautifully.
Final Thoughts
Cooking the perfect Christmas turkey doesn’t have to be a source of stress. Armed with this simple, foolproof method, you can confidently host your holiday dinner knowing you’ll serve a juicy, flavorful, and beautiful bird every single time. This recipe is more than just a set of instructions; it’s your key to creating a delicious and memorable centerpiece for a wonderful celebration with your loved ones.
What are your family’s must-have side dishes to serve alongside the perfect Christmas turkey? Share your traditions in the comments below
Last update on 2026-07-20 at 02:00 / Affiliate links / Images from Amazon Product Advertising API
