As an Amazon Associate BakingBakewareSets.com earns from qualifying purchases.
11 Genius Valentines Baking Party Ideas for Easy Fun
Struggling to find creative, engaging Valentine’s Day party ideas that don’t lead to hours of messy cleanup? Traditional holiday gatherings often come with unexpected stress and endless preparation headaches. A valentines baking party offers the perfect solution for fun family baking and creating something special together this 2026.
A Valentine’s baking party is a festive, hands-on event where guests decorate or bake themed desserts like cookies, cupcakes, or treats, designed to create sweet memories and promote creativity, especially among children. This concept integrates planning, simple recipes, and fun activities to deliver a memorable Valentine’s celebration.
Leveraging tested frameworks and experienced event planner insights, this guide provides stress-free party planning tips and the ultimate organizational structure. You’ll discover 11 genius, easy valentines baking ideas guaranteed to maximize fun and deliver a truly memorable baking event.
☰ Table of Contents ▼
show
11 Genius Valentines Baking Party Ideas To Make Your Celebration Easy and Fun

Pin this genius hack to your ‘Valentine’s Day Party Ideas’ board for later!
The secret to a simple cookie decorating party station is to do all the prep work ahead of time. Use a reliable easy sugar cookie recipe for decorating party and focus the party on assembly and fun, simple cookie decorating techniques. This allows guests to immediately engage in creative baking ideas upon arrival. Make sure all your sprinkles and frosting are visible and organized in small, easily accessible containers to facilitate custom creations party designs.
Supplies Needed
- Pre-made or batch sugar cookie recipe for decorating party (heart shaped cookies, various sizes)
- Four tubs of ready-made frosting/royal icing in pastel colors (simple, easy cleanup)
- Piping bags and coupler sets with various small tips for detailed work
- Containers of sprinkles and edible glitter (sprinkles and frosting)
- Mini rolling pins and decorating tools for simple cookie decorating
- Small cups of water and paint brushes for edible paint/glaze
- Wax paper or silicone baking mats for easy cleanup baking solutions
Step-by-Step Directions
- Prepare the Icing: Divide frosting into small bowls and color with gel food coloring. Transfer to piping bags with various tips (prepare chocolate dipped fruit, frost valentine cakes).
- Set Up Zones: Create individual stations for each guest or small group, providing pre-baked cookies and a small selection of tools and toppings at each.
- Demonstrate Techniques: Briefly show guests 2-3 simple decorating ideas (e.g., flooding, dotting, layering) before letting them create custom creations party.
- Contain the Mess: Place a large plastic tablecloth or butcher paper beneath the stations to simplify the clean up after party.
Pro-Tip: To prevent decorating challenges solved, use a thick-consistency royal icing for outlining (border) and a thinner consistency for flooding (filling). This master baker technique ensures clean edges and professional results.
2. Design and Serve a Heart-Warming DIY Hot Cocoa Bar

Share this elegant DIY station idea on your ‘Festive Party Food’ board!
A hot cocoa bar is a festive, self-serve drink station that minimizes host effort while providing charming valentine’s decor and a cozy treat. As a non-baking component, this station provides a wonderful space to serve festive drinks and complements the sweetness of the Valentine themed treats being made. Remember to integrate child safety in kitchen guidance, ensuring the base is kept warm but not scalding.
Supplies Needed
- Large self-serve beverage dispenser or slow cooker for pre-made hot cocoa (or instant mix)
- Toppings: Mini heart shaped marshmallows, whipped cream, crushed peppermint, chocolate shavings, caramel sauce
- Dippers: Homemade valentine goodies like wafers, pretzel rods, or small sugar cookies
- Serving cups (disposable or themed mugs)
- Charming valentine’s decor like a tiered serving tray and festive signage
Step-by-Step Directions
- Prepare the Base: Mix the hot cocoa base and keep it warm in a slow cooker set to low (prepare chocolate dipped fruit).
- Arrange Toppings: Place toppings in clear jars with small scoops or spoons for easy serving (assemble party favors).
- Design the Station: Create a themed display using red and pink party decorations and heart day festivities signage to enhance the celebration.
- Serve: Encourage guests to customize their creations party, reminding them to supervise younger children near the hot dispenser.
Pro-Tip: Use specialty chocolate melts (candy melts valentine) instead of cocoa powder for a richer, easier-to-mix base. This flavor pairing for Valentine’s treats elevates the drink with minimal effort.

3. Bake and Customize Simple Heart-Shaped Mini Pizzas

Save this fun savory option for your next Valentine’s Day party menu!
Serving heart-shaped mini pizzas is an effective way to introduce savory, festive party food and successfully manage the challenge of dealing with picky eaters. These quick valentine baking items use the same heart shaped cookie cutters used for the desserts, maintaining the theme while offering a needed break from sugar. It’s an easy recipe idea that involves minimal mess and high customization.
Ingredients
- Pre-made pizza dough (or pre-cut mini crusts)
- Tomato sauce or pesto
- Mozzarella cheese (shredded)
- Toppings: Mini pepperoni (use a tiny heart cutter), diced ham, or sliced vegetables
- Heart shaped cookie cutters heart (1 large, 1 small)
Instructions
- Cut Dough: Roll out the dough and use the large heart shaped cookie cutters to cut out individual mini pizza bases. Place them on baking sheets.
- Assemble Pizzas: Allow guests to spread sauce and top their dough with cheese and desired toppings, focusing on creating fun festive food crafting shapes.
- Bake: Bake according to dough instructions (usually 10-15 minutes at 400°F) until crusts are golden brown and cheese is melted.
- Serve Hot: Serve immediately as a savory balance to the dessert buffet.
Pro-Tip: Use refrigerated biscuit dough as a time-saving baking hacks alternative; simply roll flat and cut into heart shapes. This significantly reduces the prep time for large groups.
4. Organize a High-Engagement Chocolate Fountain Dipping Bar

This is the ultimate party activity! Pin this idea to your ‘Dessert Party Ideas’ board!
The chocolate fountain party eliminates the need for complex baking, instantly creating a stunning, high-engagement dessert bar centerpiece. This is one of the easiest ways to prepare chocolate dipped fruit, marshmallows, and other goodies, providing entertainment and enabling the creation of sweet memories baking. Ensure you source a reliable small chocolate fountain appliance that is easy to use and clean.
Supplies Needed
- Small chocolate fountain appliance (reviewed party supplies)
- High-quality melting chocolate or candy melts valentine
- Dipping items: Fresh strawberries (ensure they are dry!), cubed pound cake, marshmallows, pretzel rods, rice cereal treats
- Serving skewers or dipping sticks (children’s cooking activities)
- Wet wipes/napkins for easy cleanup baking solutions
Step-by-Step Directions
- Prepare Chocolate: Melt the chocolate according to the fountain manufacturer’s instructions (chocolate melting techniques). Ensure the chocolate is completely smooth.
- Assemble Fountain: Set the fountain up on a level, stable surface away from main activity areas, emphasizing child safety in kitchen.
- Arrange Dippers: Arrange all dipping items neatly around the fountain on platters, grouping like items together.
- Start Flow: Turn the fountain on and allow the chocolate to cascade. Supervise young guests to ensure dipping items are added one at a time and not double-dipped.
Pro-Tip: Use specific chocolate formulated for fountains, which generally requires no additional oil, ensuring a smooth, consistent flow and avoiding baking fails. This is crucial for event management for themed parties.

5. Assemble Stunning Edible Flower Cupcakes (Easy Decor Hack)

Pin this charming, classy dessert idea to your ‘Classy Valentine Desserts’ board!
Edible flower cupcakes are an adorable valentine treats option that requires zero advanced frosting methods and results in an elegant, gourmet valentine desserts look. This simple cookie decorating hack relies on using pre-baked cupcakes and focusing solely on the placement of certified food-grade edible flowers. The result is a refined look perfect for Galentine’s day ideas or sophisticated gatherings.
Supplies Needed
- Pre-baked cupcakes (any flavor, preferably red velvet or chocolate)
- Ready-made buttercream or cream cheese frosting (types of frosting explained)
- Small offset spatula or piping bag for simple frosting application
- Edible flowers (ensure sourced from a reliable recipe resource, pediatrician-approved snacks are best)
- Optional: Edible glitter or gold flakes
Step-by-Step Directions
- Prep Cupcakes: Ensure cupcakes are fully cooled. Spread frosting evenly over the top using an offset spatula, or use a piping bag to create a simple swirl (basic cake decorating tips).
- Place Flowers: Gently press the edible flowers onto the frosting surface, arranging them in clusters or a minimalist line.
- Add Sparkle: Lightly dust with powdered sugar or sprinkle with edible glitter (edible glitter).
- Serve: Serve the gorgeous treats immediately or store in a cool, dark place. The process is quick and makes for sweet valentine desserts.
Pro-Tip: For maximum visual impact, use a wide piping tip (like a Wilton 1M) for a quick, professional-looking swirl. This professional party guide detail saves time while providing artisanal baking techniques look.

6. Personalize Party Favors: Decorate Custom Aprons

Need engaging kid activities? Pin this DIY party favor idea now!
Decorating custom aprons is a fantastic non-baking activity that solves the party favor dilemmas while providing engaging kid activities. This DIY valentine crafts project serves as both a functional item for the subsequent baking session and a personalized homemade valentine gifts for guests to take home, creating sweet memories baking and bonding. This proven party planning strategy also helps engage early arrivals.
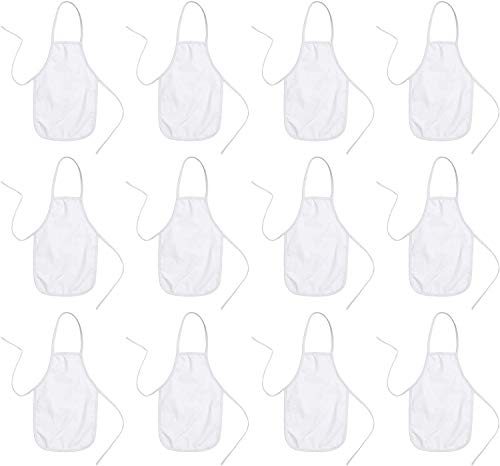
Supplies Needed
- Plain white cotton aprons (child size or adult, bulk purchase for budget-friendly baking party)
- Non-toxic fabric markers (assorted colors)
- Fabric paint or glitter glue (create valentine cupcakes)
- Heart-shaped stencils (or themed stamps)
- Wax paper or cardboard inserts to prevent bleeding through the fabric
Step-by-Step Directions
- Prep Station: Lay out the aprons with cardboard inserts underneath. Provide a designated area away from food to implement party activities.
- Decorate: Instruct guests to design invitations, draw, or stencil hearts and Valentine messages onto their aprons using the fabric markers and paint.
- Dry: Allow sufficient time (about 15-20 minutes) for the fabric paint/glue to dry before guests put the aprons on to bake.
- Wear and Keep: Guests wear their newly customized aprons for the baking session, and then package baked goods to take home as a memorable gift.
Pro-Tip: Check marker labels for drying instructions. Using heat-set fabric markers makes the apron washable, ensuring the party favor lasts long after the event, reinforcing the value of engaging kid activities.
7. Make Last-Minute Red Velvet Puppy Chow (No-Bake Treat)

Short on time? Pin this quick no-bake recipe hack to your ‘Quick Valentine Treats’ board!
Red Velvet Puppy Chow is one of the best no-bake valentine options, acting as a perfect last-minute Valentine’s treats solution that still delivers vibrant color and delicious party recipes. Because it requires no oven time, this easy homemade Valentine’s baking idea minimizes the risk of baking fails and is safe for younger guests, adhering to child safety in kitchen guidelines for heat elements.
Ingredients
- Chex cereal (9 cups)
- White chocolate candy melts valentine (1 bag)
- Red velvet cake mix (1 box – ensure you heat-treat the mix first)
- Powdered sugar
- Optional: Heart-shaped sprinkles for extra fun
Instructions
- Melt Chocolate: Melt the white chocolate candy melts in a microwave-safe bowl until completely smooth (chocolate melting techniques).
- Coat Cereal: Pour the melted chocolate over the cereal in a large bowl and gently toss until completely coated.
- Add Mix: Immediately transfer the coated cereal into a large zip-top bag. Add the powdered sugar and red velvet cake mix.
- Shake: Seal the bag and shake vigorously until all the cereal is coated in the sweet mix. Serve in decorative bowls or package baked goods as party favors.
Pro-Tip: This easy homemade Valentine’s baking idea is perfect for toddlers as they can handle the shaking step. This toddler friendly Valentine’s baking activities hack keeps them engaged and results in delicious party recipes.

8. Elevate the Event with a Galentine’s Day Dessert Bar Alternative

Planning an adult party? Pin this elegant Galentine’s theme to your ‘Adult Valentine Party Ideas’ board!
When planning a valentines baking party vs cookie decorating party for adults, focusing on a Galentine’s Day theme with sophisticated treats creates a romantic culinary event. This alternative emphasizes classy valentine desserts like gourmet chocolate creations or advanced pastry techniques, paired with elegant serve festive drinks options. This allows for a deeper exploration of flavor pairing for Valentine’s treats.
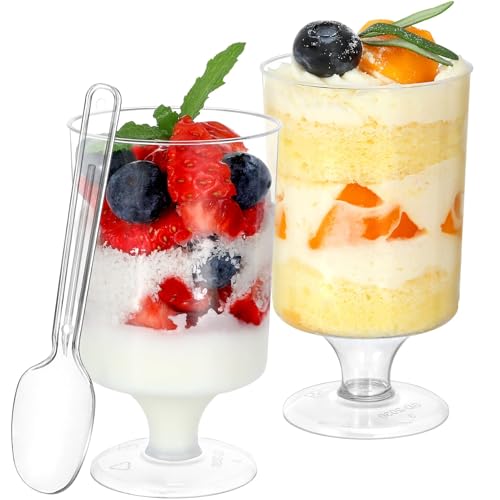
Supplies Needed
- Mini champagne flutes or small dessert cups (for easy serving)
- Elegant paper products (classy valentine desserts, not cartoonish)
- Dessert options: Macarons, mini chocolate lava cakes, or crème brûlée ingredients
- Wine pairings or sophisticated non-alcoholic beverages (serve festive drinks)
- Theme decorations: Flowers, candles, and sophisticated party decorations
Step-by-Step Directions
- Select Theme: Choose a refined color palette (e.g., blush pink and gold). Use charming valentine’s decor like quality textiles to upgrade the simple party setup.
- Prepare Desserts: Focus on 2-3 homemade valentine goodies that feel luxurious (e.g., mini mousse cups, romantic dessert recipes).
- Set Up Dessert Bar: Arrange the treats vertically using tiered stands and decorative platters. Clearly label any advanced pastry techniques or unique flavor pairings.
- Host: This themed sweet buffet encourages mingling and conversation, contrasting with the more hands-on children’s dessert workshop.
Pro-Tip: Instead of making everything from scratch, purchase high-quality pre-made French macarons or petit fours, saving significant time. Focus your energy on food styling for celebrations and wine pairings to host a sophisticated event.
9. Build the Perfect Photo Booth Backdrop for Sweet Memories

Capture those sweet memories baking! Pin this easy DIY decor idea!
A DIY Valentine’s baking party decorations photo booth provides a low-cost, high-impact area to capture those sweet memories baking and bonding with guests. This non-baking feature enhances the celebration and serves as a simple party setup. Use affordable materials to construct the backdrop and theme-relevant props to ensure the activity is a fun addition to the festive baking gathering.
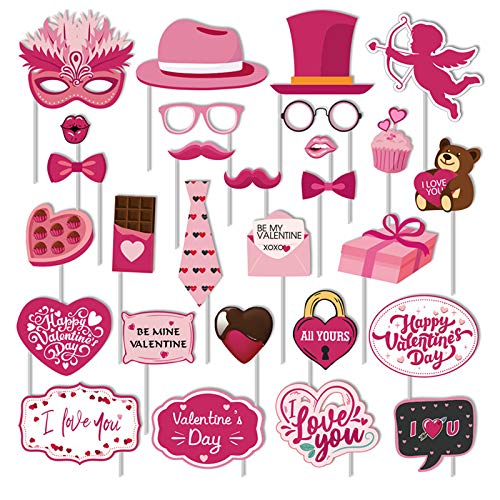
Supplies Needed
- Pink, red, and white paper fans or streamers (affordable Valentine’s baking party decorations DIY)
- Painter’s tape or removable mounting putty
- Large heart cutouts or a themed banner (valentine’s party supplies)
- Photo props: Oversized glasses, heart headbands, themed signs (party favors)
- Good lighting source (ring light or near a window)
Step-by-Step Directions
- Choose Location: Select a clear wall space near good light (ideally soft natural window light) away from high-traffic areas.
- Build Base: Begin by mounting the paper fans or streamers in a cascading pattern to fill the backdrop space, creating a textured design (coordinate guest list).
- Add Accents: Layer the heart cutouts or banners over the base to establish the Valentine theme.
- Set Up Props: Place props nearby. Encourage guests to step away from the baking station periodically to capture sweet memories baking.
Pro-Tip: Use paper garlands instead of streamers for a more professional, charming valentine’s decor look that is easy to hang and requires simple party setup.
10. Learn to Bake-Your-Own Cake Pops Station for Maximum Fun

Ready for a cupcake extravaganza? Pin this fun, compact baking idea!
A Cake Pop Station offers a great alternative in the valentines cake pop vs cupcake party debate, as cake pops are inherently easier for children to decorate and manage. By making the cake pop base ahead of time, the party activity focuses purely on dipping into candy melts valentine and decorating cookies with fun sprinkles, promoting quick and easy Valentine’s treats to bake with kids.
Supplies Needed
- Pre-rolled cake pop balls (made from cake scraps and frosting)
- Cake pop sticks (paper straws or sturdy plastic)
- Assorted candy melts valentine (pink, red, white)
- Styrofoam block or cake pop stand for holding drying pops
- Sprinkles and miniature heart candies (baking accessories valentine)
Step-by-Step Directions
- Melt & Stick: Melt the candy melts according to package directions. Dip the tip of each stick into the melted chocolate before inserting it halfway into a cake ball. Allow to set for 5 minutes.
- Dip: Dip the entire cake pop into the desired color of melted chocolate, allowing excess to drip off (chocolate melting techniques).
- Decorate: Immediately decorate cookies or cake pops with sprinkles and candies before the coating hardens. This is the main engaging kid activities portion.
- Dry: Insert the decorated pops into the Styrofoam block and allow them to fully set (about 15-20 minutes). Package goods as party favors.
Pro-Tip: Cake pops are more manageable than cupcakes for younger kids because they create less mess and are perfectly portioned. They are one of the most popular valentine’s treats when done right.

11. Implement a Simple DIY Valentine Card Box Station

Need another non-baking activity? Pin this fun craft idea to your ‘Valentine’s Day Crafts’ board!
Setting up a DIY Valentine card box station integrates fun Valentine’s party games and is a unique Valentine’s party activity for elementary school-aged children. This simple valentines day crafts project provides entertainment during breaks or while waiting for treats to bake. It supports learning through hands-on sensory experiences in baking-adjacent crafts, ensuring comprehensive topical coverage.
Supplies Needed
- Small, plain cardboard boxes (shoeboxes or craft boxes)
- Construction paper and patterned scrapbook paper (red, pink, white)
- Non-toxic glue sticks and liquid craft glue
- Glitter, foam stickers, ribbon, pipe cleaners (valentine’s party supplies)
- Child-safe scissors
- Markers and crayons
Step-by-Step Directions
- Prep Boxes: Ensure each guest has a box with a pre-cut slit in the top for cards.
- Wrap Base: Instruct guests to wrap their boxes in solid colored paper to create a clean base (coordinate guest list).
- Decorate: Encourage guests to cut out shapes (using cookie cutters as stencils) and apply stickers, glitter, and ribbon to decorate cookies card boxes, promoting creative baking ideas.
- Display: If time allows, have guests use their finished boxes to exchange small valentines before the end of the party.
Pro-Tip: This activity is excellent for promoting sensory experiences in baking-adjacent crafts and works as a perfect wind-down activity as treats bake. It also provides comprehensive topical coverage by addressing both food and craft elements of a holiday celebration.

Key Takeaways: Your Quick Guide to a Stress-Free Valentines Baking Party
A successful valentines baking party should never feel like a chore, but rather a delightful opportunity to create sweet memories baking and bonding with loved ones. By leveraging these 11 genius ideas, you have transformed the intimidating task of party planning into an achievable, exciting experience. Remember the key is simplification: pre-bake, organize your supplies, and let the guests handle the decorating.
- Pre-Bake Your Main Treats: To ensure a truly easy valentines baking party experience, handle the messy baking stage (mixing dough, baking cakes) ahead of time. Focus the party only on the fun, simple cookie decorating steps and assembly to maximize fun family baking time.
-
Focus on Two-Part Actionable Stations: Structure your event around high-impact, low-effort activities like a Chocolate Fountain Dessert Bar or a Cake Pop Dipping Station, using process action keywords to guide guests through the steps.
-
Address All Intentions with Dual Activities: Incorporate non-food activities (like the DIY Valentine card box or apron decorating) as creative baking ideas breaks, helping keep kids engaged baking and providing variety for a longer party.
-
Prioritize Child Safety in the Kitchen: Always adhere to child safety in kitchen guidelines, especially around heat elements (hot cocoa bar, oven access) and complex tools. This builds trust and maintains the integrity of the professional party guide.
-
Use Visual Elements for Memorability: Invest in a simple, themed Photo Booth Backdrop to capture those sweet memories baking and create shareable content, elevating the event from a simple dessert making class to a comprehensive themed party.
-
Embrace Quality Time Over Gourmet Perfection: The goal is a memorable baking event, not culinary arts for children perfection. Use time-saving baking hacks like pre-made dough, ready-to-use frosting, and simple recipes.
FAQs About Valentines Baking Party
What are easy Valentine’s baking party ideas for kids?
Easy Valentine’s baking party ideas for kids involve low-mess assembly rather than full baking, prioritizing hands-on decorating. Focus on simple cookie decorating party stations with pre-baked heart-shaped cookies, cupcake decorating kits, or assembling no-bake treats like Red Velvet Puppy Chow. These ideas minimize kitchen complexity, maximize fun family baking, and are highly effective for keeping children engaged baking for long periods.
What is the best age range for a Valentine’s baking party?
Valentine’s baking parties are generally best suited for children aged 4 to 12, though activities can be tailored for toddlers and teens. For younger kids (4-6), focus on simple tasks like shaking ingredients or placing large sprinkles, adhering to child safety in kitchen guidelines. Older children (8+) can handle more complex tasks, like piping frosting (advanced frosting methods) and following full recipes, allowing for more creative custom creations party outcomes.
How much does a Valentine’s baking party cost?
The cost of a Valentine’s baking party can range significantly, depending heavily on the complexity and guest count. A budget-friendly baking party focuses on homemade ingredients (sugar cookie dough recipe beginners) and DIY decorations (affordable Valentine’s baking party decorations DIY). The largest variable costs are specialized supplies (chocolate fountain party), pre-made treats (macarons), and party favors (party favor dilemmas). Simple planning can mitigate budget constraints for parties.
How do I make a Valentine’s baking party memorable?
To make a Valentine’s baking party memorable, integrate non-food activities, unique themes, and personalized touches that create sweet memories baking. Include a personalized element, like decorating custom aprons, or setting up a themed photo booth for memory capture. Ensure the atmosphere is festive and fun, moving beyond just decorating cookies to encompass a full, engaging children’s dessert workshop experience.
Alternatives to a traditional cookie decorating party include hosting a cupcake party, a chocolate dipping station, or a savory heart-shaped pizza party. These alternatives utilize different skills and supplies, addressing various dominant user intents. For example, a cake pop vs cupcake party provides a more manageable portion size, while a savory option addresses the problem of needing balanced festive party food.
What safety tips are essential for a kids baking party?
Essential safety tips include ensuring adult supervision near heat sources, separating food and craft stations, and managing potential allergens. Position hot items (like the hot cocoa bar or oven) out of reach, and clearly label ingredients to help with allergen management in party food. Using non-toxic glue and child-safe scissors for DIY valentine crafts is also crucial for overall child safety in kitchen standards.
How far in advance should I start planning a Valentine’s baking event?
For a stress-free party planning experience, start organizing the main structure and guest list 3-4 weeks in advance. Purchase all non-perishable valentine’s party supplies and gather essential baking tools for a party two weeks prior. Leave perishable ingredients, like fresh fruit for chocolate dipped strawberries, for the final few days before the event.
What should I serve besides the main baked goods?
Beyond the main baked goods, serve light snacks, fresh fruit, and themed drinks to balance the sweetness. The DIY Hot Cocoa Bar is an excellent festive drink option, and serving heart-shaped mini pizzas provides a savory offset, dealing with picky eaters. Consider healthy valentine treats options like yogurt parfaits or sliced apples, often pediatrician-approved snacks, to complement the desserts.
Handling large groups requires pre-portioning supplies, creating organized stations, and having multiple adult helpers. Utilize a process action keywords approach: pre-mix all frosting colors, pre-bake and cool all cookies, and set up the cookie decorating station buffet style. This tested valentine recipes and party guide methodology streamlines the process, preventing bottlenecks and managing the scale of party food ideas for large groups.
Should I hire a baking instructor or run the party myself?
For most easy valentines baking party events, especially those focused on decorating, the host can manage the party using detailed step-by-step guides. Hiring a baking instructor is typically reserved for more advanced party techniques (topical authority advanced) or if the host has zero experience. If running it yourself, rely heavily on tested recipes and experienced event planner insights (from this guide) to ensure success.
Final Thoughts on Valentines Baking Party
A successful valentine’s day baking party should never feel like a chore, but rather a delightful opportunity to create sweet memories baking and bonding with loved ones. By leveraging these 11 genius ideas, you have transformed the intimidating task of party planning into an achievable, exciting experience. Whether you choose the engaging kid activities of a cookie decorating party station, the high-impact visual of a chocolate fountain, or the charming valentine’s decor of a DIY photo booth, the result is a guaranteed fun baking party that caters to every need. Remember the key is simplification: pre-bake, organize your supplies (supplies needed), and let the guests handle the decorating (what to do). Use these practical, tested valentine recipes and expert planning tips to ensure your celebration is not only delicious but also stress-free from start to finish. Now go ahead, coordinate your guest list, host a baking party, and watch the magic unfold!
Which of these 11 ideas are you most excited to try at your Valentine’s Day celebration this 2026? Share your party planning secrets in the comments below!
Last update on 2026-07-10 at 00:00 / Affiliate links / Images from Amazon Product Advertising API
