As an Amazon Associate BakingBakewareSets.com earns from qualifying purchases.
Easy Valentine Cake Pops You Can Bake This July 2026
Are you tired of sticky cake pop dough or the frustration of cracked chocolate coatings? Making beautiful, ‘homemade valentine cake pops’ can be a challenge even for experienced bakers looking for that perfect ‘valentine’s day treat’. We understand the common pain points that can turn this sweet project into a frustrating kitchen disaster.
Making easy Valentine’s Day cake pops involves six core stages: baking and crumbling the cake, mixing with frosting to form dough, chilling the cake balls, inserting sticks dipped in melted chocolate, dipping the balls into the candy coating, and finally, decorating them. This proven methodology ensures a smooth finish and prevents common dipping disasters.
Leveraging ‘tested valentine’s cake pops’ results and ‘experienced baker advice,’ we provide detailed steps for ‘mastering cake pop creation.’ You will learn critical ‘temperature control for optimal dipping’ and techniques to achieve ‘bakery quality cake pops at home’ this July 2026.
☰ Table of Contents ▼
show
9 Simple Steps to Make Easy Homemade Valentine Cake Pops
1. Choosing the Best Cake Base and Flavor Profile

Pin this genius hack to your ‘Valentine’s Baking’ board for later!
Selecting the perfect cake base sets the foundation for your ‘delicious cake pops.’ While you can choose any flavor, red velvet cake pops offer the ideal color and ‘rich flavor’ for Valentine’s Day. The goal here is a ‘moist cake,’ as the cake mixture transforms into cake pops when combined with frosting. Be sure to bake your box cake mix according to the package instructions, being careful not to over-bake, which would lead to a dry, crumbly result.
Ingredients:
- 1 box of red velvet cake mix (or preferred flavor)
- Ingredients needed for the cake mix (eggs, oil, water, usually)
- High-quality concentrated red food coloring (for extra ‘vibrant colors’)
- Parchment paper for lining the baking sheet
Instructions:
- Bake cake according to package instructions, ensuring the cake is not dry or crumbly.
- Cool cake pops completely in the pan for 15 minutes, then transfer to a cooling rack.
- Crumble cake into a large, sturdy mixing bowl, ensuring no large chunks remain.
- Set aside approximately 1/4 of the crumbled cake mixture, to be added back later if needed to adjust consistency.
- Pro-Tip: To enhance the ‘rich flavor’ of your red velvet cake pops, use milk instead of water and add an extra teaspoon of vanilla extract to your cake batter before baking.

2. Creating the Creamy Cake Pop Dough Consistency

ACTIONABLE TIP: Follow this ‘mix frosting’ guide to prevent ‘cake pops too sticky’!
This is the most critical stage, often leading to ‘cake pop disasters’ if not handled correctly. The goal is for the cream cheese frosting to bind the cake crumbs into a dense, workable dough that forms a ‘creamy cake center’ without being overly wet. We recommend using minimal frosting, as too much leads to balls that are difficult to dip and are prone to falling apart.
Supplies Needed:
- 2-3 Tablespoons of softened ‘cream cheese frosting’ (start low, add more as needed)
- Sturdy rubber spatula or spoon
- Large mixing bowl
- Optional: Stand mixer with paddle attachment (for faster blending)
Steps:
- Add frosting to the crumbled cake mixture, starting with 2 tablespoons of frosting.
- Mix well using a sturdy spatula or hands until the mixture just comes together.
- Test consistency by squeezing a small amount in your hand; it should hold its shape firmly without crumbling, but not feel greasy or ‘cake pops too sticky’.
- Add small increments (1/2 teaspoon) of additional frosting if the mixture is still too dry or ‘cake pops too crumbly’. Use the reserved cake crumbs (Step 1) if the mixture is too wet.
- Pro-Tip: The ’emulsification in cake batter for moisture’ helps reduce the amount of frosting needed. Less frosting equals firmer balls, which is the secret to preventing ‘cake pops falling off sticks’ later.

3. Rolling Perfectly Round Cake Balls for a Smooth Finish

GET THE LOOK: Achieve ‘perfectly round’ cake pops every time!
Uniformity is key for a ‘professional looking’ dessert. Using a scoop ensures consistent size, which aids in cooking, chilling, and dipping. To get a ‘smooth finish,’ you need to apply firm pressure when you ‘roll cake balls’ to eliminate air pockets, aligning with ‘food engineering principles for cake pops.’
Tools Required:
- Small cookie scoop (recommended for consistency)
- Kitchen scale (optional, for precise weight)
- Parchment-lined baking sheet
Process:
- Measure dough using a cookie scoop (approximately 1.5 tablespoons) to ensure ‘mini valentine cake pops’ of uniform size.
- Roll cake balls firmly and quickly between the palms of your hands to create dense, smooth spheres. Minimize handling to prevent melting the frosting.
- Check surface for cracks or fissures; if any appear, re-roll the ball until the surface is entirely smooth.
- Place balls onto the prepared baking sheet, ensuring they do not touch.
- Pro-Tip: Using a scale to weigh each ball (around 30-35 grams) ensures not only uniformity but also that the ‘sticks support cake pops’ properly, preventing them from falling off due to being too heavy.

4. Hardening and Securing Cake Balls on Lollipop Sticks

Secure your ‘homemade valentine cake pops’ sticks before dipping!
Before you attempt to dip in chocolate, you must chill the cake balls and secure them to the ‘lollipop sticks’. Chilling causes the ‘cooling solidifies cake balls’ process to occur, creating a dense, ‘delicate texture.’ We use melted chocolate as an edible glue to provide ‘strengthening cake pop attachment’ and ‘prevent cake pops from falling off stick.’
Supplies Needed:
- 6-inch ‘lollipop sticks’
- Small bowl of melted candy melts (from Step 5 preparation)
- Styrofoam block or cake pop stand (for drying)
Steps:
- Chill mixture by placing the rolled cake balls in the refrigerator for at least 30 minutes, ensuring they are firm but not rock-hard.
- Melt small amount of candy melts in a microwave-safe bowl.
- Dip stick tip about half an inch into the melted candy coating.
- Insert sticks immediately into the center of the cake balls, only going halfway to avoid pushing through.
- Return pops to the refrigerator for 5-10 minutes to allow the candy coating ‘glue’ to set and create a secure bond.
- Pro-Tip: CRITICAL STEP: If you skip the initial stick-dipping stage, the pops are highly likely to fall off when dipping into the final coating, leading to ‘cake pop disasters.’

5. Mastering Temperature for Smooth Chocolate Candy Coating

Use our ‘expert cake pop tips’ for a ‘smooth cake pop coating solution’!
The quality of your sweet chocolate coating is entirely dependent on ‘temperature control for optimal dipping.’ If the chocolate candy coating is too hot or too thick, you risk having the coating fall off the pop, or developing cake pops cracking. We utilize ‘candy melts simplify dipping,’ but achieving the right viscosity is paramount.
Supplies Needed:
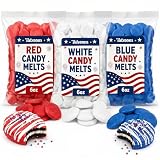
- 12 oz bag of high-quality ‘chocolate candy melts’ (red, pink, or white)
- 1 teaspoon of coconut oil or paramount crystals (thinner)
- Microwave-safe deep dipping container
- Digital thermometer (optional but highly recommended)
Instructions:
- Melt candy melts in the microwave at 50% power for 30-second intervals, stirring vigorously after each interval.
- Achieve consistency: The ideal viscosity is thin, flowing easily off the spoon. If the ‘chocolate coating too thick’, add 1/2 teaspoon of coconut oil and stir until smooth.
- Monitor temperature: Do not exceed 105°F (40°C). Overheated chocolate will seize or burn, leading to a lumpy coating.
- Transfer coating to a narrow, deep container ideal for dipping the ‘cake ball valentines.’
- Pro-Tip: Use specialized chocolate coloring (oil-based), NOT standard food coloring, to avoid seizing the coating. This is essential for a ‘smooth coating.’ We incorporate ‘food rheology applications in confections’ by using coconut oil to adjust viscosity.
6. The Perfect Dipping and Coating Technique

Master the ‘dipping and coating techniques’ for professional-looking ‘festive cake pops’!
Successful dipping relies on quick, smooth movements and optimal temperature regulation. The moment the chilled cake pop touches the melted coating, you must move quickly to ensure an ‘evenly coated’ finish. Using the tapping technique is essential to remove excess coating and prevent thick pools at the base of the pop.
Supplies Needed:
- Prepared cake pops on sticks (from Step 4)
- Narrow, deep container of melted candy coating (from Step 5)
- Styrofoam block
Instructions:
- Dip quickly but smoothly into the melted coating, fully submerging the cake pop until the coating meets the stick.
- Lift quickly and hold the pop upside down briefly for 5 seconds to let the initial excess drip.
- Tap gently on the stick against the edge of the container to allow excess coating to run off, ensuring an ‘evenly coated’ pop.
- Avoid bubbles by slowly rotating the stick while tapping. Use a toothpick to pop any bubbles before the coating sets.
- Let dry by immediately placing the stick upright into the styrofoam block.
- Pro-Tip: If you notice ‘cake pops cracking’ immediately after dipping, the cake ball was likely too cold (thermal shock) or the chocolate coating was too hot or too thick. Adjust the consistency and let the chilled balls sit at room temperature for 10 minutes before proceeding.

7. How to Form and Dip Heart Shaped Cake Pops

Learn the trick to making ‘heart-shaped cake pops for kids’ this Valentine’s Day!
To create these specialized ‘heart cake pops’, you must adapt the shaping process. Rolling works for spheres, but maintaining a crisp edge on ‘festive cake pop’ shapes requires sheeting the cake ball dough and using cookie cutters heart shapes. This technique provides the ‘unique designs’ users are looking for.
Tools Required:
- Mini ‘cookie cutters heart’ shape
- Rolling pin
- Wax or parchment paper
- Sharp knife or spatula
Process:
- Chill dough by pressing the prepared cake dough (from Step 2) into a flat, 1/2-inch thick layer between two sheets of parchment paper. Refrigerate for 30 minutes.
- Cut shapes using the mini heart cookie cutter. Re-form any scrap pieces and chill again before cutting.
- Insert sticks into the bottom point of the heart shape, following the same melted chocolate ‘glue’ technique (Step 4).
- Dip hearts by submerging the shape completely, using the gentle tapping technique to remove excess coating.
- Pro-Tip: Because the heart shape has corners and a thinner profile than a ball, it is highly susceptible to thermal shock. Allow the chilled hearts to sit at room temperature for 15 minutes before dipping to ‘prevent cracking on cake pops.’

8. Customizing Decorations and Adding Festive Sprinkles

Get creative! Our guide on ‘fun and unique valentine’s cake pop decorating ideas’ is here.
‘Decorating enhances appearance,’ transforming your simple cake pop into a ‘crowd-pleasing’ item. When you decorate cake pops, you must work quickly while the candy coating is still wet. We focus on three popular methods for ‘customizable decorations.’ Remember to follow ‘food safety for homemade treats’ guidelines when choosing edible glitter or dusts.
Supplies Needed:
- Assorted ‘sprinkles for cake pops’ (hearts, nonpareils, jimmies)
- Melted contrasting candy melts (for drizzle)
- Small piping bag or ziplock bag corner
- Edible luster dust or ‘edible glitter’ (optional)
Steps:
- Apply sprinkles immediately: While the coating is still wet, roll the pop gently in a bowl of sprinkles or sprinkle them over the pop.
- Drizzle coating: Once the main coating is dry, melt a small amount of contrasting color coating (white on red, pink on white). Transfer to a piping bag with a tiny snip. Drizzle back and forth over the pop.
- Use luster dust: If using luster dust, wait until the pops are fully dry. Apply dust with a small, soft food-safe brush for a shimmer finish.
- Let all decorations dry completely before handling or packaging.
- Pro-Tip: To prevent the colors from running, use ‘sugar pearls’ and large, high-quality sprinkles. For the finest drizzle, ensure the melted chocolate is thin and slightly cooled but still liquid—too hot and it will look messy. Use these ‘professional cake pop artist techniques’ for the best results.

9. Packaging and Storing Your Gift-Worthy Treats

Need ‘homemade gifts for valentine’s day sweet treats’? Pin this packaging guide!
After all your hard work creating these ‘gift-worthy’ ‘valentine’s cake pops,’ proper storage is essential for ‘keeping cake pops fresh.’ ‘Packaging protects treats’ from environmental damage and moisture. Pay close attention to the guidelines on ‘how long do valentine cake pops last’ to ensure optimal safety and taste.
Supplies Needed:
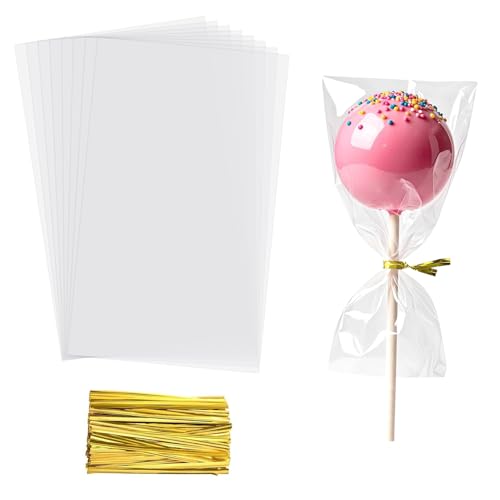
- Clear cellophane bags or cellophane wrap
- Decorative ribbon or twist ties
- ‘Gift boxes’ or presentation stand
- Air-tight container (for long-term storage)
Steps:
- Ensure drying by making sure the chocolate coating is completely solid before handling the cake pops (wait at least 1-2 hours).
- Wrap individually in small cellophane bags and tie with a festive ribbon. This prevents ‘moisture migration in cake-based products.’
- Store in refrigerator in an airtight container for up to 1-2 weeks. Place them stick-down in a tall jar or stand to protect the coating.
- Transport: If transporting, chill the pops and place them upright in a secured box, keeping them out of direct sunlight or excessive heat.
- Pro-Tip: Cake pops are best enjoyed at room temperature for maximum ‘delicate texture’ and flavor. Remove them from the fridge about 30 minutes before serving. If using ‘cream cheese frosting’, they must be refrigerated for long-term storage, in line with ‘food safety for homemade treats’.
Troubleshooting Your Cake Pops: Expert Solutions to Common Mistakes
When mastering ‘cake pop creation,’ running into problems is common. Fortunately, applying some ‘baking science behind cake pops’ can easily resolve these issues, moving you from ‘cake pop disasters’ to ‘achieving professional results.’ These ‘expert cake pop tips’ address the most frequent issues home bakers face.
Why Cake Pops Crack or Crumble
- Problem: Cake pops often crack because the interior cake ball is too cold when hitting the warm chocolate coating (thermal shock), or the cake mix was too dry initially (‘cake pops too crumbly’).
- Solution (Cracking): Always allow frozen cake balls to sit at room temperature for 10-15 minutes before dipping. The ideal internal temperature should be cool, not frozen. This stabilizes the internal structure, avoiding the extreme expansion that causes cracking.
- Solution (Crumbling): The initial cake mixture lacked sufficient binding agent. Fix crumbly cake pops by using a food processor to blend the crumbs into a finer texture, then adding a small amount of extra cream cheese frosting (1/2 teaspoon at a time) until the cake dough is firm and pliable, matching the ‘rheology of chocolate coatings’ more easily.
Lumpy or Uneven Chocolate Coating
- Problem: The ‘chocolate coating too thick’ or it was overheated, causing the candy melts to seize and become grainy or sticky. Overheating the candy melts interferes with the ‘crystallization dynamics of candy melts.’
- Solution (Thickness): Add a fat-based thinning agent (vegetable oil, coconut oil, or paramount crystals) to the melted coating, 1/4 teaspoon at a time, until the consistency is like thin paint. This provides viscosity control necessary for a ‘smooth cake pop coating solution.’
- Solution (Lumps): If the chocolate is scorched, it cannot be recovered. If it’s just lumpy due to insufficient stirring, remove it from the heat source immediately and continue stirring slowly to allow the latent heat to melt the remaining pieces, ensuring an ‘even coating.’
Cake Pops Falling Off the Stick
- Problem: The stick was inserted without an adhesive, or the cake ball itself was too heavy (due to excess frosting or size) for the stick to hold. This is a common failure point for beginners.
- Solution: Strengthen cake pop attachment by always dipping the stick tip in melted candy coating before insertion (Step 4). This hardened chocolate acts as the adhesive to secure the cake ball. If the cake pops are too heavy, reduce the size slightly (aim for 30-35 grams per pop).
Cake Pop Sweating or Bleeding Color
- Problem: Cake pops are moved too quickly from a cold fridge to a warm, humid room, causing condensation (sweating) or, in the case of red velvet, the color bleeding onto the coating. This is due to ‘moisture migration in cake-based products.’
- Solution: Prevent cake pops from melting and sweating by placing them in an airtight container in the refrigerator. When ready to serve, transfer the container to a cool counter (or even a garage) for 30 minutes before opening the container. This slow warming process prevents major temperature shock and condensation.
Key Takeaways: Your Quick Guide to Valentine Cake Pops
- The Consistency of the Cake Dough is Paramount – Achieve the right dense, non-crumbly texture by using minimal ‘cream cheese frosting’ (start with less, add more carefully) to prevent the balls from falling off the stick.
- Temperature Control Prevents Cracking – Ensure the melted ‘chocolate candy coating’ is thin (using coconut oil) and no hotter than 105°F, and always allow the chilled cake balls to warm up slightly (10-15 minutes) before dipping to avoid thermal shock.
- Always Glue the Stick – The single most important step to prevent ‘cake pops falling off sticks’ is to dip the ‘lollipop sticks’ in melted coating before insertion, securing them to the ‘creamy cake center’ before the final dip.
- Roll for a Smooth Finish – Use a cookie scoop for uniform size and firmly ‘roll cake balls’ to create a tight, smooth exterior; this is key to getting a ‘professional looking’ finished product.
- Decorate Quickly – Once dipped, you have mere seconds to ‘add sprinkles’ or other ‘customizable decorations’ before the coating sets, so have all your supplies prepped and ready for immediate application.
- Store Correctly to Maintain Texture – For long-term storage, ‘store cake pops’ in the refrigerator, but let them warm to room temperature for 30 minutes before serving to experience the optimal ‘moist cake’ texture.
- Troubleshoot Like a Pro – If the coating is too thick, thin it with oil; if the cake pops crack, they were too cold. These ‘expert cake pop tips’ will make your ‘valentine cake pops’ foolproof.
FAQs About Valentines Baking Cake Pops
Is it hard to make homemade cake pops for Valentine’s Day?
Making homemade cake pops is easier than you think, especially when following a detailed, step-by-step recipe that addresses common issues like cracking or crumbling. The process, which involves baking, crumbling, mixing, chilling, dipping, and decorating, requires patience, but the individual steps are quite simple. Many recipes, including this one, utilize ‘box cake mix’ and canned frosting, simplifying the process considerably. By managing the temperature of the chocolate coating and ensuring the cake balls are properly chilled, you can achieve ‘bakery quality cake pops at home.’
Why do cake pops crack when dipping them in chocolate?
Cake pops crack primarily due to thermal shock, which occurs when a very cold cake ball is submerged into warm melted chocolate. The warm chocolate coating immediately sets on the outside, but as the inner cake ball warms up, it expands, causing the rigid outer shell to fracture. To prevent this, ensure your cake balls are only firm—not frozen rock-hard—and allow them to sit at room temperature for 10-15 minutes before beginning the dipping process, ensuring optimal ‘temperature control for optimal dipping.’
What frosting should I use for cake pops, and how much?
The best frosting to use is a thick, firm variety like cream cheese or buttercream, as it effectively binds the ‘cake crumbs’ without adding excessive moisture. The key is moderation: start with only 2–3 tablespoons of frosting per standard-sized cake mix. Too much frosting results in a greasy, overly sticky dough that is difficult to roll and more likely to fall off the stick. Achieving the right consistency is crucial for a ‘smooth cake pop coating solution.’
How long do Valentine cake pops last, and how should they be stored?
When properly stored in an airtight container in the refrigerator, ‘valentine cake pops’ can last for up to two weeks. If you use a non-refrigerated coating (like candy melts) and a butter-based frosting, they can last up to 4 days at cool room temperature. However, if using cream cheese frosting, refrigeration is mandatory for ‘food safety for homemade treats.’ Always bring them to room temperature for 30 minutes before serving to ensure the best flavor and ‘delicate texture.’
What is the best way to get a smooth, non-lumpy coating?
Achieving a smooth coating depends on the correct temperature and viscosity of your chocolate coating. You must use quality ‘chocolate candy melts’ and thin them with a small amount of neutral fat (like coconut oil or paramount crystals) until the coating drips easily off a spoon. Never overheat the melts (keep below 105°F) and use the tapping technique (Step 6) to remove all excess coating and prevent ‘uneven coating.’
Can I use regular chocolate bars instead of candy melts for dipping?
You can use regular chocolate (such as high-quality baking bars), but it must be properly tempered to achieve a hard, shiny, non-sticky coating. Candy melts are often preferred because they contain stabilizing fats that eliminate the need for difficult tempering, making the process much simpler and more reliable for beginners. If using regular chocolate, ensure you follow a guide on ‘advanced tempering methods for chocolate’ to avoid a dull, soft finish.
What is the difference between cake pops and cake balls?
The primary difference is the stick: ‘cake pops’ are served on a stick (lollipop sticks), while ‘cake balls’ are served without them. Both treats are made from the same mixture of cake crumbs and frosting. The term ‘cake ball valentines’ is often used interchangeably with cake pops, especially when discussing the undecorated sphere stage. This content focuses on ‘sweet bites’ that are easily handled and displayed for a party or gift.
How do I make heart shaped cake pops without a mold?
You can create heart-shaped cake pops without a mold by rolling the cake dough into balls first, then immediately pinching and shaping them. Alternatively, the superior method involves pressing the prepared dough into a chilled, thin layer (about 1/2 inch thick) and using a ‘cookie cutters heart’ shape to cut out clean, uniform hearts (as detailed in Step 7). This second method provides crisper, more defined edges ideal for ‘festive cake pops.’
How should I display Valentine’s cake pops for a party?
For a ‘valentine’s party food’ display, the pops should be showcased upright to show off their ‘customizable decorations.’ Use a large styrofoam block covered in wrapping paper, a decorative vase filled with sugar or rice to hold the sticks, or a tiered cake pop stand. You can also create a ‘cake pop bouquet’ by wrapping the individual pops in cellophane and arranging them like flowers in a pretty container for gifting.
Can I use store bought cake instead of baking a box cake for the recipe?
Yes, you can absolutely use ‘store bought cake for cake pops’ to speed up the process, as the goal is simply to acquire the cake crumbs. Ensure the cake is not excessively dry or crumbly. Simply strip off any crust or hard edges, weigh out the equivalent amount of cake base the recipe requires (usually about 2 cups of compacted crumbs), and proceed directly to the mixing and ‘form balls’ steps (Step 2).
Final Thoughts on Valentines Baking Cake Pops
Making ‘valentine’s cake pops’ may seem intimidating, but by breaking down the process into nine manageable, expert-guided steps, you can confidently create these ‘decadent treat’ spheres. Remember, the true secret to success lies not in the baking itself, but in two crucial techniques: controlling the amount of frosting to achieve a firm cake dough, and meticulously managing the temperature of both the cake ball and the chocolate coating to prevent those frustrating cracks. Our ‘tested valentine’s cake pops’ method provides all the ‘expert cake pop tips’ necessary to transition from simply baking a box cake to mastering ‘bakery quality cake pops at home.’ These ‘sweet cake pops’ are the perfect homemade gesture to express love this July 2026.
Now that you have the complete guide for ‘easy homemade cake pops,’ which decorating idea are you planning to try first—the elegant drizzle or the festive heart shape? Let us know in the comments!
Last update on 2026-07-12 at 09:50 / Affiliate links / Images from Amazon Product Advertising API
