As an Amazon Associate BakingBakewareSets.com earns from qualifying purchases.
Make-Ahead Summer Side Dishes: 11 Wilt-Proof 2026 Ideas
Are you tired of babysitting a hot stove while your guests enjoy the sunshine outside? The stress of last-minute prep and serving soggy, wilted greens can easily ruin your weekend gathering. Discovering reliable **Make-Ahead Summer Side Dishes** is the ultimate secret to taking back your afternoon and enjoying your own party.
**Make-ahead summer side dishes are cold or room-temperature accompaniments specifically designed to be prepared 24 to 48 hours before an outdoor event.** These highly stable recipes, like vinegar-based slaws and marinated pasta salads, actually improve in flavor overnight while resisting sogginess during hot weather serving.
Drawing from comprehensive analysis of FDA safe storage guidelines and proven culinary science, this guide eliminates common temperature abuse risks. You will discover exactly how to balance pH levels and manage moisture for flawless outdoor dining. Master these chef-tested, fail-proof techniques to guarantee crisp, flavorful results and experience truly stress-free hosting.
## How To Prep Make-Ahead Summer Side Dishes That Defy the Heat and Save You Time
**Preparing advance culinary solutions requires understanding basic food science to prevent your hard work from degrading in the hot sun.** If you have ever struggled with soggy pasta or wilted lettuce, you need reliable **summer cookout sides** built for endurance. By focusing on wilt-proof cooking techniques, you can achieve truly **stress-free hosting** for your next major gathering. Using proper airtight containers and mastering refrigerator storage allows you to lock in crisp textures for 24 to 48 hours without losing quality.
Based on FDA standards and **safe storage guidelines**, these **easy make ahead sides** utilize natural pH balance and critical moisture control. Chef-tested methods effectively prevent both enzymatic oxidation and rapid bacterial growth in high-moisture dishes. You can comfortably **prepare ahead summer recipes** that defy the heat and deliver the **best summer meals** without the dreaded day-of panic. Properly matching your seasonal fare with appropriate containers ensures complete texture preservation.
## Make-Ahead Summer Side Dishes: 11 Wilt-Proof 2026 Ideas
**The secret to flawless outdoor entertaining lies in selecting side dishes that prioritize structural integrity and flavor marination over time.** When you need easy summer sides that withstand the heat, you must choose recipes featuring durable, crispy, and refreshing ingredients. These 11 curated **bbq side dishes** solve the common dilemma of wilted greens by utilizing acidulation and emulsification to guarantee incredible longevity.
By relying on properly **refrigerated side dishes**, you actively allow complex flavors to develop overnight through natural osmosis. Whether you need **make ahead salad recipes** or hearty hot dishes, these actionable ideas provide the exact storage mechanics required for large crowd events. Expect detailed ingredient lists, precise day-before preparation steps, and the essential food science needed to execute **make ahead summer side dishes for a large crowd** with absolute confidence.
### 1. Assemble and Marinate Zesty Italian Pasta Salad
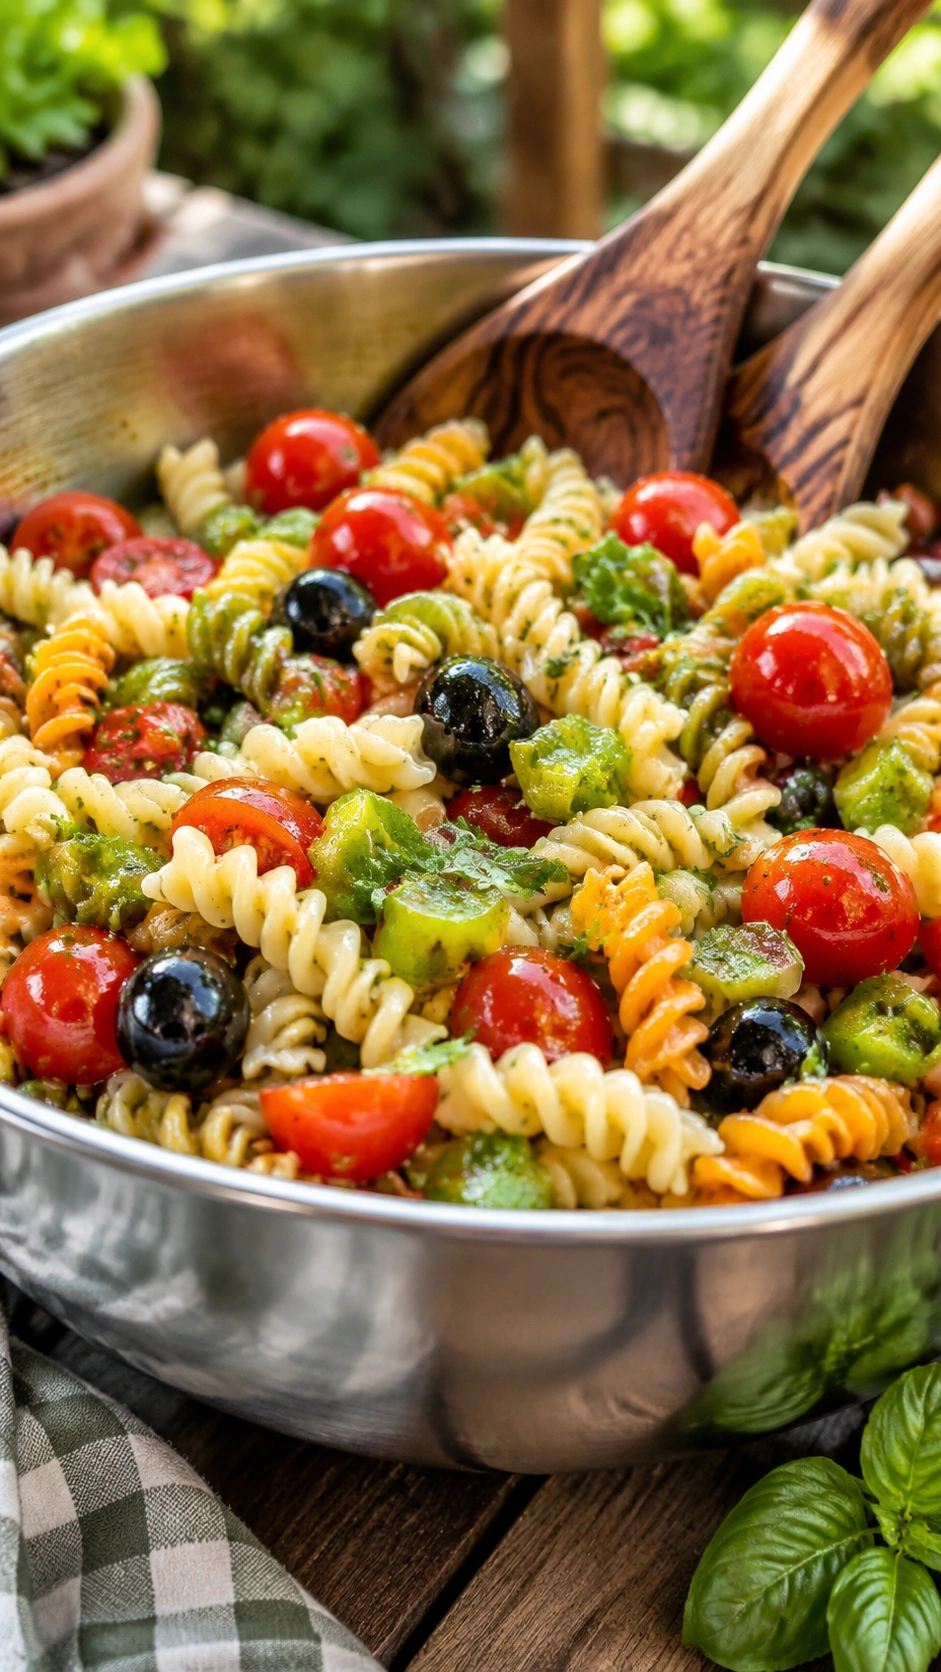
Pin this fail-proof pasta salad recipe to your Summer BBQ Ideas board so you never stress over soggy noodles again!
**To prepare a zesty Italian pasta salad in advance, slightly overcook the noodles and dress them while warm to maximize flavor absorption and prevent chalky textures.** This method turns a basic carbohydrate into a robust, durable, and highly portable side dish.
A successful **gluten free make ahead summer pasta salad** requires leveraging starch retrogradation. When you toss warm pasta with an acidic **vinegar + dressing**, the noodles act like sponges. This draws the oil and vinegar directly into the center of the pasta, establishing a highly flavorful profile that won’t dry out overnight. It remains one of the most reliable **pasta salad recipes** for busy hosts.
#### Ingredients
– 1 lb rotini pasta (gluten-free or regular)
– 1 cup cherry tomatoes, halved
– 1/2 cup black olives, sliced
– 1 medium green bell pepper, diced
– 1/2 cup red onion, finely chopped
– 1/4 cup fresh parsley, chopped
– 1 cup zesty Italian vinaigrette dressing
– Large insulated serving bowl with an airtight lid to keep fresh outdoors
#### Instructions
1. **Boil** the pasta in generously salted water until just past al dente (about 1 minute longer than package directions).
2. **Drain** and immediately toss the warm pasta with half of the Italian vinaigrette so the warm starches absorb the flavors.
3. **Cool** the mixture completely to room temperature to avoid sogginess in your fresh vegetables.
4. **Chop** all vegetables and fold them gently into the cooled pasta.
5. **Refrigerate** in an airtight container for up to 48 hours.
6. **Toss** with the remaining vinaigrette right before serving to refresh the dish entirely.
> **What most guides miss:** Dressing warm pasta relies heavily on capillary action, drawing the flavorful liquid into the noodle itself. However, you must wait until the mixture cools completely before adding your fresh vegetables. Adding crisp bell peppers to hot pasta causes severe temperature abuse and instantly ruins their crisp texture!

### 2. Steam and Chill Creamy Dill Potato Salad
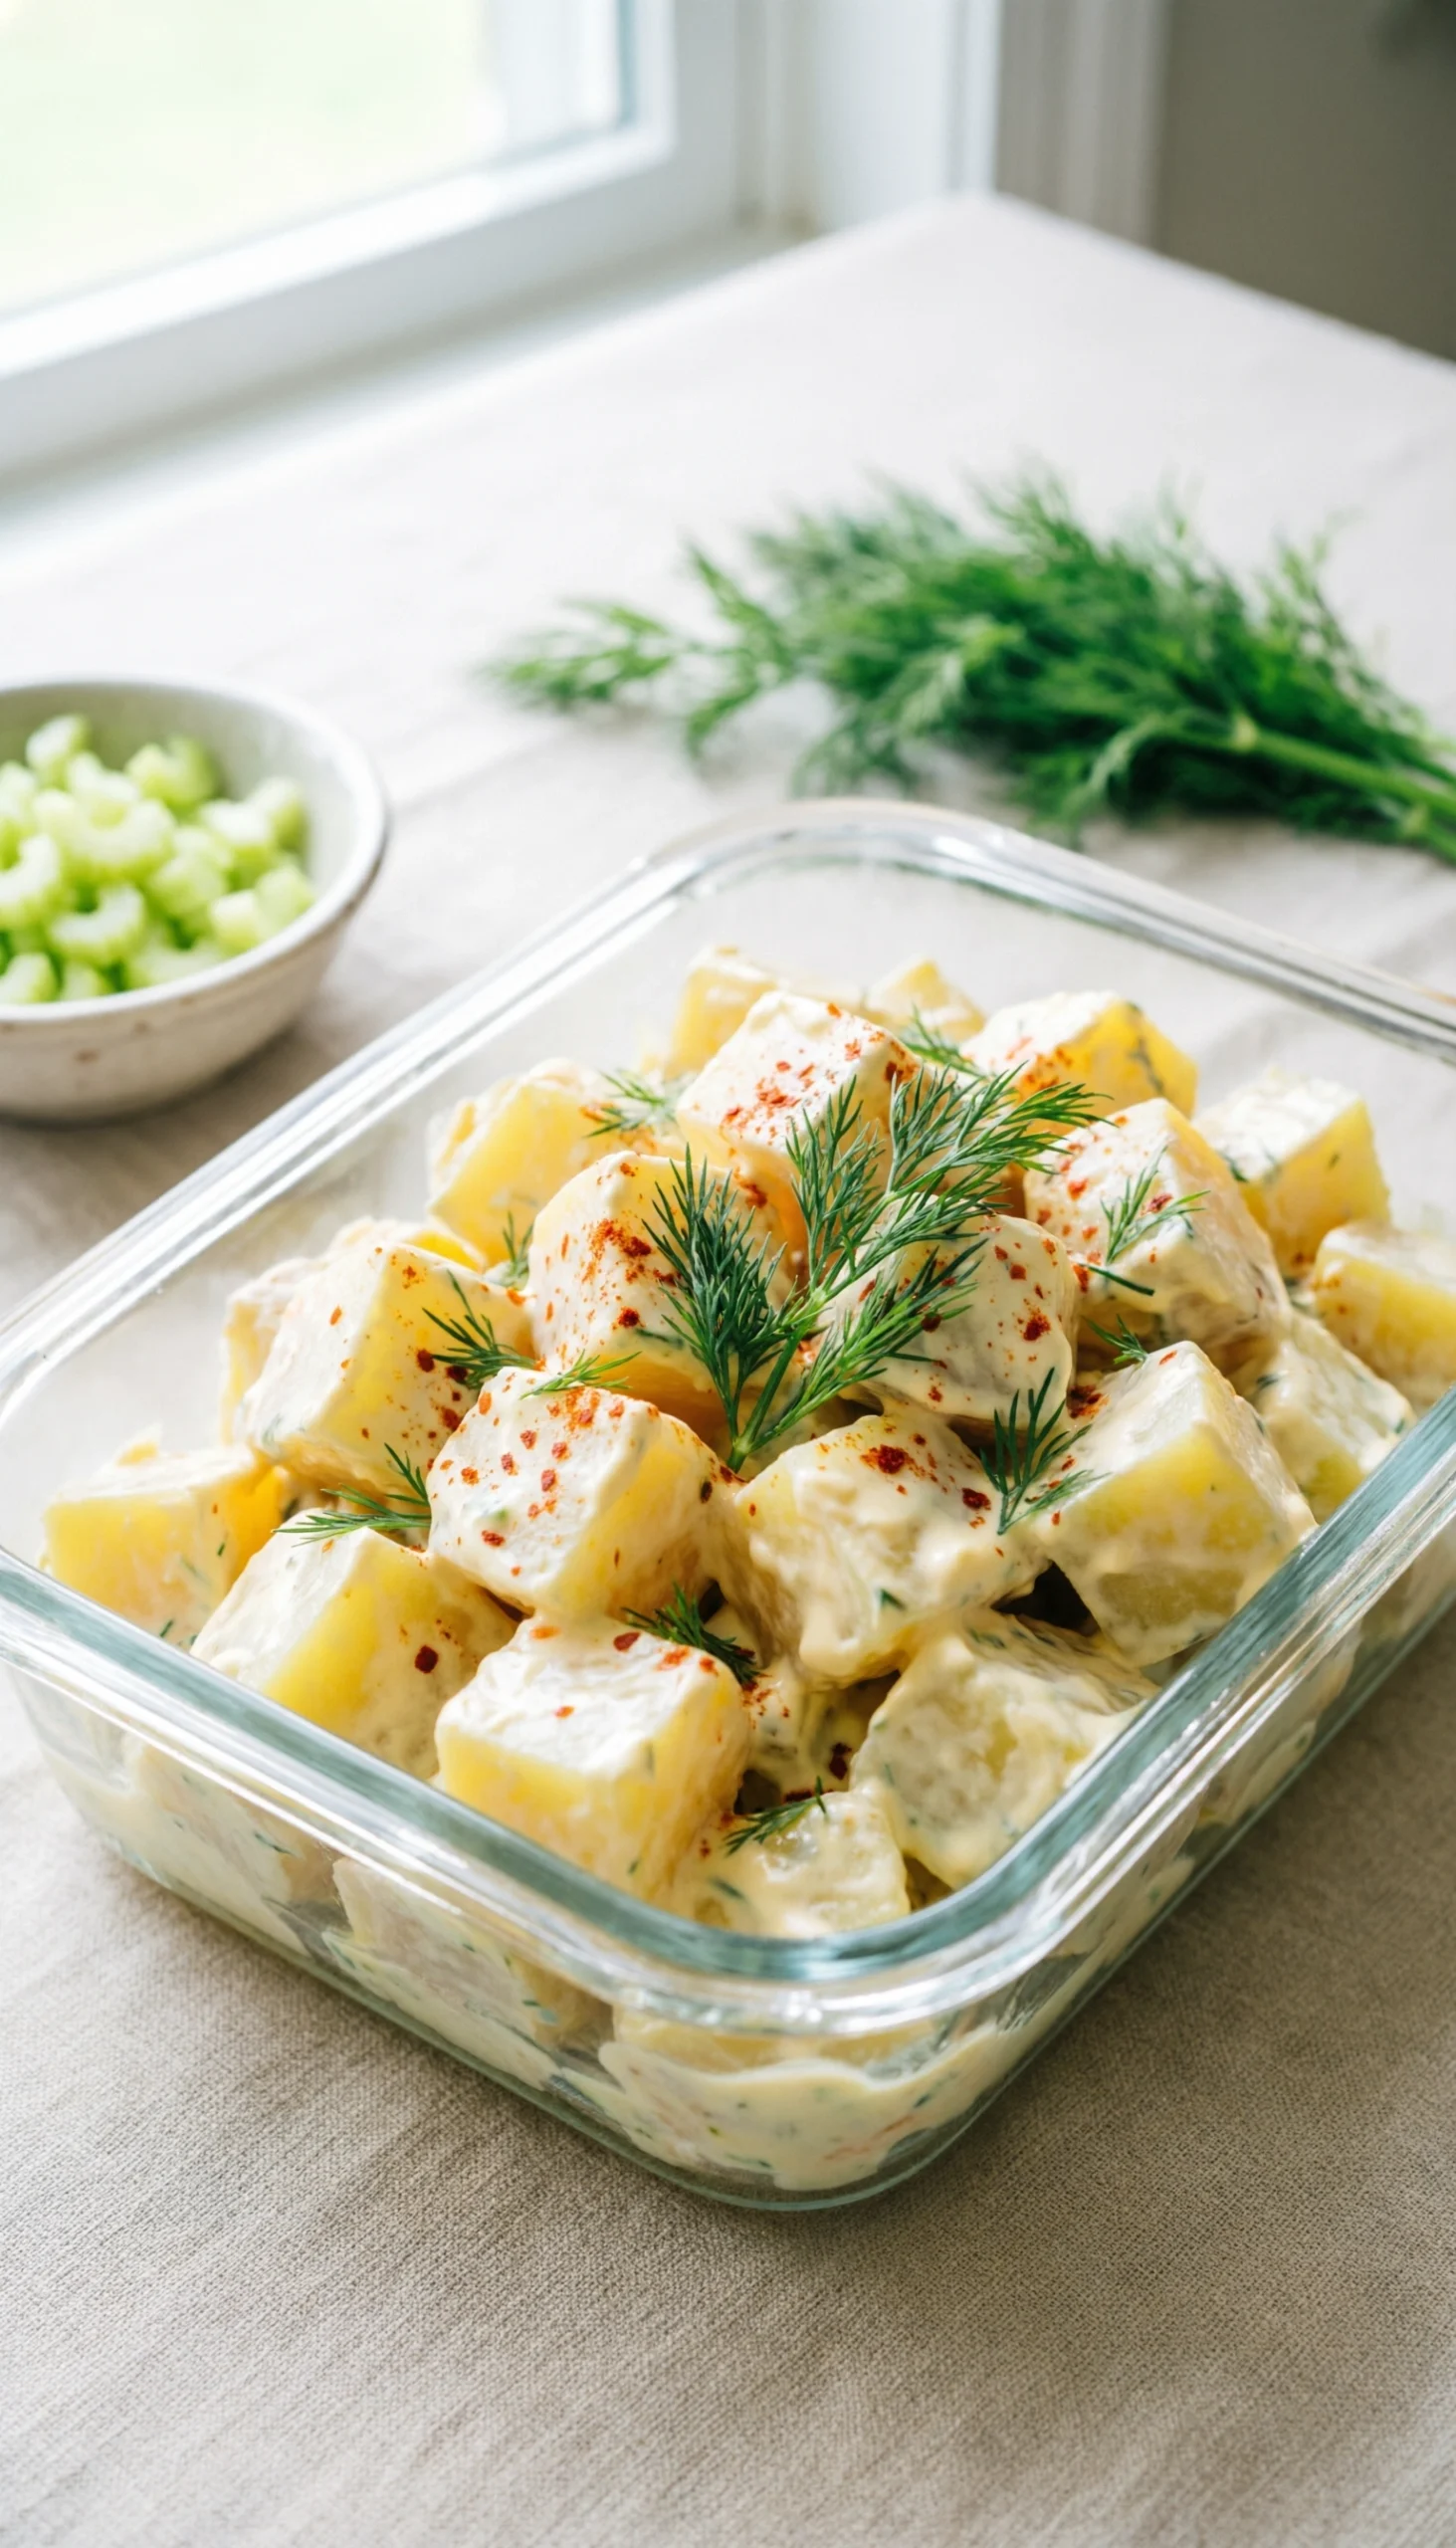
Save this creamy, make-ahead potato salad to your Cookout Recipes board for perfectly chilled results every time!
**For a perfectly durable creamy dill potato salad, steam your potatoes instead of boiling them to prevent waterlogging and maintain structural integrity.** This comforting dish pairs perfectly with main course grilling items like burgers and ribs.
Managing a **mayonnaise + refrigeration** side dish requires strict attention to cross-contamination prevention and safe temperatures. Keeping the dish below 40°F is critical for outdoor dining safety. Utilizing a proper pH balance in dressings by adding apple cider vinegar naturally inhibits microbial growth. These essential **potato salad tips** guarantee your **classic summer side dishes** remain perfectly safe and delicious for hours.
#### Ingredients
– 3 lbs Yukon Gold potatoes, peeled and cubed
– 1 cup high-quality mayonnaise
– 2 tablespoons apple cider vinegar
– 1 tablespoon Dijon mustard
– 1/2 cup celery, finely diced
– 1/4 cup fresh dill, chopped
– 4 hard-boiled eggs, chopped
– Large leak-proof glass storage containers for optimal refrigerator storage
#### Instructions
1. **Steam** the cubed potatoes in a steamer basket over boiling water for 12-15 minutes until tender (steaming prevents waterlogging significantly better than boiling).
2. **Whisk** the mayonnaise, apple cider vinegar, and Dijon mustard together in a large bowl to create a highly stable dressing.
3. **Cool** the steamed potatoes on a baking sheet until they reach room temperature.
4. **Fold** the cooled potatoes, celery, dill, and eggs gently into the dressing mixture.
5. **Refrigerate** immediately in a glass airtight container for at least 12 hours to let the flavors meld deeply.
6. **Transport** in a high-quality cooler with ice packs to easily maintain safe storage guidelines.
> **Expert insight:** The true secret to a safe outdoor potato salad is acidulation. Adding apple cider vinegar to your mayonnaise doesn’t just taste great; it slightly lowers the overall pH of the dressing. This creates an environment that is significantly less hospitable to rapid bacterial growth during your sunny picnic!

### 3. Roast and Store Grilled Corn and Cotija Salad
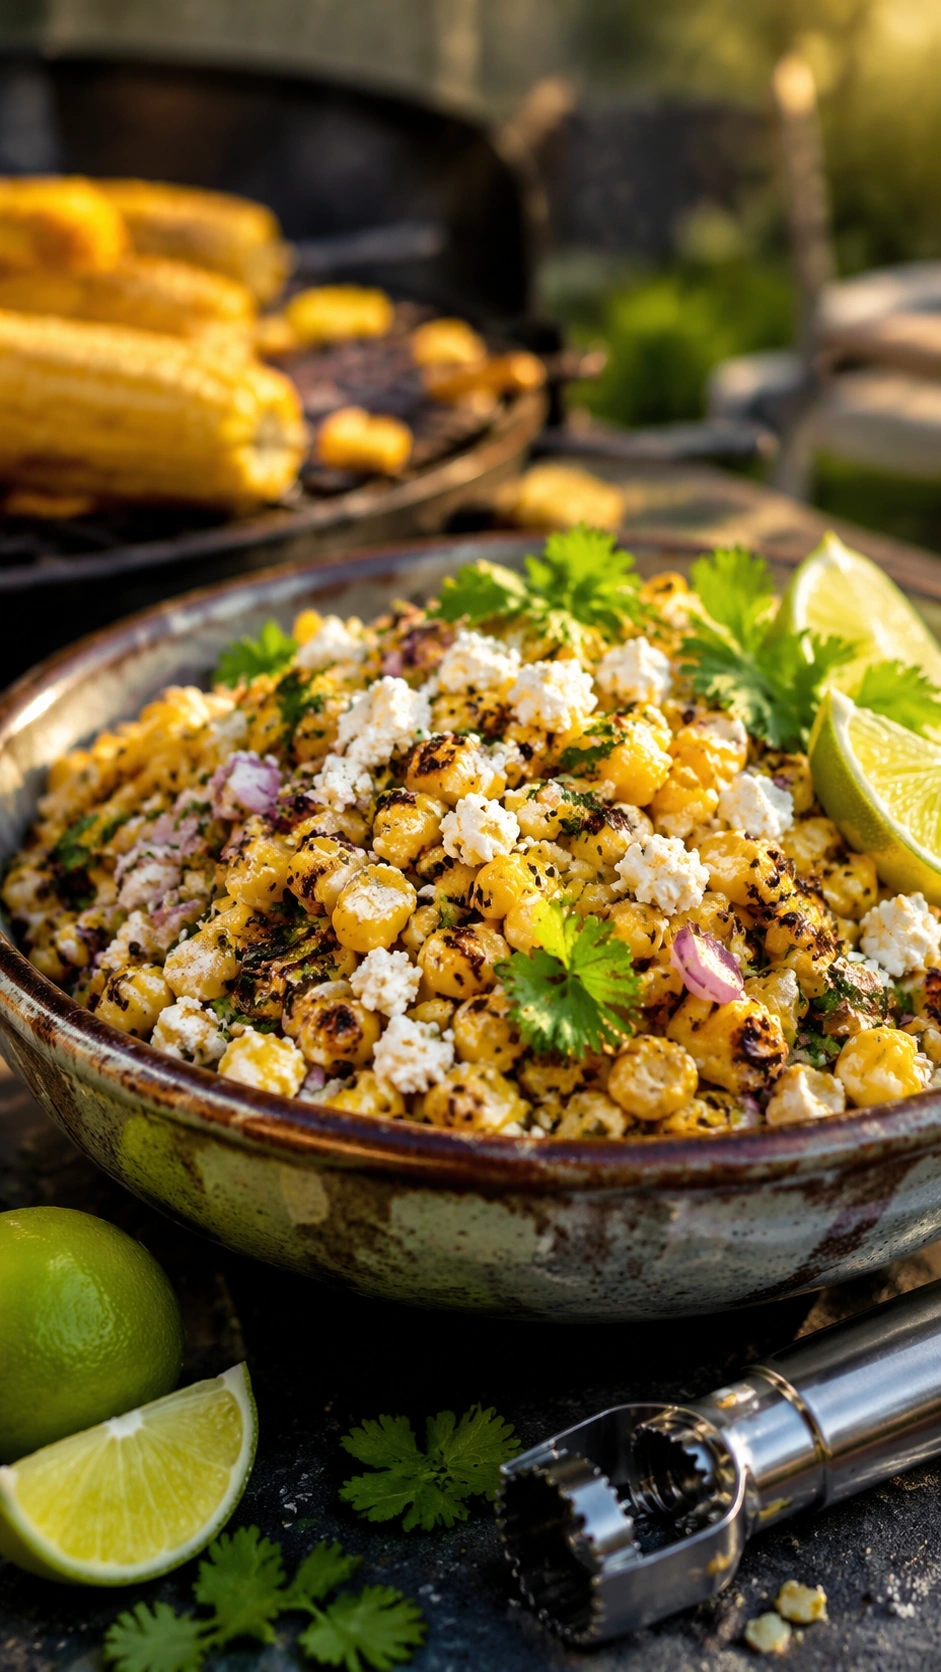
Give your guests the ultimate summer flavor! Pin this roasted corn salad for your next sunny weekend BBQ.
**To create a vibrant grilled corn and cotija salad, char fresh sweet corn directly on the grill before removing the kernels to achieve a deep, roasted flavor.** This beautiful, kid-friendly option avoids the heaviness of traditional mayonnaise-based sides.
**Corn salad** beautifully highlights seasonal fare and heavily requires a citrus base like **corn + lime** to maintain its refreshing bite. Charring the corn initiates a gorgeous maillard reaction, and those deep roasted notes intensify wonderfully after 24 hours of marination. Because corn naturally resists wilting, this acts as one of the most reliable **make ahead vegetable sides** available.
#### Ingredients
– 6 ears fresh sweet corn, husked
– 1/2 cup Cotija cheese, crumbled (or feta)
– 1/3 cup red onion, finely diced
– 1/4 cup fresh cilantro, chopped
– 1 jalapeño, seeded and minced
– 3 tablespoons fresh lime juice
– 2 tablespoons olive oil
– A heavy-duty stainless steel corn stripper to easily remove kernels
#### Instructions
1. **Roast** the whole ears of corn directly on a hot grill for 10-12 minutes, turning occasionally until lightly charred on all sides.
2. **Cool** the corn completely to room temperature.
3. **Slice** the kernels off the cob using a stainless steel corn stripper over a large mixing bowl.
4. **Toss** the charred corn with the red onion, jalapeño, lime juice, and olive oil to deeply emulsify the dressing.
5. **Refrigerate** the mixture in an airtight container for up to 48 hours to let the corn + lime flavors intensify.
6. **Garnish** with the Cotija cheese and fresh cilantro right before serving to maintain their delicate textures.
> **An often-overlooked strategy:** Leaving the Cotija cheese and fresh cilantro out of the container until serving day is absolutely crucial. This prevents the delicate cheese from turning mushy and stops the fresh herbs from undergoing rapid enzymatic browning while sitting in the acidic lime juice.

### 4. Slice and Soak Vinaigrette Coleslaw (No-Mayo)
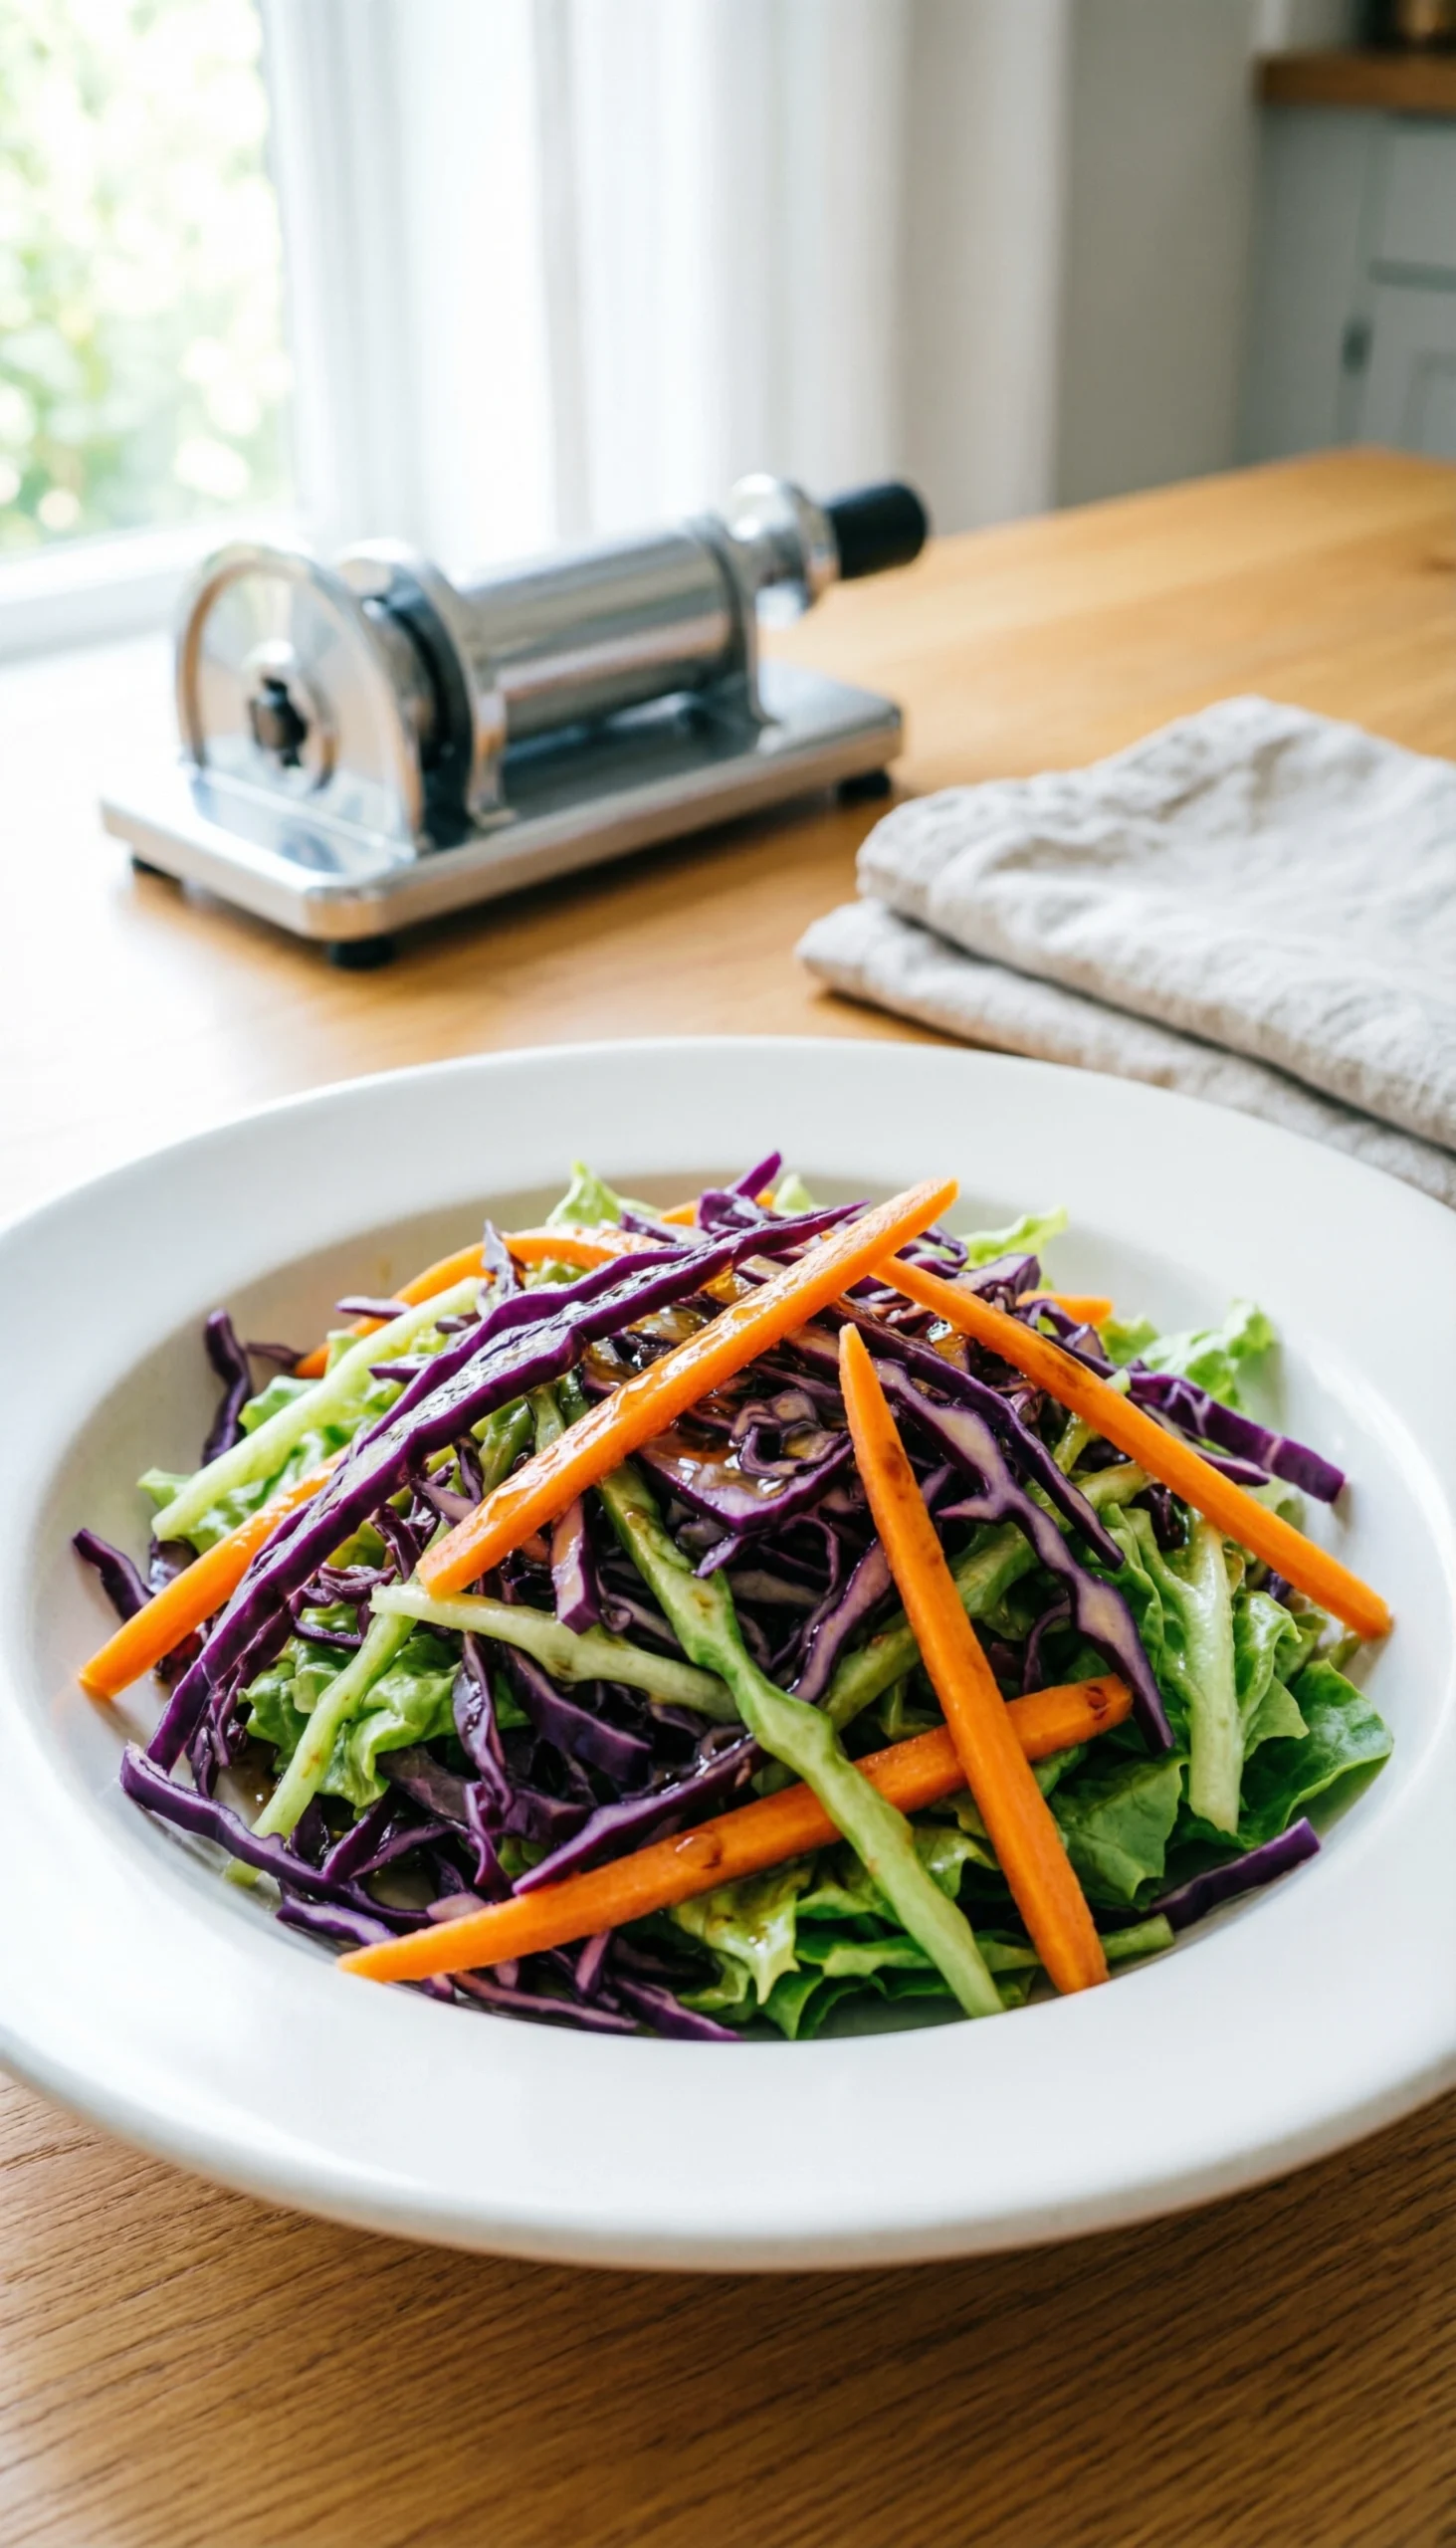
Don’t let mayo ruin your picnic! Save this heat-safe, perfectly crunchy vinaigrette coleslaw hack for your next party.
**A no-mayo vinaigrette coleslaw thrives on prolonged marination because dense cabbage cell walls easily withstand acidic dressings without losing their ultimate crunch.** This provides the ultimate stress-free hosting solution when you need a side dish to sit outdoors safely.
**Coleslaw** serves as a highly heat-resistant side when executing a creamy vs vinaigrette comparison. Leafy greens turn to absolute mush in vinegar overnight, but the cellular breakdown of tough brassicas like cabbage happens incredibly slowly. By utilizing a highly stable dressing and relying on long **marination + overnight** storage, you get one of the best **no-cook summer side dishes** for vegan-friendly guests. Wondering **how long does homemade coleslaw last in the fridge**? This version easily holds up for four days!
#### Ingredients
– 1/2 head green cabbage, finely shredded
– 1/2 head red cabbage, finely shredded
– 2 large carrots, julienned
– 1/3 cup apple cider vinegar
– 1/4 cup olive oil
– 2 tablespoons honey (or maple syrup for vegan-friendly)
– 1 teaspoon celery seed
– A high-quality adjustable kitchen mandoline slicer for uniform shredding
#### Instructions
1. **Shred** the cabbages and carrots using a mandoline slicer to ensure uniform thickness, which is critical for even flavor absorption.
2. **Whisk** the apple cider vinegar, olive oil, honey, celery seed, salt, and pepper in a small bowl until completely emulsified.
3. **Toss** the shredded vegetables with the vinaigrette in a large mixing bowl, ensuring every single strand is coated.
4. **Pack** the slaw tightly into an airtight container, pressing down slightly to submerge the cabbage in the liquid.
5. **Refrigerate** for at least 24 hours (and up to 4 days) to allow the cabbage to soften slightly while retaining its ultimate crunch.
6. **Drain** excess liquid quickly before moving to a serving bowl for your outdoor cookout.
> **What most guides miss:** To avoid sogginess completely, never salt your raw cabbage before adding the oil and vinegar dressing. Pre-salting draws out entirely too much moisture via cellular osmosis, leaving you with a watery bowl. The oil in the vinaigrette acts as a vital protective barrier around the cell walls!

### 5. Chop and Prep Greek Cucumber Salad
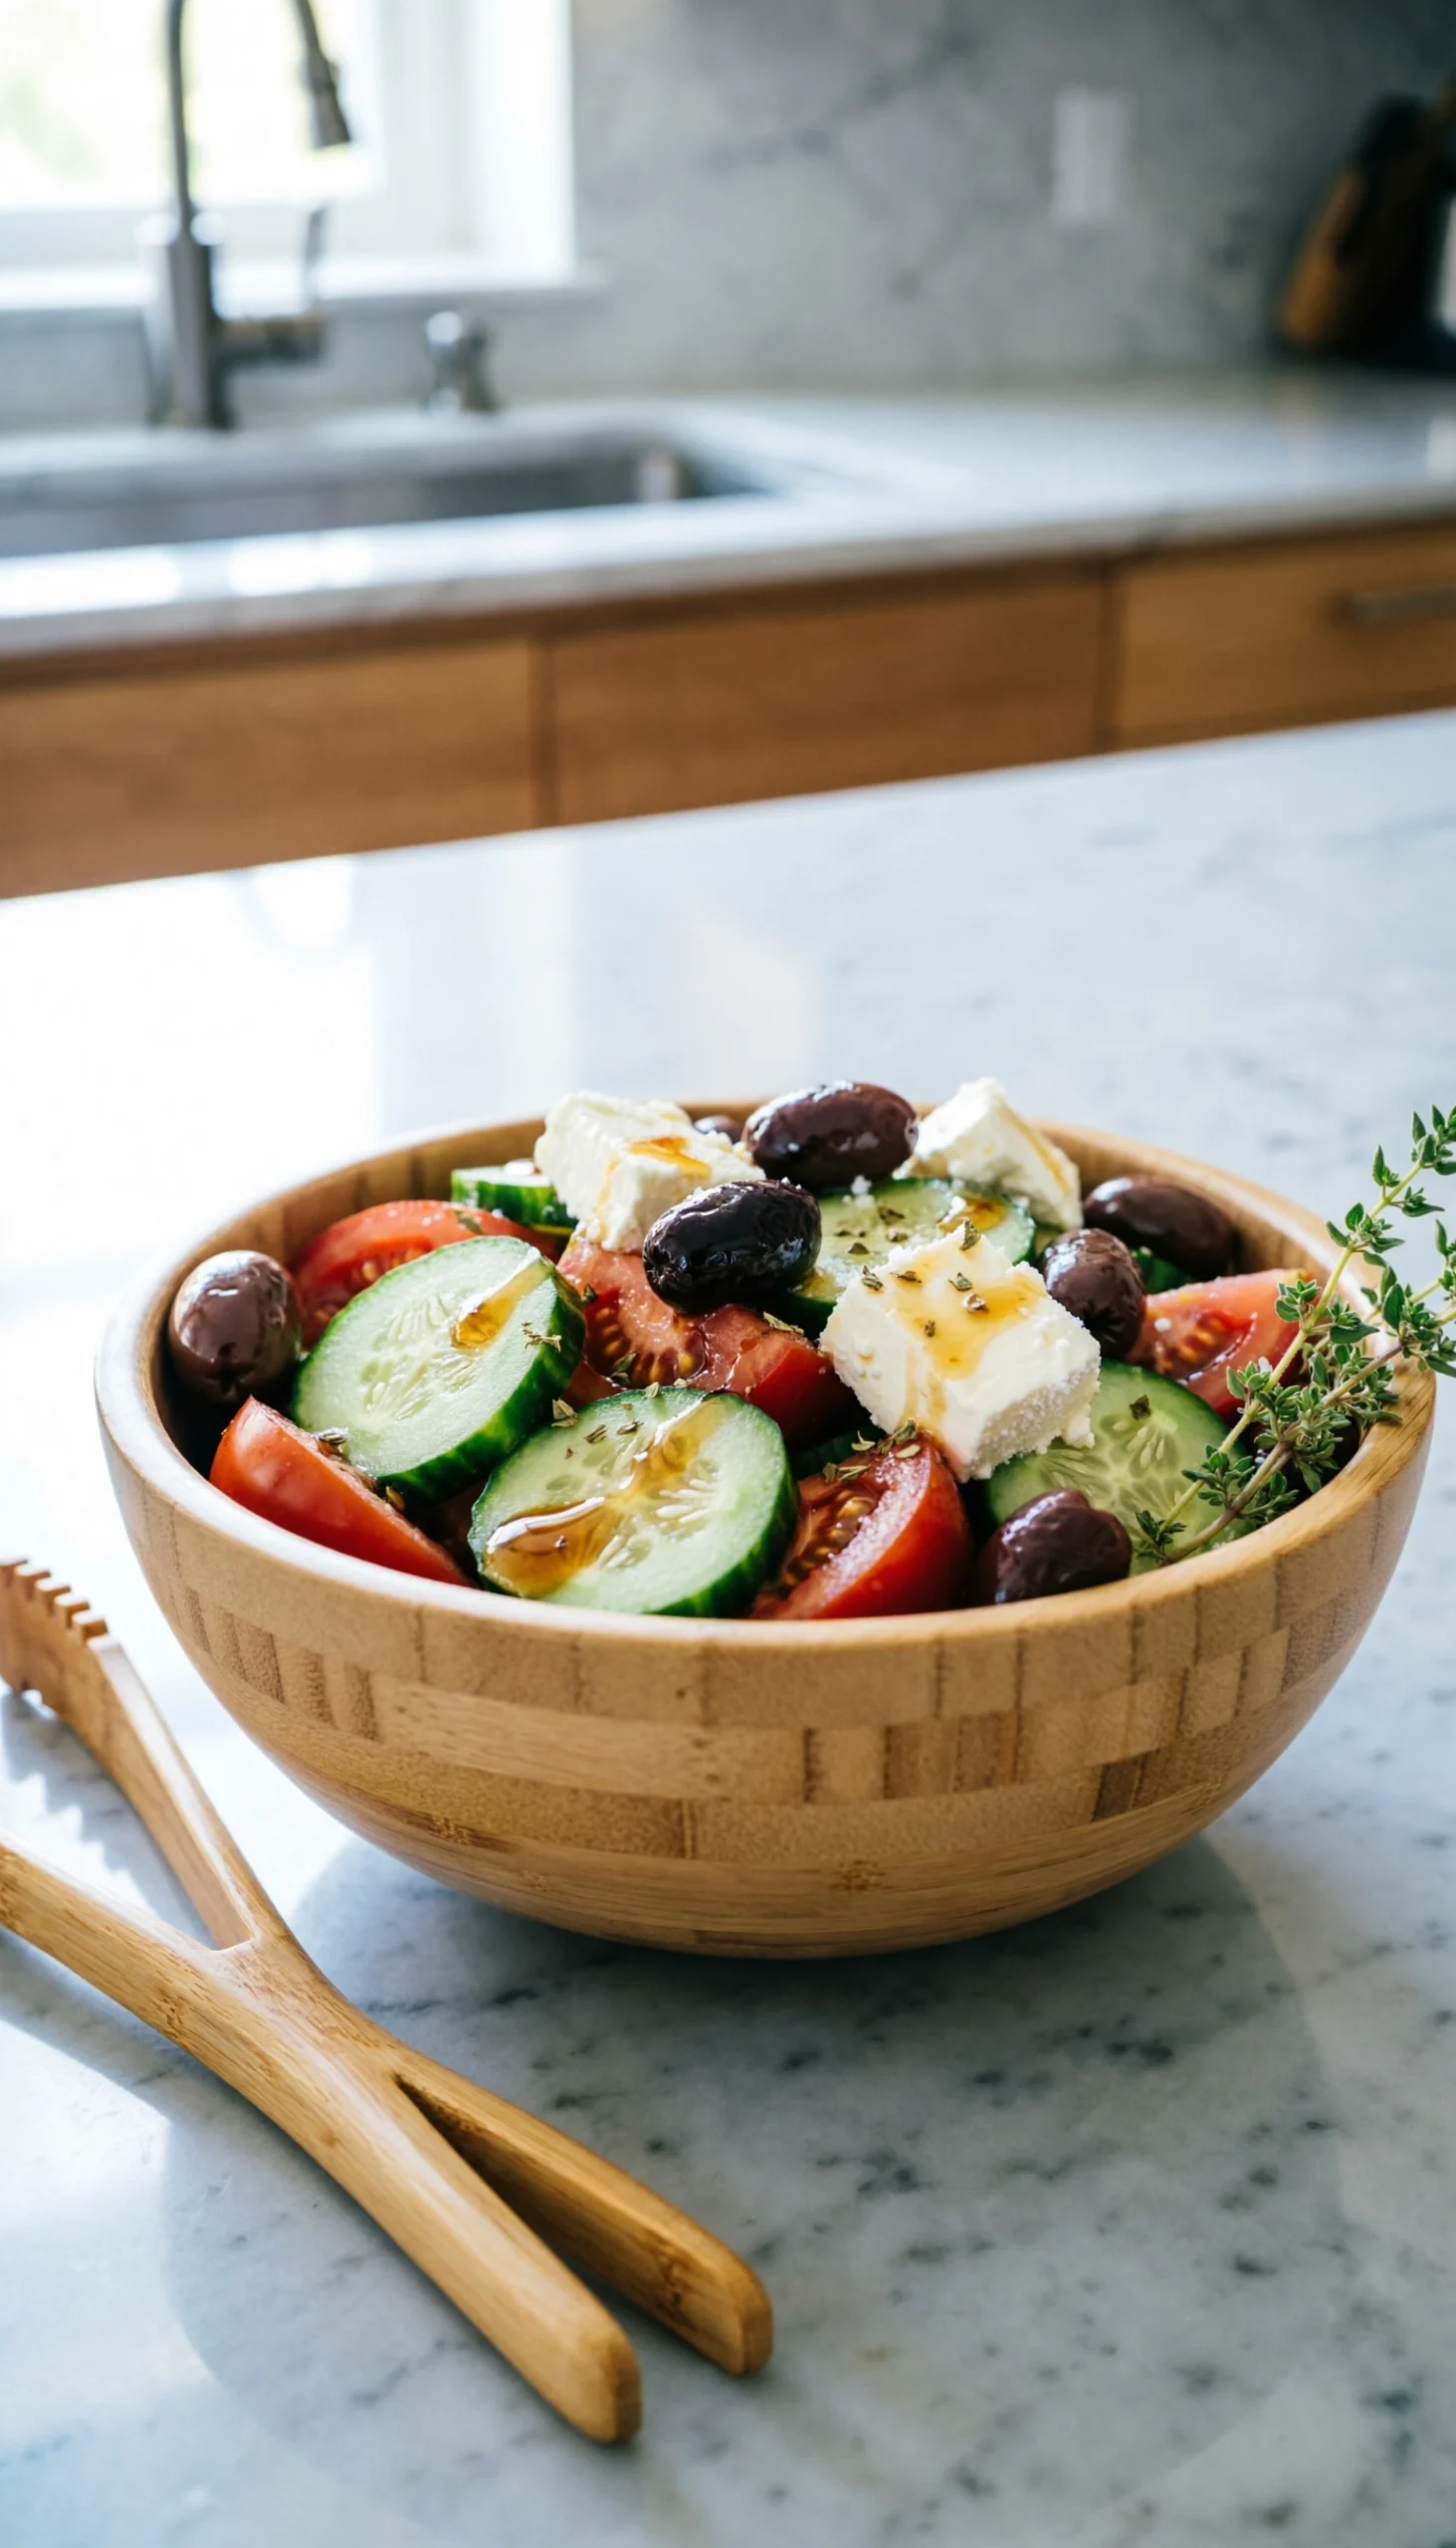
Cucumbers always get mushy? Pin this secret technique for the crunchiest make-ahead Greek salad ever!
**To prevent a soggy Greek cucumber salad, purge the excess moisture from the cucumbers using salt before adding your dressing.** This chef-tested technique guarantees a wilt-proof outcome that retains its snap for 48 hours.
A refreshing **cucumber salad** paired with feta and olives creates a highly flavorful, low-carb, and low calorie option perfect to balance heavy barbecue mains. Understanding exactly **how to prevent soggy cucumber salad** comes down to controlling osmosis in food. This **cucumber + onion** combination easily ranks among the top **healthy make ahead sides** when prepped correctly.
#### Ingredients
– 2 large English cucumbers, sliced into half-moons
– 1 pint cherry tomatoes, halved
– 1/2 cup red onion, thinly sliced
– 1/2 cup Kalamata olives, pitted
– 6 oz block feta cheese, cubed (not crumbled)
– 1/3 cup olive oil
– 2 tablespoons red wine vinegar
– 1 teaspoon dried oregano
– A gorgeous large bamboo salad bowl for elegant outdoor serving
#### Instructions
1. **Chop** the cucumbers and place them in a colander in the sink. Toss with 1 teaspoon of kosher salt and let them sit for 30 minutes to purge excess water.
2. **Pat** the cucumbers completely dry with a clean paper towel to ensure the dressing sticks properly.
3. **Whisk** the olive oil, red wine vinegar, and dried oregano together in the bottom of your bamboo salad bowl.
4. **Toss** the dried cucumbers, cherry tomatoes, red onion, and olives thoroughly in the dressing.
5. **Refrigerate** the mixed vegetables in a sealed container for up to 2 days.
6. **Assemble** the final dish by gently folding in the feta cheese cubes right before serving so they don’t dissolve.
> **Expert insight:** Utilizing osmosis in food by pre-salting your cucumbers aggressively removes the excess water that typically dilutes your dressing and causes rapid sogginess. Always buy block feta and cube it yourself; pre-crumbled feta contains harsh anti-caking agents that ruin the overall texture when sitting in an acidic dressing!

### 6. Whisk and Chill Classic Three Bean Salad
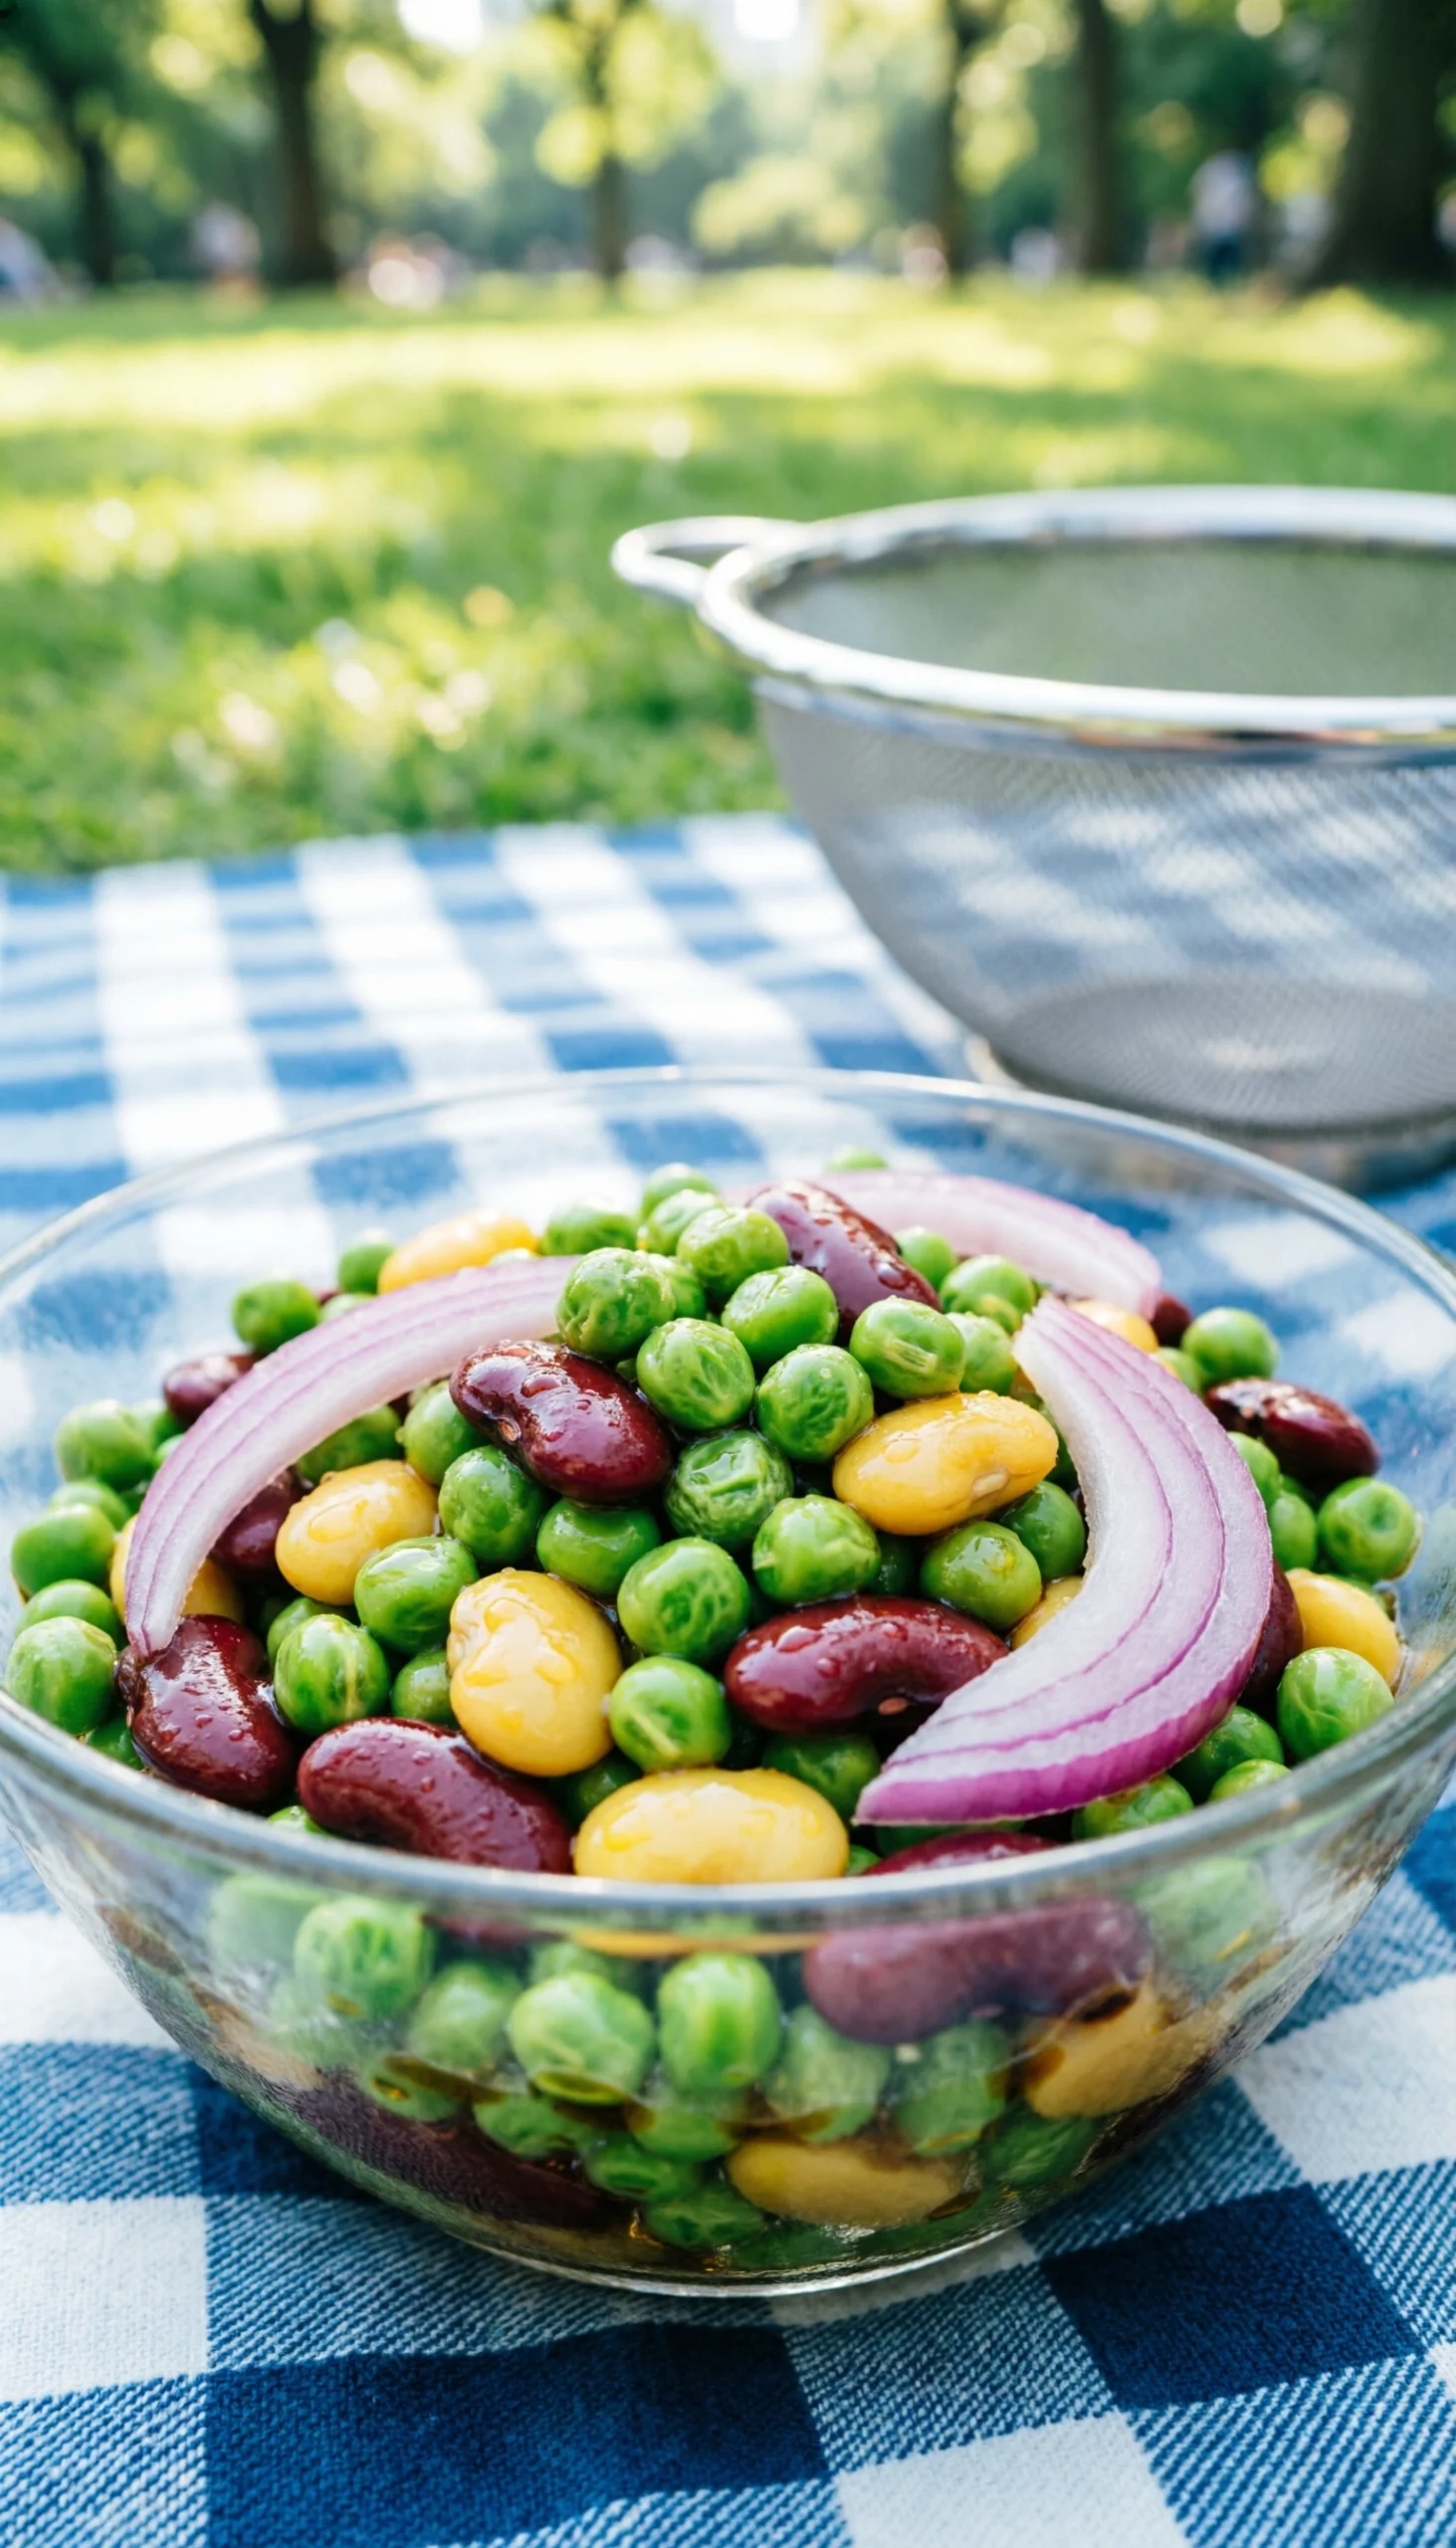
Need a budget-friendly side that feeds an army? Pin this 3-day stable Three Bean Salad for your next massive BBQ!
**A classic three bean salad requires 48 hours of refrigeration because the tough skins of the legumes need extended time to absorb the acidic vinaigrette.** This is the undisputed king of transport-friendly, high-volume outdoor cooking.
A well-crafted **three bean salad** provides excellent **beans + protein** and remains highly budget-friendly, easily feeding a large crowd without requiring any temperature babysitting. Finding **cheap summer side dishes for a potluck** often means sacrificing quality, but this original recipe proves otherwise. The acidic dressing physically toughens the exterior of the legumes slightly, guaranteeing they remain crispy and intact.
#### Ingredients
– 1 can (15 oz) green beans, thoroughly rinsed
– 1 can (15 oz) yellow wax beans, thoroughly rinsed
– 1 can (15 oz) dark red kidney beans, thoroughly rinsed
– 1/2 cup red onion, very thinly sliced
– 1/3 cup apple cider vinegar
– 1/4 cup neutral oil (like avocado or canola)
– 3 tablespoons granulated sugar
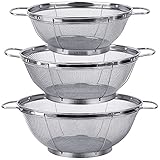
– A high-quality stainless steel mesh colander set to properly wash canned vegetables
#### Instructions
1. **Drain** and aggressively rinse all canned beans using a fine mesh colander to remove the starchy, metallic-tasting canning liquid.
2. **Whisk** the apple cider vinegar, oil, sugar, salt, and pepper in a large bowl until the sugar is completely dissolved.
3. **Toss** the rinsed beans and sliced red onions directly into the dressing.
4. **Marinate** by transferring the mixture to an airtight container and refrigerating.
5. **Soak** the beans in the dressing for an absolute minimum of 24 hours (48 hours is highly optimal) to allow the tough bean skins to absorb the sweet and sour flavors.
6. **Stir** the container once every 12 hours to ensure the beans at the top get equal time submerged in the vinaigrette.
> **Pro-Tip:** Rinsing canned beans isn’t just for flavor improvement; it actively washes away excess sodium and complex sugars that typically cause digestive issues. The acidic vinegar dressing will naturally preserve this entire dish, making it safely shelf-stable for hours on a hot picnic table without spoiling!
### 7. Mix and Mingle Advance-Prep Broccoli Slaw
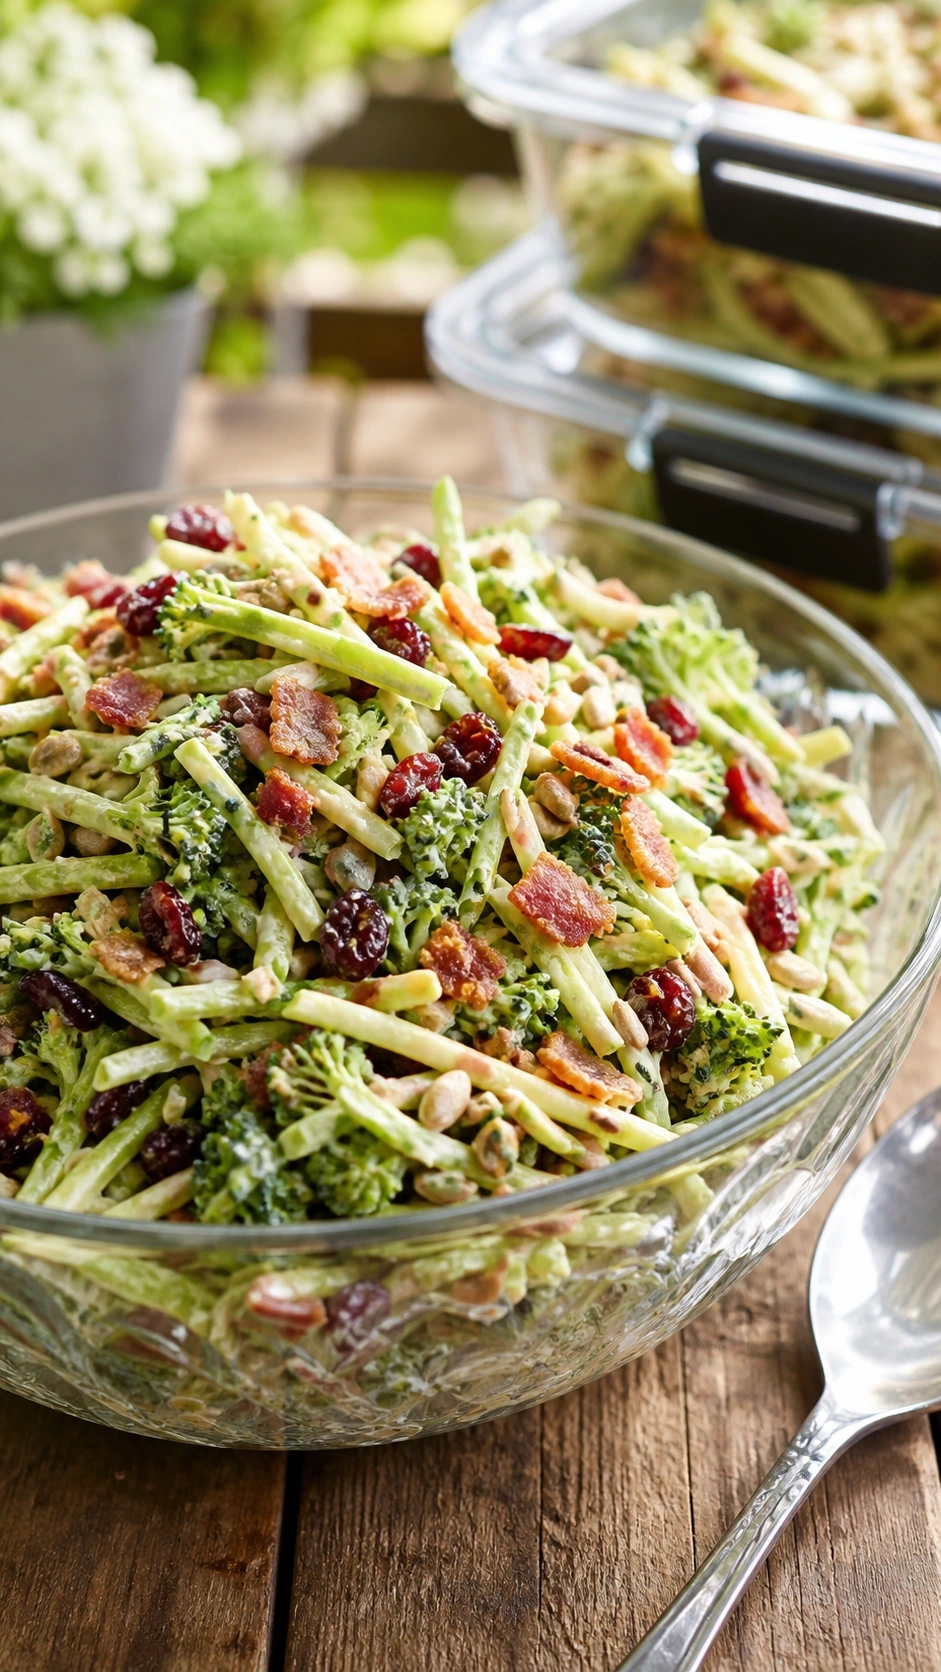
Bored of regular coleslaw? Pin this incredibly crunchy, make-ahead Broccoli Bacon Slaw that stays crisp for days!
**Advance-prep broccoli slaw utilizes sturdy broccoli stalks rather than delicate florets to maintain incredible textural contrast and crunch for days.** This sweet-and-savory side outperforms traditional lettuce salads in both longevity and intense flavor development.
A fantastic **broccoli slaw** relies heavily on textural contrast (pairing soft cranberries with hard sunflower seeds and bacon). It strongly requires robust airtight food storage containers to maintain that distinct **vegetables + crunch** profile over a weekend. If you need reliable **make ahead sides for a crowd**, this crowd-pleaser coats fibrous vegetable stalks in fat to lock in moisture definitively.
#### Ingredients
– 1 bag (12 oz) pre-shredded broccoli slaw mix
– 1/2 cup dried cranberries
– 1/2 cup sunflower seeds, shelled
– 6 strips cooked bacon, crumbled
– 1/2 cup mayonnaise
– 2 tablespoons apple cider vinegar
– 1 tablespoon sugar
– Premium leakproof airtight food storage containers to lock in freshness
#### Instructions
1. **Whisk** the mayonnaise, apple cider vinegar, and sugar in the bottom of a large mixing bowl until perfectly smooth and emulsified.
2. **Toss** the shredded broccoli slaw mix and dried cranberries heavily into the dressing to ensure complete coating.
3. **Store** the mixture in an airtight container in the refrigerator for 24 to 48 hours to soften the tough broccoli stalks slightly.
4. **Chill** the crumbled bacon and sunflower seeds in a separate, small dry container.
5. **Transport** the chilled slaw and dry ingredients to your cookout location.
6. **Assemble** by tossing the crunchy bacon and seeds into the wet slaw immediately before serving to preserve their ultimate crispy texture.
> **What most guides miss:** Pre-bagged broccoli slaw is strategically made from the stalks, not the florets. The stalks contain incredibly dense cellulose that easily withstands 48 hours of soaking in an acidic, creamy dressing without losing its core vegetables + crunch integrity!

### 8. Layer and Transport Mason Jar Caprese Skewers
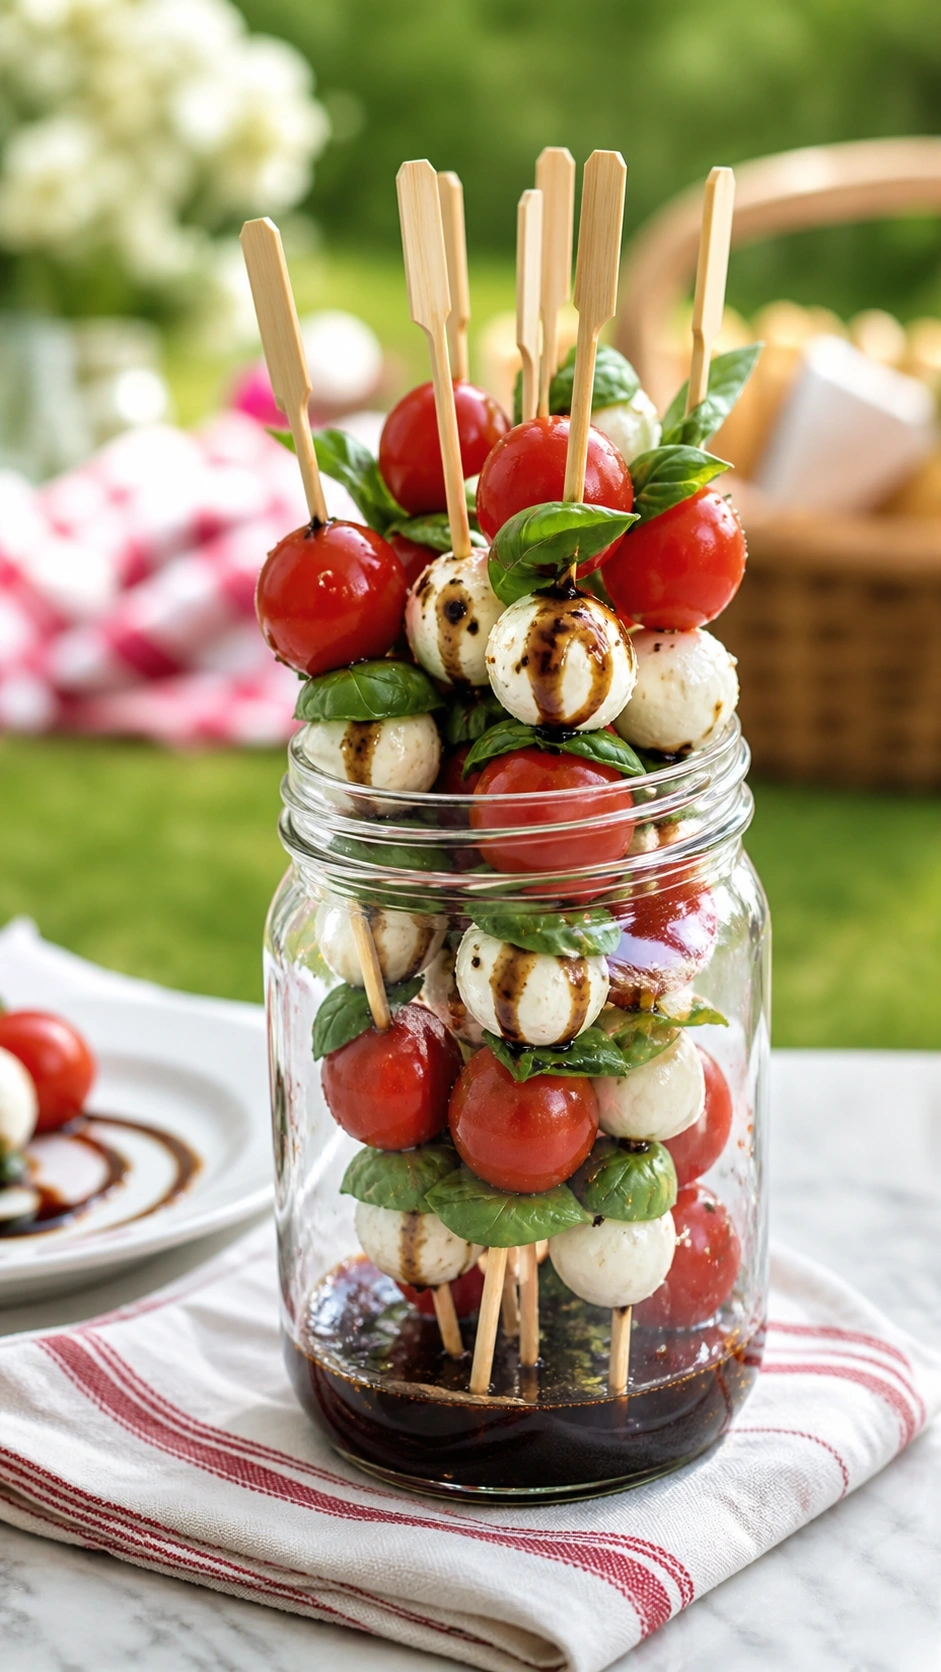
No messy platters here! Pin these genius Make-Ahead Mason Jar Caprese Skewers for perfectly portioned party food.
**Mason jar caprese skewers remain perfectly fresh when stored vertically above a layer of balsamic glaze to prevent the delicate basil from turning completely black.** This brilliant vertical storage hack ensures your elegant, Italian-inspired appetizer survives transportation flawlessly.
Traditional **caprese skewers** are highly portable when stored standing up in **mason jars**, effectively protecting the herbs + freshness from crushing during transport to a sunny picnic. This method actively prevents rapid enzymatic browning. When searching for **make ahead cold appetizers for summer parties**, avoiding soggy basil and messy balsamic stains is your primary objective.
#### Ingredients
– 2 pints cherry tomatoes
– 1 container (16 oz) mini mozzarella balls (ciliegine)
– 1 large bunch fresh basil leaves
– 1/4 cup thick balsamic glaze
– 1/4 cup extra virgin olive oil
– 6-inch bamboo skewers
– 16 oz wide-mouth glass mason jars for brilliant vertical refrigerator storage
#### Instructions
1. **Thread** one cherry tomato, one folded fresh basil leaf, and one mini mozzarella ball onto a bamboo skewer. Repeat until you have dozens of small skewers.
2. **Whisk** the thick balsamic glaze and olive oil together in a small measuring cup.
3. **Pour** 2 tablespoons of the balsamic mixture directly into the bottom of each wide-mouth mason jar.
4. **Pack** the finished Caprese skewers standing straight up into the jars, ensuring the basil leaves remain well above the dressing line.
5. **Seal** the jars tightly with their lids and refrigerate for up to 24 hours.
6. **Serve** by simply opening the jar; guests pull out a skewer, naturally dragging it through the balsamic glaze at the bottom for a perfect, mess-free bite.
> **Expert insight:** Fresh basil is highly susceptible to both extreme cold and strong acid. If you toss a standard Caprese salad in balsamic dressing 24 hours in advance, the basil will quickly oxidize, turn completely black, and become slimy. This vertical mason jar method keeps the delicate leaves dry and pristine until the second they are consumed!
### 9. Slice and Preserve Watermelon Salad with Mint
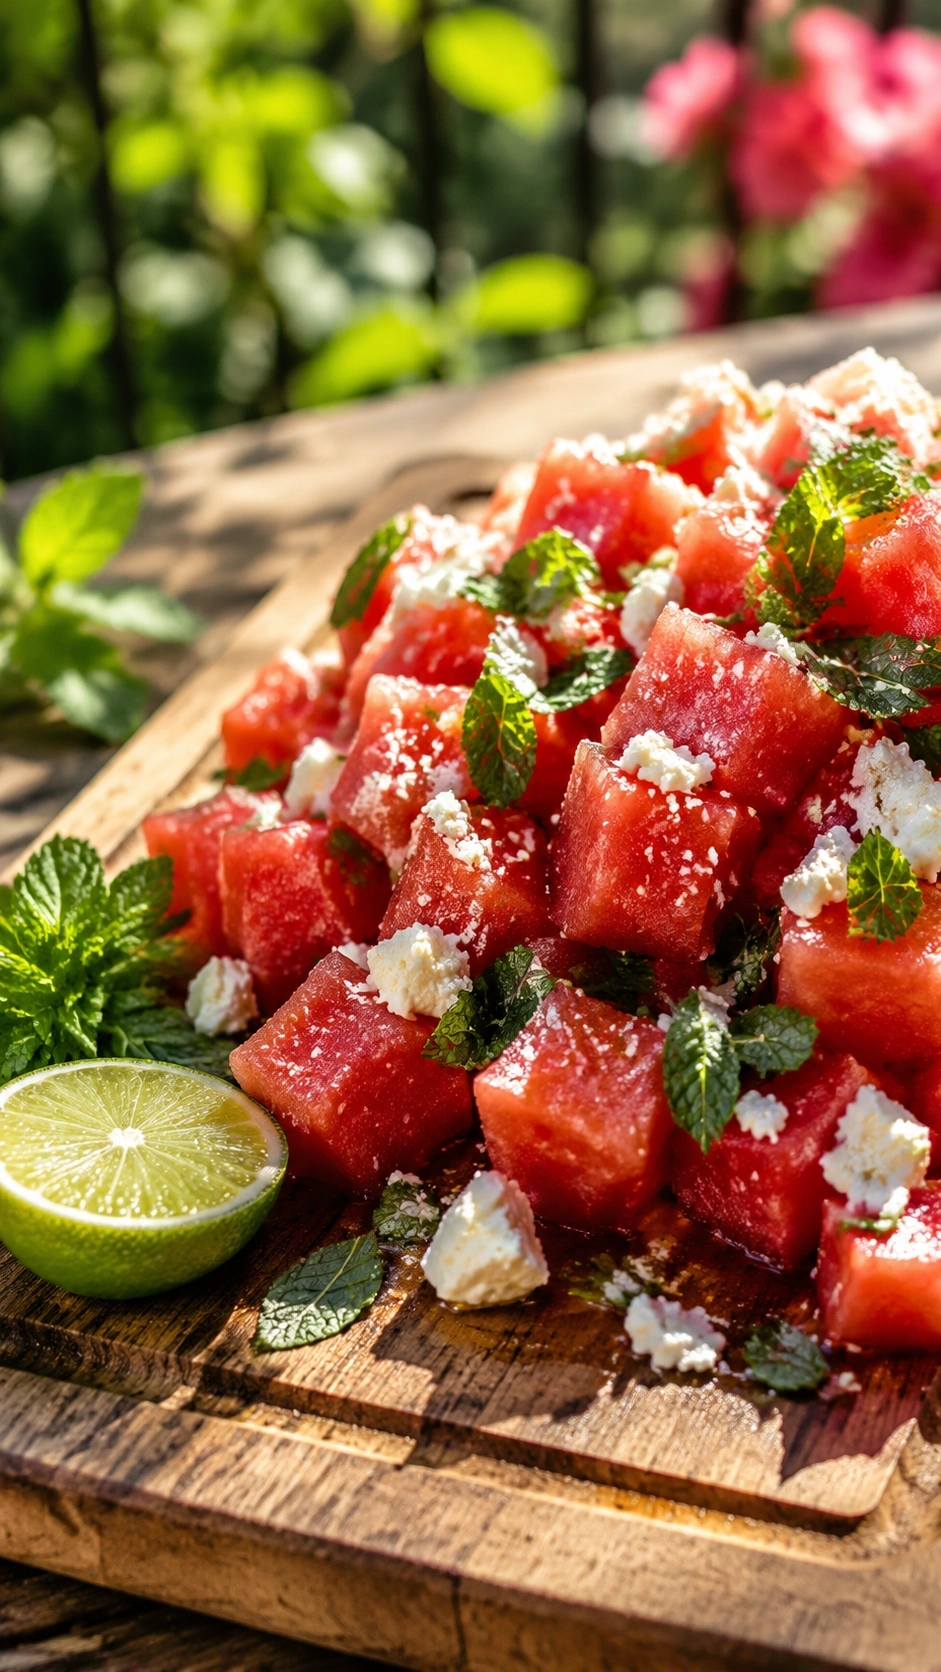
Keep your fruit salads from turning into soup! Pin this foolproof prep method for Make-Ahead Watermelon Salad.
**To prevent watermelon salad from turning into soup, cut the melon early but store all the ingredients separately until exactly when you plan to serve.** This “separate and assemble” protocol is mandatory for high-water-content fruits to prevent aggressive cellular breakdown.
A classic **watermelon salad** relies on bright citrus + acidity to stay vibrant and beautifully complements spicy BBQ dishes by offering a cooling, **refreshing summer sides** profile. Learning **how to prevent fruit salad from turning brown** or mushy requires understanding spoilage prevention. Salt destroys melon structure, which is exactly why the components must remain physically separated until serving time.
#### Ingredients
– 1 small seedless watermelon, cut into 1-inch cubes
– 1 cup feta cheese, crumbled
– 1/2 cup fresh mint leaves, torn
– 2 tablespoons lime juice
– 1 tablespoon olive oil
– A heavy-duty large wooden cutting board with a juice groove to manage the mess during prep
#### Instructions
1. **Chop** the watermelon into cubes on a large cutting board with a juice groove to catch the excess liquid.
2. **Drain** the cubed watermelon gently in a large colander for 15 minutes to remove the initial surface juice.
3. **Store** the drained watermelon cubes in an airtight container lined with dry paper towels to absorb excess moisture over the next 24 hours.
4. **Whisk** the lime juice and olive oil together in a tiny, separate jar.
5. **Pack** the crumbled feta and torn mint leaves into their own small, dry containers.
6. **Assemble** on-site by tumbling the dry watermelon, feta, and mint into a serving bowl, then drizzling lightly with the lime dressing just seconds before eating.
> **What most guides miss:** Never salt or dress a fresh watermelon salad in advance! Salt aggressively draws water out of the melon rapidly through cellular osmosis, leaving you with a bowl of soup and shriveled fruit. Keeping the components separate is the only verified way to achieve a wilt-proof fruit salad for outdoor dining.

### 10. Simmer Slow-Cooker Smoky Baked Beans
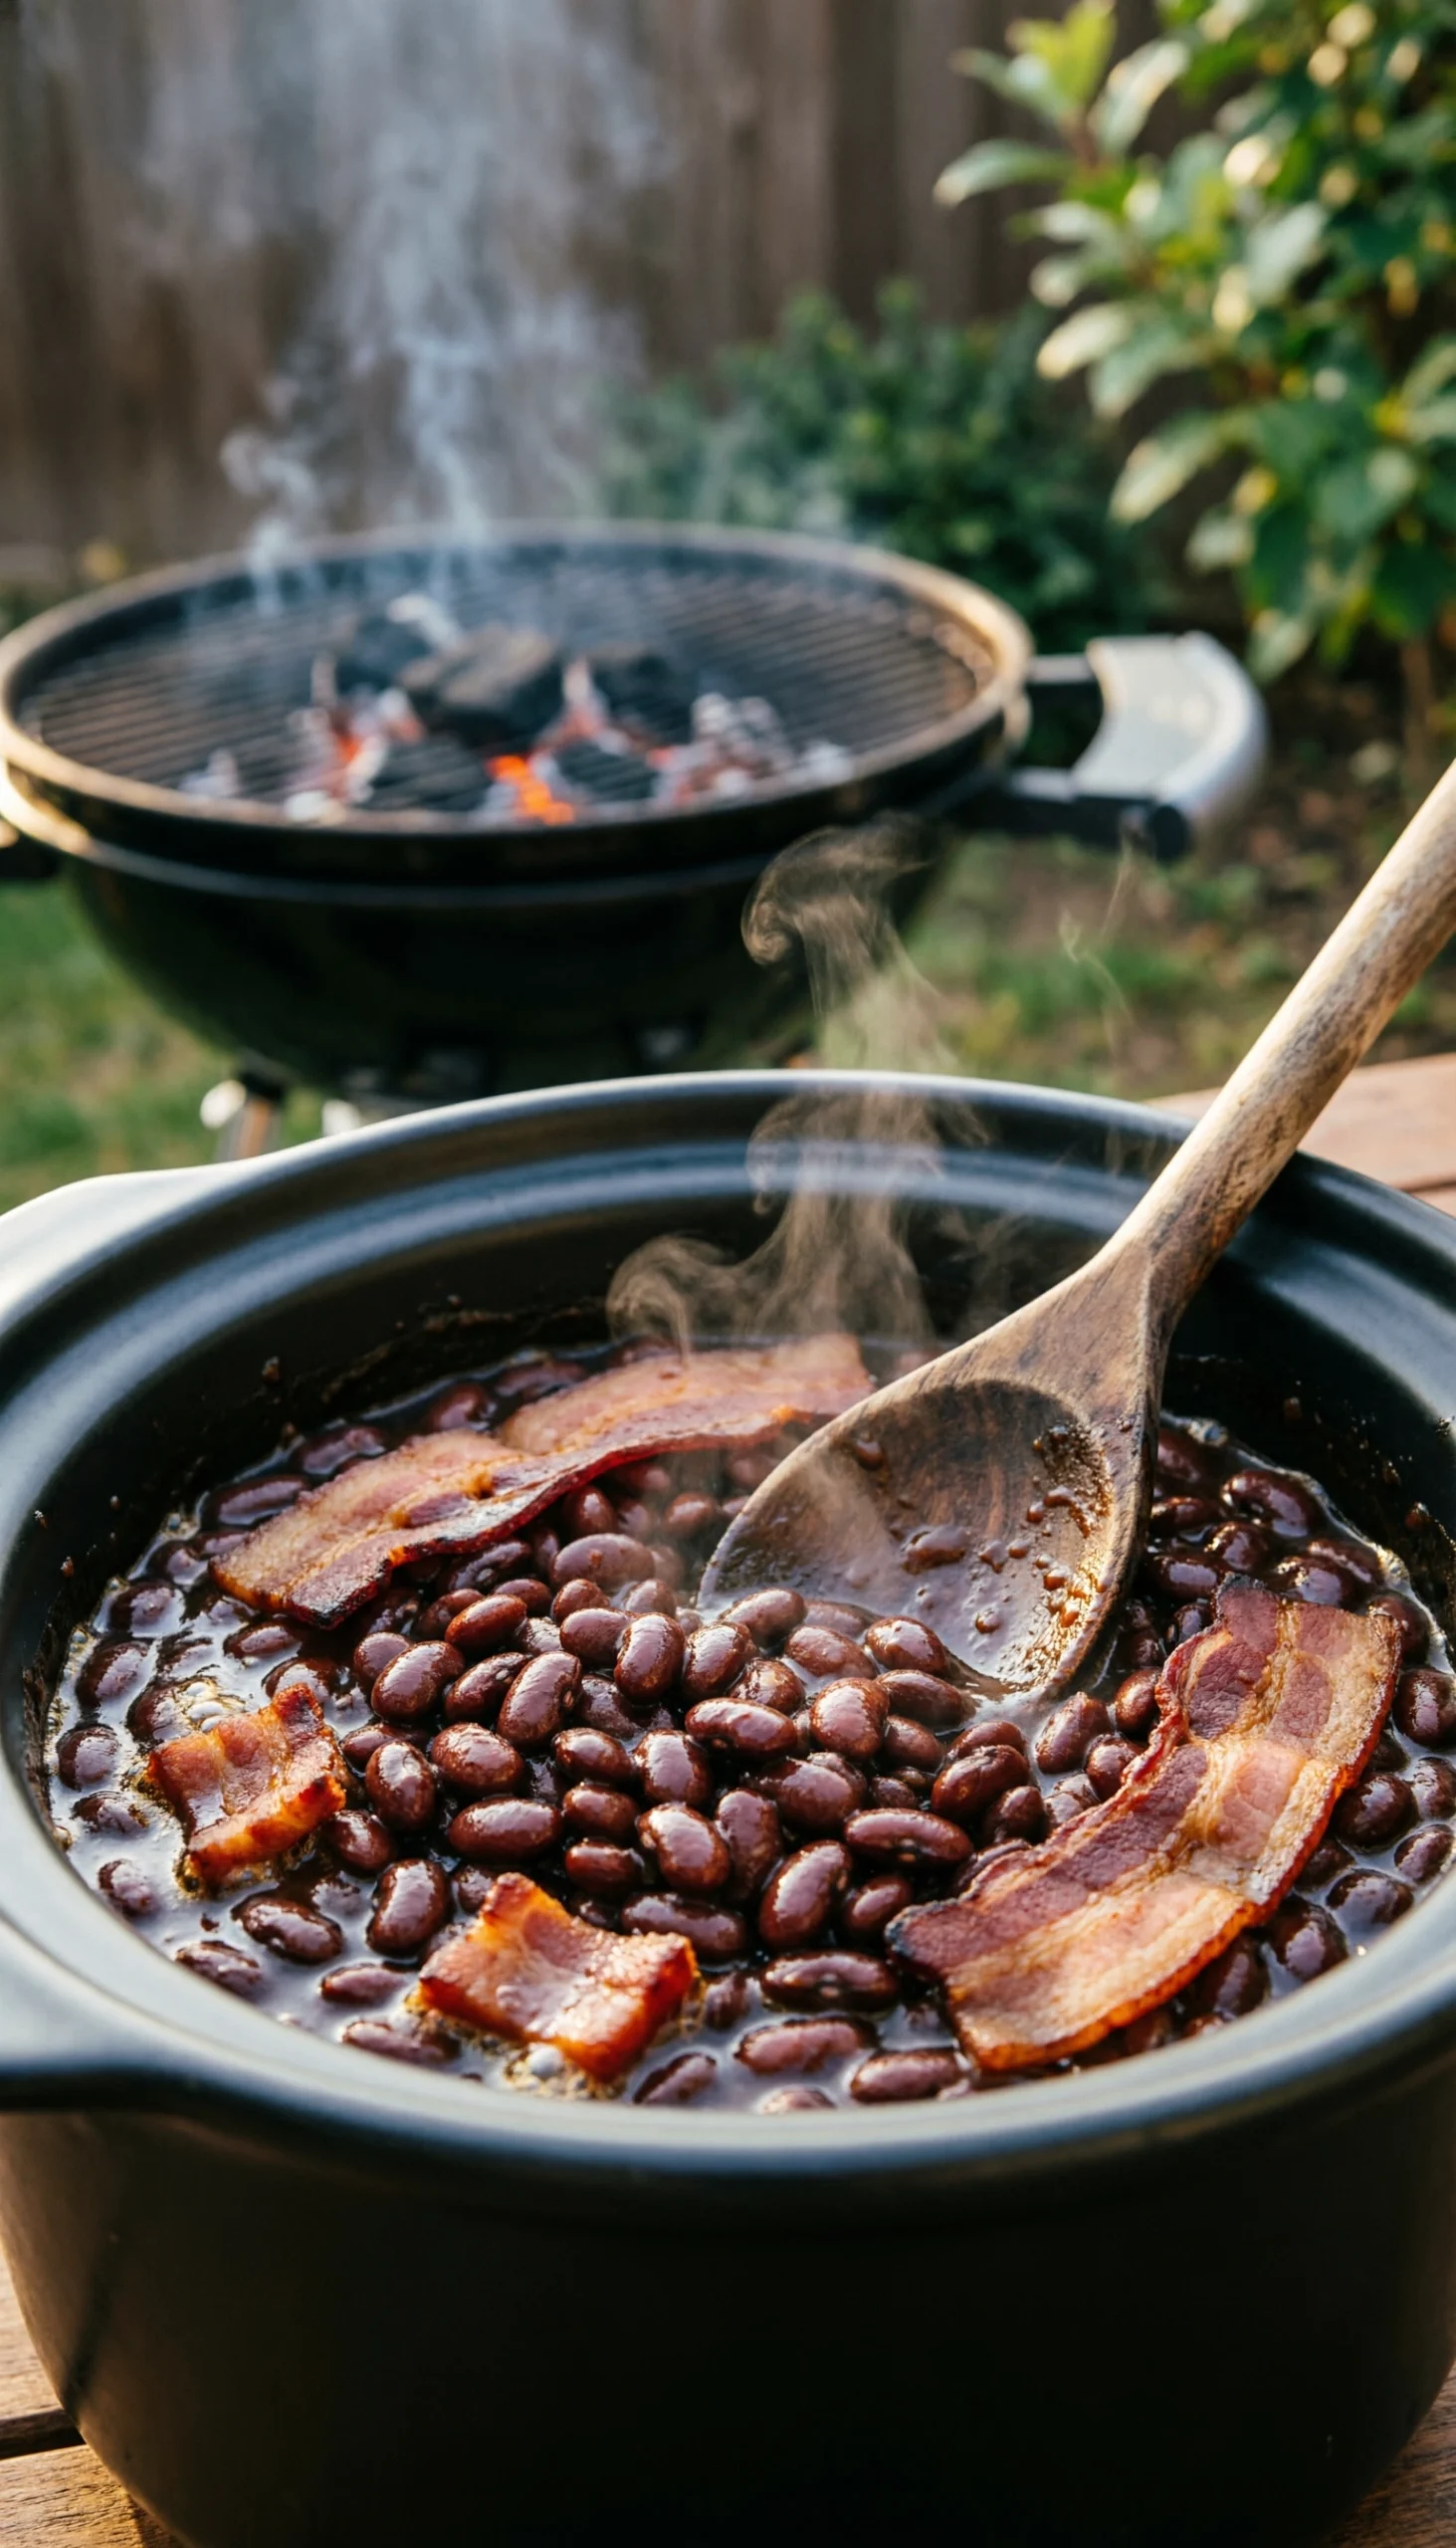
Free up your stovetop! Pin this make-ahead, slow-cooker baked bean recipe that actually tastes better on day two.
**Slow-cooker smoky baked beans develop significantly deeper flavor profiles when allowed to cool overnight as complex sugars fully penetrate the dense beans.** This hands-off approach frees up critical grill and stove space on the exact day of your busy cookout.
Authentic **baked beans** utilizing a programmable slow cooker act as a incredibly hearty, comforting hot side dish. This deeply savory option pairs brilliantly with all main course grilling meats. Relying on prolonged cooking deepens the molasses and bacon flavors far better than canned stovetop heating. The carryover cooking process ensures these **classic summer side dishes** achieve maximum umami balance.
#### Ingredients
– 3 cans (15 oz each) navy beans or pinto beans, drained
– 1/2 lb thick-cut bacon, chopped
– 1 cup favorite BBQ sauce
– 1/2 cup brown sugar
– 1/4 cup molasses
– 1 medium yellow onion, diced
– 2 tablespoons Dijon mustard
– A programmable slow cooker with a locking lid for spill-proof transportation
#### Instructions
1. **Sauté** the chopped bacon and diced onion in a skillet until the bacon is crispy and the onions are translucent. Drain excess grease.
2. **Combine** the drained beans, cooked bacon/onion mixture, BBQ sauce, brown sugar, molasses, and mustard directly into the slow cooker insert.
3. **Stir** thoroughly to ensure the thick sugars are evenly distributed among the beans.
4. **Simmer** on LOW for 4 to 6 hours. Turn off the heat and let it cool completely.
5. **Refrigerate** the entire ceramic slow cooker insert (covered) overnight. The starches will thicken the sauce beautifully as it cools.
6. **Reheat** on the day of the party by placing the insert back into the machine and turning it to HIGH for 2 hours before serving.
> **Expert insight:** Baked beans are the ultimate advance-prep side because of the complex sugars found in the molasses and thick BBQ sauce. Allowing the hot dish to cool overnight allows those heavy sugars to fully penetrate the tough bean skins, resulting in a significantly richer, deeper flavor profile upon reheating!

### 11. Toss and Chill Mediterranean Quinoa Salad
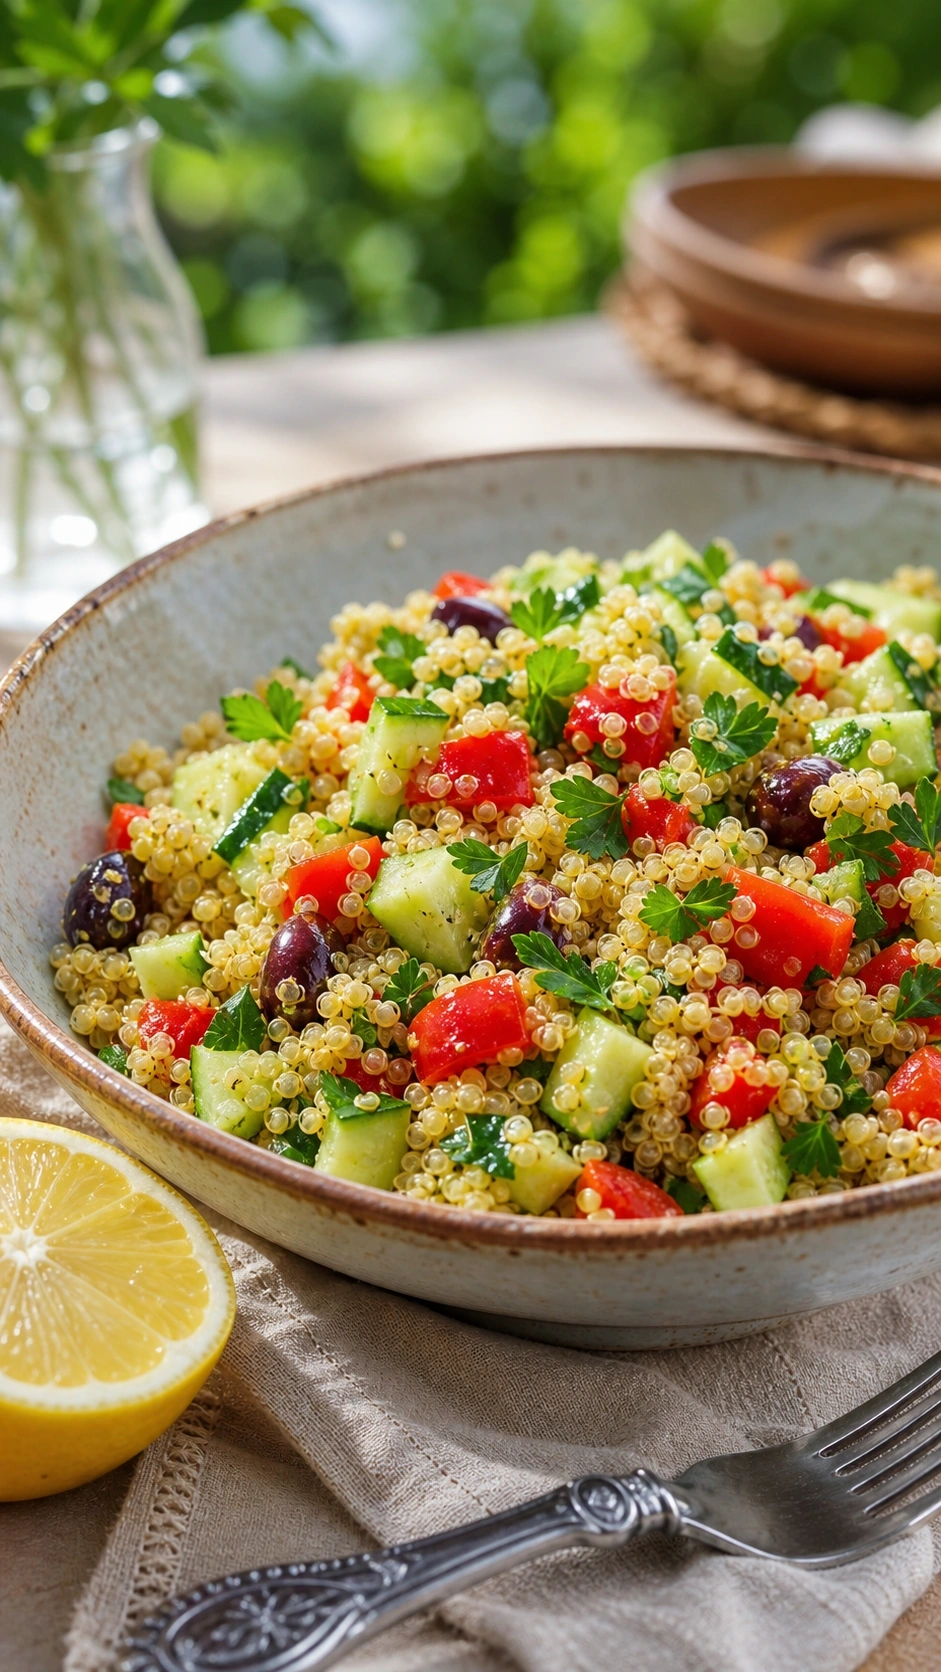
Need a healthy, gluten-free side that won’t go bad in the sun? Pin this protein-packed Mediterranean Quinoa Salad!
**Mediterranean quinoa salad serves as a robust, gluten-free side that perfectly absorbs lemon vinaigrettes while maintaining impeccable structural integrity over several days.** This highlights quinoa’s incredible ability to absorb dressing without ever becoming bloated or mushy.
A well-rinsed **quinoa salad** serves as an essential gluten-free alternative in any pasta vs quinoa comparison for large gatherings. It relies heavily on herbs + freshness to act as a light, undeniably healthy side dish. Following chef-tested culinary knowledge to rinse away bitter saponins guarantees these **healthy make ahead sides** withstand both heat and time flawlessly.
#### Ingredients
– 1 cup dry quinoa, aggressively rinsed
– 1 medium English cucumber, diced
– 1 red bell pepper, diced
– 1/2 cup Kalamata olives, halved
– 1/4 cup fresh parsley, finely chopped
– 3 tablespoons olive oil
– 2 tablespoons fresh lemon juice
– A dedicated fine mesh strainer designed specifically to keep tiny quinoa grains from washing down the sink
#### Instructions
1. **Rinse** the dry quinoa vigorously under cold water using a fine mesh strainer for at least 2 minutes to completely remove the bitter outer coating (saponin).
2. **Boil** the quinoa in 2 cups of water or vegetable broth for 15 minutes, then fluff deeply with a fork and let it cool completely.
3. **Whisk** the olive oil, fresh lemon juice, salt, and pepper in a large mixing bowl.
4. **Fold** the cooled quinoa, diced cucumber, red bell pepper, olives, and parsley gently into the lemon dressing until evenly coated.
5. **Refrigerate** in an airtight container for up to 3 days. The hardy grains will drink up the lemon juice, intensifying the flavor safely over time.
6. **Serve** chilled or at room temperature; this dish is incredibly heat-resistant and perfectly safe to leave on a picnic table!
> **What most guides miss:** Quinoa is arguably one of the most durable grains you can cook with. Unlike traditional boiled pasta which can easily get bloated and mushy, quinoa holds its unique texture indefinitely when stored in an acidic dressing, making it the supreme choice for advance prep summer meals!

## Key Takeaways: Food Safety & Storage for Make-Ahead Summer Side Dishes
Guaranteeing a successful outdoor gathering requires strict adherence to proper food safety protocols and smart temperature control. When preparing **make-ahead summer side dishes**, you must prioritize safe storage guidelines to actively prevent any risk of foodborne illness. Understanding how to manage severe temperature abuse and cross-contamination is exactly what separates an amateur cook from a seasoned host.
This critical knowledge ensures your refrigerator storage practices meet basic FDA standards for vital spoilage prevention. Review these essential safety mechanics to confidently manage both mayo-based salads and highly acidic vinegar dressings during long, hot summer afternoons.
**Key Takeaways:**
* **Respect the Temperature Danger Zone:** According to **safe storage guidelines**, any cold summer side dish must be kept strictly below 40°F. Never let a mayonnaise or dairy-based dish sit in the hot sun for more than two hours (or one hour if ambient temperatures exceed 90°F) to prevent dangerous microbial growth.
* **Utilize Acidulation for Safety and Flavor:** Dressings heavy in vinegar or fresh citrus actively lower the pH balance of your **summer cookout sides**. This highly acidic environment acts as a potent natural preservative, fighting off bacteria and making vinaigrette-based slaws incredibly heat-resistant.
* **Purge Water to Prevent Sogginess:** Always aggressively extract moisture from high-water vegetables (like cucumbers and fresh tomatoes) via **osmosis in food** (salting them and draining) before mixing. This guarantees a wilt-proof texture that actively stays crunchy for days.
* **Isolate Delicate Textures:** Keep your valuable textural contrast items safe. Never mix crispy croutons, bacon, fresh delicate herbs, or soft cheeses into your wet salads 24 hours in advance. Store them in entirely separate, dry airtight containers and fold them in just seconds before serving.
* **Leverage the 48-Hour Marination Window:** Tough cellular structures like raw cabbage, carrots, and canned beans actually *require* heavy marination to taste their absolute best. Prepping these specific **easy make ahead sides** two full days in advance guarantees a significantly superior flavor profile.
## FAQs About Make-Ahead Summer Side Dishes
Navigating the logistics of outdoor dining often brings up important questions regarding strict storage limits and ingredient longevity. Hosts frequently need absolute clarity on how to keep summer salads fresh for a party without accidentally sacrificing flavor or safety.
Whether you are wondering what side dishes can be made 2 days ahead or how to perfectly manage complex ingredient substitutions, reliable guidance is essential. We have compiled expert answers to the most common questions about **make-ahead summer side dishes** to guarantee your next event is entirely flawless. These professional tips strictly reflect safe storage guidelines to eliminate all your advance-prep uncertainties.
### What side dishes can be made 2 days ahead?
**The best side dishes to make 48 hours in advance are vinaigrette-based coleslaws, three-bean salads, and marinated pasta salads.**
Hearty ingredients like raw cabbage, carrots, canned legumes, and robust pasta shapes benefit immensely from prolonged marination. The highly acidic dressings break down tough vegetable fibers and absorb directly into starches over time, meaning these classic summer side dishes actually taste significantly better on day two than day one.
### How to keep summer salads fresh for a party?
**To keep salads fresh outdoors, serve them nested securely in a larger bowl filled with ice and keep them entirely out of direct sunlight.**
For delicate leafy greens, keep the dressing completely separate until the exact moment guests arrive to avoid sogginess. Utilizing commercial-grade insulated serving bowls with airtight lids can also actively maintain safe temperatures and protect your food from insects during prolonged outdoor dining.
### Can you make potato salad 24 hours in advance?
**Yes, making potato salad 24 hours in advance is highly recommended because it allows the dense starches to properly absorb the dressing and seasonings.**
According to safe storage guidelines, as long as the potato salad is immediately placed in an airtight container and maintained strictly below 40°F in the refrigerator, it will be perfectly safe and substantially more flavorful the very next day.
### How long does homemade coleslaw last in the fridge?
**Homemade vinegar-based coleslaw lasts 3 to 4 days, while mayonnaise-based coleslaw should be safely consumed within 2 to 3 days.**
Because cabbage is a highly dense brassica, it aggressively resists breaking down into mush far better than standard lettuce. However, for maximum vegetables + crunch, it is best consumed within 48 hours. After 3 days, it remains entirely safe to eat but will become noticeably softer.
### Which summer sides don’t need refrigeration?
**Vinegar-based bean salads, roasted vegetable medleys, and grain bowls like quinoa or couscous dressed in oil and citrus do not strictly require heavy refrigeration.**
These brilliant dairy-free alternatives rely on natural acidity (pH balance in dressings) to remain completely shelf-stable for several hours. However, for optimal food safety, no food should ever sit in direct, hot sun for longer than two hours.
### How do you keep pasta salad from getting dry?
**To prevent pasta salad from drying out in the fridge, toss the noodles with half of your dressing while they are still physically warm.**
Warm pasta heavily expands and absorbs liquid deeply through capillary action. If you dress cold pasta, the oil just sits on the surface and unpleasantly congeals. Always save the second half of your dressing to properly refresh the dish right before serving.
### How to prevent fruit salad from turning brown?
**Toss your cut fruit in a light coating of fresh citrus juice (lemon, lime, or orange) immediately after chopping to aggressively prevent enzymatic browning.**
The natural ascorbic acid (Vitamin C) in the citrus rapidly interrupts the chemical reaction that causes apples, pears, and bananas to oxidize when exposed to air. Keeping the fruit tightly sealed in airtight containers to heavily limit oxygen exposure also significantly extends its visual appeal.
### Can you freeze summer side dishes?
**Generally, you should never freeze raw vegetable salads, mayonnaise-based dishes, or fresh fruit salads, as freezing violently destroys their delicate cellular structure.**
When ice crystals form inside crisp vegetables or fresh fruits, they quickly puncture the microscopic cell walls. Upon thawing, they will turn into a watery, severely mushy mess. However, cooked hot sides like smoky baked beans or hearty corn casseroles freeze and reheat exceptionally well.
### What is the safest way to chill side dishes?
**The safest method is to divide large batches of hot side dishes into multiple shallow containers before placing them in the refrigerator.**
Putting a massive, deep pot of warm potato salad directly into the fridge creates a highly dangerous scenario where the center remains warm for hours, allowing bacteria to rapidly multiply. Shallow refrigerator storage ensures rapid, perfectly even cooling to rigorously meet FDA standards.
### Is it better to dress salad before or after storage?
**It entirely depends on the specific ingredients: dense vegetables and pasta should be dressed heavily before storage, while leafy greens must be dressed immediately after.**
Tough ingredients (cabbage, carrots, beans, pasta, quinoa) desperately need 12-24 hours to deeply marinate in the dressing for maximum flavor. Delicate ingredients (spinach, romaine, arugula) will actively suffer instant cellular breakdown and wilting if exposed to acid and salt overnight.
## Final Thoughts
Mastering **make-ahead summer side dishes** is the ultimate, proven secret to achieving truly **stress-free hosting**. By deeply understanding a few basic culinary principles—like actively utilizing osmosis to purge water from cucumbers, relying on acidulation to keep creamy dressings safe, and giving tough vegetables the critical time they need to marinate—you completely eliminate the day-of chaos that ruins so many backyard BBQs.
Remember that the ultimate success of these **best summer side dish recipes** relies entirely on executing the prep work correctly. Treat your cold refrigerator as an active cooking environment where flavors deepen and beautifully meld over 48 hours. By trusting the actual science of these wilt-proof methods, you can successfully step away from the cutting board and actually enjoy your own party.
Are you a die-hard potato salad traditionalist, or do you heavily prefer a vinegar-based slaw when the temperatures rise? Let us know which of these make-ahead strategies saved your summer cookout in the comments below!
Last update on 2026-06-04 at 23:31 / Affiliate links / Images from Amazon Product Advertising API
