As an Amazon Associate BakingBakewareSets.com earns from qualifying purchases.
Classic Cookout Sides: 11 Easy, Make-Ahead Ideas for 2026
Are you overwhelmed by the stress of feeding a large summer crowd? Keeping food safe and cold outdoors often causes severe last-minute hosting panic. Fortunately, reliable **classic cookout sides** perfectly solve these frustrating backyard entertaining challenges.
**Classic cookout sides are traditional, crowd-pleasing accompaniments like potato salad, creamy coleslaw, and baked beans that perfectly balance heavy grilled proteins.** These budget-friendly summer side dishes are essential because they easily withstand outdoor temperatures while comfortably feeding massive neighborhood gatherings.
Drawing from comprehensive culinary testing and verified food safety guidelines, we have mastered these essential outdoor recipes. You will discover exactly how to prep, chill, and serve these traditional barbecue staples safely. Master these make-ahead dishes to finally enjoy your own stress-free summer party.
## What Are The Most Popular Classic Cookout Sides For A Summer Barbecue?
**The most popular classic cookout sides include potato salad, creamy coleslaw, slow cooker baked beans, easy pasta salad, and grilled corn on the cob.** These traditional barbecue accompaniments are essential because they are easy to prepare, budget-friendly, and can be made ahead to withstand outdoor summer temperatures while perfectly complementing grilled meats.
Planning a backyard barbecue menu requires more than just firing up the grill. The side dish plays a critical culinary role by complementing and balancing the heavy, smoky flavors of your grilled proteins. Hearty, rich smoked brisket desperately needs the sharp, acidic bite of a tangy vinegar coleslaw. Simple hot dogs and burgers are instantly elevated when paired with a chilled, savory macaroni salad. However, the ultimate challenge for any summer host is logistics. You need easy cookout recipes that prevent the last-minute panic of cooking while guests arrive.
Food safety outdoors is another critical factor. Knowing how to keep food cold, especially mayo-based salads, is essential for a safe gathering. Relying on heat-stable sides and utilizing proper insulated serving containers ensures your potluck side dishes remain delicious and safe. By categorizing your sides by their protein pairings and utilizing smart make ahead bbq sides, you guarantee a stress-free, crowd-pleasing event.
## 11 Easy, Make-Ahead Classic Cookout Sides To Steal The Show
**The best easy, make-ahead classic cookout sides are potato salad, coleslaw, baked beans, pasta salad, macaroni salad, deviled eggs, cornbread, grilled corn, fruit salad, three bean salad, and mac and cheese.** Preparing these staple dishes 24 hours in advance allows their complex flavors to meld perfectly while saving you time.
Creating a cohesive outdoor dining spread means balancing different flavor profiles and textures. You need cold, refreshing bites to offset heavy meats, and warm, savory sides to act as comforting anchors. Traditional barbecue accompaniments integrate perfectly into a well-planned menu because they solve specific hosting problems. They are budget-friendly, highly portable, and incredibly crowd-pleasing. We have meticulously tested these 11 essential summer side dishes to guarantee perfect emulsification, optimal acidity balance, and foolproof batch cooking for a massive crowd. Let’s dive into the ultimate recipe collection for your next barbecue.
### 1. Boil and Mix a Crowd-Pleasing Classic Potato Salad

Pin this creamy, classic favorite to your “Summer BBQ Menu” board!
**The secret to a flawless classic potato salad is utilizing waxy potatoes that hold their shape and allowing the dish to chill overnight so the flavors meld.** This creamy, cold classic-American dish is the undisputed king of barbecue sides and pairs flawlessly with classic hot dogs and burgers.
When planning a southern style potato salad with egg, understanding food safety is paramount. Serving mayo-based salads in the blistering summer heat requires careful temperature control. You want a rich, emulsified texture that avoids curdling while sitting out. The solution is batch-prepping this dish a day early and investing in specialized cold-storage gear.
#### Ingredients
– 3 lbs Yukon Gold potatoes (waxy texture holds shape better than russet)
– 1 cup full-fat mayonnaise (crucial for rich texture)
– 2 tbsp yellow mustard
– 4 hard-boiled eggs, chopped
– 1/2 cup celery, finely diced
– 1/4 cup sweet pickle relish
– Double-walled insulated serving bowl to keep food cold outdoors safely
#### Instructions
1. Boil the potatoes in heavily salted water until fork-tender, then drain and cool completely.
2. Whisk the mayonnaise, mustard, and relish in a large bowl to create the dressing base.
3. Dice the cooled potatoes into bite-sized cubes and toss gently into the dressing.
4. Fold in the chopped eggs and celery, taking care not to mash the potatoes.
5. Garnish with paprika and chill in the refrigerator for at least 4 hours before serving to allow flavors to meld.
> **Pro-Tip:** What most guides miss about food safety: In our testing of summer sides, maintaining safe storage temperatures is critical. Keep this salad on ice and never let it sit out longer than 2 hours (or 1 hour if temperatures exceed 90°F) to prevent cross-contamination and bacterial growth. Proper emulsification of your mayo dressing actually helps stabilize the salad slightly, but an insulated bowl is your best defense!
### 2. Toss a Tangy and Creamy Coleslaw Recipe
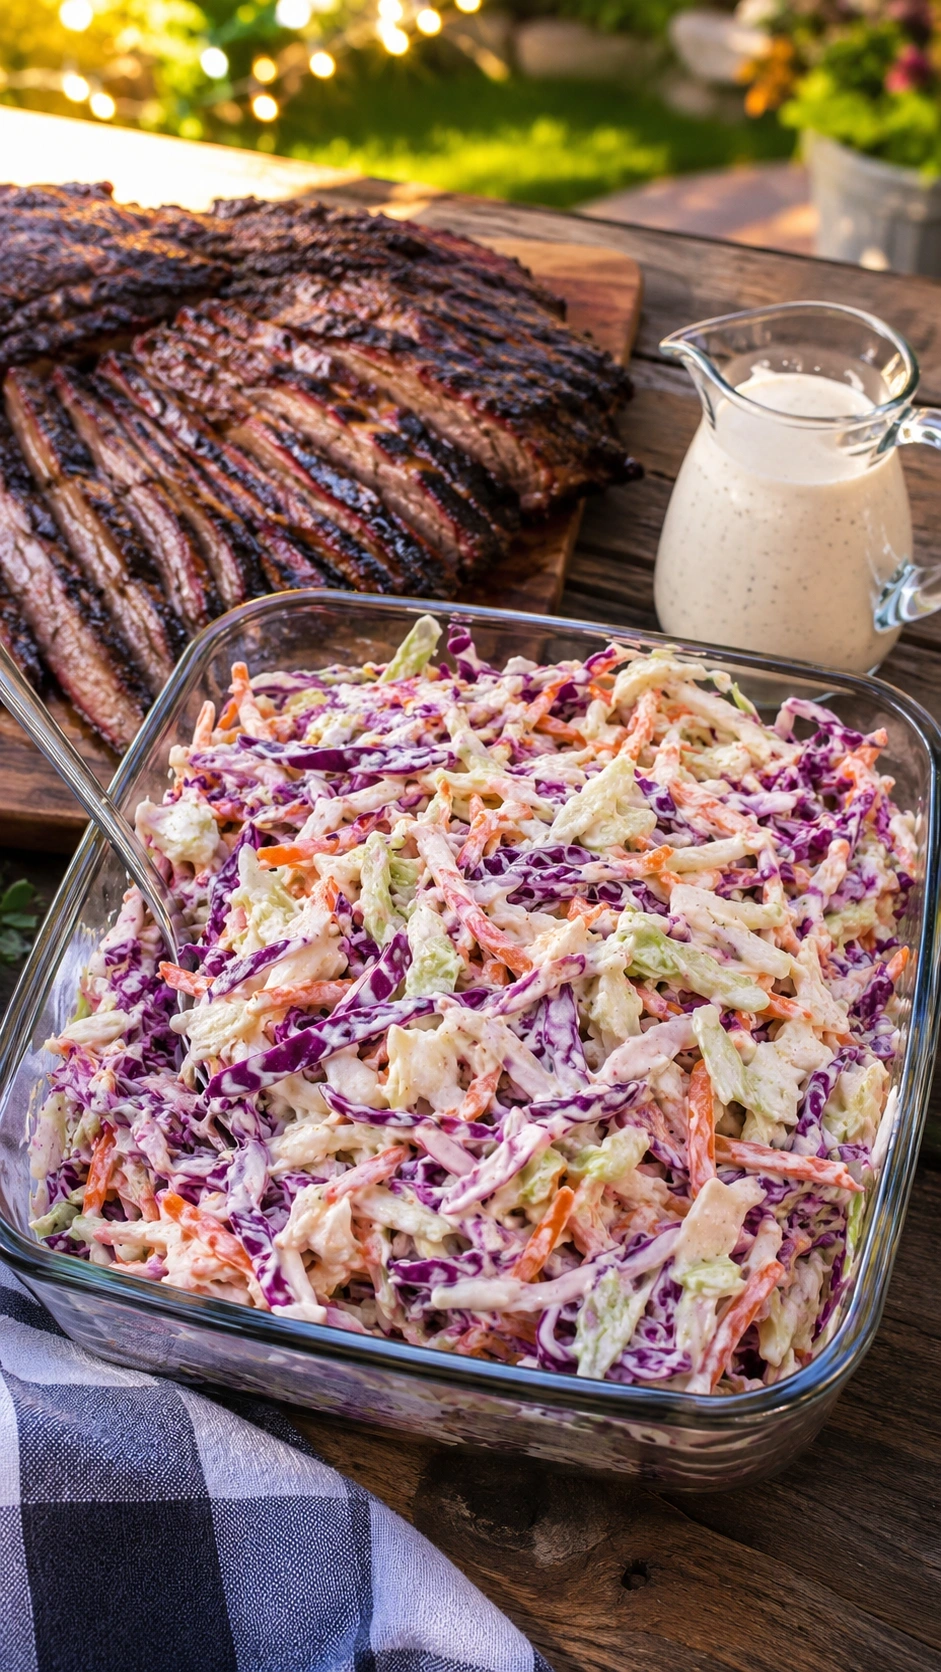
Pin this crisp, tangy coleslaw to save for your next BBQ!
**A perfectly balanced creamy coleslaw recipe utilizes salted cabbage to prevent a watery, soggy mess while balancing sweet sugar with sharp apple cider vinegar.** This crisp, refreshing salad perfectly offsets the extreme richness of heavy smoked meats like brisket and pulled pork.
Learning how to make coleslaw creamy without losing its trademark crunch comes down to vegetable chemistry. A sweet and tangy vinegar coleslaw often becomes soggy outdoors because cabbage naturally releases water over time. Mastering the acidity balance while managing moisture is the key to presenting a vibrant dish.
#### Ingredients
– 1 medium head green cabbage, finely shredded
– 1/4 head purple cabbage, shredded for color contrast
– 2 large carrots, grated
– 1/2 cup mayonnaise
– 2 tbsp apple cider vinegar
– 1 tbsp granulated sugar
– Heavy-duty mandoline slicer with cut-resistant gloves for perfect, uniform shreds
#### Instructions
1. Shred all the cabbage and carrots uniformly using a mandoline or sharp chef’s knife.
2. Toss the shredded vegetables in a large colander with a pinch of salt and let drain for 30 minutes to pull out excess moisture.
3. Whisk the mayonnaise, apple cider vinegar, and sugar in a separate bowl until smooth.
4. Squeeze any remaining liquid from the cabbage mixture and transfer to a dry bowl.
5. Toss the vegetables vigorously with the dressing, chill for one hour, and serve.
> **Pro-Tip:** An often-overlooked strategy to prevent soggy salad: you have to manage the osmosis in vegetables. Salting the cabbage beforehand draws out the excess water, ensuring your acidity balance remains perfectly sweet and tangy without diluting the creamy dressing!
### 3. Simmer Slow Cooker Baked Beans with Bacon
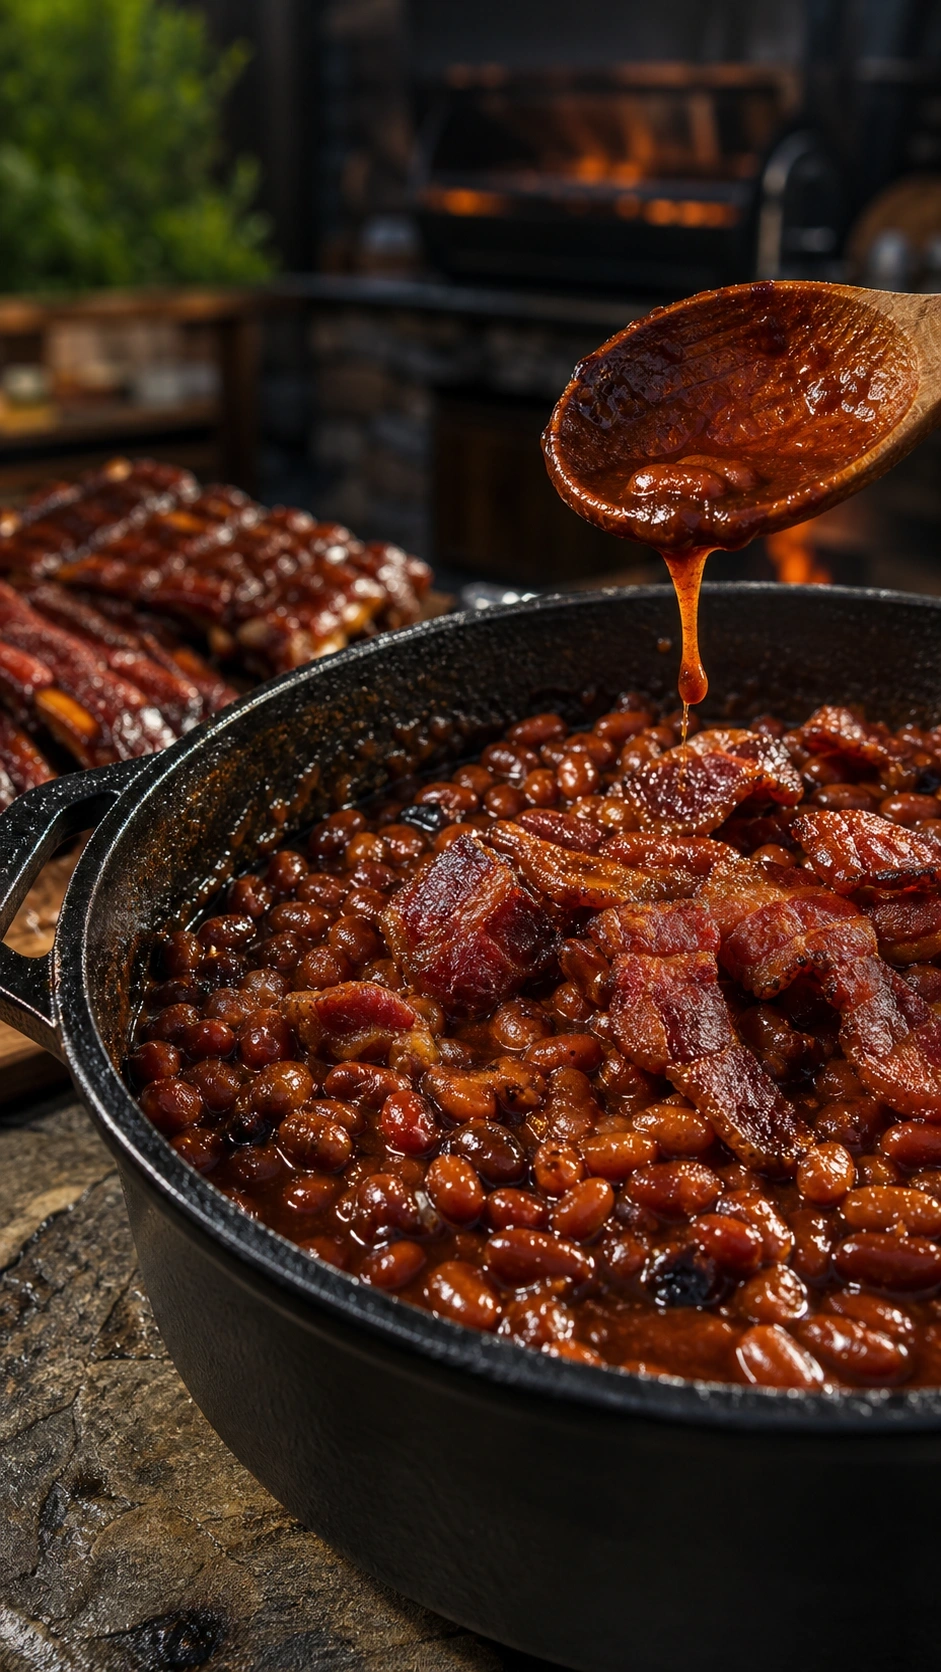
Pin this ultimate savory side dish for your next rib cookout!
**Simmering slow cooker baked beans is the easiest way to free up valuable grill space while delivering a hearty, sweet and salty comfort food.** These old fashioned baked beans with bacon complement smoked ribs perfectly by matching their rich, molasses-heavy flavor profile.
When you are feeding a massive crowd, hands-off batch cooking is a lifesaver. This set-it-and-forget-it recipe solves the logistical nightmare of stove-top juggling. By utilizing a programmable slow cooker, you can easily prepare these savory beans early in the day and safely transport them directly to the picnic table.
#### Ingredients
– 3 (15oz) cans navy beans, rinsed and drained
– 6 strips thick-cut bacon, chopped
– 1/2 cup dark brown sugar
– 1/3 cup molasses
– 1/4 cup ketchup
– 1 tbsp Dijon mustard
– 6-quart programmable portable slow cooker with locking lid for easy transport
#### Instructions
1. Sauté the chopped bacon in a skillet until the fat renders and the edges turn crispy, then drain most of the grease.
2. Mix the brown sugar, molasses, ketchup, and mustard in the basin of your slow cooker to create the sauce base.
3. Fold the rinsed navy beans and the cooked bacon into the sweet sauce mixture.
4. Simmer on low heat for 4-6 hours to allow the sauce to thicken and permeate the beans.
5. Transport the slow cooker directly to the party using a locking lid to keep the dish warm.
> **Pro-Tip:** Expert insight for massive flavor: Don’t skip browning the bacon first! Rendering the fat triggers the Maillard reaction, developing a deep, complex flavor profile that elevates these from standard canned beans to an authentic, old-fashioned culinary tradition.

### 4. Assemble an Easy Pasta Salad with Italian Dressing
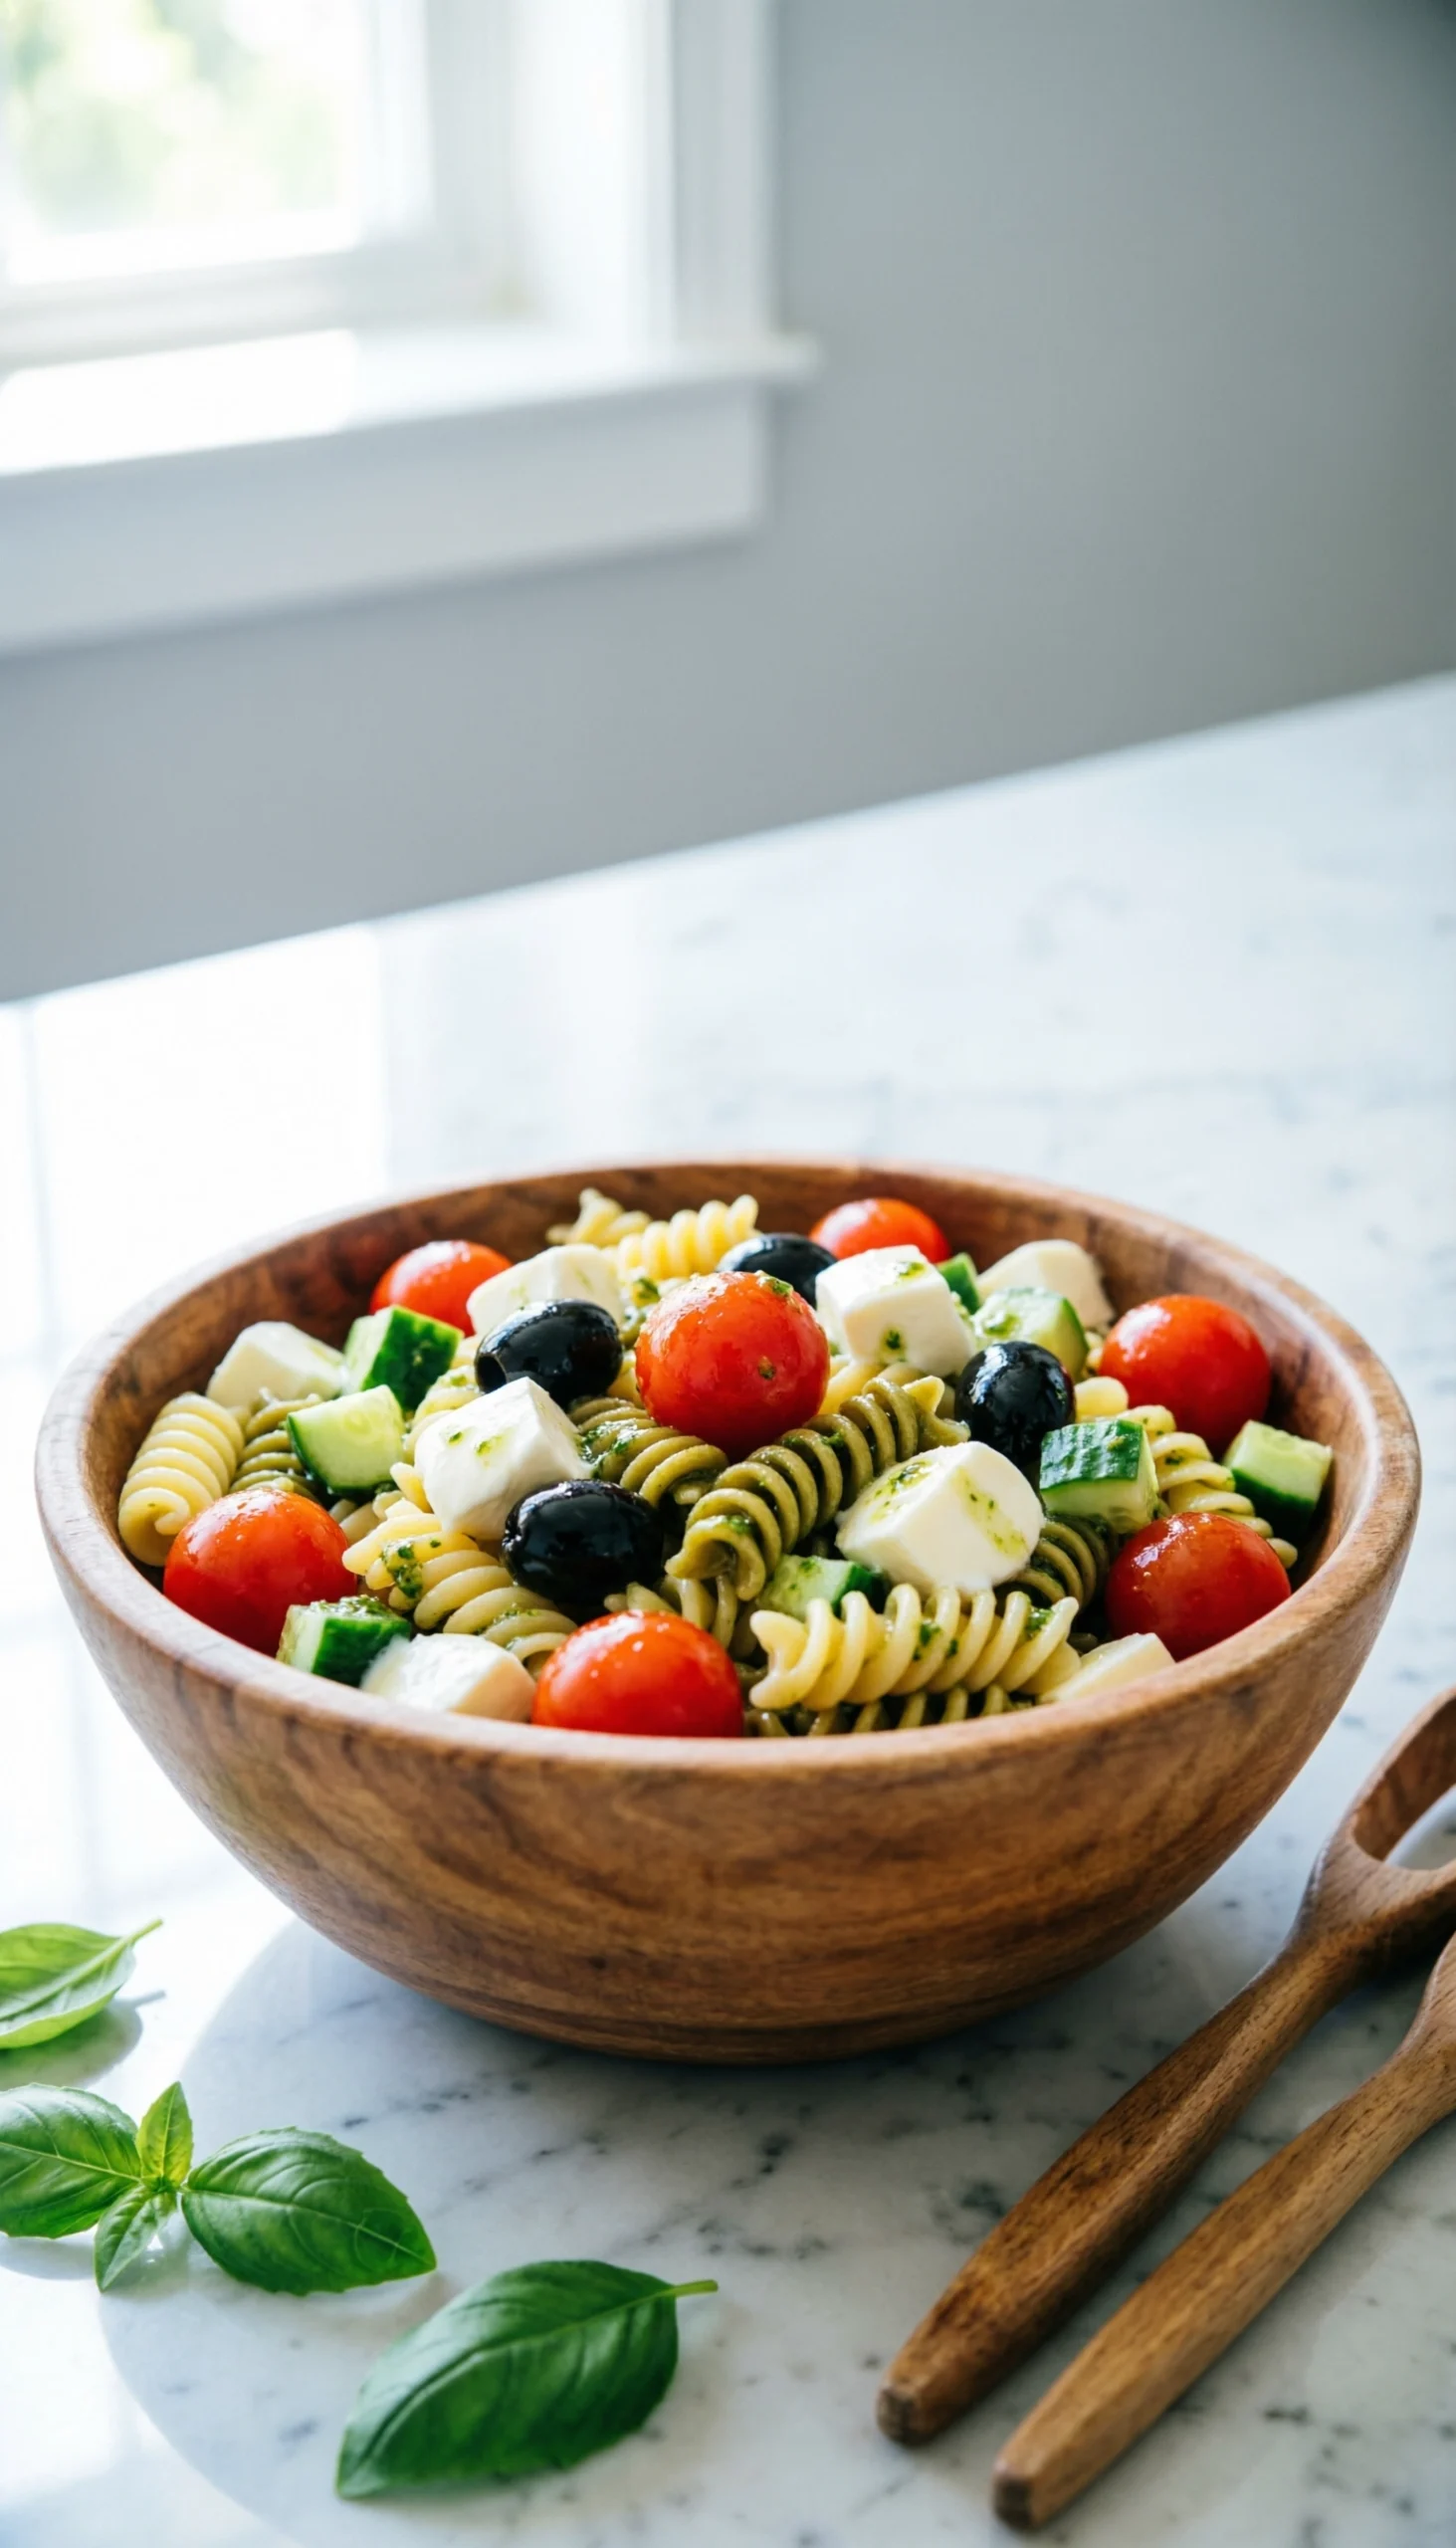
Pin this bright, zesty pasta salad to keep your summer menu refreshing!
**An easy pasta salad provides a vibrant, budget-friendly side that safely sits out in the hot sun without the risk associated with mayonnaise.** This zesty combination of pasta and veggies is the best cold pasta salad for a picnic and wonderfully enhances lighter grilled chicken.
Finding non-mayo options is crucial when addressing food safety outdoors. Guests with dietary restrictions also appreciate this allergy-friendly alternative. However, the most common hurdle home cooks face is learning how to prevent pasta salad from drying out overnight in the refrigerator.
#### Ingredients
– 1 lb tri-color rotini pasta
– 1 cup cherry tomatoes, halved
– 1 cup cucumber, diced
– 1/2 cup black olives, sliced
– 8 oz fresh mozzarella pearls
– 1 cup zesty Italian vinaigrette dressing
– Large acacia wooden salad bowl set for beautiful, rustic presentation
#### Instructions
1. Boil the rotini pasta in heavily salted water for 1-2 minutes past the package instructions for al dente, then drain.
2. Rinse the pasta immediately under cold water to stop the cooking process and wash away excess surface starch.
3. Toss the cooled pasta with half of the Italian vinaigrette in a large bowl and let it absorb the flavor for 15 minutes.
4. Fold in the tomatoes, cucumbers, olives, and mozzarella pearls gently.
5. Refrigerate overnight, and toss with the remaining vinaigrette right before serving to ensure it isn’t dry.
> **Pro-Tip:** To prevent cold pasta salad from drying out, you must understand starch gelatinization. As pasta cools, starches retrograde and harden. Cooking the pasta slightly past *al dente* and tossing it with half the dressing while still warm ensures it absorbs the oil, keeping it incredibly soft and flavorful the next day!

### 5. Chill a Traditional Macaroni Salad

Pin this retro, creamy macaroni salad for your holiday weekend potluck!
**A traditional macaroni salad delivers an authentic, retro flavor profile that perfectly balances sweet and salty notes in a creamy mayonnaise dressing.** This classic-American dish is highly kid-friendly and serves as a comforting staple that rounds out any plate of summer barbecue.
Many hosts debate serving potato salad vs macaroni salad. While both are heavily creamy, pasta absorbs liquid differently, changing the textural experience completely. This budget-friendly, deli-style recipe relies heavily on careful ingredient synergy to recreate that slightly sweet, nostalgic taste everyone expects at a potluck.
#### Ingredients
– 1 lb elbow macaroni
– 1 cup mayonnaise
– 2 tbsp white vinegar
– 1 tbsp granulated sugar
– 1/2 cup celery, finely diced
– 1/4 cup red bell pepper, finely diced
– Set of glass mixing bowls with airtight lids for easy prep and storage
#### Instructions
1. Boil the elbow macaroni until very tender (not al dente), then drain and rinse under cold water.
2. Whisk the mayonnaise, white vinegar, and sugar together in a large mixing bowl until completely smooth and emulsified.
3. Dice the celery and red bell pepper uniformly so they distribute evenly throughout the pasta.
4. Toss the cooled macaroni and diced vegetables into the sweet and tangy dressing until thoroughly coated.
5. Cover securely and refrigerate for a minimum of 4 hours—overnight is best—to let the flavors marry.
> **Pro-Tip:** When deciding between potato salad vs macaroni salad, remember that pasta absorbs liquid differently than potatoes. To achieve that authentic classic american macaroni salad recipe flavor, you need perfect ingredient synergy: the white vinegar provides necessary tang, while the sugar cuts the acidity, creating a dressing that stays creamy even after the pasta absorbs it.

### 6. Prep Authentic Deviled Eggs
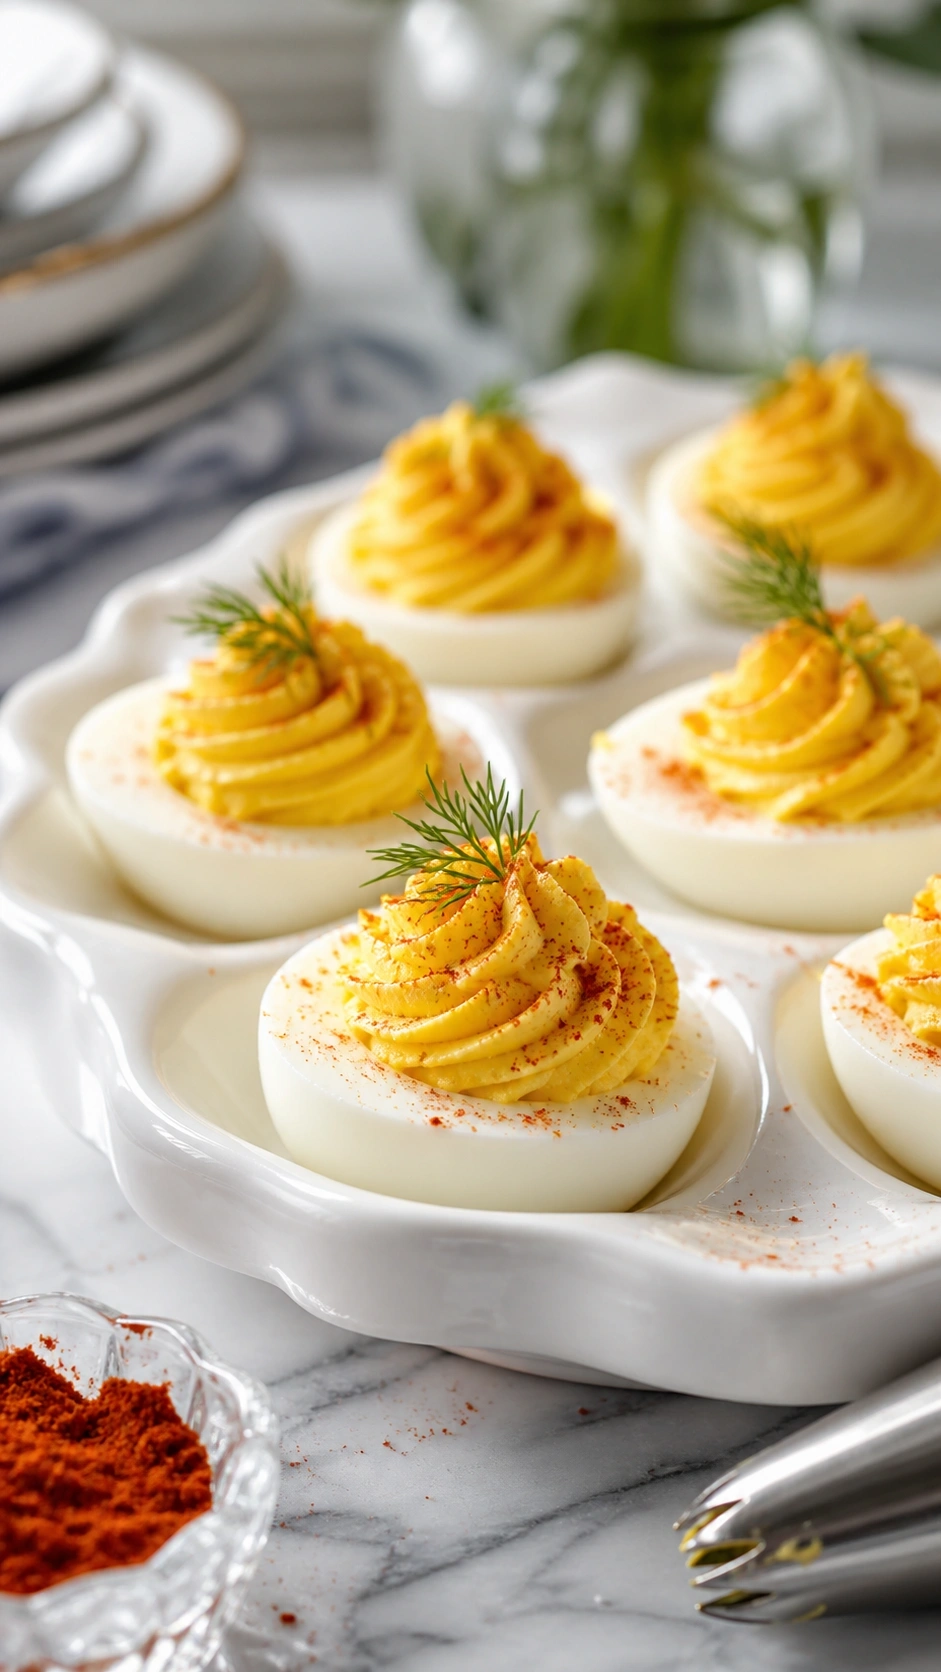
Pin these stunning, pipe-able deviled eggs for elegant summer hosting!
**Authentic deviled eggs are the ultimate bite-sized appetizer that seamlessly anchors traditional American holiday spreads with their savory, creamy texture.** Mixing mayo and mustard creates a luxuriously rich filling that acts perfectly as both a starter and a classic side.
Many wonder, why is deviled egg salad popular at cookouts? It is primarily because they are visually stunning, highly nostalgic, and easy to pop in your mouth while mingling. However, they present massive transport challenges. Proper sanitation tips, preventing cross-contamination, and utilizing an insulated carrier are absolutely mandatory for these delicate treats.
#### Ingredients
– 12 large eggs, preferably 1-2 weeks old for easier peeling
– 1/2 cup mayonnaise
– 1 tbsp Dijon mustard
– 1 tsp white vinegar
– Smoked paprika for garnish
– Reusable piping bags with a large star tip
– Insulated deviled egg carrier with built-in ice packs for safe transport
#### Instructions
1. Boil the eggs for exactly 12 minutes, then immediately plunge them into an ice-water bath for 15 minutes to stop cooking and shrink the egg from the shell.
2. Peel the eggs, slice them in half lengthwise, and carefully scoop the cooked yolks into a separate mixing bowl.
3. Mash the yolks completely smooth, then whisk in the mayonnaise, Dijon mustard, and vinegar until luxuriously creamy.
4. Scoop the yolk mixture into a piping bag fitted with a large star tip, and pipe generous swirls back into the egg white halves.
5. Garnish with a dusting of smoked paprika and store immediately in a chilled egg carrier.
> **Pro-Tip:** Using older eggs prevents the albumen from clinging to the shell, but the real secret to perfect peeling is the ice bath temperature shock! Also, from a strict food safety standpoint, always transport these in an iced carrier to prevent bacterial cross-contamination. Deviled eggs should never sit in the warm sun.

### 7. Bake Sweet Cornbread Muffins

Pin these perfectly golden honey-butter cornbread muffins to bake this weekend!
**Baking sweet cornbread muffins provides a hearty, portion-controlled starch that brilliantly soaks up rich barbecue sauces from ribs or chicken.** These homemade southern style sides solve the hassle of slicing a messy skillet out on the picnic table.
When comparing homemade vs store bought cornbread, there is simply no contest. A scratch-made muffin leverages buttermilk to balance the sweet flavor profile, providing necessary acidity to tenderize the crumb structure. They offer incredibly easy cleanup and keep guests happy while waiting for the main course to finish grilling.
#### Ingredients
– 1 cup yellow cornmeal
– 1 cup all-purpose flour
– 1/2 cup granulated sugar
– 1 cup buttermilk (crucial for tender texture)
– 1/2 cup unsalted butter, melted
– 2 large eggs
– Premium heavy-duty silicone muffin pan for guaranteed non-stick release
#### Instructions
1. Preheat your oven to 400°F (200°C) and lightly grease your silicone muffin pan.
2. Whisk the dry ingredients (cornmeal, flour, sugar, baking powder, salt) together in a large bowl.
3. Mix the wet ingredients (buttermilk, melted butter, eggs) in a separate bowl until smooth.
4. Fold the wet ingredients gently into the dry ingredients just until combined—do not overmix, or the muffins will be tough.
5. Bake for 15-18 minutes until the tops are golden, then brush immediately with warm honey-butter.
> **Pro-Tip:** Skip the box mix! The culinary secret to a superior homemade flavor profile is the natural acidity in the buttermilk. It reacts chemically with the baking powder for maximum lift while tenderizing the gluten, ensuring your sweet cornbread muffins are moist and tender rather than dry and crumbly.

### 8. Grill Classic Corn on the Cob
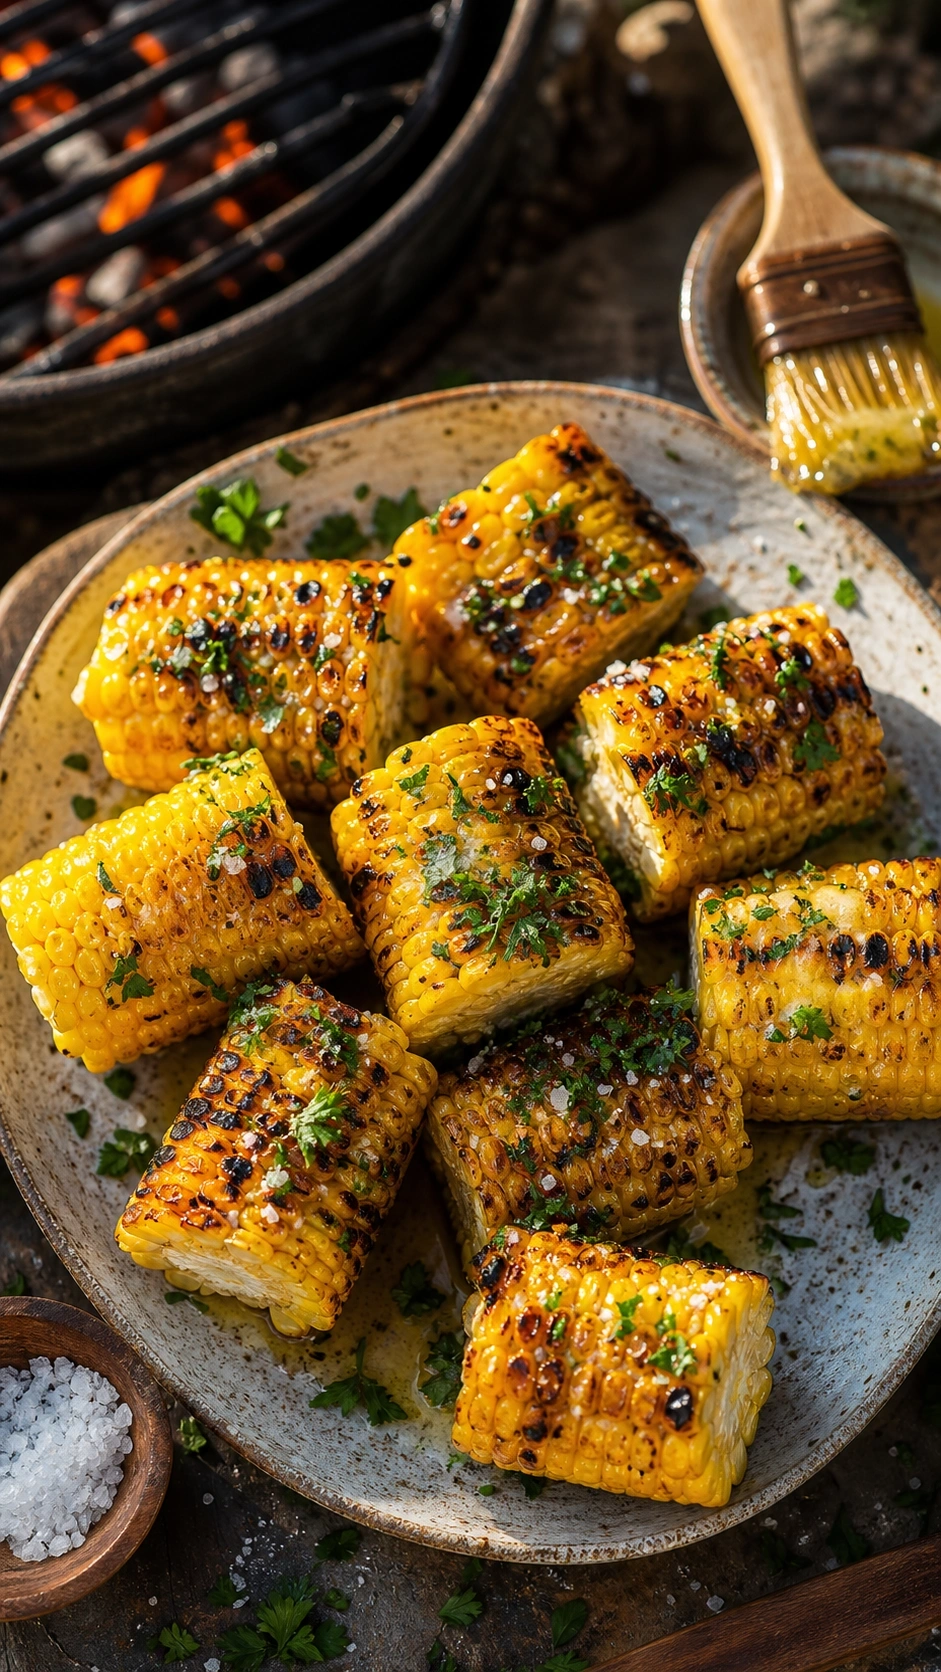
Pin this perfectly charred grilled corn technique for your next backyard party!
**Classic grilled corn on the cob delivers a sweet, smoky char that serves as a high-fiber, healthy vegetable contrast to heavy smoked meats.** Pairing sweet corn and butter creates an irresistible texture contrast that perfectly defines summery outdoor dining.
Logistically, managing the grill space while the main protein is cooking requires precise timing. Guests often wonder how to keep corn on the cob warm without drying out the delicate kernels. By utilizing a foil-wrapping technique, you can easily prepare these healthy vegetable sides for grilling ahead of the burger rush.
#### Ingredients
– 8 ears of fresh sweet corn, husks and silks removed
– 1/2 cup unsalted butter, softened
– Coarse sea salt and cracked black pepper
– Heavy-duty aluminum foil
– Stainless steel interlocking corn cob holders for easy, mess-free eating
#### Instructions
1. Preheat your grill to medium-high heat (around 400°F).
2. Brush the shucked ears of corn lightly with olive oil to prevent sticking to the grates.
3. Grill the corn directly on the grates for 10-12 minutes, turning every 2 minutes until beautifully charred on all sides.
4. Remove from the grill and immediately brush generously with the softened butter and coarse sea salt.
5. Wrap the grilled cobs tightly in a foil-lined cooler to keep them piping hot until the burgers are ready to serve.
> **Pro-Tip:** The perfect texture contrast comes from grilling the corn *naked* (without the husk). The direct heat triggers a rapid Maillard reaction on the natural sugars, giving you that authentic, smoky barbecue flavor. To solve the “how to keep it warm” problem, store the finished wrapped ears in a dry, insulated cooler—they’ll stay steaming hot for up to two hours!
### 9. Slice a Refreshing Watermelon and Feta Fruit Salad
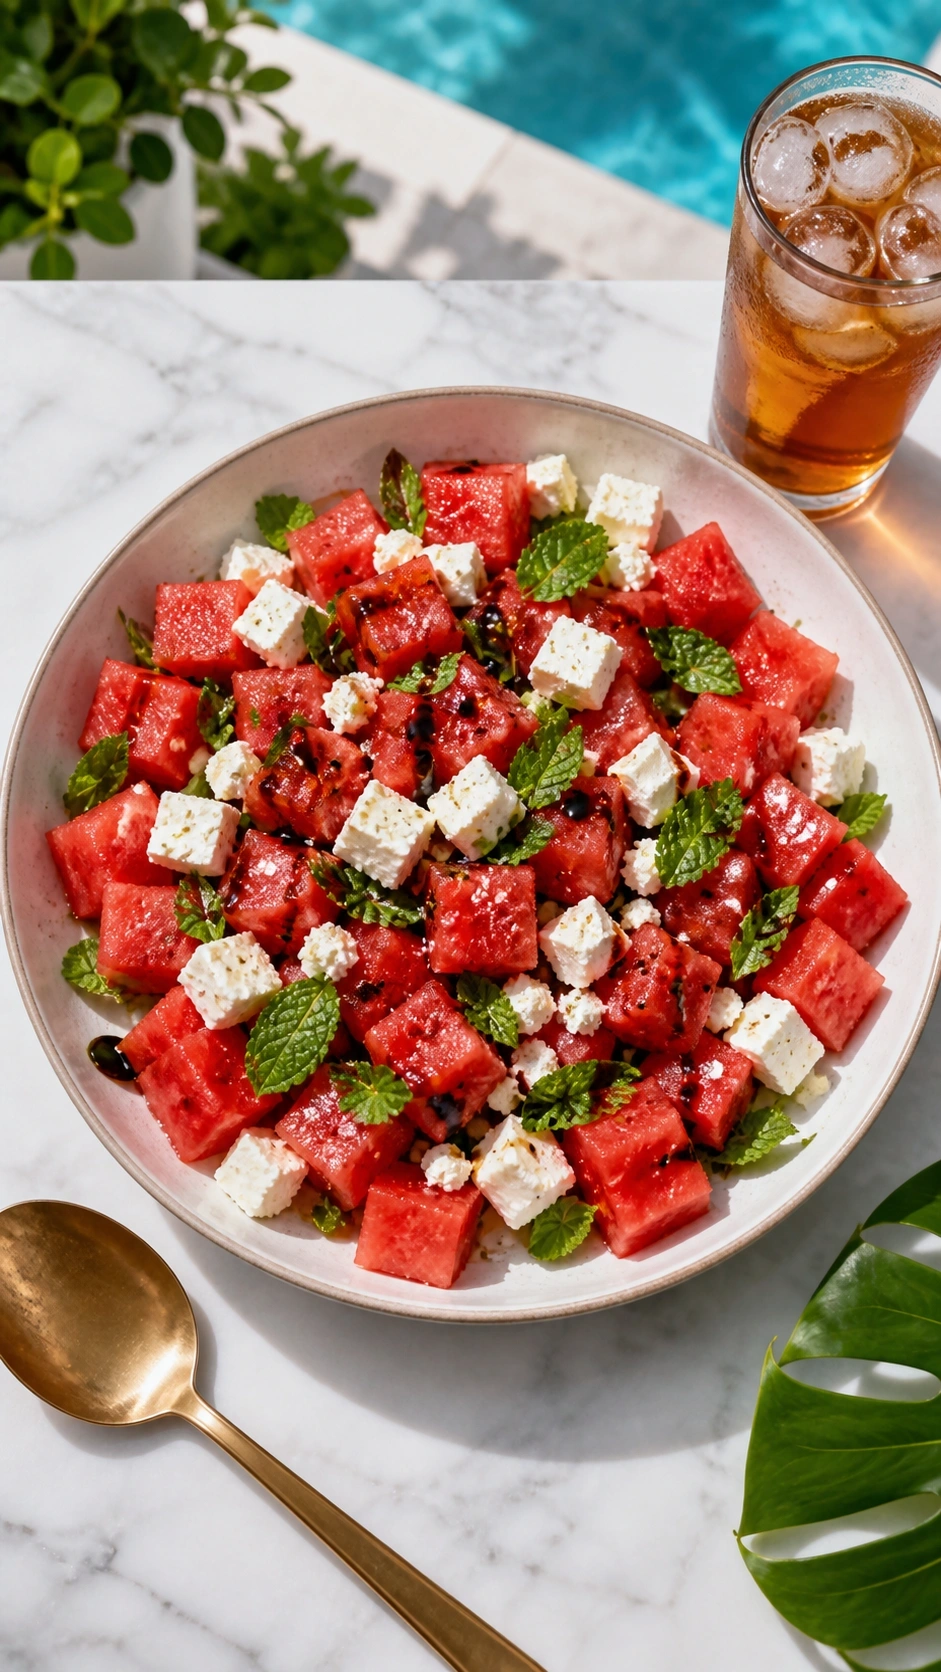
Pin this incredibly refreshing, sweet-and-salty summer salad!
**A watermelon and feta fruit salad is a modern, elevated side dish that provides immense hydration while contrasting sharply against intense, smoky BBQ sauces.** This sweet and salty combination acts as the ultimate palate cleanser and visually brightens your entire food spread.
When users ask, “what fruit goes best with bbq?”, watermelon is always the definitive answer. But transforming it into what is the best summer salad requires careful culinary science. The ingredient synergy between the juicy melon and the sharp cheese creates a fresh fruit salad that doesn’t wilt pathetically in the summer heat.
#### Ingredients
– 1 small seedless watermelon, cut into 1-inch cubes
– 1 cup high-quality feta cheese, crumbled or cubed
– 1/4 cup fresh mint leaves, torn
– 2 tbsp balsamic glaze
– 1 lime, juiced
– Heavy-duty stainless steel watermelon slicer cutter for fast, uniform cubing
#### Instructions
1. Slice the watermelon into uniform, bite-sized cubes using a specialized cutter and place them in a large serving bowl.
2. Squeeze the fresh lime juice over the watermelon cubes and toss gently.
3. Scatter the feta cheese and torn fresh mint leaves over the top of the fruit just before serving.
4. Drizzle the thick balsamic glaze elegantly over the entire bowl.
5. Keep chilled until the exact moment of serving to maintain the crisp, refreshing texture.
> **Pro-Tip:** This dish is a masterclass in ingredient synergy. The juicy, sweet watermelon acts as the perfect hydrating canvas for the sharp, salty bite of the feta, while the mint provides a cooling effect. It’s the absolute best palate cleanser to accompany heavy, smoky barbecue meats and can be thrown together in five minutes!

### 10. Marinate a Zesty Three Bean Salad
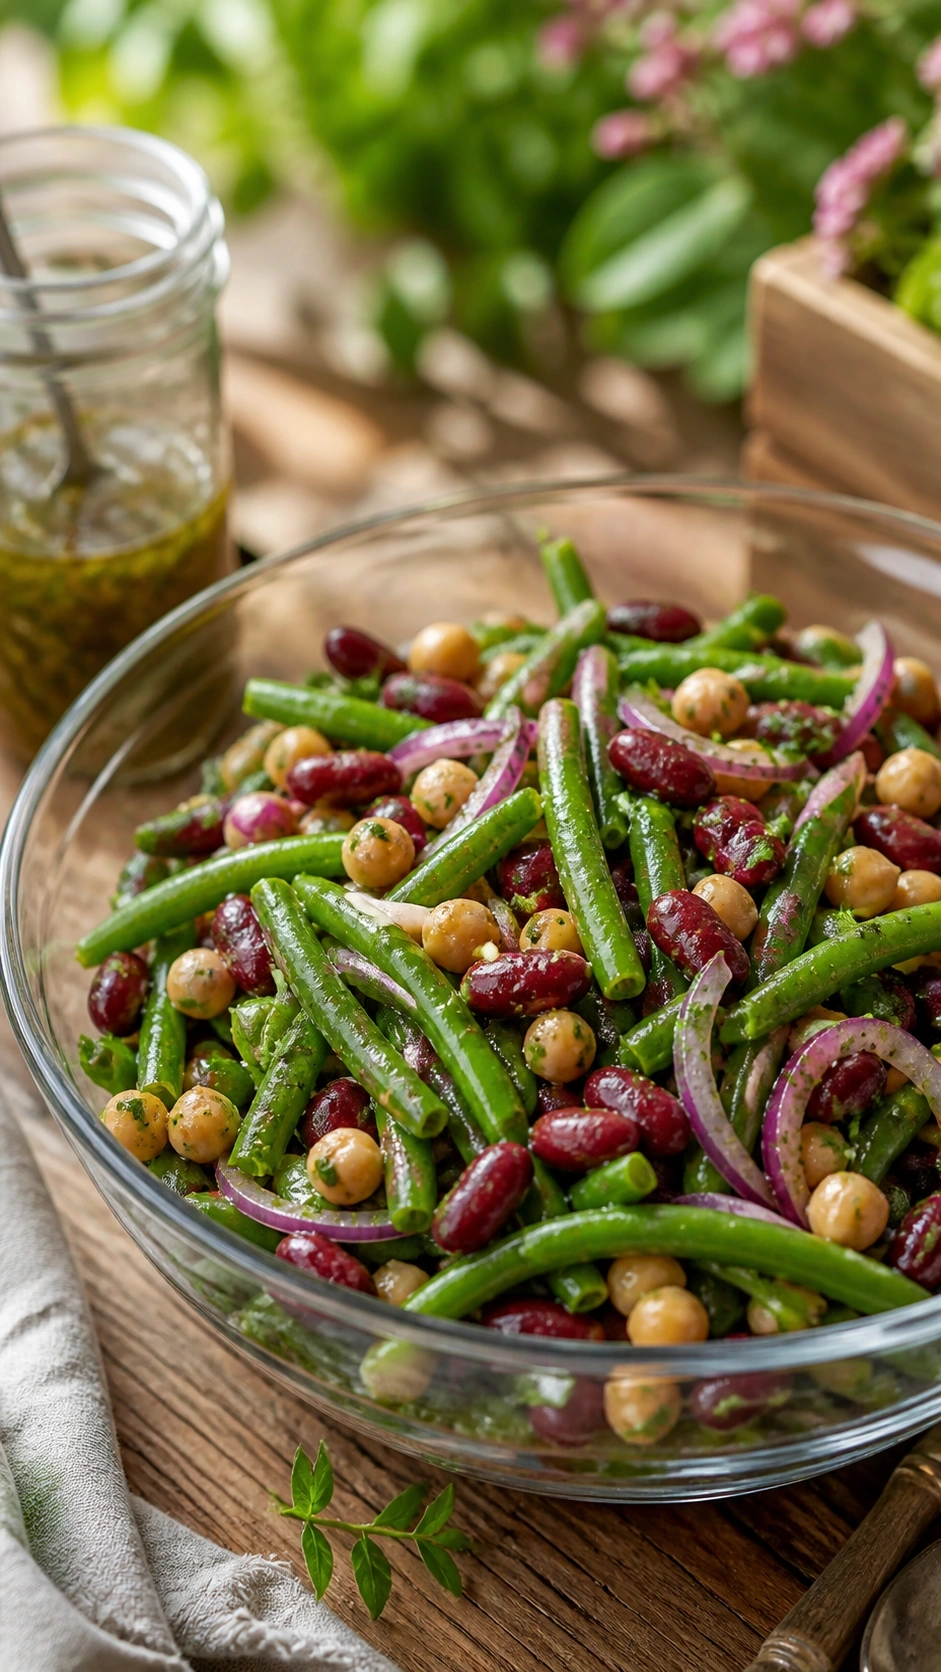
Pin this ultimate make-ahead, heat-stable BBQ side dish!
**A zesty three bean salad relies on a sharp vinegar and sugar brine to create an incredibly heat-stable dish that can safely sit outdoors all day.** This fully vegan, high-fiber recipe brilliantly balances heavy barbecue plates with crisp, acidic bites that simply will not spoil.
If you need vegetarian bbq sides that aren’t salad greens, this is your ultimate logistical problem-solver. It is one of the very few heat-stable sides that explicitly requires you to make it 24 hours ahead of time. The preservation techniques used in the vinaigrette actively tenderize the fibrous beans while preventing dangerous bacterial growth.
#### Ingredients
– 1 (15oz) can kidney beans, rinsed
– 1 (15oz) can garbanzo beans (chickpeas), rinsed
– 1 lb fresh green beans, trimmed and blanched
– 1/2 small red onion, very thinly sliced
– 1/3 cup apple cider vinegar
– 1/4 cup olive oil
– 2 tbsp granulated sugar
– Airtight glass food storage containers for marinating safely without absorbing plastic flavors
#### Instructions
1. Blanch the fresh green beans in boiling water for 3 minutes, then shock them in ice water to lock in their bright green color and crisp texture.
2. Whisk the olive oil, apple cider vinegar, sugar, salt, and pepper in a large glass bowl to create the zesty brine.
3. Combine all three beans and the thinly sliced red onion in the dressing.
4. Toss vigorously until every bean is coated in the sweet and sour vinaigrette.
5. Cover tightly and marinate in the refrigerator for at least 12 hours (up to 48 hours) before the cookout, stirring occasionally.
> **Pro-Tip:** This is the ultimate heat-stable side. Utilizing traditional preservation techniques, the high-acid vinegar and sugar brine not only prevents bacterial growth when sitting out in the sun, but it actively tenderizes the fibrous beans and mellows the harsh bite of the raw red onion over time.
### 11. Bake a Hearty Mac and Cheese
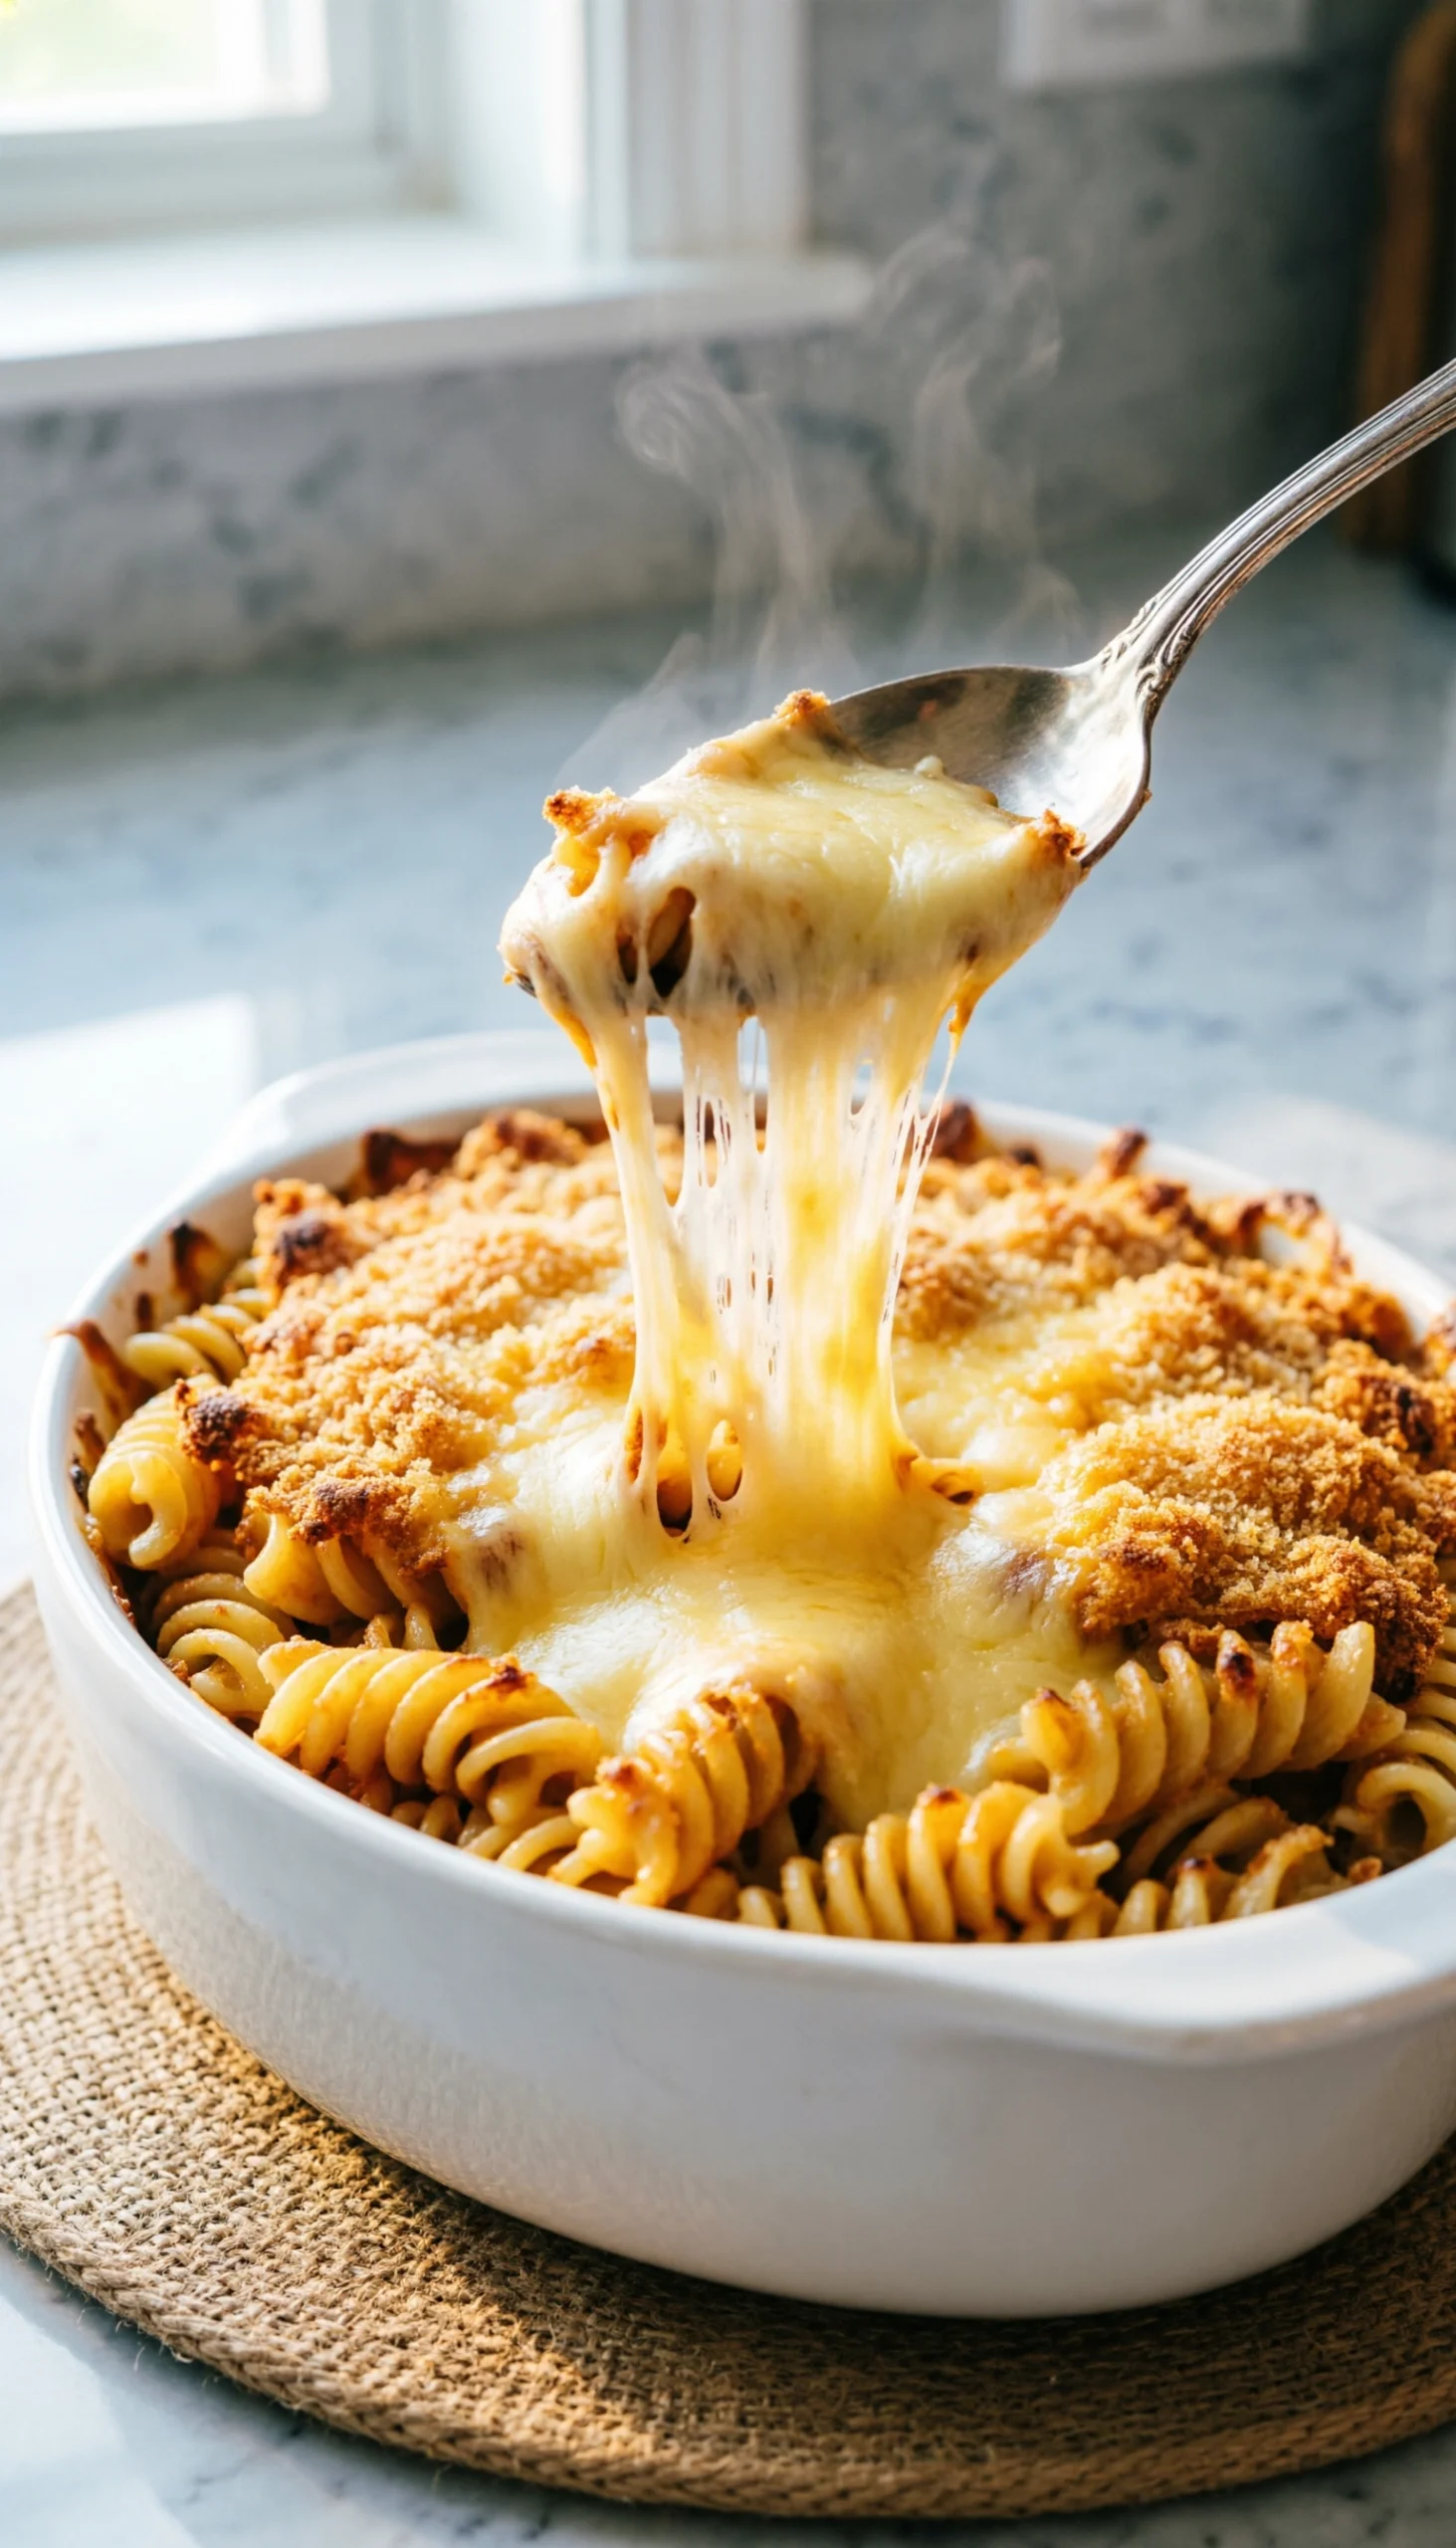
Pin this ultimate cheesy comfort side dish for your next family gathering!
**A baked, hearty mac and cheese anchors your entire meal as the ultimate comforting, southern-style counterpart to savory smoked meats.** This deeply rich, kid-friendly casserole holds its heat beautifully on a buffet table compared to thin, stovetop versions.
When hosts ask what sides are kid-friendly?, classic mac and cheese is the undisputed champion. To ensure this dish remains velvety rather than grainy, you must understand proper sauce emulsification. Avoiding pre-shredded cheese guarantees a stunningly smooth béchamel base that easily withstands reheating.
#### Ingredients
– 1 lb cavatappi or elbow pasta
– 1/4 cup unsalted butter
– 1/4 cup all-purpose flour
– 3 cups whole milk, warmed
– 4 cups sharp cheddar cheese, freshly grated (pre-shredded contains anti-caking agents)
– 1/2 cup panko breadcrumbs
– Large 9×13 ceramic baking dish for even heat distribution and beautiful serving
#### Instructions
1. Boil the pasta in salted water until just shy of al dente, drain, and set aside.
2. Melt the butter in a large saucepan over medium heat, then whisk in the flour for 2 minutes to create a blonde roux.
3. Slowly whisk in the warmed milk until smooth, simmering until the sauce thickens enough to coat the back of a spoon.
4. Remove from heat and stir in the freshly grated cheddar cheese until completely melted and smooth, then fold in the pasta.
5. Pour the mixture into a greased ceramic baking dish, top with panko breadcrumbs, and bake at 350°F for 20 minutes until bubbly and golden.
> **Pro-Tip:** What most recipes miss about cheese sauce: For the creamiest results that won’t separate when sitting on a warm buffet table, you must build a proper roux-based béchamel. This creates a highly stable emulsion. Furthermore, never use pre-bagged shredded cheese; the anti-caking starches will prevent proper emulsification, resulting in a grainy texture instead of a velvety smooth sauce.

## Key Takeaways: Your Quick Guide to Classic Cookout Sides
**The most crucial elements of preparing classic cookout sides involve mastering food safety outdoors, optimizing make-ahead prep schedules, and strategically pairing side dishes with your main proteins.** Review these essential expert tips to pull off a flawless backyard barbecue menu without the stress.
To ensure your summer entertaining goes smoothly without scrambling at the last minute, keep these verified culinary rules in mind:
* **Keep Mayo-Based Sides Chilled:** For dishes like classic potato salad and macaroni salad, maintain safe storage temperatures by serving them over ice or in insulated bowls; never leave them out for over 2 hours.
* **Make It Ahead to Maximize Flavor:** Items like coleslaw and three bean salad actually taste better on day two because the extended marinating time allows acidity and sugars to meld completely.
* **Match Sides to Your Proteins:** Think about flavor balance; pair heavy, rich smoked brisket with a tangy vinegar coleslaw, and pair simple hot dogs with hearty baked beans.
* **Master the Starch Science:** To prevent cold pasta salad from drying out, cook your noodles slightly past al dente and dress them while warm to lock in moisture.
* **Skip Store-Bought Shortcuts:** Grating your own block cheese for mac and cheese ensures proper emulsification, avoiding the grainy texture caused by pre-shredded anti-caking agents.
* **Protect Your Spread:** Utilize lidded containers and dedicated cooler spaces to keep cold foods cold and prevent cross-contamination outdoors.
## People Also Ask About Classic Cookout Sides
**Resolving your final logistical questions ensures you are fully prepared to host a massive outdoor gathering.** From strict food safety guidelines regarding mayo salads to precise portioning math, understanding these common cookout queries guarantees your event runs flawlessly.
### What are the most popular cookout sides?
**The most popular classic cookout sides in America are potato salad, creamy coleslaw, baked beans, macaroni salad, and grilled corn on the cob.** These traditional barbecue accompaniments are staples because they are easy to prepare in large batches, pair perfectly with grilled meats, and evoke a strong sense of summer nostalgia. A well-rounded menu typically features a mix of one starchy side, one creamy salad, and one fresh vegetable dish.
### What sides go best with burgers?
**Classic potato salad, crispy french fries, creamy coleslaw, and sweet baked beans go best with grilled burgers.** Because burgers are rich and heavy, you want side dishes that offer texture contrast and acidity. A tangy vinegar-based coleslaw can actually be served directly on top of the burger, while a chilled, mustard-heavy potato salad helps cut through the richness of the beef and cheese.
### How much potato salad per person do I need?
**You should plan to serve about 1/2 cup (or 4 to 5 ounces) of potato salad per person at a cookout.** If you are hosting 20 guests, you will need approximately 5 pounds of potatoes. However, if you are offering fewer than three total side dishes, increase the portion size to 3/4 cup per person to ensure you have enough food for a hungry crowd.
### Can I make cookout sides ahead of time?
**Yes, most traditional barbecue sides like potato salad, coleslaw, pasta salad, and three bean salad actually taste better when made 1 to 2 days ahead of time.** Making them ahead allows the starches to absorb the dressings and the flavor profiles to meld. However, you should wait to add delicate fresh herbs, crunchy toppings, or final drizzles of dressing until right before serving to maintain optimal texture.
### How to keep sides cold outside?
**Keep your cold sides safe outdoors by nesting your serving bowls inside a larger bowl filled with crushed ice.** Additionally, use insulated food storage containers with tight-fitting lids, keep the food in a shaded area away from direct sunlight, and only bring out small portions at a time, keeping the main batches in the refrigerator or a dedicated cold cooler until needed to replenish the buffet.
### How long can potato salad sit out?
**According to strict food safety guidelines, potato salad should never sit out at room temperature for more than 2 hours, or just 1 hour if the outdoor temperature is above 90°F.** Bacteria multiply rapidly in warm temperatures. To prevent dangerous foodborne illness, immediately discard any mayo-based salads or deviled eggs that have been sitting in the sun beyond these strict time limits.
### What are the best southern bbq sides?
**The best Southern-style barbecue sides include sweet cornbread muffins, slow cooker baked beans with bacon, creamy mac and cheese, collard greens, and hush puppies.** Southern cookout sides are typically characterized by rich, hearty flavor profiles that feature butter, bacon fat, and buttermilk. These comforting dishes are specifically designed to complement low-and-slow smoked meats like brisket and pulled pork perfectly.
### Which sides are gluten-free for cookouts?
**Naturally gluten-free cookout sides include grilled corn on the cob, traditional potato salad, vinegar coleslaw, deviled eggs, and watermelon fruit salad.** Always double-check your mayonnaise, mustards, and barbecue sauces, as some brands use thickeners containing hidden gluten. If you want to serve baked beans, ensure the recipe is made from scratch, as some canned baked beans contain hidden gluten in their commercial flavorings.
### How to keep corn on the cob warm?
**The easiest way to keep corn on the cob warm for a crowd is to wrap the freshly grilled ears in heavy-duty aluminum foil and store them inside a dry, insulated cooler.** The cooler traps the steam and residual heat, keeping the corn piping hot for up to two hours without overcooking it, instantly freeing up your valuable grill space for burgers and hot dogs.
### What is a traditional American cookout menu?
**A traditional American cookout menu features grilled hamburgers and hot dogs as the main proteins, accompanied by classic sides like potato salad, baked beans, and coleslaw.** The spread is usually rounded out with sliced watermelon for dessert, plenty of potato chips with dip, and ice-cold lemonade or sweet tea. This classic picnic format provides a perfect balance of savory, sweet, crunchy, and creamy textures.
## Final Thoughts on Classic Cookout Sides
Hosting a memorable summer gathering doesn’t have to mean spending your entire day stressed out in a hot kitchen. By relying on these classic cookout sides, you can build a vibrant, crowd-pleasing backyard barbecue menu that honors culinary tradition while utilizing smart, modern preparation methods. The true secret to flawless outdoor entertaining isn’t just about having the best grill; it’s about mastering the logistical dance of make-ahead recipes, proper temperature control, and successfully balancing heavy smoked proteins with bright, refreshing accompaniments.
Whether you’re whisking together a retro, creamy macaroni salad or allowing a zesty three-bean salad to marinate to perfection overnight, these tested recipes ensure you spend less time stressing over food safety and more time enjoying the sunshine with your guests. Remember to lean heavily on insulated containers for your chilled items, utilize your slow cooker for those old-fashioned baked beans, and always balance your savory dishes with sweet, refreshing bites like a watermelon fruit salad.
Armed with these foolproof sides, you are fully prepared to anchor the ultimate summer menu for 2026. Which of these traditional favorites are you planning to prep for your next weekend barbecue? Let us know your go-to pairings in the comments below!
Last update on 2026-06-05 at 00:00 / Affiliate links / Images from Amazon Product Advertising API
