As an Amazon Associate BakingBakewareSets.com earns from qualifying purchases.
Make-Ahead Cookout Sides: 11 Proven Recipes for 2026
Rushing before a party while staring at a soggy salad is the ultimate hosting nightmare. You need reliable make-ahead cookout sides that actually survive the summer heat. Eliminating day-of stress transforms you from a frantic cook into a relaxed backyard entertainer.
The best make-ahead cookout sides are vinegar-based pasta salads, hearty bean dishes, and properly chilled potato salads. To prevent soggy ingredients and ensure food safety outdoors, prepare dishes 24 hours early, store them in airtight containers, and serve mayo-based sides over an ice bath setup.
Drawing from comprehensive analysis of current data and professional kitchen tips, this guide solves outdoor dining logistics. You will discover chef-tested recipes engineered specifically for advance prep side dishes. Master proper overnight storage to ensure long-lasting freshness for your next gathering.
☰ Table of Contents ▼
show
Make-Ahead Cookout Sides: Mastering Stress-Free Prep and Outdoor Food Safety
Securing proper outdoor food safety: Mastering stress-free prep requires a firm grasp of temperature control and ingredient durability. Hosting an outdoor dining event often involves balancing a massive checklist while worrying constantly about food spoilage. To avoid serving a wilted, soggy salad or risking dangerous cross-contamination, you must select durable ingredients designed to thrive in a chilled temperature environment. Proper overnight storage is the ultimate secret to locking in long-lasting freshness. By preparing easy side dishes 24 to 48 hours early, you eliminate the frantic day-of scramble entirely. This systematic approach not only prevents foodborne illness but also provides complex flavors the necessary time to meld, mature, and peak perfectly before your guests arrive.
Make-Ahead Cookout Sides: 11 Proven Recipes for 2026
Curating the ultimate summer menu: The best summer cookout recipes balance refreshing textures with absolute logistical reliability. Designing a perfect menu means selecting crowd-sized portions of hearty starches, vibrant vegetables, and fresh fruits that beautifully complement grilled meats like hamburgers and hot dogs. These specific recipes leverage specialized chilling techniques and chemical processes to guarantee flawless results. Because they are highly make ahead friendly, you eliminate day-of cooking stress completely. Instead of scrambling over a hot stove while your friends mingle outdoors, you will simply pull these finished culinary masterpieces straight from your refrigerator. Let’s explore eleven professionally structured, step-by-step recipes specifically engineered to thrive in demanding outdoor environments.
1. Assemble a Classic Creamy Potato Salad

Pin this classic recipe to your ‘Summer BBQ Menu’ board so you never lose it!
Perfecting your potato base: Preparing a crowd-pleasing potato salad requires precise blanching and refrigerating techniques. A common issue with this traditional side is that warm potatoes easily absorb too much dressing and turn to mush. By mastering the exact chilled temperature required, you achieve a flawlessly creamy texture. This method also works beautifully if you need a dairy free creamy potato salad alternative using vegan mayonnaise. Serving potato salad + coleslaw alongside your grilled mains creates the ultimate classic plate.
Ingredients
- 3 lbs Yukon Gold potatoes, peeled and diced into 1-inch cubes
- 1 cup heavy-duty mayonnaise (or high-quality vegan mayo)
- 2 tablespoons yellow mustard and 1 tablespoon apple cider vinegar
- 3 celery stalks, finely diced for crisp vegetables contrast
- 4 hard-boiled eggs, chopped
- 1/2 red onion, finely minced
- Salt, black pepper, and smoked paprika for garnish
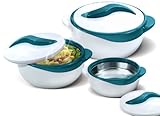
- 1 double-walled insulated stainless steel serving bowl with an airtight lid
Instructions
- Simmer the diced potatoes in heavily salted water until fork-tender (about 10-12 minutes), then drain and let them cool slightly.
- Whisk together the mayonnaise, mustard, vinegar, salt, and pepper in the bottom of your large insulated serving bowl.
- Fold the warm potatoes gently into the dressing (warm potatoes absorb the dressing better).
- Layer in the chopped celery, onions, and hard-boiled eggs, tossing lightly to combine.
- Garnish with a sprinkle of paprika, seal the lid tightly, and chill in the refrigerator for at least 12 to 24 hours before serving.
Pro-Tip: Don’t skip the overnight chill! Through a process called starch retrogradation, the starches in the potatoes realign and firm up as they cool in the fridge. This prevents them from turning to mush when stirred and allows the flavor maturation to peak right as your guests arrive. What most guides miss is that this chilling period actually lowers the glycemic index of the dish as well!
7% OffBestseller No. 1
2. Toss a Zesty Vinaigrette Pasta Salad
Save this non-perishable pasta salad trick to your ‘Summer Recipes’ board!
Mastering the dairy-free side: Toss dry pasta with a vibrant, zesty dressing to create the ultimate vegan make ahead BBQ recipe. Many hosts struggle with noodles soaking up all the liquid overnight, resulting in a bland and sticky mess. This specific technique guarantees a perfectly moist salad that easily scales up, making it the best cold pasta salad for 100 people. Combining pasta salad + vinaigrette ensures the dish won’t quickly spoil under the hot afternoon sun.
Ingredients
- 1 lb rotini or fusilli pasta (spirals hold the dressing best)
- 1/2 cup extra-virgin olive oil and 1/4 cup red wine vinegar
- 1 tablespoon Dijon mustard and 1 teaspoon honey
- 1 cup cherry tomatoes, halved
- 1/2 cup Kalamata olives, pitted and sliced
- 1 cup bell peppers (assorted colors), finely chopped
- Extra large borosilicate glass mixing bowl with leak-proof silicone lid
Instructions
- Boil the pasta in salted water until it is past al dente (make it slightly softer than usual, as it will firm up when cold).
- Whisk the olive oil, red wine vinegar, Dijon mustard, and honey vigorously in a small bowl until fully blended.
- Drain the pasta and rinse briefly under cool water to stop the cooking process, shaking off all excess moisture.
- Toss the warm pasta with only half of the prepared vinaigrette, allowing the noodles to absorb the flavor as they cool.
- Assemble by adding the tomatoes, olives, and bell peppers. Seal the bowl tightly and store in the fridge. Toss with the remaining half of the dressing just 30 minutes before serving.
Pro-Tip: The Dijon mustard is crucial here—it acts as a binding agent that ensures emulsification stability. Without it, your oil and vinegar will separate overnight. Adding half the dressing right before serving is the ultimate catering secret to prevent dry pasta syndrome and guarantee every bite is perfectly coated.

3. Simmer Slow-Cooker Baked Beans
Don’t let your BBQ be boring—Pin this foolproof baked bean recipe!
Building a warm, hearty classic: Combine hearty beans with your slow cooker to develop an intensely savory profile. The rich sweet-and-sour notes beautifully complement grilled ribs, providing an essential warm option among cold salads. Because this requires zero active stove time on the day of your event, it serves as one of the best budget friendly bulk cookout sides available. Pairing baked beans + slow cooker technology frees up critical grill space for your main proteins.
Ingredients
- 3 (15 oz) cans of navy beans or great northern beans, drained and rinsed
- 6 slices of thick-cut bacon, chopped
- 1 cup barbecue sauce (your favorite brand)
- 1/2 cup brown sugar and 1/4 cup dark molasses
- 1/2 yellow onion, finely diced
- 1 tablespoon apple cider vinegar and 1 teaspoon dry mustard powder
- Programmable slow cooker with a locking travel lid
Instructions
- Sauté the chopped bacon and diced onion in a skillet until the bacon is crispy and onions are translucent. Drain excess grease.
- Combine the drained beans, cooked bacon and onions, barbecue sauce, brown sugar, molasses, vinegar, and mustard powder directly into the slow cooker basin.
- Stir everything thoroughly until the beans are completely coated in the sauce mixture.
- Simmer on LOW for 6-8 hours the day before your party to allow the flavors to marry perfectly.
- Refrigerate the entire removable basin overnight. The next day, simply pop it back into the heating base and set it to “Keep Warm” two hours before guests eat.
Pro-Tip: Cooking these the day before triggers an extended Maillard reaction, creating deep, complex caramel notes that you simply cannot achieve by rushing them on the stove an hour before dinner. The overnight rest allows the sugars to penetrate fully to the center of the beans, transforming a basic side into a culinary masterpiece.

4. Whisk a Creamy Buttermilk Coleslaw
Pin this crunch-saving coleslaw trick for your next pulled pork night!
Creating the ultimate BBQ crunch: Dress fresh cabbage with real buttermilk to introduce refreshing flavors that expertly balance the smokiness of heavy barbecue meats. Wilting lettuce is a common frustration, but proper vegetable prep ensures an unyielding crunch. Whether your guests prefer a creamy vs tangy coleslaw, this recipe bridges the gap beautifully. It firmly secures its place among top traditional southern cookout side dishes by maintaining a perfect texture entirely overnight.
Ingredients
- 1 large head of green cabbage, finely shredded
- 1/4 head of purple cabbage, finely shredded (for a colorful presentation)
- 2 large carrots, grated
- 3/4 cup mayonnaise and 1/4 cup real buttermilk
- 2 tablespoons apple cider vinegar and 2 tablespoons granulated sugar
- 1 teaspoon celery seed, plus kosher salt
- Heavy-duty adjustable stainless steel mandoline slicer
Instructions
- Shred the cabbages and grate the carrots uniformly using your mandoline slicer for the perfect professional texture.
- Toss the cabbage mixture with 1 tablespoon of kosher salt in a colander set over a bowl. Let it sit for 1-2 hours, then squeeze out the excess water. (This stops it from weeping later!)
- Whisk the mayonnaise, buttermilk, vinegar, sugar, and celery seed together in a large mixing bowl until perfectly smooth.
- Fold the dry, salted cabbage blend into the buttermilk dressing until thoroughly coated.
- Transfer to an airtight container and let the flavors meld in the fridge overnight.
Pro-Tip: Salting the cabbage beforehand utilizes osmotic pressure in salads to draw out excess cellular water. If you skip this critical step, that hidden water leaks directly into your dressing overnight. This turns what should be a rich, perfectly clinging sauce into a bland, soupy puddle at the bottom of your serving bowl.

5. Layer a Honey Lime Fresh Fruit Salad
Fruit salad that never turns brown? Pin this genius hack to remember it!
Preserving vibrant, fresh fruit: Protect your fresh fruit with natural citrus juice to provide a bright, kid-friendly palate cleanser. Preventing mushy fruit is the biggest challenge when preparing sweet sides in advance. This specific methodology delivers a make ahead fruit salad that stays fresh, colorful, and highly appetizing 24 hours later. Combining a robust fruit salad + honey lime glaze creates a protective barrier that stops oxidation dead in its tracks.
Ingredients
- 2 cups strawberries, hulled and halved
- 1 cup blueberries and 1 cup blackberries
- 2 kiwis, peeled and sliced into half-moons
- 1/2 cantaloupe or honeydew melon, scooped into balls
- 1/4 cup pure honey
- Zest and juice of 2 fresh limes
- Stainless steel double-sided melon baller tool
Instructions
- Whisk the fresh lime juice, lime zest, and honey together in a small bowl. (Warm the honey slightly in the microwave for 10 seconds if it’s too thick to blend).
- Scoop the melon using your baller and prep all the berries, placing the firmest fruits (melon, blueberries) at the bottom of your storage container.
- Layer the more delicate fruits (strawberries, kiwi, blackberries) gently on top to prevent crushing.
- Drizzle the honey lime dressing evenly over the top of the fruit.
- Seal the container tightly. Toss very gently just once right before setting the bowl on the buffet table.
Pro-Tip: The lime juice in the dressing provides natural acidulation, which is essential for enzymatic browning prevention. The ascorbic acid lowers the pH on the surface of the fruit, stopping rapid oxidation in its tracks. This culinary science ensures your delicate fruits look brilliantly freshly cut even 24 hours after preparation.

6. Chop a Grilled Corn and Black Bean Salsa
Need a side that won’t spoil in the sun? Pin this vegan corn salsa!
Serving durable, dairy-free sides: Mixing charred corn and beans creates an incredibly durable, room-temperature stable side dish. When the sun is beating down on your buffet table, you need vegan make ahead BBQ recipes that easily substitute for heavy mayo salads. This specific pairing of corn + grilled flavors results in one of the best budget-friendly sides available for massive outdoor gatherings. It acts as the ultimate food-safety insurance policy for daytime events.
Ingredients
- 4 ears of fresh corn, shucked and cleaned
- 1 (15 oz) can black beans, thoroughly rinsed and drained
- 1 large red bell pepper, finely diced
- 1/2 cup fresh cilantro, roughly chopped
- 1 jalapeño, seeded and minced
- 1/4 cup olive oil and 2 tablespoons fresh lime juice
- 1 teaspoon cumin and 1 teaspoon kosher salt
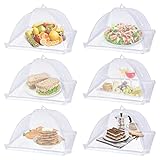
- Pop-up mesh food cover tents (essential for outdoor serving)
Instructions
- Grill the whole ears of corn over high heat for 10-12 minutes, turning occasionally until beautifully charred on all sides. Let cool.
- Slice the charred kernels off the cob using a sharp chef’s knife and transfer them to a large mixing bowl.
- Add the rinsed black beans, diced red pepper, minced jalapeño, and cilantro to the corn.
- Whisk the olive oil, lime juice, cumin, and salt in a separate small bowl, then pour over the corn mixture.
- Toss thoroughly to combine, store in a sealed container in the fridge overnight, and serve at room temperature the next day under a mesh food tent.
Pro-Tip: This is the absolute ultimate room-temperature stable side dish. Giving the cumin, lime juice, and charred corn 24 full hours to mingle allows for profound flavor maturation. The oils extract the fat-soluble flavor compounds from the jalapeño and cumin overnight, resulting in a significantly bolder, more cohesive taste profile than making it fresh.
7. Marinate a Mediterranean Quinoa Salad
Looking for a gluten-free side that actually fills people up? Pin this Quinoa salad!
Accommodating dietary restrictions easily: Pairing robust quinoa with bright Mediterranean ingredients yields a fantastic vegetarian-friendly option. Providing healthy vs decadent sides ensures every guest feels welcome at your table. This particular recipe stands out as one of the best gluten free make ahead side dish recipes because it fiercely supports large gatherings without multiplying your workload. The structural integrity of quinoa + mediterranean flavors holds up brilliantly against overnight marination.
Ingredients
- 1.5 cups dry quinoa, rinsed thoroughly
- 1 cup cherry tomatoes, quartered
- 1 English cucumber, seeded and diced
- 1/2 cup Kalamata olives, pitted and halved
- 1/2 cup feta cheese, crumbled
- 1/3 cup olive oil, 3 tablespoons lemon juice, and 1 tsp dried oregano
- Stainless steel fine mesh strainer (critical for prep)
Instructions
- Rinse the dry quinoa vigorously under cold water in a fine mesh strainer for at least 60 seconds to remove its bitter natural coating (saponin).
- Simmer the quinoa in 3 cups of water or vegetable broth until the liquid is absorbed and the grain rings pop open (about 15 minutes). Let it cool completely.
- Whisk the olive oil, lemon juice, oregano, salt, and pepper in the bottom of your serving bowl.
- Fold the cooled quinoa, cucumbers, tomatoes, and olives into the dressing.
- Refrigerate overnight. Garnish with the crumbled feta cheese right before serving so the cheese doesn’t dissolve into the dressing.
Pro-Tip: The key to this dish lasting for days is expertly managing the pH balance in dressings. By using a strict 3-to-1 oil-to-acid ratio, the dressing easily permeates the tough exterior of the quinoa without aggressively breaking down the cellular structure of the cucumbers. This technique keeps the crisp vegetables perfectly crunchy over 48 hours.

8. Blanch a Bacon and Cheddar Broccoli Salad
Raw broccoli is too tough—Pin this blanching secret for the perfect salad!
Softening tough vegetables beautifully: Mixing fresh broccoli with crispy bacon develops an intensely savory profile that perfectly offsets heavy meats. Advanced color preservation techniques ensure this low carb summer sides for cookouts entry looks visually stunning the next day. Combining broccoli salad + bacon satisfies low-carb guests while delivering an incredibly flavorful punch. Precise blanching elevates standard raw vegetables into a tender, professional-tier culinary experience.
Ingredients
- 6 cups fresh broccoli florets, chopped into bite-sized pieces
- 8 slices of thick-cut bacon
- 1 cup sharp cheddar cheese, cubed or thick-shredded
- 1/4 cup red onion, finely diced
- 1/4 cup sunflower seeds
- 3/4 cup mayonnaise, 2 tablespoons apple cider vinegar, and 2 tablespoons sugar
- Heavy-duty cast iron meat press
Instructions
- Fry the bacon in a skillet, using a cast-iron meat press to keep the strips perfectly flat and evenly rendered. Crumble once cooled.
- Blanch the broccoli florets by dropping them into boiling salted water for exactly 60 seconds, then immediately plunging them into an ice bath setup. Drain thoroughly.
- Whisk the mayo, vinegar, and sugar in a large bowl to create the creamy dressing.
- Toss the perfectly dried broccoli, red onions, and cheese into the dressing until coated. Store in the fridge overnight.
- Garnish with the crumbled bacon and sunflower seeds just before serving to maintain maximum crunch.
Pro-Tip: Blanching the broccoli for just 60 seconds works absolute miracles for color preservation. The quick heat permanently sets the chlorophyll, locking in a hyper-vibrant green color, while the rapid ice bath stops the cooking immediately. This professional technique ensures the salad is easier to chew than raw broccoli but won’t turn mushy while marinating.

9. Emulsify a Lemony Orzo Pasta Salad
Need a side dish that scales easily for 50 people? Pin this Orzo Salad!
Scaling elegance for massive groups: Flavoring delicate orzo with bright lemon provides an elegant, herb-infused base that beautifully integrates seasonal produce. This is one of the premier make ahead side dishes for graduation party events because it effortlessly scales for a group without breaking your budget. The combination of orzo + lemony dressing looks incredibly gourmet but requires minimal active preparation time.
Ingredients
- 1 lb dry orzo pasta
- 1/3 cup extra-virgin olive oil and 1/4 cup fresh lemon juice
- 1 tablespoon lemon zest
- 2 cups fresh baby spinach, chopped into thin ribbons
- 1/2 cup pine nuts, toasted
- 1/2 cup grated parmesan cheese
- Heavy-duty manual citrus press
Instructions
- Boil the orzo in generously salted water until al dente (about 8-9 minutes), then drain well.
- Juice your lemons using a manual press to extract the maximum amount of oil from the rind alongside the juice.
- Emulsify the hot pasta immediately with the olive oil, fresh lemon juice, and zest. (Hot orzo absorbs citrus flavors much better than cold orzo).
- Fold in the spinach ribbons while the pasta is still slightly warm, allowing them to wilt just slightly.
- Refrigerate overnight. Garnish with the toasted pine nuts and parmesan cheese right before the cookout begins.
Pro-Tip: When scaling this for a massive graduation party, serve it in a heavy ceramic or stoneware bowl. Dense ceramics hold thermal mass in coolers beautifully. If you chill the heavy ceramic bowl overnight alongside the salad, it will naturally keep the entire dish safely cold on the buffet table for hours without melting ice.

10. Chill Classic Deviled Eggs Safely
Love deviled eggs but hate transporting them? Pin this safe-travel method!
Executing strict cold-chain logistics: Mixing delicate eggs with rich mayo requires specialized transportable containers to ensure perfectly safe outdoor dining. Many hosts frantically search for How to transport deviled eggs safely? to avoid ruining presentations or triggering food poisoning prevention protocols. Preparing deviled eggs + chilled storage solutions guarantees this highly requested BBQ staple arrives flawlessly. The true value lies entirely in executing masterful cold-chain logistics.
Ingredients
- 12 large eggs, hard-boiled, peeled, and halved
- 1/3 cup mayonnaise
- 1 teaspoon Dijon mustard and 1 teaspoon white vinegar
- 1/4 teaspoon Tabasco or hot sauce
- Salt, pepper, and paprika for dusting
- Specialized deviled egg carrier with an integrated ice pack base
Instructions
- Scoop the yolks from the halved eggs into a medium bowl, arranging the empty whites directly into your egg carrier tray.
- Mash the yolks completely smooth with a fork before adding the mayonnaise, mustard, vinegar, and hot sauce. Mix until perfectly silky.
- Pipe the yolk filling back into the egg whites using a zip-top bag with the corner snipped off for a clean, professional look.
- Dust lightly with paprika.
- Snap the lid onto the carrier, place the freezable base in the freezer, and chill the eggs in the fridge overnight.
Pro-Tip: Maintaining strict cold-chain logistics is absolutely critical for food poisoning prevention. Deviled eggs must remain below 40°F (4°C) until the exact moment of consumption. Using a dedicated carrier with an integrated, freezable ice-pack base ensures they stay firmly in the safe temperature zone even while sitting on an exposed outdoor picnic table.

11. Infuse an Overnight Cucumber Red Onion Salad
Need a super cheap, mayo-free side dish? Pin this overnight cucumber salad!
Harnessing quick-pickling chemistry: Submerging fresh cucumbers in a tangy vinaigrette creates a spectacular palate cleanser that slices through fatty BBQ meats. For those seeking incredibly cheap, no mayo cookout side dishes, this requires zero active cooking. The classic pairing of cucumber + red onion acts as a hybrid between a traditional salad and quick pickles + fermentation. Acidulation naturally mellows harsh vegetable flavors overnight while retaining a profound, snappy crunch.
Ingredients
- 3 large English cucumbers, thinly sliced
- 1 large red onion, halved and very thinly sliced
- 1/2 cup white vinegar and 1/4 cup water
- 2 tablespoons granulated sugar
- 1 tablespoon fresh dill, chopped
- 1 teaspoon kosher salt and 1/2 teaspoon black pepper
- Airtight borosilicate glass storage containers
Instructions
- Slice the cucumbers and red onions as thinly and uniformly as possible.
- Whisk the vinegar, water, sugar, salt, and pepper in a bowl until the sugar and salt are completely dissolved.
- Layer the cucumbers and onions interchangeably into your glass storage container.
- Pour the vinegar mixture entirely over the vegetables, ensuring they are mostly submerged. Add the fresh dill on top.
- Seal with a locking lid, give it one good shake, and refrigerate overnight.
Pro-Tip: The overnight soak triggers a mild fermentation process and deep acidulation. The vinegar brilliantly breaks down the harsh sulfur compounds found in the raw red onion, turning them sweet and mellow, while the high osmotic pressure keeps the cucumbers incredibly crunchy. This simple chemistry trick creates the ultimate, stress-free palate cleanser.

Key Takeaways: Your Quick Guide to Make-Ahead Cookout Sides
Synthesizing vital prep logistics: To flawlessly execute your Make-Ahead Cookout Sides summary, you must bridge essential flavor science with strict food safety rules. The best BBQ sides rely entirely on strategic temperature control and proper ingredient sequencing. Review these critical stress-free side dishes principles to dramatically mitigate risks and guarantee your food remains appetizing for hours.
- Respect the Cold Chain: Keeping food cold is absolutely paramount; mayo-based salads and deviled eggs must be kept strictly below 40°F until immediately serving to ensure total food poisoning prevention.
- Leverage Starch Retrogradation: Potato and macaroni salads actually taste vastly better the next day because chilling allows the internal starches to firm up, effectively preventing soggy salads and mushy textures.
- Hold the Final Toss: For vinaigrette-based pasta salads, toss your noodles with only half the dressing on day one; add the remaining half just before serving to completely eliminate the risk of dry pasta.
- Utilize Osmotic Pressure: Always salt your shredded cabbage and let it drain for an hour before adding any dressing; this crucial step prevents water from leaking out overnight and ruining a creamy vs tangy coleslaw.
- Opt for Room-Temperature Stable Sides: When hosting in extreme summer heat, lean heavily on no mayo cookout side dishes like grilled corn salsa or vinegar-based cucumber salads that simply won’t spoil on a buffet table.
People Also Ask About Make-Ahead Cookout Sides
Resolving common prep anxieties: Even with comprehensive recipes, outdoor food logistics generate specific uncertainties regarding food longevity and safe transport. By clarifying these exact food safety questions, you can confidently troubleshoot common make-ahead failures. Here are the authoritative, professional-grade answers to your most pressing outdoor entertaining questions.
What are the best make-ahead cookout sides?
The best make-ahead cookout sides are vinegar-based pasta salads, slow-cooker baked beans, and sturdy grain bowls like quinoa.
These resilient dishes actually improve in flavor when allowed to rest overnight. Unlike delicate leafy greens that quickly wilt, hearty ingredients deeply absorb marinades and dressings, resulting in a more cohesive and robust savory profile the next day while dramatically simplifying your hosting duties.
Can I make potato salad two days in advance?
Yes, you can safely make potato salad up to 48 hours in advance if stored continuously in an airtight container in the refrigerator.
In fact, professional kitchen tips suggest that a 24-to-48-hour resting period is optimal. This resting phase allows the potatoes to fully absorb the dressing and the sharp flavors of the onions and mustard to mature, resulting in a much richer flavor profile than a freshly made batch.
Which sides travel best to a cookout?
Vinegar-based slaws, bean salads, and corn salsas are the most reliable options for travel because they do not require strict refrigeration.
If you are packing picnic baskets without access to heavy coolers, avoid anything containing mayonnaise, dairy, or raw eggs. Room-temperature stable dishes made exclusively with oil and vinegar dressings are highly durable and pose the lowest possible risk of foodborne illness during transit.
Is it safe to leave mayo-based salads outside?
According to USDA recommendations, mayo-based salads should never sit out at room temperature for more than two hours, or just one hour if the temperature is above 90°F.
To practice proper food safety outdoors, you must actively keep these dishes chilled. The best catering secret is to serve your potato or macaroni salad bowl nested directly inside a slightly larger bowl filled with ice, creating a temporary cold-chain barrier on your buffet table.
How to prevent pasta salad from getting dry?
To prevent dry pasta, toss the cooked noodles with only half of your vinaigrette before storing them in the fridge overnight.
Pasta acts exactly like a sponge as it cools, aggressively absorbing surrounding moisture. By reserving half of your dressing and tossing it into the salad just 30 minutes before serving, you ensure the dish remains perfectly moist and flavorful without ever becoming soggy or oily.
How long can coleslaw sit in the fridge?
A freshly prepared coleslaw can safely sit in the fridge for 3 to 5 days, though it is at its absolute textural peak at the 24-hour mark.
If you want to prepare it further in advance, chop the crisp vegetables and make the dressing, but meticulously store them in separate containers. Assembling the slaw the night before the cookout ensures maximum crunch while still allowing the flavors sufficient time to meld.
How to stop fruit salad from getting mushy?
To prevent mushy fruit, avoid adding highly water-dense or delicate fruits like watermelon and raspberries until the absolute last minute.
For a true make-ahead fruit salad, stick strictly to sturdy fruits like grapes, blueberries, and melon balls. Toss them gently in a light glaze of honey and lime juice; this process, known as acidulation, naturally stops the fruit from turning brown and protects the cellular structure overnight.
Should I dress pasta salad before or after chilling?
You should dress a pasta salad partially before chilling, and partially right before serving.
When pasta is still slightly warm, it absorbs the rich flavors of the dressing deeply. However, it will soak up almost everything overnight. Dressing it twice—once before refrigerating and once just before the party—gives you the absolute perfect balance of deep internal flavor and a glossy, highly appetizing exterior.
How to store macaroni salad overnight?
Store macaroni salad overnight in a deeply sealed, airtight glass or BPA-free plastic container pressed directly against the back of the refrigerator.
The back of the fridge is the coldest zone, which helps securely stabilize the mayonnaise emulsion. Before serving, give the salad a vigorous stir; if it seems slightly tight or dry, simply fold in one extra tablespoon of milk or mayo to instantly revive the creamy texture.
How to transport deviled eggs safely?
Transport deviled eggs safely by using a specialized hard-sided egg carrier equipped with molded inserts and a freezable gel base.
Never attempt to transport them on a flat plate covered tightly in plastic wrap, as the toppings will smear and the eggs will aggressively slide. Utilizing a carrier with a built-in ice pack ensures you effortlessly maintain strict cold-chain logistics, preventing the eggs from entering the dangerous temperature zone during travel.
Final Thoughts on Make-Ahead Cookout Sides
Mastering make-ahead cookout sides isn’t just about saving a few hours on the day of your party; it is a fundamental shift in how you approach summer entertaining. By deeply understanding the simple science behind food prep—from leveraging starch retrogradation for the perfect potato salad to using acidulation to keep your fruit salads vibrant—you effortlessly elevate your menu from standard backyard fare to chef-tested, professional-quality dishes.
The true secret to the ultimate cookout guide is recognizing that many complex dishes actually require an overnight rest to reach their absolute peak flavor. When you consistently utilize these tried and true methods, you aren’t compromising on quality for the sake of convenience; you are actively improving the taste and texture of your food while simultaneously mitigating the dangerous risks of outdoor food spoilage. This inherently simplifies hosting duties across the board.
Remember, the true goal of any social gathering is to actually spend quality time with your guests, not to be hopelessly trapped in the hot kitchen rapidly chopping and whisking while everyone else enjoys the beautiful sunshine. Use this expert advice to plan your menu, prep smart the day before, and reclaim your rightful role as a relaxed, fully present host.
What is your absolute favorite side dish to bring to a summer BBQ? Let me know in the comments below!
Last update on 2026-07-27 at 02:00 / Affiliate links / Images from Amazon Product Advertising API
