As an Amazon Associate BakingBakewareSets.com earns from qualifying purchases.
Gooey Apple Pie Filling Recipe: 7 Foolproof Stovetop Tips
Have you ever cut into a beautiful dessert only to discover a watery runny apple pie? That dreaded soggy bottom crust completely ruins hours of hard baking work. Choosing a stovetop apple pie filling recipe instantly eliminates this frustrating culinary failure.
The best apple pie filling recipe is made on the stovetop by simmering fresh sliced apples with butter, brown sugar, and cinnamon. To prevent a watery center, you must whisk a cornstarch slurry into the warm spiced apple mixture and boil it for one minute to fully gelatinize the starches.
Drawing from established culinary food science pie baking tips, we built this kitchen tested foolproof pie method. Understanding the starch gelatinization temperature guide transforms your basic fruit filling into a masterpiece. You will learn the exact steps to create a flawless dessert this September.
☰ Table of Contents ▼
show
7 Foolproof Stovetop Tips for a Gooey Apple Pie Filling Recipe
Making the perfect stovetop apple pie filling in 10 minutes requires more than just mixing raw fruit. We need to create a thickened pie filling that holds its shape under pressure. Utilizing a cornstarch slurry or clear jel thickener guarantees a stunning jammy apple pie filling texture. When you cook your fruit in a stainless steel saucepan, the thickener gelatinizes at simmering temperature for immediate structural stability. Follow these exact steps to master your sweet brown sugar apple filling.
1. Peel Core and Slice Apples Using Firm Baking Varieties

Pin this apple prep guide to your Thanksgiving Baking board!
Choosing the best firm baking apples for homemade pie filling is your critical first step. When comparing granny smith vs honeycrisp for apple pie filling, a curated blend is actually best. Granny smith apples and honeycrisp apples provide the perfect structure because the dish requires firm crisp baking apples to survive the oven’s intense heat. This tart apples vs sweet apples baking comparison ensures your fresh sliced apples won’t turn into a disappointing mush.
Ingredients
- 6 cups of firm cooked baking apples (Recommend 3 Granny Smith, 3 Honeycrisp)
- A heavy-duty rotary apple peeler and corer tool
Instructions
- Peel core and slice apples evenly to exactly 1/4-inch thickness.
- Discard the cores and stems, or save them for homemade apple cider vinegar.
- Place all fresh sliced apples immediately into a large mixing bowl.
Pro-Tip: Utilizing the correct sugar-to-acid balance in baking cultivars is critical. A mix of tart Granny Smiths and sweet Galas prevents the filling from becoming one-dimensional, while ensuring the pectin enzymatic breakdown in cooking apples happens evenly.

2. Toss Sliced Apples with Lemon Juice to Stop Oxidation

Save this pro-baking secret to your Dessert Tips board!
You must immediately toss sliced apples with lemon juice to preserve their bright, appetizing color. This essential step will stop apple slices from turning brown oxidation while you prepare the rest of the ingredients. The lemon juice + oxidation reaction halts rapidly because fresh lemon juice effectively prevents oxidation using citric acid. Without it, your filling looks muddy before it even hits the stove.
Ingredients
- 1 Tablespoon of fresh lemon juice
- A stainless steel manual citrus squeezer
Instructions
- Squeeze the citrus directly over the bowl, catching any seeds.
- Toss sliced apples with lemon juice thoroughly until every piece is coated.
- Let the bowl sit at room temperature while you prepare your dry spices.
Pro-Tip: The acid does more than just polyphenol oxidase inhibition with ascorbic acid (stopping browning); it also balances the sweetness of the sugars we are about to add, brightening the overall flavor profile of the sweet apple pie sauce.

3. Macerate Apple Slices in Sugar to Extract Natural Juices

Pin this flavor-building technique for your next holiday bake!
Learning to macerate apple slices in sugar is a game-changing culinary technique that pulls liquid out of the fruit early. When evaluating brown sugar vs white sugar in apple pie filling, dark brown sugar adds deep, complex molasses notes. The combination of cinnamon + brown sugar naturally draws out moisture. This mixture, sweetened with brown sugar, rapidly releases natural fruit pectin from the apples to form our sauce base.
Ingredients
- 1/2 cup dark brown sugar (packed)
- 1/4 cup granulated white sugar
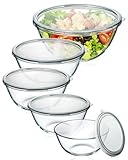
- A set of large glass mixing bowls
Instructions
- Pour both sugars over the lemon-coated apples.
- Macerate apple slices in sugar by tossing gently until the sugars begin to dissolve.
- Allow the mixture to sit for 10-15 minutes so it releases natural fruit pectin and forms a syrupy liquid at the bottom of the bowl.
Pro-Tip: Utilizing the osmotic fruit maceration technique draws the water out of the apples before they go into the pastry. This liquid is then cooked down with our thickener, guaranteeing you never have to avoid soggy bottom pie crust disasters again.
4. Simmer Apples Over Medium Heat to Par-Cook

Don’t skip this crucial step—pin it to remember!
You must pre-cook apple filling on stovetop to eliminate excess volume before baking. When you simmer apples over medium heat, the fruit softens perfectly while shrinking. Combining butter + saucepan heat prevents a mushy cooked apple filling from developing in the oven later. The mixture is safely cooked in stainless steel saucepan utilizing rich salted butter to create a stunning rich caramel apple pie filling.
Ingredients
- 2 Tablespoons of salted butter
- The macerated apple and sugar mixture (along with all juices)
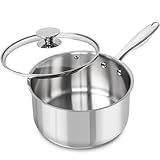
- A heavy-bottomed stainless steel saucepan
Instructions
- Melt the butter in your saucepan over medium heat.
- Add the apples and all the accumulated juices from the bowl.
- Simmer apples over medium heat for 5 to 7 minutes, stirring occasionally.
- Stir constantly to prevent burning once the syrup begins to bubble vigorously, looking for translucent cooked apple slices that are tender but not falling apart.
Pro-Tip: Par-cooking apples to prevent crust dome collapse is the ultimate bakery secret. Raw apples shrink significantly in the oven; cooking them on the stovetop first ensures your top crust sits flush against a perfectly packed stovetop apple pie filling.
5. Whisk Cornstarch Slurry Until Smooth for a Glossy Finish

Save this thickening trick for flawless fruit pies!
To achieve a thickened glossy apple sauce, you need proper starch activation. You must whisk cornstarch slurry until smooth before it hits the heat to avoid clumping. Mixing cornstarch + cold water prevents lumps effortlessly. When weighing cornstarch vs flour vs tapioca for pie filling, a cornstarch slurry easily thickens with cornstarch slurry action. It also serves as a reliable clear jel starch alternative for immediate baking purposes.
Ingredients
- 3 Tablespoons of cornstarch (or Clear Jel thickener if canning)
- 3 Tablespoons of cold water
- A small prep bowl and wire whisk
Instructions
- In your small bowl, vigorously whisk cornstarch slurry until smooth, ensuring no lumps remain.
- Slowly pour the slurry into the simmering saucepan while stirring continuously.
- Boil the mixture for exactly 1-2 minutes to fully gelatinize pie filling starch and cook out the raw chalky flavor, yielding a thickened glossy apple sauce.
Pro-Tip: You must bring the mixture to a full bubble to reach the proper starch gelatinization temperature range (around 203°F or 95°C). The amylose and amylopectin starch binding only locks the liquid into a sliceable gel once this temperature threshold is crossed.

6. Infuse the Warm Spiced Apple Mixture with Cinnamon and Nutmeg

Pin the ultimate spice blend to your Autumn Recipes board!
You must elevate your warm spiced apple mixture off the heat to protect volatile oils. Adding ground ceylon cinnamon and freshly grated nutmeg + allspice will instantly fix bland unflavored apple filling. The dessert is beautifully spiced with cinnamon and nutmeg utilizing pure vanilla extract and allspice berries to create a perfectly spiced cinnamon apple filling that rivals professional bakeries.
Ingredients
- 1 ½ teaspoons of ground ceylon cinnamon
- ¼ teaspoon of ground nutmeg (freshly grated is best)
- 1 teaspoon of pure vanilla extract
Instructions
- Remove the thickened saucepan from the heat source entirely.
- Add the cinnamon, nutmeg, and vanilla directly into the hot filling.
- Gently fold the warm spiced apple mixture until all the spices are evenly distributed and the aroma blooms.
Pro-Tip: Never boil your pure vanilla extract. The alcohol evaporates rapidly, taking the delicate flavor compounds with it. Stirring it in off the heat guarantees your stewed spiced apples retain their deep, rich vanilla notes.

7. Cool Filling Completely Before Baking or Freezing

Save this crucial baking tip for your pie crust success!
You absolutely must cool filling completely before baking to protect your delicate pastry. Learning how to freeze apple pie filling recipe correctly helps you avoid soggy bottom pie crust disasters. Using freezer bags + airtight seal ensures incredible flavor longevity. The filling should only be stored in airtight freezer container or baked inside double pie crust once room temperature is officially reached.
Ingredients
- The completed, hot apple pie filling
- A wide, shallow glass baking dish (for rapid cooling)
- Pie crust dough (if baking immediately)
Instructions
- Transfer the hot mixture out of the saucepan into a wide glass dish to maximize surface area.
- Cool filling completely before baking, allowing it to reach room temperature (about 1-2 hours).
- Once fully cooled, ladle it into your pie crust dough, or transfer it to airtight bags to thaw frozen pie filling in refrigerator for later use.
Pro-Tip: Adding hot filling to raw pastry instantly melts the butter pockets in the dough, ruining the flaky layers and causing a soggy bottom. Patience here is mandatory. If you are freezing this batch, note that retrogradation in frozen pie starches may make it look slightly cloudy until reheated!

Key Takeaways: Your Quick Guide to Apple Pie Filling Recipe Success
Reviewing this apple pie filling recipe summary ensures you remember the most vital procedural steps. These best apple pie filling recipe takeaways will guide your homemade pie filling success every time. Combining firm cooked baking apples with a proper cornstarch slurry permanently prevents a watery runny apple pie from ruining your holiday table.
Key Takeaways:
- Use a Mix of Firm Baking Apples: A 50/50 blend of tart Granny Smith apples and sweet Honeycrisp ensures a balanced, complex flavor and perfect texture retention.
- Macerate with Sugar First: Tossing your slices in sugar extracts the natural juices via the osmotic fruit maceration technique, preventing excess water from bleeding into your pastry later.
- Always Par-Cook on the Stovetop: A stovetop apple pie filling recipe pre-shrinks the fruit, ensuring your pie doesn’t develop a massive gap under the top crust during baking.
- Boil the Cornstarch Slurry: You must bring the mixture to a simmer for at least one minute to reach the starch gelatinization temperature range; otherwise, the filling won’t set up.
- Add Vanilla and Spices Off the Heat: Stir in your ground ceylon cinnamon, nutmeg, and vanilla after removing the pot from the burner to preserve their delicate, aromatic oils.
- Cool Completely Before Filling: Hot filling will instantly melt the butter in your pie crust dough, guaranteeing a soggy bottom. Always cool the mixture in a wide, shallow dish.
- Use Clear Jel for Canning: If you are processing this for long-term pantry storage, you must substitute clear jel in apple pie canning, as standard cornstarch is not deemed safe by USDA guidelines.
People Also Ask About Apple Pie Filling Recipes
Home bakers often have questions about apple pie filling recipe techniques and chemistry. If you wonder how to make apple pie filling from scratch or why is my apple pie filling watery, these direct answers will help you troubleshoot. We cover cornstarch vs flour vs tapioca for pie filling, safe water bath canning, and securing a freezer bags + airtight seal.
Why is my apple pie filling watery?
Your apple pie filling is watery because the apples released their natural juices inside the oven rather than being pre-cooked, or the thickener did not reach boiling point.
To prevent watery runny apple pie, always use a stovetop apple pie filling recipe to cook the fruit down first. Furthermore, ensure your cornstarch slurry reaches the proper starch gelatinization temperature range by boiling it for one full minute on the stove before cooling.
What are the best apples for apple pie filling?
The best apples for pie filling are firm, crisp varieties that hold their shape under heat, such as Granny Smith, Honeycrisp, Braeburn, and Pink Lady.
According to professional bakers, utilizing a 50/50 blend of tart apples (like Granny Smith) and sweet apples (like Honeycrisp) provides the perfect sugar-to-acid balance in baking cultivars. Avoid softer apples like Red Delicious or McIntosh, which tend to disintegrate into a mushy cooked apple filling during baking.
Can you use flour instead of cornstarch for apple pie filling?
Yes, you can substitute flour for cornstarch, but you will need to use twice as much flour (about 6 tablespoons) to achieve the same thickening power.
When comparing cornstarch vs flour vs tapioca for pie filling, cornstarch provides a thickened glossy apple sauce look, whereas flour yields a more matte, cloudy appearance. Note that flour can sometimes leave a raw, chalky taste if the pie isn’t baked long enough to cook the starch out.
How to freeze apple pie filling recipe?
To freeze homemade pie filling, allow the cooked stovetop mixture to cool completely to room temperature, then transfer it into heavy-duty airtight freezer bags or containers.
Remove as much air as possible to ensure an airtight seal. The freezer pie filling will stay fresh for up to 6 months. When you are ready to bake, simply thaw frozen pie filling in refrigerator overnight before pouring it directly into your unbaked pie crust dough.
Can you can apple pie filling with cornstarch?
No, standard cornstarch breaks down during thermal processing and can insulate botulism spores, making it unsafe for water bath canning.
Following USDA food preservation guidelines, you must use cook type clear jel thickener, which is a specially modified food starch. If you plan to safely preserve jars in a water bath canner, Clear Jel is the only thickener approved by the NCHFP for long-term pantry storage.
Why do you add lemon juice to apple pie filling?
Lemon juice is added to halt enzymatic browning (oxidation) and to provide an acidic counterbalance to the sweet sugars.
Tossing the fruit in citrus initiates polyphenol oxidase inhibition with ascorbic acid, keeping the apples bright and appetizing. Additionally, the tartness of the fresh lemon juice enhances the overall depth of the perfectly spiced cinnamon apple filling, preventing the dessert from tasting flat or overly sugary.
Should you cook apples before putting them in a pie?
Yes, pre-cooking apples on the stovetop is highly recommended because it shrinks the fruit before baking, preventing a large gap from forming under the top crust.
This par-cooking apples to prevent crust dome collapse technique is a standard professional pastry chef recommendation. It also gives you total control over the liquid ratio, allowing you to activate the cornstarch slurry properly and avoid soggy bottom pie crust disasters.
How do I make apple pie filling without Clear Jel?
If you are making the filling for immediate baking or freezing, you can easily thicken the filling using a standard cornstarch slurry or all-purpose flour.
Clear Jel is only strictly mandatory for water bath canning apple pie filling recipe step by step. For a standard small batch apple pie filling recipe for one pie, standard organic cornstarch works perfectly to create a thick and glossy stovetop apple pie filling recipe.
What can I make with apple pie filling besides pie?
Homemade apple pie filling is incredibly versatile and can be used as a topping for pancakes, waffles, oatmeal, or vanilla ice cream.
Beyond traditional pies, you can create a cinnamon roll apple cobbler recipe, fill puff pastry apple turnovers from scratch, or use it as the fruity base for an easy homemade apple crisp with oats. It acts as a phenomenal standalone spiced fruit compote.
How long does homemade apple pie filling last in the fridge?
Stored in an airtight container, homemade cooked apple pie filling will last in the refrigerator for 4 to 5 days.
Because it is sweetened with brown sugar and acidified with fresh lemon juice, the environment is slightly hostile to rapid bacterial growth. However, if you do not plan to use the fresh apple pie filling recipe within that 5-day window, it is best to transition it to the freezer for long-term storage.
Final Thoughts on the Ultimate Apple Pie Filling Recipe
Mastering the ultimate apple pie filling recipe changes your holiday baking forever. This best apple pie filling recipe empowers home cooks to execute a flawless dish that never falls apart. Creating a classic apple pie filling recipe is about relying on a kitchen tested foolproof pie method rather than crossing your fingers. You can now confidently utilize everyday fresh sliced apples and robust ground ceylon cinnamon to build incredible homemade pie filling from scratch.
Mastering the stovetop method isn’t about luck; it is entirely about understanding the science of your ingredients. By moving the initial cooking phase to the stovetop, you take complete control over the texture, moisture levels, and starch gelatinization. You no longer have to cross your fingers and hope for the best when you slice into your holiday dessert.
This kitchen tested foolproof pie method guarantees a perfectly thick, jammy apple pie filling texture every single time. Whether you choose to bake it immediately into an all-butter crust, pack it into freezer bags for future crisps, or preserve it via safe water bath canning using Clear Jel, you now have the foundational culinary knowledge to execute it flawlessly. Remember to respect the cooling process, let those warm spices bloom off the heat, and never skip the lemon juice.
Now that you have the ultimate homemade apple pie filling in your arsenal, how will you use your first batch? Are you baking a traditional lattice double-crust pie for the holidays, or spooning this warm cinnamon goodness over a bowl of vanilla bean ice cream tonight? Let me know in the comments below!
Last update on 2026-09-01 at 04:56 / Affiliate links / Images from Amazon Product Advertising API
