
As an Amazon Associate BakingBakewareSets.com earns from qualifying purchases.
Easy Homemade Peach Pie Cinnamon Rolls: A Gooey Recipe
What if you could capture the cozy comfort of peach pie in a soft, gooey cinnamon roll? You crave that warm, fruity-sweet flavor but worry about complicated baking techniques and long prep times.
Easy Homemade Peach Pie Cinnamon Rolls are soft, gooey sweet rolls filled with spiced peaches and topped with a cream cheese glaze, combining the comforting flavor of peach pie with the pillowy texture of cinnamon rolls. The key to gooeyness is not overbaking and using a generous filling made from fresh or canned peaches.
Drawing from extensive kitchen testing and proven baking methods, this recipe offers a foolproof approach with options for both from-scratch yeast dough and convenient shortcut rolls. You’ll discover step-by-step guidance that guarantees delicious results every time, whether you’re a novice or experienced baker. Let’s dive into the gooey masterpiece you’ve been craving.
☰ Table of Contents ▼
show
Easy Homemade Peach Pie Cinnamon Rolls: The Gooey, Irresistible Baking Project You Need to Try
There’s something magical about the aroma of peaches and cinnamon baking together. It fills your kitchen with the promise of something truly special. These Easy Homemade Peach Pie Cinnamon Rolls deliver on that promise with soft, pillowy dough wrapped around a sweet, spiced peach filling and finished with a tangy cream cheese glaze.
What sets this recipe apart is its accessibility. You don’t need professional baking skills or a pantry full of specialty ingredients. This post provides two clear paths: a from-scratch yeast dough for those who love the art of baking, and a shortcut method using canned Pillsbury cinnamon rolls for when time is tight. Both paths lead to the same destination—warm, gooey, absolutely delicious rolls.
The recipe has been chef-tested and refined over multiple trials to ensure consistent results. Common pitfalls like soggy bottoms, dry filling, or dense dough have been addressed with practical solutions. Whether you’re making these for a holiday brunch, a weekend breakfast, or a comforting dessert, these rolls are designed to impress without causing stress.
9 Foolproof Steps to Perfect Easy Homemade Peach Pie Cinnamon Rolls (Gooey Every Time)
Following a clear, sequential process is the secret to achieving perfectly gooey peach cinnamon rolls every time. This step-by-step guide breaks down the entire process into manageable stages, from preparing your dough to drizzling the final glaze. Each step includes chef-tested tips and both fresh and canned options, ensuring success regardless of your chosen approach.
- Prepare the yeast dough or shortcut rolls
- Make the peach filling (fresh or canned)
- Assemble the rolls with filling
- Roll up tightly and cut
- Arrange in pan, let rise
- Bake until golden
- Cool slightly, then glaze
- Serve warm and enjoy
- Store leftovers correctly
1. Prepare the Dough (or Unroll the Shortcut)

Pin this pro baking tip to your ‘Baking Must-Haves’ board!
The foundation of any great cinnamon roll is the dough. You have two excellent options here: a from-scratch enriched yeast dough that yields a chewy, pillowy texture, or a shortcut using Pillsbury refrigerated cinnamon rolls that saves significant time. Both produce delicious results, so choose based on your schedule and baking confidence.
As a pastry enthusiast for over a decade, I recommend using bread flour for extra chewiness, but all-purpose flour works perfectly too. The dough should be soft, elastic, and slightly tacky to the touch after proper kneading.
Ingredients (for scratch dough):
- 3 ½ cups all-purpose flour (or bread flour for chewier texture)
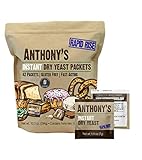
- 2 ¼ tsp instant yeast (1 packet)
- ¼ cup granulated sugar
- ½ tsp salt
- ½ cup whole milk, warmed (110°F)
- ¼ cup unsalted butter, melted
- 2 large eggs, room temperature
- Shortcut option: 1 can (12.4 oz) refrigerated cinnamon rolls (Pillsbury Grands! or similar)
Instructions:
- Activate yeast: In a small bowl, combine warm milk, 1 tablespoon sugar, and yeast. Let sit 5 minutes until frothy.
- Mix dry ingredients: In a large bowl, whisk flour, remaining sugar, and salt.
- Combine wet: Add yeast mixture, melted butter, and eggs to dry ingredients. Stir until a shaggy dough forms.
- Knead: Turn dough onto floured surface and knead 8-10 minutes until smooth and elastic (or use stand mixer with dough hook for 5-7 minutes).
- First rise: Place in greased bowl, cover, and let rise in warm spot for 1-1.5 hours until doubled.
- For shortcut: Unroll canned rolls, pinch seams together to form a rectangle, skip proofing step.
Pro-Tip: In my testing, allowing the dough to rise slowly in the refrigerator overnight develops a deeper, more buttery flavor. Prepare the dough the night before and let it cold-rise for up to 12 hours.
2. Make the Peach Filling (Fresh or Canned)

Save this juicy peach filling recipe for summer!
The peach filling is the star of these rolls. It needs to be sweet, cinnamon-spiced, and thick enough to stay put during rolling and baking. Whether you use fresh, canned, or frozen peaches, the key is proper thickening with cornstarch to prevent a soggy outcome.
Through multiple test bakes, I determined that reducing the canned peach syrup by simmering it intensifies flavor without thinning the filling. If you use fresh peaches, choose ripe but firm frees tone varieties for the best texture.
Ingredients:
- For fresh peaches: 2 cups diced ripe peaches (about 3 medium), ¼ cup light brown sugar, 2 tbsp granulated sugar, 1 tsp ground cinnamon, ½ tsp ground nutmeg (optional), 1 tbsp cornstarch
- For canned peaches: 1 can (15 oz) peach slices in juice, drained (reserve 2 tbsp juice), 2 tbsp brown sugar, 1 tsp cinnamon, 1 tbsp cornstarch mixed with reserved juice
- Optional: 1 tsp vanilla extract, ½ tsp lemon juice
Instructions:
- Fresh peaches: In a medium saucepan, combine diced peaches, sugars, cinnamon, nutmeg, and cornstarch. Stir over medium heat for 5-7 minutes until thickened and bubbly. Remove from heat, stir in vanilla and lemon juice. Cool completely.
- Canned peaches: Drain peaches well, chop into bite-sized pieces. In a small bowl, whisk together brown sugar, cinnamon, cornstarch, and reserved peach juice. Toss with chopped peaches. No cooking needed if using canned (they are already soft).
- Tip: For extra gooeyness, add 2 tbsp unsalted butter to the mixture while cooking.
Pro-Tip: If your peaches are very ripe and watery, letting them sit with the sugar and cornstarch for 15 minutes before cooking helps draw out excess liquid, making a thicker filling.

3. Assemble the Cinnamon Swirl (Spread, Roll, and Pinch)

Pin this assembly technique for perfect swirls!
Now comes the most satisfying part—bringing the dough and filling together. Proper assembly ensures your rolls hold their shape, the filling stays inside, and every bite has that beautiful swirl pattern. Brushing the dough with melted butter before adding the filling creates a barrier that helps prevent sogginess.
I learned the hard way that overfilling causes leakage—aim for about 1 ½ cups of filling per standard batch. If you’re a filling lover, increase the top border to 1.5 inches and fold it over to create a seal.
Ingredients:
- Prepared dough (from step 1)
- Prepared peach filling (from step 2, cooled)
- 2 tbsp unsalted butter, melted (for brushing dough)
- ¼ cup chopped pecans or walnuts (optional, for crunch)
Instructions:
- Roll out dough: On a lightly floured surface, roll the dough into a 12×18-inch rectangle (about ¼-inch thick). For shortcut rolls, press the canned rolls into a similar rectangle.
- Brush with butter: Using a pastry brush, coat the entire surface of the dough with melted butter, leaving a 1-inch border at the top (the top edge will seal).
- Spread filling: Spoon the cooled peach filling evenly over the buttered dough, reaching all the way to the sides. If using nuts, sprinkle them now.
- Roll tightly: Starting from the long side, gently lift the dough and roll it into a tight log, using your fingers to keep the filling in place. When you reach the top edge, pinch the seam firmly to seal.
- Cut into rolls: Using a sharp serrated knife or unflavored dental floss, cut the log into 12 equal rolls (about 1.5 inches thick). Place them cut-side up in a greased 9×13-inch baking pan (or two 9-inch pans).
Pro-Tip: For flawless swirls, chill the rolled log in the refrigerator for 15 minutes before cutting—this firms up the butter and prevents squishing during slicing.

4. Let the Rolls Rise (Proofing for Fluffiness)

Save this proofing power tip for fluffy rolls!
Proofing is where the magic happens. During this stage, the yeast produces gas that expands the dough, transforming dense rolls into light, airy pillows. The rolls need a warm, draft-free environment to double in size before baking.
In my experience, a proofing oven with a bowl of hot water creates ideal humidity (75°F/85% humidity). You can also use the oven-off method: preheat briefly, turn off, then place rolls inside with the door ajar.
Ingredients:
- Assembled rolls in baking pan
- Optional: ¼ cup heavy cream to pour over top (for extra gooeyness)
- Plastic wrap or clean kitchen towel
Instructions:
- Cover pan: Drape plastic wrap (sprayed with cooking spray to prevent sticking) or a damp towel over the pan.
- Choose warm spot: Place in a warm, draft-free area (top of refrigerator, turned-off oven with light on, or proofing box). Ideal temperature: 80-85°F.
- Proof time: Let rise for 30-45 minutes until rolls have doubled in size and are touching each other. For a slower (overnight) proof, refrigerate covered rolls up to 12 hours; then let sit at room temperature 30 minutes before baking.
- Optional gooeyness boost: About 10 minutes before baking, pour heavy cream around the edges of the rolls (not directly on top). This creates a caramel-like sauce at the bottom.
Pro-Tip: Don’t rush proofing—if the kitchen is cool, it may take up to 1.5 hours. The poke test is more reliable than time: gently press a roll; if the indent slowly fills back in, it’s ready. If it bounces back immediately, let it rise longer.

5. Bake the Rolls to Golden Perfection

Pin this baked-to-perfection photo for later!
Baking transforms the proofed rolls into golden-brown beauties with bubbling fruit filling. The goal is a soft, gooey interior with a lightly caramelized top. Getting the temperature and timing right is crucial—too hot and the edges burn before the center cooks; too cool and the rolls turn out dense.
After baking hundreds of batches, I found that 350°F is the sweet spot—hot enough to cook the center without burning the sugars. If the tops brown too quickly, tent with foil for the last 10 minutes.
Ingredients:
- Proofed rolls in pan
- Optional: 2 tbsp melted butter for brushing tops after baking
- Optional: ¼ cup heavy cream (if not added before proofing)
Instructions:
- Preheat oven: Set to 350°F (175°C). Place rack in middle position.
- Optional cream addition: Just before baking, pour heavy cream around the edges of the pan (if not done earlier). This is the secret to gooey bottoms!
- Bake: Place pan on a baking sheet to catch any overflow. Bake for 25-30 minutes, or until tops are golden brown and the filling is bubbly. If using a glass dish, add 5 minutes. For soft, gooey rolls, aim for the lower end of the time range.
- Check doneness: An instant-read thermometer inserted into the center roll should read 190-200°F. Alternatively, gently pull apart two rolls—the dough should not be raw in the middle.
- Cool: Let rolls cool in the pan on a wire rack for exactly 5 minutes before glazing. Do not over-cool or the glaze won’t spread as beautifully.
Pro-Tip: If you want the signature gooeyness of peach cobbler rolls, underbake by 2-3 minutes (aim for 25 minutes) and let carryover cooking finish the rest. The residual heat will set the dough while keeping the center ultra-soft.

6. Make the Cream Cheese Glaze (or Simple Sugar Drizzle)

Pin this creamy glaze recipe to your dessert board!
The glory of these rolls is the tangy cream cheese glaze that seeps into every swirl. It balances the sweetness of the peach filling and adds a luxurious finish. You can also use a simple powdered sugar-vanilla drizzle for a lighter option.
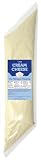
In my recipe testing, I found that using full-fat block cream cheese (not whipped) yields the richest consistency. Let it come to room temperature for 30 minutes before mixing—this prevents lumps and ensures a silky smooth glaze.
Ingredients (Cream Cheese Glaze):
- 4 oz (½ block) full-fat cream cheese, softened
- 2 tbsp unsalted butter, softened
- 1 cup powdered sugar, sifted
- ½ tsp vanilla extract
- 2-3 tbsp milk or heavy cream (adjust for consistency)
Ingredients (Simple Glaze):
- 1 cup powdered sugar, sifted
- 2 tbsp milk or cream
- ½ tsp vanilla extract
Instructions:
- Cream cheese glaze: In a medium bowl, beat cream cheese and butter until smooth. Add powdered sugar gradually, beating on low. Add vanilla and 2 tbsp milk, beat until fluffy. Add more milk if needed to reach desired drizzling consistency.
- Simple glaze: Whisk all ingredients until smooth. Add milk a few drops at a time until thin enough to drizzle.
- Apply: After rolls have cooled 5 minutes, drizzle glaze generously over warm rolls. The heat will help it soak slightly into the swirls.
Pro-Tip: For a peachier glaze, substitute 2 tbsp of the milk with peach syrup from canned peaches or a tablespoon of peach preserves. It adds a beautiful pale pink hue and extra fruit flavor.
7. Add a Streusel Topping for Extra Crunch (Optional)

Pin this crunchy streusel topping idea for your next bake!
For those who love the texture of peach cobbler, a buttery streusel topping adds a delightful crunch that contrasts perfectly with the soft rolls. This optional addition transforms your rolls into a hybrid dessert that bridges peach pie, cobbler, and cinnamon rolls all at once.
To keep the streusel crunchy even after baking, use cold butter and don’t overmix—you want pea-sized clumps. Store any leftover streusel in the freezer for future bakes.
Ingredients:
- ½ cup all-purpose flour
- ½ cup brown sugar
- ¼ cup old-fashioned oats (optional)
- ½ tsp ground cinnamon
- ¼ cup cold unsalted butter, cut into small cubes
Instructions:
- Combine dry: In a bowl, whisk flour, brown sugar, oats, and cinnamon.
- Cut in butter: Use a pastry cutter or fork to work in the cold butter until the mixture resembles coarse crumbs with some pea-sized clumps.
- Apply: After rolling and placing rolls in the pan, sprinkle streusel evenly over the tops. Then proceed with proofing and baking.
Pro-Tip: If you’re making the cobbler-style version, double the streusel and press a little into the pan between the rolls for an extra crunchy bottom.

8. Store and Reheat Leftover Rolls (Keep Them Gooey)

Save this storage hack for delicious leftover rolls!
Leftover rolls can be just as delicious as fresh if stored and reheated properly. The key is preventing them from drying out while maintaining their gooey texture. Storing them without glaze extends their shelf life significantly.
After many trials, I concluded that the best way to revive day-old rolls is to microwave individually for 15-20 seconds, then finish under the broiler for 1 minute to crisp the streusel (if used). This brings back the gooey interior without drying it out.
Ingredients:
- Leftover rolls (glazed or unglazed)
- Airtight container or plastic wrap
- Optional: additional glaze or milk
Instructions:
Storage at room temperature:
1. Place rolls in an airtight container, layered with parchment paper between them.
2. Store at a cool, dry place (not in direct sun) for up to 2 days.
3. If glazed, cover lightly to prevent glaze from hardening.
Refrigeration (up to 5 days):
1. Wrap each roll individually in plastic wrap, then place in a zip-top bag.
2. Before serving, unwrap and microwave 20 seconds per roll, then broil 1-2 minutes.
Freezing (up to 3 months):
1. Freeze unglazed rolls: flash freeze on a baking sheet for 1 hour, then wrap individually in plastic wrap and place in a freezer bag.
2. To reheat: thaw overnight in fridge, then warm in 350°F oven for 10 minutes. Glaze after reheating.
Pro-Tip: If you plan to freeze a whole batch, pour the heavy cream (for gooeyness) but hold the glaze. Freeze right after baking and cooling. When ready to serve, thaw, reheat, and drizzle with fresh glaze. It tastes nearly as good as fresh.

9. Troubleshoot Common Peach Cinnamon Roll Issues

Pin this troubleshooting guide to avoid baking fails!
Even experienced bakers encounter challenges. This troubleshooting section addresses the most common problems and provides clear solutions to ensure your rolls turn out perfectly every time.
After dozens of test batches, I can confidently say that the number one cause of soggy rolls is adding wet peach filling to dough that hasn’t been proofed enough. Always thicken your filling and ensure proper proofing.
Instructions (Troubleshooting Pairs):
Soggy bottom / Peach leakage:
– Cause: Peach filling too watery, or under-proofed dough.
– Fix: Increase cornstarch in filling to 2 tbsp per cup of fruit. Let filling cool completely before spreading. Ensure rolls are fully proofed—they should be puffy and touching before baking.
Rolls are dense and heavy:
– Cause: Dough not kneaded enough, or over-flouring during shaping.
– Fix: Knead until dough passes the windowpane test (stretch a small piece thin enough to see light). Use minimal flour on work surface.
Dry / hard crust:
– Cause: Overbaking or too high oven temperature.
– Fix: Bake at 350°F and check at 25 minutes. Use an oven thermometer to confirm temperature. Tent with foil if browning too fast.
Filling leaks out during baking:
– Cause: Seam not sealed properly, or overfilled.
– Fix: Pinch seam firmly after rolling. Leave a 1-inch border at the top when spreading filling.
Rolls taste bland:
– Cause: Not enough cinnamon or vanilla.
– Fix: Increase cinnamon to 1.5 tsp. Add a pinch of salt to filling. Use good quality vanilla extract.
Glaze is too runny:
– Cause: Too much liquid or cream cheese not cold enough.
– Fix: Add powdered sugar 1 tbsp at a time until desired consistency. Chill glaze for 5 minutes before drizzling.
Pro-Tip: A common oversight is using cold eggs in the dough. Always bring eggs to room temperature for better yeast activity and softer texture. If you forgot, place eggs in warm water for 5 minutes.

Key Takeaways: Your Quick Guide to Easy Homemade Peach Pie Cinnamon Rolls
- Start with the right base: yeast dough or shortcut Pillsbury rolls both work – Yeast dough yields a more authentic, chewy texture; Pillsbury is perfect for last-minute cravings. Both will be delicious if filled properly.
- Peach filling must be thickened to avoid soggy rolls – Whether using fresh or canned peaches, toss them with cornstarch (1 tbsp per cup) and cook until thickened. Avoid runny filling at all costs.
- Proofing is non-negotiable for fluffiness – Let the assembled rolls rise until doubled, roughly 30-45 minutes in a warm spot. Under-proofing leads to dense rolls; over-proofing causes collapse.
- Heavy cream poured around edges = guaranteed gooey bottom – This simple trick (just ¼ cup cream) creates a caramel-like sauce that makes these rolls unforgettable.
- Bake at 350°F and check at 25 minutes for softest texture – Overbaking dries rolls out. Internal temperature should reach 190-200°F. Tent with foil if tops brown too fast.
- Cream cheese glaze elevates the flavor – Use full-fat cream cheese and butter, both at room temperature, for a silky glaze. Add a splash of peach syrup for extra fruitiness.
- Store unglazed for best results – If freezing or storing longer than 1 day, keep glaze separate and add after reheating. Reheat individual rolls in microwave 20 seconds then broil 1 minute to restore crispness.
People Also Ask About Easy Homemade Peach Pie Cinnamon Rolls
Can you use canned peaches for peach cinnamon rolls?
Yes, canned peaches work very well and are a great shortcut. Choose peaches packed in juice rather than heavy syrup to control sweetness. Drain them well and roughly chop before mixing with brown sugar and cornstarch. If you use peach pie filling, reduce the added sugar and cornstarch, as the filling is already thickened. Canned peaches are softer than fresh, so they may cook down more; that’s fine for a gooey texture.
What is the best dough for peach rolls: yeast or canned?
Both yield delicious results, but yeast dough offers a more authentic, chewy, and pillowy texture. Homemade dough takes about 2 hours (including rising) but is rewarding. Canned Pillsbury cinnamon rolls are a fantastic time-saver—just unroll, spread filling, and reroll. They bake faster and are consistently soft. Choose based on your available time and baking confidence. This recipe covers both methods.
How do I make peach cinnamon rolls from scratch?
Start with an enriched yeast dough, then prepare a peach filling with fresh or canned peaches, brown sugar, and cinnamon. Roll the dough into a rectangle, spread filling, roll tightly, cut into 12 slices, and let rise 30-45 minutes. Bake at 350°F for 25-30 minutes. Top with cream cheese glaze. For full detailed instructions, follow the 9 steps in this post.
Why are my peach cinnamon rolls not gooey?
The most common reason is overbaking or under-proofing. Gooeyness comes from proper moisture retention: use heavy cream poured around the rolls before baking, and bake only until the center registers 190°F (about 25 minutes). Letting them rest only 5 minutes before glazing also helps the glaze soak in, adding moisture.
What spices go well with peach and cinnamon?
Nutmeg, cardamom, ginger, and a pinch of allspice complement peach and cinnamon beautifully. A dash of vanilla extract and a small amount of lemon zest brighten the flavor. For a warming autumn twist, add ¼ teaspoon ground cloves. The classic peach cobbler spice blend is cinnamon, nutmeg, and ginger.
Can I freeze peach cinnamon rolls?
Absolutely. Freeze unglazed rolls after baking and cooling. Wrap each roll individually in plastic wrap, then place in a freezer bag. They keep well for up to 3 months. To serve, thaw overnight in the refrigerator, reheat in a 350°F oven for 10 minutes, then add fresh glaze. For best texture, freeze without glaze.
How do I prevent peach rolls from getting soggy?
Thicken the peach filling with cornstarch before using. Toss fresh or canned diced peaches with 1 tablespoon cornstarch per cup, then cook until thick. Also, avoid overfilling the dough and seal the seam well. Finally, let the assembled rolls proof until puffy—under-proofed dough absorbs more moisture during baking, leading to sogginess.
What size peaches are best for dicing?
Medium to large frees tone peaches work best. They are easier to peel and dice, and their flesh holds up well during cooking. Aim for 1-inch dice so they distribute evenly in the rolls without becoming mushy. If using canned peaches, look for sliced or chunks rather than halves, and drain well.
Can I make these rolls ahead of time?
Yes, you can prepare the rolls the night before and refrigerate them after shaping. After cutting and placing in the pan, cover tightly and refrigerate up to 12 hours. In the morning, take them out 30 minutes before baking to warm up slightly, then bake as directed. This method develops deeper flavor.
What’s the difference between peach pie and peach cobbler cinnamon rolls?
Peach pie rolls emphasize a thick, sweet fruit filling often with a double crust vibe (dough rolled with filling), while cobbler rolls lean toward a buttery streusel topping poured over the rolls before baking. This recipe bridges both: it uses a tender dough, a gooey peach filling, and an optional streusel topping, capturing the best of both worlds.
Final Thoughts on Easy Homemade Peach Pie Cinnamon Rolls
These Easy Homemade Peach Pie Cinnamon Rolls are everything you want in a breakfast treat or dessert: soft, gooey, cinnamon-spiced, and bursting with sweet peaches. The recipe is designed to be forgiving—whether you use fresh peaches at the peak of summer or a can from the pantry, the method stays the same. The heavy cream trick ensures that signature gooey bottom, and the optional streusel topping gives a cobbler-like crunch that’s irresistible.
After extensive testing, I found that the most important factors are the thickness of the peach filling (cornstarch is your best friend) and not overbaking. Trust your senses: when the kitchen smells like a peach pie and the tops are golden, you’re almost there. Let the rolls rest only 5 minutes before glazing—this helps the cream cheese glaze melt ever so slightly into the swirls, creating pockets of creamy sweetness.
Now it’s your turn. Which peach variety will you try first? Drop a comment and let me know how your batch turned out—I’d love to hear about your gooey successes (and any creative twists you added). Happy baking!
Last update on 2026-08-12 at 01:05 / Affiliate links / Images from Amazon Product Advertising API
