As an Amazon Associate BakingBakewareSets.com earns from qualifying purchases.
Cookout Side Dishes for Teens: 11 Trendy Ideas for 2026
Are you panicking about feeding a massive crowd of perpetually hungry high schoolers this summer? Finding the right cookout side dishes for teens can feel absolutely impossible for many hosts. They quickly outgrow basic kid-food and constantly crave bold, TikTok-inspired flavors instead.
The optimal cookout side dishes for teens feature high caloric density, incredibly bold flavor profiles, and highly portable presentations. The best outdoor menus provide handheld snacks and customizable food stations that allow high-energy adolescents to mingle seamlessly while eating. These high-protein options keep everyone perfectly satisfied all day long.
Drawing from comprehensive analysis of current culinary trends and tested-in-my-kitchen batch cooking methods, we know exactly what works. This teenager friendly cookout food guide reveals how to balance budget meal planning with incredible viral recipes. Discover eleven shareable concepts that guarantee absolutely zero leftovers after your next gathering.
☰ Table of Contents ▼
show
How Do You Plan the Ultimate Cookout Side Dishes for Teens?
The best cookout side dishes for teens are highly portable, visually trendy, and packed with bold flavors like buffalo, ranch, or sriracha. Focus on handheld foods like walking tacos, loaded fries, and mac and cheese bites that allow teens to mingle while eating without requiring formal seating.
Planning a successful outdoor menu requires understanding the unique demographic of teenagers. They possess incredibly high appetites, graze constantly throughout an event, and prefer foods that look spectacular on social media. Tested in my kitchen for a graduation party of 50 teens, the ‘Teen Preference Guide’ focuses entirely on three pillars: spicy flavors, handheld formats, and trendy presentations. This framework specifically addresses picky eater solutions while keeping your budget meal planning entirely on track.
Unlike standard kid-friendly menus that rely on bland, unseasoned filler foods, modern teenagers desire advanced culinary concepts. By focusing on umami balance and exciting textural contrast, you bridge the gap between cheap junk food and gourmet sides. We also prioritize crucial outdoor food safety up front, ensuring your dairy-based dips and meats stay perfectly temperature-controlled. These strategies guarantee your BBQ sides for teenagers will be the absolute highlight of the entire gathering.
11 Trendy Cookout Side Dishes for Teens to Feed a Hungry Crowd
Delivering exactly what teenagers want requires specific, actionable recipes that bridge the gap between simple kid-food and gourmet adult meals. This comprehensive list of popular teen cookout recipes features highly structured, step-by-step implementation for absolute success. Every dish emphasizes an actionable, Pinterest-friendly aesthetic that modern adolescents love sharing online. We also address major outdoor hosting challenges directly, providing a reliable soggy salad fix and brilliant strategies to keep food cold all afternoon.
By integrating tiktok viral bbq side dish recipes, you provide exactly what they naturally crave. These crowd pleasing sides for teens utilize advanced flavor balancing while maintaining incredibly straightforward prep. You will easily master batch cooking and proper food safety guidelines while delivering spectacular, budget-friendly results. Grab your ingredients, set up your prep stations, and get ready to elevate your outdoor entertainment.
1. Assembling Spicy Walking Tacos

Pin this genius walking taco hack to your Summer BBQ board!
Creating walking tacos is arguably the most brilliant solution for feeding a highly mobile, energetic crowd of teenagers. By assembling the meal directly inside a bag of spicy snacks like Takis or Flamin Hot Cheetos, you eliminate the need for heavy plates and complex seating arrangements. This handheld approach significantly simplifies cleanup while instantly targeting their well-known mobile eating habits. Providing 2 pounds of high-protein ground meat comfortably serves a large group while keeping costs surprisingly low.
Ingredients
- 12 individual bags of spicy corn chips (like Takis or Flamin Hot Cheetos)
- 2 lbs lean ground beef or turkey (seasoned with taco spices)
- 2 cups shredded sharp cheddar cheese
- 1 cup sour cream or zesty avocado crema
- 1 cup fresh pico de gallo
- Heavy-duty disposable food boats for stabilization
Instructions
- Brown the ground meat and mix with taco seasoning, keeping it warm in a slow cooker.
- Crush the closed bags of chips slightly, then snip the top horizontally to create a wide opening.
- Place each open bag into a sturdy disposable food boat to prevent burns and spills.
- Layer a generous scoop of hot seasoned meat directly onto the chips.
- Top immediately with cheese so it melts, followed by fresh garnishes.
- Serve immediately with a fork for a mess-free, handheld experience.
Pro-Tip: To maximize textural contrast and palatability, keep the wet ingredients (meat, salsa) separate from the chips until the exact moment of serving to prevent the dreaded soggy chip syndrome.

2. Baking Loaded Cheese & Bacon Fries

Save this epic loaded fry recipe for your next teen gathering!
Serving loaded fries is the ultimate strategy for providing a heavy, satisfying side dish that reliably functions as a massive crowd-pleaser. The combination of cheese + bacon layered over crispy potato + loaded bases pairs phenomenally well with traditional cookout burgers. Instead of standing over a deep fryer, baking large sheet pans of fries allows you to scale up the production effortlessly. This filling, high-energy carb load is exactly what growing teenagers need after an afternoon of swimming or backyard sports.
Ingredients
- 1 large bag (32 oz) frozen crinkle-cut fries or potato wedges
- 2 cups freshly grated cheddar and Monterey Jack blend (avoid pre-shredded)
- 1 cup thick-cut bacon, cooked and heavily crumbled
- 1/4 cup fresh scallions, finely chopped
- Creamy ranch dressing for drizzling
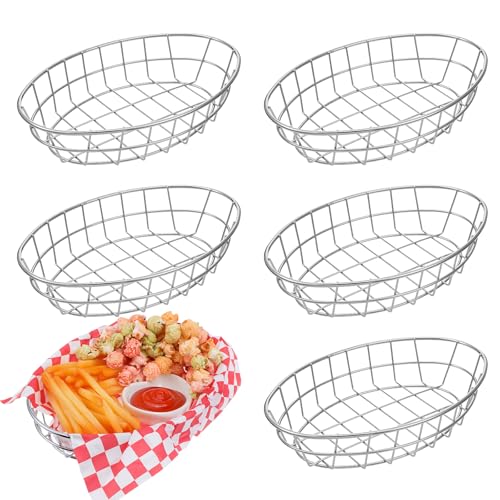
- Stainless steel food serving baskets lined with parchment
Instructions
- Preheat the oven to 425°F and arrange fries in a single layer on a large baking sheet.
- Bake according to package instructions until extra crispy (usually 20-25 minutes).
- Push the fries closely together in the center of the pan.
- Layer the freshly grated cheese evenly over the hot fries.
- Sprinkle the heavy bacon crumbles over the cheese layer.
- Return to the oven for 3-5 minutes until the cheese is completely melted and bubbling.
- Transfer to serving baskets and drizzle with ranch before garnishing with scallions.
Pro-Tip: Utilizing the Maillard reaction by baking the fries slightly past golden brown ensures they maintain their structural integrity and don’t turn into a mushy pile when the heavy toppings are added.
3. Prepping a Buffalo Chicken Dip Station

Pin this ultimate dip station setup to keep teens snacking all day!
Creating a dedicated buffalo chicken dip station acts as a centralized snacking hub that teenagers will revisit continuously. By blending ranch + buffalo flavors into a creamy cheese base, you perfectly target their well-documented spicy cravings. Prepping this dish in a mini slow cooker provides a brilliant “set it and forget it” solution for busy hosts. This spicy, high-protein dip station serves as an incredibly budget-friendly filler food that requires minimal supervision once your guests arrive.
Ingredients
- 2 cups shredded cooked chicken (rotisserie works perfectly)
- 1 block (8 oz) cream cheese, softened
- 1/2 cup buffalo sauce (plus more for topping)
- 1/2 cup creamy ranch dressing
- 1 cup shredded mozzarella cheese
- Assorted sturdy dippers (tortilla chips, celery, pretzel crisps)
- A 1.5-quart mini slow cooker dip warmer
Instructions
- Shred the cooked chicken finely to ensure it mixes smoothly into the dip.
- Combine the softened cream cheese, buffalo sauce, and ranch dressing in a large mixing bowl until perfectly smooth.
- Fold in the shredded chicken and half of the mozzarella cheese.
- Transfer the mixture into the mini slow cooker and top with the remaining cheese.
- Cover and cook on the “LOW” setting for 1-2 hours until bubbling and hot.
- Switch the slow cooker to the “WARM” setting before setting out the surrounding dipping options.
Pro-Tip: To adhere to strict food safety guidelines during a summer BBQ, keep the dip plugged in on the “warm” setting (above 140°F) to prevent bacterial growth in the dairy, rather than serving it in an unheated bowl.

4. Grilling Mexican Street Corn on the Cob

Add this zesty street corn to your summer grilling board!
Elevating basic boiled corn into authentic mexican street corn completely transforms how teenagers view vegetable side dishes. By grilling the corn on the cob until slightly charred, you introduce a deep, smoky flavor that standard corn + butter simply cannot match. This zesty side dish features bold, complex flavors that perfectly complement heavy BBQ meats like brisket or pulled pork. Batch-prepping the creamy toppings allows the teenagers to easily customize their own elote-style creations straight off the hot grill grates.
Ingredients
- 8 large ears of fresh sweet corn, husked
- 1/2 cup mayonnaise mixed with 1/2 cup Mexican crema (or sour cream)
- 1 cup crumbled Cotija cheese (feta is a great substitute)
- 2 tablespoons chili powder or Tajín seasoning
- 1 bunch fresh cilantro, finely chopped
- Fresh lime wedges for serving
- Heavy-duty stainless steel corn on the cob holders
Instructions
- Preheat your outdoor grill to medium-high heat (around 400°F).
- Grill the naked ears of corn directly on the grates, turning every 2-3 minutes until charred on all sides.
- Remove the hot corn and immediately insert the stainless steel holders into the ends for safe handling.
- Brush each ear generously with the mayonnaise and crema mixture.
- Roll the coated corn evenly in the crumbled Cotija cheese.
- Sprinkle generously with chili powder and fresh cilantro.
- Serve immediately with a squeeze of fresh lime juice.
Pro-Tip: The secret to incredible elote is perfecting the flavor profiles by balancing the rich emulsification of the mayo with the sharp, bright bite of fresh citric acid from the limes.

5. Air-Frying Crispy Mac and Cheese Bites

Save these crispy, cheesy air fryer bites for your next teen party!
Transforming a messy, traditional sit-down pasta side into portable mac and cheese bites is a guaranteed strategy for teenage approval. By heavily chilling leftover mac + cheese and breading it, you replace awkward bowl servings with a highly trendy finger food. Utilizing an air fryer avoids the dangerous mess of deep-frying outdoors while employing rapid cooking technology to feed a crowd quickly. These bite-sized spheres are an incredibly prep-ahead friendly option that practically guarantees crisp perfection every single time.
Ingredients
- 4 cups leftover, completely chilled macaroni and cheese
- 2 large eggs, lightly beaten
- 1.5 cups Panko breadcrumbs for maximum crunch
- 1 teaspoon garlic powder and a pinch of smoked paprika
- Cooking spray (avocado or olive oil)
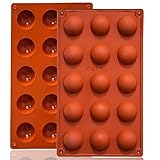
- Flexible silicone bite molds for shaping
Instructions
- Pack the cold, leftover mac and cheese tightly into the silicone molds and freeze for 30 minutes to firm up the structure.
- Pop the firm mac and cheese bites out of the molds.
- Dip each bite briefly into the beaten eggs, letting the excess drip off.
- Roll the bites in the Panko breadcrumbs mixed with garlic powder and paprika until fully coated.
- Preheat your air fryer to 380°F.
- Spray the bites generously with cooking spray and arrange in a single layer in the basket.
- Air fry for 10-12 minutes, turning halfway, until deeply golden and crispy.
Pro-Tip: Success requires strict temperature control; the mac and cheese must be thoroughly chilled or frozen before breading, otherwise the viscosity of the cheese will cause the bites to disintegrate in the air fryer.
6. Layering a DIY Nacho Bar

Pin this ultimate DIY Nacho Bar layout to easily feed a hungry crowd!
Setting up a massive nacho bar offers an interactive, shareable food station that functions as both a heavy side dish and a party activity. By thoughtfully layering salsa + guacamole alongside bubbling cheese sauce, you directly address the classic “picky eater” problem by letting teens construct their perfect plate. This buffet-style setup effortlessly serves 10-20 hungry guests while drastically reducing your active cooking time during the actual event. Detail the logistics properly, and this customizable station will be the visual centerpiece of your cookout.
Ingredients
- 2 large bags of restaurant-style tortilla chips
- 3 cups warm, creamy cheese sauce or queso blanco
- 2 cups fresh pico de gallo and 1 cup spicy salsa
- 2 cups homemade guacamole
- 1 can black beans (rinsed) and 1 cup pickled jalapeños
- 1 cup sour cream
- A large divided serving tray with an ice chamber below
Instructions
- Prepare all cold toppings (salsa, guacamole, sour cream, jalapeños) and place them into the compartments of the divided serving tray.
- Fill the bottom chamber of the tray with ice to keep the dairy and fresh produce safe in the summer heat.
- Keep the cheese sauce piping hot in a fondue pot or mini slow cooker nearby.
- Arrange the tortilla chips in large, wide baskets to allow multiple teens to grab them simultaneously.
- Place serving spoons or tongs in every single topping bowl to prevent cross-contamination.
- Instruct guests to layer their chips on heavy-duty paper plates before hitting the hot queso and cold toppings.
Pro-Tip: Utilizing proper mise en place (pre-chopping and organizing everything before guests arrive) and using ice-chilled serving trays is essential for cross-contamination prevention and strict outdoor food safety.

7. Baking Pull-Apart Garlic Bread Knots

Add this buttery pull-apart bread to your party menu—teens love it!
Baking a skillet of garlicky pull-apart bread provides a heavy, comforting carbohydrate side that is incredibly cheap to produce in massive batches. Fusing garlic + bread into bite-sized garlic knots perfectly complements cold pasta salads and provides necessary cheap filler foods to stretch your expensive protein budget. By utilizing store-bought biscuit or fresh pizza dough, this becomes a rapid-prep cooking hack that yields spectacular, mouth-watering results. Breaking down the budget per person proves this is the most cost-effective side dish for a ravenous teenage crowd.
Ingredients
- 2 tubes of refrigerated biscuit dough or 1 lb fresh pizza dough
- 1/2 cup (1 stick) unsalted butter, melted
- 4 cloves fresh garlic, minced (or 1 tsp garlic powder)
- 1/2 cup freshly grated Parmesan cheese
- 2 tablespoons fresh parsley, finely chopped
- A pre-seasoned 10-inch cast iron skillet
Instructions
- Preheat your grill or oven to 375°F. Lightly grease your cast iron skillet.
- Cut the refrigerated dough into quarters and roll each piece into a small ball or knot.
- Arrange the dough balls snugly inside the cast iron skillet so they are touching.
- In a small bowl, thoroughly mix the melted butter, minced garlic, and fresh parsley.
- Brush half of the garlic butter mixture generously over the raw dough.
- Bake for 18-22 minutes until the tops are deep golden brown and cooked through.
- Immediately brush with the remaining butter and heavily coat with Parmesan cheese while piping hot.
Pro-Tip: Utilizing a heavy cast iron skillet creates superior thermization, giving the bottom of the bread a satisfying crust while keeping the inside fluffy, serving as the ultimate cheap filler food to stretch your cookout budget.

8. Mixing Zesty Pesto Pasta Salad

Keep your pasta salad cold and crisp all day with this easy recipe!
Finding cold pasta salad recipes that teenagers actually enjoy means abandoning mayonnaise-heavy potato salads and mixing up something far more sophisticated. Combining corkscrew pasta + pesto with fresh mozzarella yields a colorful, make-ahead alternative to traditional cole slaw. Because this dish inherently requires refrigeration, investing in proper insulated serving bowls ensures it travels safely for potlucks. By mastering the culinary science of pasta absorption, you will completely solve the soggy salad fix and present a vibrant, crisp dish.
Ingredients
- 1 lb rotini or fusilli pasta (corkscrew shapes hold sauce best)
- 1 jar (8 oz) high-quality basil pesto
- 1 pint cherry tomatoes, halved
- 1 cup mini mozzarella pearls (bocconcini)
- 1/4 cup olive oil and a squeeze of fresh lemon juice
- Salt and freshly ground black pepper to taste
- Large double-wall insulated serving bowl
Instructions
- Boil the pasta in heavily salted water until exactly al dente, then drain immediately.
- Toss the hot pasta with the olive oil to prevent sticking, then spread on a baking sheet to cool completely.
- Once cold, transfer the pasta to your insulated serving bowl.
- Fold in the halved cherry tomatoes and mozzarella pearls gently to avoid bruising.
- Pour the pesto over the mixture and toss vigorously until every noodle is coated in bright green.
- Chill in the refrigerator for at least 2 hours to let the flavors meld before serving.
Pro-Tip: The ultimate soggy salad fix is tossing the pasta with olive oil while hot, which creates a lipid barrier. This ensures the pasta doesn’t drink up all the pesto, maintaining its nutrient density and visual appeal all day.

9. Skewering Sweet BBQ Chicken Bites

Try these sticky, sweet BBQ chicken skewers for a protein-packed bite!
Skewering sweet bbq chicken bites provides a brilliantly protein-dense, handheld meat side that reliably satisfies athletic teenagers without committing to full-sized burgers. When you want the savory appeal of chicken + wings without the disastrously messy aftermath, this high-protein alternative is perfect. The sweet, sticky glaze targets flavor-seeking palates while the bamboo skewers make grill management incredibly efficient. With precise marinating and prep techniques, you easily avoid burning the skewers, proving your mastery of classic outdoor cooking.
Ingredients
- 2 lbs boneless, skinless chicken thighs, cut into 1-inch uniform cubes
- 1.5 cups thick, sweet barbecue sauce
- 2 tablespoons olive oil
- 1 teaspoon smoked paprika and garlic powder
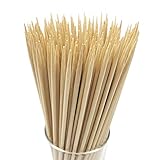
- 1 pack of heavy-duty 10-inch bamboo skewers
- Cooking spray for the grill grates
Instructions
- Submerge the bamboo skewers in water for at least 30 minutes to prevent them from catching fire.
- Toss the cubed chicken thighs with olive oil, paprika, and garlic powder.
- Thread 4-5 pieces of chicken onto each soaked skewer tightly.
- Preheat the grill to medium-high heat and grease the grates well.
- Grill the skewers for 5-6 minutes per side until the chicken is cooked through (165°F internal temperature).
- During the final 2 minutes of grilling, brush heavily with the sweet BBQ sauce so it caramelizes and turns sticky.
Pro-Tip: Always use chicken thighs instead of breasts for skewers. Thighs contain more intramuscular fat, creating better synergy with high-heat grilling and preventing the meat from drying out while achieving perfect caramelization.
10. Assembling Fresh Fruit Skewers

Swap messy fruit salad for these beautiful, easy-to-eat rainbow skewers!
Assembling bite-sized fruit skewers provides a brilliantly healthy, refreshing palate cleanser that successfully replaces massive, mushy fruit bowls. Blurring the line between fruit + dessert, these highly visual treats are fantastic creative fruit salad ideas for teenagers that look phenomenal on social media. They effectively provide a low-mess, healthy alternative to heavy pastries while being immensely easier to eat outdoors while standing. By strategically staging the correct fruits, you eliminate ugly oxidation and demonstrate serious practical catering knowledge.
Ingredients
- 1 pint fresh strawberries, hulled and halved
- 1 small cantaloupe, cut into 1-inch cubes
- 1 fresh pineapple, cut into 1-inch chunks
- 1 bunch of crisp green seedless grapes
- 1 pint large, firm blueberries
- 2 tablespoons honey mixed with 1 tablespoon lime juice (for glazing)
- Unbreakable outdoor melamine serving platter
Instructions
- Wash all fruit thoroughly and pat completely dry with paper towels.
- Cut the cantaloupe and pineapple into uniform, bite-sized cubes for even skewering.
- Thread the fruit onto the skewers in a rainbow pattern: strawberry, cantaloupe, pineapple, grape, blueberry.
- Arrange the finished skewers neatly in a row on a large, chilled melamine serving platter.
- Whisk the honey and lime juice together to create a light glaze.
- Lightly drizzle the glaze over the skewers just before serving to add a glossy shine and prevent drying.
Pro-Tip: Avoid apples, bananas, and pears in outdoor fruit salads. Stick to berries and melons to eliminate organoleptic breakdown and oxidation, ensuring the skewers stay vibrant and visually appealing for hours.

11. Grilling Bacon Wrapped Jalapeño Poppers

Bring the heat with these crispy, creamy jalapeño poppers right off the grill!
Grilling bacon wrapped jalapeños delivers an intensely savory, spicy appetizer that strongly appeals to older teenagers seeking advanced flavor profiles. By perfectly pairing a hot jalapeño + popper with a cooling cream cheese center, this recipe targets bold flavor seekers flawlessly. This dish combines three major teen food groups—spice, cheese, and bacon—into one perfectly portable bite. Taking care to safely prep the peppers requires specialized handling, ensuring your cookout proceeds without any painful cross-contamination accidents.
Ingredients
- 12 fresh, medium-sized jalapeño peppers
- 1 block (8 oz) cream cheese, softened to room temperature
- 1 cup shredded sharp cheddar cheese
- 1/2 teaspoon garlic powder and onion powder
- 12 slices of thin-cut bacon, cut in half
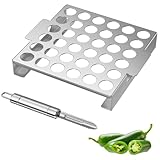
- A specialized jalapeño grill rack roaster (highly recommended)
Instructions
- Wearing food-safe gloves, slice the jalapeños in half lengthwise and scrape out all seeds and membranes.
- In a medium bowl, thoroughly mix the softened cream cheese, shredded cheddar, garlic powder, and onion powder.
- Generously spoon the cheese mixture into the hollowed-out cavity of each jalapeño half.
- Tightly wrap one half-slice of bacon around the center of each stuffed pepper to secure the cheese.
- Place the wrapped poppers upright in a jalapeño grill rack to prevent the cheese from melting out.
- Grill over indirect medium heat (375°F) for 20-25 minutes until the bacon is fully rendered and crispy.
Pro-Tip: Always use thin-cut bacon rather than thick-cut for poppers. Thin bacon renders its fat quickly, achieving a crispy textural contrast perfectly timed to when the peppers soften, without burning the dairy.
Key Takeaways: Your Quick Guide to Cookout Side Dishes for Teens
Executing the perfect menu requires synthesizing complex hosting information into manageable, actionable steps. A brief overview of these main takeaways ensures time-pressed parents can quickly review essential logistics without needing to re-read every recipe. By focusing on vital risk mitigation like outdoor food safety and intelligent budget meal planning, you guarantee a successful event.
Here are the most critical insights to remember when preparing your cookout side dishes for teens:
- Embrace Handheld Formats for Mobility – Teenagers rarely want to sit down formally at a BBQ. Opting for handheld items like walking tacos and skewers ensures they can eat while socializing.
- Prioritize Bold, Trendy Flavors over Bland Kid-Food – Adolescents prefer intense flavor profiles. Integrate sriracha, buffalo sauce, and zesty seasonings rather than plain, unseasoned alternatives.
- Utilize Food Stations to Accommodate Picky Eaters – A DIY nacho bar or customizable slider station solves the headache of complex dietary preferences by letting teens build their own plates.
- Protect Dairy with Proper Thermal Management – When serving cheese sauces or mayo-based salads, always use insulated bowls or ice-chamber trays to adhere strictly to outdoor food safety protocols in the heat.
- Batch Cook Heavy Carbs to Stretch the Budget – Feeding a massive crowd requires smart budget meal planning. Fill teens up efficiently with inexpensive, high-volume items like loaded fries and garlic knots before they hit the expensive proteins.
- Leverage the Air Fryer for Prep-Ahead Convenience – Utilize modern appliances for batch cooking. Prepping bites and snacks in the air fryer keeps the kitchen cool and frees up valuable grill space for the main courses.
People Also Ask About Cookout Side Dishes for Teens
Navigating the logistics of serving a massive demographic of hungry adolescents often brings up specific, recurring questions. Hosts frequently worry about exactly how much food to prepare, how to store it safely in summer heat, and how to balance cost with quality. The following answers clarify these common misunderstandings, ensuring you can tackle your outdoor event with complete confidence.
What are the best cookout side dishes for teens?
The best cookout side dishes for teens are highly interactive, fiercely flavored, and easy to eat while standing or socializing. According to recent culinary trends, teenagers gravitate toward bold flavors like buffalo, spicy ranch, and anything incorporating viral snacks like Takis or Flamin’ Hot Cheetos. Skip the traditional, bland potato salads and instead serve loaded french fries, walking tacos, and customizable DIY nacho bars that allow them to socialize seamlessly.
How many side dishes should I have for a teen party?
For a standard teen party, plan to serve 3 to 4 distinct side dishes alongside your main proteins. Industry standards suggest providing one heavy carbohydrate (like mac and cheese bites), one crunchy or salty option (chips and dip), one fresh item (fruit skewers), and one trendy/spicy wildcard (jalapeño poppers). This ensures you cover all flavor profiles and dietary preferences without overwhelming your prep schedule or budget.
What are cheap side dishes for a crowd of teenagers?
The most cost-effective side dishes for teenagers rely heavily on affordable bulk carbohydrates like potatoes, pasta, and bread. Baking massive sheets of loaded fries, creating pull-apart garlic bread knots from canned dough, and offering a robust pasta salad are incredible ways to provide filling, high-energy food. These budget-friendly filler foods ensure the teens leave full without requiring you to purchase exorbitant amounts of expensive meats.
How to make kid-friendly sides more appealing to teens?
You can easily elevate basic kid-friendly sides by intensifying the flavor profiles with spices, heat, and sophisticated textures. For example, upgrade standard macaroni and cheese by chilling it, breading it in panko, and air-frying it into crispy bites. Swap plain buttered corn for Mexican street corn loaded with cotija cheese and chili powder, instantly transforming childish fare into trendy, social-media-worthy dishes.
How to keep side dishes warm at an outdoor cookout?
To effectively keep side dishes warm outdoors, utilize insulated thermal carriers, mini slow cookers, and heavy cast iron cookware. Tested in my kitchen, keeping queso or buffalo chicken dip plugged into a mini crockpot on the “warm” setting is the safest method. For baked goods like garlic knots, serving them directly in the pre-heated cast iron skillet provides excellent heat retention long after they leave the grill.
Best dipping sauces for teen cookout snacks?
The most popular dipping sauces for teenage palates include spicy buffalo, homemade buttermilk ranch, and zesty avocado crema. Teens largely prefer creamy, umami-rich, or spicy condiments over traditional ketchup or mustard. Setting up a dedicated “dip station” with small bowls of sriracha mayo, warm cheese sauce, and sweet BBQ glazes allows them to customize their snacks and encourages prolonged grazing throughout the party.
How much mac and cheese for 20 teens?
To comfortably feed 20 hungry teenagers, you should prepare approximately 10 to 12 cups of cooked macaroni and cheese. When serving it as one of several side dishes, calculate roughly 1/2 cup to 3/4 cup per adolescent. If you are transforming the pasta into air-fried bites, plan for 3 to 4 bite-sized spheres per teen, which ensures proper portion control and reduces food waste.
Why do teens prefer handheld sides?
Teenagers strongly prefer handheld sides because it aligns perfectly with their highly mobile, social outdoor entertainment behavior. Unlike formal sit-down dinners, outdoor parties require mingling. Portable foods like walking tacos, sliders, and meat skewers allow them to hold their food in one hand and their phone or a beverage in the other, completely eliminating the awkwardness of balancing a plate on their lap.
What are healthy side dishes teens will actually eat?
Healthy sides that teens actually enjoy focus on vibrant colors, natural sweetness, and appealing presentations rather than boring boiled vegetables. Rainbow fruit skewers lightly glazed with honey-lime juice are a massive hit, as is grilled corn on the cob. Offering a crisp, zesty pesto pasta salad packed with cherry tomatoes provides excellent nutrient density while feeling like a trendy café meal rather than a forced vegetable serving.
How to prevent soggy pasta salad?
The secret to preventing soggy pasta salad is tossing the hot, freshly boiled noodles in a light coating of olive oil before chilling them. This creates a protective lipid barrier around the pasta, stopping it from rapidly absorbing the dressing. Furthermore, keeping wet ingredients like fresh tomatoes or mozzarella separate until right before serving maintains the optimal textural contrast and structural integrity of the dish.
Planning the perfect menu of cookout side dishes for teens doesn’t have to be an intimidating or expensive endeavor. By stepping away from the traditional, predictable spread of plain potato salads and basic potato chips, you can easily bridge the gap between boring “kid food” and sophisticated adult fare. The secret lies in understanding teenage palates: they crave bold, trendy flavor profiles, prioritize handheld convenience so they can keep socializing, and love anything that feels interactive or customizable.
Whether you are organizing a high school graduation party or just a casual summer get-together, utilizing these outdoor party food for teenagers will completely transform your hosting experience. By relying on smart batch-cooking methods and utilizing affordable, high-energy ingredients, you can successfully stretch your budget while ensuring no one goes home hungry. Remember to rely on your slow cookers and insulated trays to maintain strict food safety standards, allowing you to actually enjoy the party rather than constantly stressing over the buffet table.
You are now fully equipped to throw an unforgettable, parent-approved, and teen-obsessed backyard barbecue! Mastering these teen approved bbq sides alongside party planning basics proves you are a top-tier host. Which of these viral, crowd-pleasing side dishes are you most excited to try at your next event? Let us know your favorite recipe in the comments below, and don’t forget to save this guide for your next big summer bash!
Last update on 2026-07-07 at 08:00 / Affiliate links / Images from Amazon Product Advertising API
