As an Amazon Associate BakingBakewareSets.com earns from qualifying purchases.
Transform Your Leftover Halloween Candy With 13 Genius Recipes
Staring at a mountain of Halloween candy and not sure what to do? You’re not alone in facing this sweet, sugary dilemma.
Leftover Halloween candy is a concept every household knows well. It’s the colorful surplus that lingers long after the costumes are put away, creating a challenge of potential waste versus over-indulgence.
Transforming that excess Halloween candy into new, creative desserts is the best way to extend the fun and avoid waste. This guide gives you 13 genius, easy-to-follow recipes to turn your candy stash into incredible treats the whole family will love.
☰ Table of Contents ▼
show
13 Genius Recipes to Transform Your Leftover Halloween Candy
That post-Halloween candy surplus doesn’t have to be a problem. Think of it as a treasure trove of ingredients waiting to be transformed! We’ve curated and tested these simple recipes to ensure you get delicious, successful results. From baked goods to no-bake wonders, here are 13 creative ways to use up every last piece of candy, turning your leftovers into encore-worthy desserts.

Pin this genius tips to your ‘Halloween Baking’ board!
Ingredients Needed:
- 1/2 cup (1 stick) unsalted butter, melted
- 1/2 cup granulated sugar
- 1/4 cup packed light brown sugar
- 1 large egg
- 1 teaspoon vanilla extract
- 1 1/4 cups all-purpose flour
- 1/2 teaspoon baking powder
- 1/4 teaspoon salt
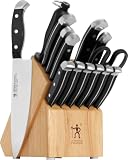
- 1 1/2 cups (about 15-20 fun-size bars) assorted chocolate Halloween candy, roughly chopped (e.g., Snickers, Milky Way, Kit Kat, Butterfinger – a good quality knife set makes chopping easy)
- 8×8 inch baking pan
Step-by-Step Directions:
- Preheat oven to 350°F (175°C). Line an 8×8 inch baking pan with parchment paper, leaving an overhang on the sides for easy removal.
- In a large bowl, whisk together the melted butter, granulated sugar, and brown sugar until smooth.
- Beat in the egg and vanilla extract until well combined.
- In a separate medium bowl, whisk together the flour, baking powder, and salt.
- Gradually add the dry ingredients to the wet ingredients, mixing until just combined. Be careful not to overmix.
- Gently fold in 1 cup of the chopped chocolate candy.
- Spread the batter evenly into the prepared baking pan.
- Sprinkle the remaining 1/2 cup of chopped candy over the top of the batter.
- Bake for 25-30 minutes, or until the edges are golden brown and a toothpick inserted into the center comes out with moist crumbs.
- Let cool completely in the pan before lifting out with the parchment paper and cutting into bars.
Pro-Tip: Freeze chocolate candy bars for 15-20 minutes before chopping. This helps prevent them from melting in your hands and makes for cleaner cuts, ensuring better distribution in your cookie bars.

Save this clever organization idea!
Ingredients Needed:
- 1/2 cup (1 stick) unsalted butter, softened
- 1/2 cup granulated sugar
- 1/2 cup packed light brown sugar
- 1 large egg
- 1 teaspoon vanilla extract
- 1 1/4 cups all-purpose flour
- 1/2 teaspoon baking soda
- 1/4 teaspoon salt
- 1 cup semi-sweet chocolate chips (or chopped chocolate bars)
- 12-18 mini Reese’s Peanut Butter Cups, unwrapped (using a good cookie scoop ensures even cookie size)
Step-by-Step Directions:
- Preheat oven to 375°F (190°C). Line a baking sheet with parchment paper.
- In a large bowl, cream together the softened butter, granulated sugar, and brown sugar until light and fluffy.
- Beat in the egg and vanilla extract until well combined.
- In a separate medium bowl, whisk together the flour, baking soda, and salt.
- Gradually add the dry ingredients to the wet ingredients, mixing on low speed until just combined.
- Stir in the chocolate chips.
- Take a tablespoon of cookie dough and flatten it in your palm. Place one mini Reese’s Peanut Butter Cup in the center.
- Top with another tablespoon of cookie dough and gently shape around the Reese’s cup to fully enclose it.
- Place the stuffed cookie dough balls on the prepared baking sheet, about 2 inches apart.
- Bake for 9-11 minutes, or until the edges are golden and the centers are set. The Reese’s will be perfectly melted and gooey.
- Let cool on the baking sheet for 5 minutes before transferring to a wire rack to cool completely.
Pro-Tip: For extra-gooey centers, slightly underbake the cookies. The residual heat will continue to melt the Reese’s, creating a wonderfully soft and indulgent treat.

3. Gooey Skittles & Starburst Blondies

Discover this colorful candy creation!
Ingredients Needed:
- 1/2 cup (1 stick) unsalted butter, melted
- 1 cup packed light brown sugar
- 1 large egg
- 1 teaspoon vanilla extract
- 1 cup all-purpose flour
- 1/2 teaspoon baking powder
- 1/4 teaspoon salt
- 1 cup (about 20-25 fun-size pieces) assorted Skittles and Starburst candies, roughly chopped (a durable cutting board is key for sticky candies)
- 8×8 inch baking pan
Step-by-Step Directions:
- Preheat oven to 350°F (175°C). Line an 8×8 inch baking pan with parchment paper.
- In a large bowl, whisk together the melted butter and brown sugar until smooth.
- Beat in the egg and vanilla extract until well combined.
- In a separate medium bowl, whisk together the flour, baking powder, and salt.
- Gradually add the dry ingredients to the wet ingredients, mixing until just combined.
- Gently fold in 3/4 cup of the chopped Skittles and Starburst.
- Spread the batter evenly into the prepared baking pan.
- Sprinkle the remaining 1/4 cup of chopped candy over the top for extra visual appeal.
- Bake for 22-28 minutes, or until the edges are lightly golden and a toothpick inserted into the center comes out with moist crumbs. Be careful not to overbake for maximum gooeyness.
- Let cool completely in the pan before cutting into squares.
Pro-Tip: To minimize color bleeding from fruity candies, add them towards the end of the baking cycle or gently press them into the surface of the blondies during the last 5 minutes of baking.

4. No-Bake Candy Bar Fudge

Pin this easy no-bake dessert!
Ingredients Needed:
- 1 (14-ounce) can sweetened condensed milk
- 2 cups (12 ounces) semi-sweet chocolate chips (good quality chocolate chips make a difference)
- 1/4 cup (1/2 stick) unsalted butter
- 1 teaspoon vanilla extract
- 1 1/2 cups assorted chopped chocolate Halloween candy bars (e.g., Snickers, Twix, M&M’s, Kit Kat)
- 8×8 inch baking pan
Step-by-Step Directions:
- Line an 8×8 inch baking pan with parchment paper, leaving an overhang on the sides.
- In a medium saucepan, combine the sweetened condensed milk, chocolate chips, and butter over medium-low heat.
- Stir constantly until the chocolate chips and butter are fully melted and the mixture is smooth and glossy. Remove from heat.
- Stir in the vanilla extract.
- Quickly fold in 1 cup of the chopped Halloween candy.
- Pour the fudge mixture into the prepared pan and spread evenly.
- Sprinkle the remaining 1/2 cup of chopped candy over the top of the fudge, pressing lightly.
- Refrigerate for at least 2 hours, or until the fudge is firm.
- Use the parchment paper overhang to lift the fudge from the pan, then cut into squares.
Pro-Tip: For the easiest chopping of candy bars for fudge, chill them in the refrigerator for about 30 minutes before cutting. This helps prevent melting and stickiness.

5. Ultimate Mixed Candy Bark

Pin this easy-to-make candy bark!
Ingredients Needed:
- 12 ounces semi-sweet chocolate chips (or dark chocolate for a less sweet option)
- 1 cup white chocolate chips (for drizzling, optional)
- 2 cups assorted Halloween candy, chopped or crushed (e.g., M&M’s, gummy worms, mini chocolate bars, crushed pretzels) – a microwave-safe bowl is handy for melting chocolate.
- Parchment paper-lined baking sheet
Step-by-Step Directions:
- Line a large baking sheet (approximately 9×13 inches) with parchment paper.
- Place the semi-sweet chocolate chips in a microwave-safe bowl. Microwave in 30-second intervals, stirring after each, until completely melted and smooth. This usually takes 1-2 minutes.
- Pour the melted chocolate onto the prepared baking sheet and spread it evenly into a thin layer using an offset spatula or the back of a spoon.
- If using white chocolate, melt it in a separate microwave-safe bowl following the same method. Drizzle the melted white chocolate over the dark chocolate layer. Use a toothpick or skewer to swirl the two chocolates together gently.
- Immediately sprinkle the chopped and crushed Halloween candy evenly over the melted chocolate. Press gently to ensure the candies adhere.
- Refrigerate for at least 30-60 minutes, or until the chocolate is completely firm.
- Once firm, break the candy bark into irregular pieces.
Pro-Tip: Don’t limit yourself to just candy! Pretzels, nuts, dried fruit, or even sprinkles can be added to your candy bark for extra texture and flavor, making it a true “kitchen sink” creation.


Save this sweet and salty cookie idea!
Ingredients Needed:
- 1/2 cup (1 stick) unsalted butter, softened
- 1/2 cup granulated sugar
- 1/2 cup packed light brown sugar
- 1 large egg
- 1 teaspoon vanilla extract
- 1 1/4 cups all-purpose flour
- 1/2 teaspoon baking soda
- 1/4 teaspoon salt
- 1 cup semi-sweet chocolate chips
- 1 cup M&M’s Halloween candy (a sturdy mixing spoon is helpful for folding in add-ins)
- 1/2 cup crushed pretzels
Step-by-Step Directions:
- Preheat oven to 375°F (190°C). Line a baking sheet with parchment paper.
- In a large bowl, cream together the softened butter, granulated sugar, and brown sugar until light and fluffy.
- Beat in the egg and vanilla extract until well combined.
- In a separate medium bowl, whisk together the flour, baking soda, and salt.
- Gradually add the dry ingredients to the wet ingredients, mixing until just combined.
- Fold in the chocolate chips, M&M’s, and crushed pretzels.
- Drop rounded tablespoons of dough onto the prepared baking sheet, about 2 inches apart.
- Bake for 10-12 minutes, or until the edges are golden brown and the centers are set.
- Let cool on the baking sheet for a few minutes before transferring to a wire rack to cool completely.
Pro-Tip: To prevent M&M’s colors from bleeding too much, you can chill the dough for 30 minutes before baking, or press extra M&M’s onto the tops of the cookies immediately after they come out of the oven.

7. Butterfinger Crumble Brownies

Pin this crunchy brownie recipe!
Ingredients Needed:
- 1/2 cup (1 stick) unsalted butter
- 1 cup granulated sugar
- 2 large eggs
- 1 teaspoon vanilla extract
- 1/2 cup all-purpose flour
- 1/3 cup unsweetened cocoa powder (high-quality cocoa makes a difference)
- 1/4 teaspoon baking powder
- 1/4 teaspoon salt
- 1 1/2 cups (about 10-12 fun-size bars) Butterfinger candy, crushed or chopped
- 8×8 inch baking pan
Step-by-Step Directions:
- Preheat oven to 350°F (175°C). Line an 8×8 inch baking pan with parchment paper.
- In a medium saucepan, melt the butter over low heat. Remove from heat and stir in the sugar until combined.
- Whisk in the eggs one at a time, then stir in the vanilla extract until smooth.
- In a separate bowl, whisk together the flour, cocoa powder, baking powder, and salt.
- Gradually add the dry ingredients to the wet ingredients, mixing until just combined.
- Fold in 1 cup of the crushed Butterfinger candy.
- Pour the batter into the prepared pan and spread evenly.
- Sprinkle the remaining 1/2 cup of crushed Butterfinger candy evenly over the top of the brownie batter.
- Bake for 25-30 minutes, or until a toothpick inserted into the center comes out with moist crumbs. Do not overbake.
- Let cool completely in the pan before cutting into squares.
Pro-Tip: For the best crunch, crush your Butterfinger candy just before adding it, and be sure to add a portion on top of the brownies halfway through baking, or right after to maintain maximum crispness.

8. Jolly Rancher Stained Glass Lollipops

Discover this fun hard candy craft!
Materials Needed:
- 10-15 Jolly Rancher candies, unwrapped (separated by color for best effect)
- Lollipop sticks (available at craft stores or online)
- Silicone lollipop mold or baking sheet lined with parchment paper
- Small hammer or meat tenderizer (for crushing, if not using a mold)
Step-by-Step Directions:
- Preheat oven to 275°F (135°C).
- For Silicone Molds: Place one Jolly Rancher in each cavity of your silicone lollipop mold.
- For Parchment Paper: Arrange unwrapped Jolly Ranchers (separated by color if desired) on the parchment-lined baking sheet, leaving about 2 inches between them. If you want a “crushed glass” effect, place candies in a sealed bag and gently crush them with a small hammer or meat tenderizer, then arrange the crushed pieces in small clusters on the parchment.
- Bake for 5-8 minutes, or until the candies are completely melted and spread into thin, glassy circles.
- Immediately remove from the oven. If making lollipops, gently press a lollipop stick into the melted candy, twisting slightly to ensure it’s fully coated.
- Let cool completely at room temperature or in the refrigerator until hardened (about 15-30 minutes).
- Carefully peel the hardened candy from the silicone mold or parchment paper.
Pro-Tip: If the candies spread too thin on parchment paper, you can use metal cookie cutters (greased) to help contain their shape as they melt.

9. Twix Caramel Apple Nachos

Save this unique no-bake snack!
Materials Needed:
- 2-3 medium-sized apples (e.g., Gala, Honeycrisp, Granny Smith), cored and sliced (an apple slicer makes quick work)
- 1/2 cup caramel sauce (store-bought or homemade)
- 4-5 fun-size Twix candy bars, chopped
- Optional toppings: mini chocolate chips, chopped nuts, sprinkles
- Large platter or serving board
Step-by-Step Directions:
- Arrange the apple slices in an overlapping pattern on a large platter or serving board.
- Warm the caramel sauce slightly in the microwave (if using store-bought) for 15-30 seconds to make it easier to drizzle.
- Drizzle the warm caramel sauce generously over the apple slices.
- Evenly sprinkle the chopped Twix candy bars over the caramel-drizzled apples.
- If desired, add any optional toppings like mini chocolate chips or chopped nuts.
- Serve immediately as a fun, interactive dessert or snack.
Pro-Tip: To prevent apple slices from browning, toss them lightly in a small amount of lemon juice (about 1 teaspoon per apple) immediately after slicing, then pat dry before arranging.

10. Kit Kat & Ice Cream Cake

Pin this impressive ice cream cake!
Materials Needed:
- 1 (1.75-quart) container vanilla ice cream, softened
- 1 (1.75-quart) container chocolate ice cream, softened
- 1 (9-inch) chocolate cookie crust (store-bought or homemade)
- 20-25 fun-size Kit Kat bars, unwrapped
- 1/2 cup chocolate fudge topping or ganache
- 9-inch springform pan (optional, for easier removal)
Step-by-Step Directions:
- If using a springform pan, line the sides with parchment paper for easy removal. Place the chocolate cookie crust in the bottom.
- Evenly spread the softened vanilla ice cream over the cookie crust. Use an offset spatula or the back of a spoon to smooth it out.
- Place the unwrapped Kit Kat bars vertically around the inside edge of the pan, pressing them gently into the vanilla ice cream. They should stand upright.
- Evenly spread the softened chocolate ice cream over the vanilla layer, making sure to fill any gaps between the Kit Kat bars. Smooth the top.
- Freeze for at least 4-6 hours, or overnight, until completely firm.
- When ready to serve, remove the cake from the springform pan (or carefully unmold). Drizzle with chocolate fudge topping and sprinkle with a few extra crushed Kit Kat pieces.
- Slice and serve immediately.
Pro-Tip: To get perfectly smooth layers of ice cream, take it out of the freezer about 15-20 minutes before assembling. It should be soft enough to spread but not completely melted.
16% OffBestseller No. 10
11. Gummy Bear & Fruit Slice Tarts

Discover this colorful tart idea!
Materials Needed:
- 1 (14.1-ounce) package refrigerated pie crusts, or homemade shortbread crust
- 1 (8-ounce) package cream cheese, softened
- 1/2 cup granulated sugar
- 1 teaspoon vanilla extract
- 1 (8-ounce) container whipped topping, thawed
- 1 cup mini gummy bears (a set of mini tart pans is ideal for individual servings)
- 1/2 cup hard fruit slice candies, chopped or left whole for decoration
- Mini muffin/tart pan
Step-by-Step Directions:
- Preheat oven to 375°F (190°C).
- Roll out pie crusts or shortbread dough. Using a 3-inch round cutter, cut out circles of dough. Press each circle into the cavities of a mini muffin/tart pan. Prick the bottoms with a fork.
- Bake for 10-12 minutes, or until golden brown. Let crusts cool completely in the pan, then remove carefully.
- In a medium bowl, beat softened cream cheese, sugar, and vanilla extract until smooth.
- Gently fold in the thawed whipped topping until well combined.
- Spoon or pipe the cream cheese mixture into the cooled tart shells.
- Arrange gummy bears and chopped fruit slice candies decoratively on top of each tart.
- Refrigerate for at least 1 hour before serving to allow the filling to set.
Pro-Tip: For optimal presentation, arrange the gummy bears and fruit slices just before serving to prevent them from becoming too soft from the moisture in the filling.

12. Snickers Caramel Popcorn Mix

Pin this ultimate movie night snack!
Materials Needed:
- 12 cups popped popcorn (approximately 1/2 cup unpopped kernels, popped in an air popper or stovetop popcorn maker for best results)
- 1 cup (2 sticks) unsalted butter
- 1/2 cup light corn syrup
- 1 cup packed light brown sugar
- 1 teaspoon vanilla extract
- 1/2 teaspoon baking soda
- 6-8 fun-size Snickers candy bars, chopped
- Large roasting pan or two large baking sheets
Step-by-Step Directions:
- Preheat oven to 250°F (120°C). Spread the popped popcorn evenly in a large roasting pan or across two large baking sheets.
- In a medium saucepan, combine butter, corn syrup, and brown sugar. Bring to a boil over medium heat, stirring constantly, then boil for 5 minutes without stirring.
- Remove from heat and immediately stir in the vanilla extract and baking soda (the mixture will foam up).
- Carefully pour the hot caramel sauce over the popcorn, stirring gently to coat as evenly as possible.
- Bake for 30 minutes, stirring every 10 minutes to ensure even coating and prevent sticking.
- Remove from oven and stir in the chopped Snickers candy bars.
- Spread the popcorn mix onto parchment paper to cool completely, breaking up any large clusters as it cools.
Pro-Tip: Using an air popper for your popcorn ensures no unpopped kernels or excess oil, which can make your caramel popcorn greasy.

13. Tootsie Roll Chocolate Truffles

Save this decadent no-bake treat!
Materials Needed:
- 1 cup (about 25-30 fun-size) Tootsie Rolls, unwrapped
- 1/4 cup heavy cream
- 1 cup semi-sweet chocolate chips (or finely chopped good quality dark chocolate)
- 1/4 cup unsweetened cocoa powder, for dusting (a small saucepan is needed for melting)
- Optional: finely chopped nuts, shredded coconut, or sprinkles for rolling
Step-by-Step Directions:
- In a small saucepan, combine the unwrapped Tootsie Rolls and heavy cream. Heat over low heat, stirring constantly, until the Tootsie Rolls are completely melted and the mixture is smooth. Remove from heat.
- Add the chocolate chips to the Tootsie Roll mixture. Stir until the chocolate chips are completely melted and the mixture is smooth and glossy.
- Pour the mixture into a shallow bowl, cover with plastic wrap, and refrigerate for at least 2 hours, or until firm enough to roll.
- Place the cocoa powder (or other rolling coating) in a separate shallow dish.
- Using a small scoop or your hands, roll the chilled Tootsie Roll mixture into 1-inch balls.
- Roll each truffle in the cocoa powder (or other coating) until evenly coated.
- Store the truffles in an airtight container in the refrigerator for up to 1 week.
Pro-Tip: If the Tootsie Roll mixture becomes too sticky to roll, simply pop it back into the refrigerator for another 15-20 minutes to firm up further. You can also lightly grease your hands for easier rolling.
Key Takeaways: Your Quick Guide to Transforming Leftover Halloween Candy
- Versatility is Key: Cookie bars and bark are perfect for mixing all types of chocolate candies.
- No-Bake Wonders: Fudge, truffles, and apple nachos offer quick, oven-free solutions.
- Fruity Fun: Blondies and lollipops provide vibrant uses for non-chocolate candies.
- Sweet & Salty: Don’t forget the power of pretzels to balance sweetness in cookies and popcorn.
- Prep Matters: Proper chopping and temperature control ensure successful candy integration in any recipe.
People Also Ask About Leftover Halloween Candy Recipes
What are the best types of Halloween candy to bake with?
Chocolate bars like Snickers, Milky Way, and Kit Kat are excellent for baking as they melt or soften appealingly. M&M’s hold their shape well, while Reese’s Peanut Butter Cups create a delightful gooey center. Chewy candies such as Starburst or Skittles are best for blondies or no-bake options to prevent excessive melting or color bleeding.
Can I mix different types of Halloween candy in one recipe?
Absolutely! Many “kitchen sink” style recipes, like cookie bars or candy bark, are designed for mixed candy. It’s a fantastic way to use up a variety of your stash. Just be mindful of combining very strong flavors (e.g., highly sour with rich chocolate) and textures, aiming for a harmonious blend.
How do I prevent candies from sinking to the bottom of baked goods?
A common and effective trick is to toss your chopped candies (especially chocolate ones) with about a tablespoon of flour before folding them into the batter. This light coating helps them suspend more evenly throughout the dough or batter during baking, ensuring better distribution in your final treat.
What can I do with hard or sticky candies that don’t bake well?
Hard candies like Jolly Ranchers can be melted to create edible “stained glass” or glazes, or formed into lollipops. Sticky, chewy candies such as Tootsie Rolls or Starburst are often best utilized in no-bake applications like candy bark, truffles, or rice crispy treats to prevent them from becoming too gooey or difficult to manage in the oven.
How long do desserts made with Halloween candy last, and how should I store them?
Most baked goods containing Halloween candy will last 3-5 days at room temperature when stored in an airtight container. For longer preservation, many candy-filled cookies, brownies, or fudge can be frozen for up to 1-2 months. Ensure they are wrapped tightly to prevent freezer burn.
Final Thoughts
As the Halloween season winds down, don’t let that mountain of candy become a source of guilt or waste. With these 13 genius recipes, your leftover stash can be transformed into unforgettable, delicious treats that extend the festive fun! From gooey cookie bars to elegant truffles and vibrant tarts, there’s a creative way to repurpose every last sweet bite. Embrace the spirit of ingenuity and turn that candy overload into culinary triumph.
What’s your go-to recipe for using up leftover Halloween candy? Share your favorite transformations in the comments below
Last update on 2026-07-19 at 16:05 / Affiliate links / Images from Amazon Product Advertising API
