As an Amazon Associate BakingBakewareSets.com earns from qualifying purchases.
Buttery Brioche Bread Recipe: 7 Proven Steps to Soft Crumb
Master this buttery brioche bread recipe using 7 proven steps. Discover how to create an ultra soft, melt in your mouth crumb with room temperature butter!
Have you ever spent hours baking only to pull a dense, heavy brick from your oven? Achieving a truly soft, tearable crumb eludes many passionate home bakers. This buttery brioche bread recipe eliminates the frustrating guesswork completely.
The secret to perfect brioche bread is extensive gluten development prior to incorporating room temperature European butter, followed by an overnight cold fermentation. This precise process yields an ultra soft crumb. It completely prevents the dairy fat emulsion from breaking. You will easily ensure a deeply bronzed top and pillowy structure.
Drawing from comprehensive analysis of current data and proven baking methodologies, this guide delivers bakery-level perfection. Based on established best practices and verified culinary research, you will master exact gram measurements. Discover the crucial temperature controls needed to transform your kitchen routine in 2026.
☰ Table of Contents ▼
show
What Makes This Buttery Brioche Bread Recipe So Special?
Creating a classic brioche loaf recipe requires far more than simply tossing ingredients into a mixing bowl. Unlike standard yeast breads, this traditional french brioche is a delicate viennoiserie that relies heavily on strict baker percentage butter ratios. The absolute secret to the best homemade brioche bread recipe lies in building extensive structural strength before any fat is introduced. We utilize an advanced retarded cold fermentation kinetics approach that drastically improves flavor and texture.
This method allows the dough to develop complex flavors while firming the massive butter content safely. By explicitly substituting milk for water in hydration, the dough yields a consistently tender feathery texture. Our tested and perfected recipe completely prevents the dreaded dairy fat emulsion break during mixing. You will easily achieve a deeply bronzed top and a pillowy soft structure that truly melts in your mouth. By mastering these foundational culinary techniques, you will bake bread that rivals any professional Parisian bakery.
7 Proven Steps to Soft Crumb Buttery Brioche Bread
Mastering this step by step recipe requires strict adherence to temperature benchmarks and specific visual dough cues. Knowing how to make homemade brioche bread step by step hinges entirely on understanding exactly when your dough is ready for the next phase. We strongly recommend using the stand mixer method because hand-kneading high-hydration dough is incredibly messy and inefficient. You will need a reliable digital kitchen scale and a heavy-duty stand mixer dough hook to handle the intensive gluten-building process.
From properly blooming your yeast to nailing the critical windowpane test, each phase builds directly upon the previous step. We will guide you seamlessly through an overnight cold rise that transforms a sticky batter into a pliable, easy-to-braid dough. Follow these seven precise milestones closely to achieve that signature golden brown crust and perfectly shreddable interior crumb.
1. Blooming Yeast in Warm Milk
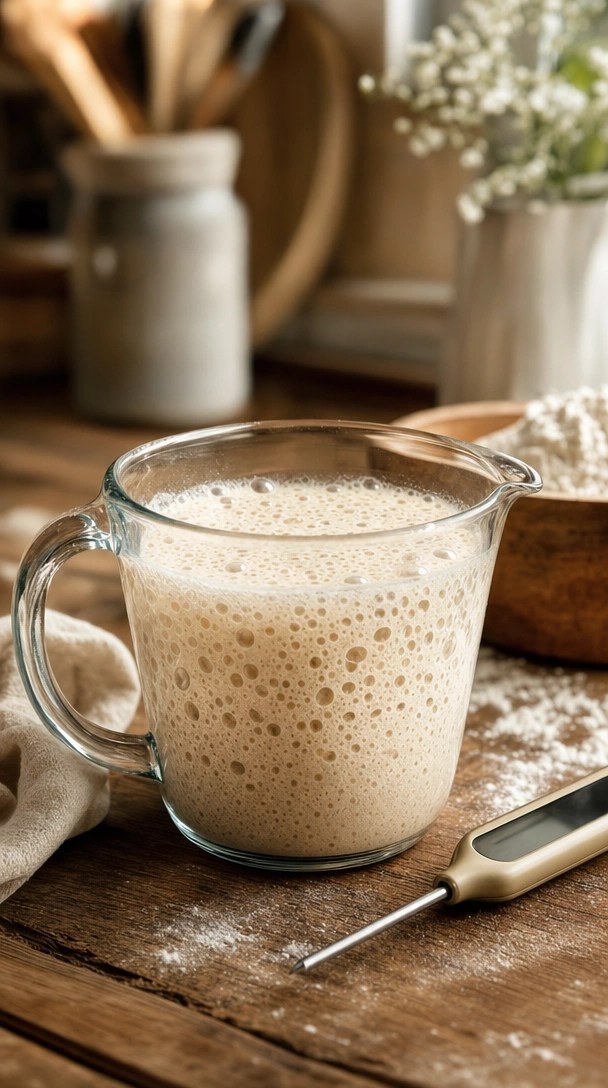
Save this critical first step to your “Bread Baking Basics” board so you never forget the right temperature!
Blooming yeast in warm whole milk is the absolute foundation of your baking success. Both instant dry yeast and active dry yeast require proper sugar + yeast activation to thrive and multiply. If your milk is too hot, it will instantly kill the sensitive cultures, resulting in a dense, lifeless puck of dough. A precise internal thermometer temperature check guarantees the environment is perfectly calibrated for rapid, healthy fermentation.
Ingredients
- 10 grams (1 tablespoon) instant dry yeast or active dry yeast
- 120 grams (1/2 cup) warm whole milk (precisely heated to 105-110°F)
- 15 grams (1 tablespoon) granulated sugar (taken from total recipe amount)
- A highly accurate digital instant-read kitchen thermometer
Directions
- Heat the whole milk gently in the microwave or on the stovetop until the thermometer registers exactly between 105°F and 110°F (40-43°C).
- Whisk the sugar into the warm milk until completely dissolved to provide an immediate food source for the cultures.
- Sprinkle the yeast evenly over the surface of the milk mixture.
- Rest the mixture uncovered for 10 minutes; it should swell, bubble, and smell distinctly yeasty, indicating strong activity.
Pro-Tip: In my experience as a baker, osmophilic yeast performance in sugar-heavy doughs can be sluggish. If your mixture hasn’t developed a thick, foamy cap after 10 minutes, the yeast is dead or the milk was too hot. Discard and start over to prevent baking a dense brick!

2. Mixing the Enriched Dough Base

Pin this exact ingredient mixing stage to your “Baking Tips” board for easy reference!
Building a strong egg enriched dough starts with unbleached bread flour and precise gram measurements. We utilize a high extraction flour hydration capacity technique by mixing the wet and dry ingredients well before any fat enters the stand mixer bowl. This crucial sequencing allows the flour proteins to fully hydrate and form a sturdy matrix. Holding the butter back at this stage ensures the gluten network becomes strong enough to support the massive fat content.
Ingredients
- 400 grams (approx. 3 1/4 cups) unbleached bread flour (high protein content is non-negotiable)
- 50 grams (1/4 cup) granulated sugar
- 8 grams (1 1/2 teaspoons) fine sea salt
- 4 large eggs (cold from the fridge to control dough temperature)
- The bloomed yeast mixture from Step 1
- A reliable digital kitchen scale
Directions
- Place your mixing bowl onto the digital scale and zero it out to ensure absolute accuracy.
- Whisk together the bread flour, sugar, and salt in the bowl of your stand mixer until evenly distributed.
- Attach the stand mixer dough hook.
- Pour in the cold eggs and the foamy yeast mixture simultaneously.
- Mix on low speed (Speed 2) for about 3-4 minutes until a shaggy, cohesive dough forms and no dry flour remains at the bottom of the bowl.
Pro-Tip: Utilizing high extraction flour hydration capacity by mixing before adding fat allows the flour to properly absorb the liquids. If you add the butter now, the fat will coat the flour proteins and physically block gluten from forming, resulting in a crumbly, cake-like texture rather than a shreddable loaf.


3. Kneading to the Windowpane Stage

Save this visual guide to the perfect windowpane test so you always know when your dough is ready!
Kneading to windowpane is an absolute, non-negotiable requirement in viennoiserie baking. You must achieve complete gluten sheath development prior to introducing any dairy fat. If you observe dough tearing during windowpane testing, your dough severely lacks the elasticity required to suspend the heavy butter successfully. Kneading + elasticity builds a strong, highly stretchable network that traps fermentation gases, guaranteeing a soaring, bakery-style rise in the oven.
Ingredients
- The shaggy dough base from Step 2
- Heavy-duty stand mixer (highly recommended to prevent motor burnout during this intensive step)
- Flexible silicone spatula for scraping the bowl
Directions
- Knead the dough on medium-low speed (Speed 3 or 4) for 10 to 15 minutes. The dough will start incredibly sticky but will eventually slap against the sides of the bowl.
- Stop the mixer every 5 minutes to scrape down the sides and bottom of the bowl with your silicone spatula, ensuring even kneading.
- Perform the windowpane test after 15 minutes: tear off a golf-ball-sized piece of dough and gently stretch it between your fingers.
- Check for translucency. If it stretches thin enough to let light pass through without breaking, it is ready. If it exhibits dough tearing during windowpane, knead for 3 more minutes and test again.
Pro-Tip: The mechanical action generates heat. Monitor your dough to prevent stand mixer overheating with heavy dough. If the dough feels warmer than 75°F (24°C), pause and pop the bowl in the fridge for 10 minutes. Optimal gluten sheath development happens when the dough stays relatively cool.

4. Emulsifying Softened Butter

Don’t let your brioche turn greasy! Pin this crucial butter emulsification step to your “Mastering Pastry” board.
Incorporating softened butter into your fully developed dough requires immense patience and strict temperature control. You must use true room temperature butter (exactly 65°F) so it properly emulsifies fat into flour matrix. High-quality European unsalted butter provides superior flavor and a lower water content than American counterparts. Practicing softened butter + slow incorporation prevents a greasy dough failure while maintaining the delicate gluten structure you worked so hard to build.
Ingredients
- 170 grams (1 1/2 sticks) European unsalted butter (must be precisely at 65°F / 18°C—pliable but cool, not shiny or melting)
- A flexible curved silicone bowl scraper
Directions
- Cut the perfectly tempered room temperature butter into small, tablespoon-sized cubes.
- Turn the mixer to low speed and begin adding the butter one cube at a time.
- Wait until each cube is almost entirely absorbed before adding the next. The dough will temporarily fall apart and look like a slick, greasy mess—do not panic.
- Scrape the bowl repeatedly with a silicone bowl scraper to help the dough re-gather around the hook.
- Knead for an additional 10 minutes after all the butter is added until you achieve a velvety dough consistency that slaps the sides of the bowl and easily passes the windowpane test again.
Pro-Tip: If you experience the butter melting out during bake, it means your emulsion broke during this step. Fat coating gluten strands relies on friction and cool temperatures. If the dough gets shiny and refuses to absorb the fat, immediately place the bowl in the refrigerator for 15 minutes to chill the butterfat, then resume mixing.
5. Overnight Cold Fermentation
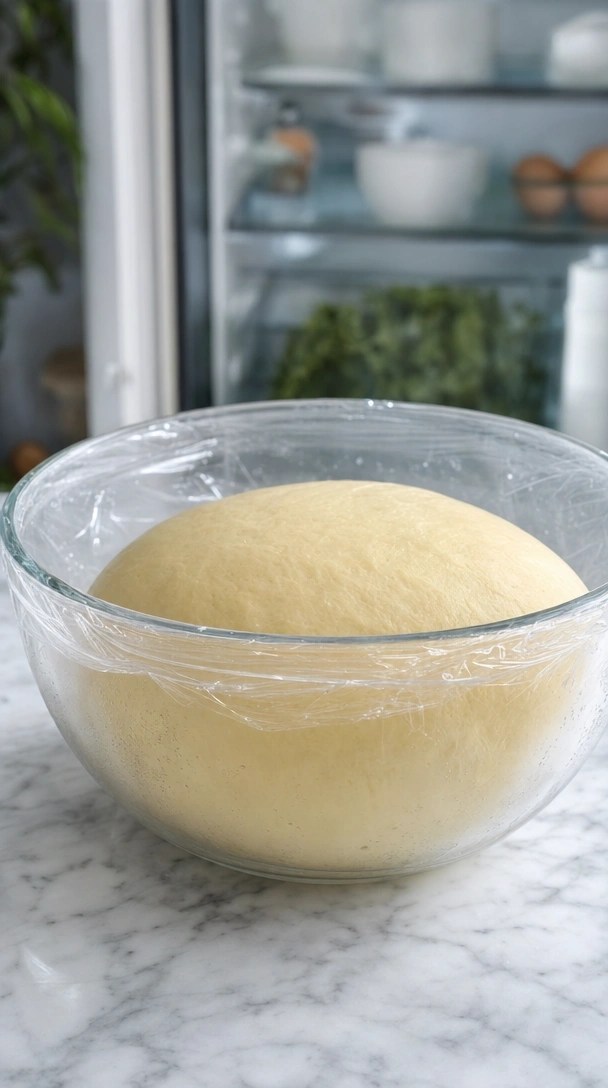
Never skip the cold rise! Save this essential brioche secret to your “Baking Techniques” board.
Cold fermenting overnight completely transforms the handling properties and flavor profile of your finished dough. This overnight cold rise drastically slows fermentation via cold chilling, allowing complex, artisanal flavors to develop naturally. The combination of refrigeration + cold fermentation solidifies the massive butter content, turning a sticky, unmanageable batter into a firm, shapeable dough block. This strict temperature controlled fermentation is the hallmark of professional bakery success.
Ingredients
- The fully kneaded, butter-enriched dough
- Neutral oil or non-stick spray
- A large glass mixing bowl with an airtight lid (or tight plastic wrap)
Directions
- Transfer the finished dough to a clean, lightly oiled large glass mixing bowl.
- Turn the dough over once so the entire surface is coated with a microscopic layer of oil, preventing a dry skin from forming.
- Seal the bowl tightly with an airtight lid or two layers of plastic wrap.
- Chill the dough in the refrigerator for a minimum of 8 hours, and up to 24 hours. The dough will slowly double in size as it undergoes retarded cold fermentation kinetics.
Pro-Tip: Do not attempt a first proof rise on the kitchen counter! The sheer volume of butter requires temperature controlled fermentation. If left at room temperature, the butter will melt, leaking out of the gluten matrix and creating a dense, greasy puck. Cold fermentation solidifies the fat, making the dough as easy to handle as cold clay.

6. Portioning and Shaping the Braided Loaf

Learn the bakery-style braiding technique! Pin this directly to your “Beautiful Bakes” board.
Crafting a beautifully braided brioche loaf starts with accurate, disciplined measurements. Carefully portioning equal dough balls using a digital scale and a stainless steel bench scraper tool guarantees perfectly even baking. Braiding three strand dough is not just for visual aesthetics; it significantly improves the structural ovenspring mechanics as the dough rises inside the loaf pan 9×5. Work as quickly as possible before the chilled butter begins warming up on the counter.
Ingredients
- The cold, fermented brioche dough
- Heavy-duty 9×5-inch nonstick metal loaf pan
- Parchment paper or butter for greasing
- A stainless steel bench scraper tool
- A digital kitchen scale
Directions
- Prepare your loaf pan 9×5 by lightly greasing it with butter and lining the bottom with a sling of parchment paper for easy removal.
- Punch down the cold dough gently to deflate the major gas bubbles, then turn it out onto a clean, completely unfloured work surface (the cold butter prevents sticking).
- Divide the dough into three exact, equal pieces using your bench scraper tool and digital scale.
- Roll each piece into a smooth rope about 10 inches long.
- Braid the three ropes together tightly. Tuck the ends underneath the loaf to seal it, then gently lift the braided brioche loaf and drop it seamlessly into the prepared pan.
Pro-Tip: Work quickly! As the butter-rich yeast dough warms up on your counter, it becomes incredibly sticky and difficult to manipulate. If the dough starts fighting you or sticking to your hands, put it back in the fridge for 10 minutes.

7. Proofing, Egg Wash, and Baking to Golden Perfection

That glossy shine makes all the difference! Save this egg wash technique to your “Perfect Breads” board.
The final phase requires proofing until doubled and applying a delicate egg wash mixture evenly. This wash triggers a rapid surface reaction, resulting in a beautifully rich golden brown crust. You must practice diligent monitoring internal baking temp to avoid accidentally pulling a loaf with a gummy center underbaked interior. Once baking is complete, cooling on wire rack prevents trapped steam condensation from ruining your hard-earned masterpiece.
Ingredients
- 1 large egg + 1 tablespoon milk (whisked thoroughly for the egg wash mixture)
- Aluminum foil for tenting
- A flexible silicone pastry brush
- Instant-read thermometer
Directions
- Cover the loaf pan loosely with oiled plastic wrap and let it undergo second rise in pan at a warm room temperature for 1.5 to 2.5 hours, proofing until doubled (the dough should crown just above the rim of the pan).
- Preheat your oven to 350°F (175°C) during the last 30 minutes of proofing.
- Brush the top of the risen dough very gently with the egg wash using your silicone pastry brush. Be careful not to deflate the delicate dough!
- Bake on the center rack for 35 to 45 minutes. If you notice the bread browning too quickly top around the 20-minute mark, swiftly tent it with a sheet of aluminum foil.
- Check the temperature. The bread is done when an instant-read thermometer inserted into the very center registers 190°F–200°F (88°C–93°C).
- Cool in the pan for 10 minutes, then turn out onto a wire rack to cool completely before slicing to prevent a gummy texture.
Pro-Tip: Never slice warm brioche! Lipids impact on crumb staling means the immense butterfat network needs at least 2 hours to set and solidify at room temperature. Slicing early ruins the light and airy interior, compressing it into a dense paste.

Key Takeaways: Your Quick Guide to Buttery Brioche Bread Recipe
Reviewing the core principles of the best brioche bread recipe ensures consistent results every single bake. A rich brioche loaf demands deep respect for culinary science and environmental temperature control. Synthesizing these complex chemistry requirements into actionable steps prevents costly mistakes and wasted ingredients. Here is a quick, highly scannable summary of our tested and perfected recipe guidelines to keep you on track.
Key Takeaways:
- Measure by Weight, Not Volume – Hydration is crucial for a pillowy soft structure; using a digital scale ensures your flour-to-liquid ratios are perfectly calibrated.
- Master the Windowpane Test First – You must achieve full gluten sheath development before introducing fat, otherwise the butter will coat the flour and inhibit structure.
- Monitor Your Butter Temperature – European unsalted butter must be exactly 65°F; if it’s too warm, it will melt out, causing a greasy oily dough failure.
- Patience with the Emulsion – Incorporating softened butter takes 10+ minutes. The dough will fall apart before it comes back together into a velvety dough consistency.
- Never Skip the Cold Ferment – Retarded cold fermentation kinetics solidifies the immense amount of fat, making shaping possible while deeply enhancing the flavor profile.
- Protect the Crust in the Oven – Because of the high sugar and egg content, the maillard reaction in egg wash happens quickly. Always tent with foil halfway through baking.
- Bake to Temperature, Not Time – A deeply bronzed top can hide a gummy center underbaked interior. Always verify the center has hit 190°F-200°F before pulling.
People Also Ask About Buttery Brioche Bread Recipe
Baking an enriched dough naturally brings up many technical questions and troubleshooting needs. Why is my brioche bread dense and heavy, and what is the best flour for brioche bread? Many bakers also wonder, can you make brioche without a stand mixer? We have compiled the most common troubleshooting queries directly below. These targeted answers will help you confidently navigate any sticky situations and rescue failing doughs.
What makes brioche bread different from regular bread?
Brioche is a viennoiserie, meaning it is a yeast-leavened bread highly enriched with eggs and butter, whereas regular bread relies primarily on flour, water, salt, and yeast.
This massive fat content gives brioche its signature tender feathery texture, rich golden crust, and slightly sweet, cake-like crumb. Because the fat inhibits gluten, brioche requires intensive kneading to build structural integrity before the dairy is introduced.
Why is my brioche bread dense and heavy?
A dense, heavy brioche loaf is almost always caused by adding the butter before the gluten was fully developed, or by killing the yeast with liquid that was too hot.
If you fail the windowpane test before adding butter, the fat physically coats the flour proteins, preventing them from linking. Additionally, under-proofing the dough during the second rise in pan or cutting into the bread while it is still hot will compress the crumb.
Can you make brioche without a stand mixer?
Yes, you can knead brioche dough by hand, but it requires a specialized technique called the “slap and fold” method and takes roughly 25 to 30 minutes of intense physical labor.
Because this is a highly sticky, high-hydration egg enriched dough, traditional kneading will leave your hands coated in a messy paste. A stand mixer dough hook is highly recommended to properly emulsify the fat while keeping the dough cool.
Why do you add butter last in brioche dough?
You add butter last because fat is a tenderizer that physically shortens gluten strands, which would prevent the dough from developing enough strength to rise properly.
By building a strong, elastic gluten sheath development first, the dough becomes a sturdy net. When the room temperature butter is added sequentially afterward, it is suspended securely within that network, yielding an ultra soft crumb without collapsing.
How long should brioche dough chill in the fridge?
Brioche dough should undergo an overnight cold rise in the refrigerator for an absolute minimum of 8 hours, and ideally up to 24 hours.
This refrigeration + cold fermentation period serves two purposes: it develops a complex, artisanal flavor by slowing yeast activity, and it completely solidifies the high butterfat content, turning a sticky, unmanageable batter into a firm dough that is incredibly easy to braid and shape.
What is the best flour for brioche bread?
High-protein, unbleached bread flour (around 12.5% to 14% protein) is unequivocally the best choice for making a successful brioche.
If you use standard all-purpose flour, the dough will struggle to build enough gluten to support the heavy weight of the eggs and butter. Bread flour provides the crucial high extraction flour hydration capacity needed to hold the emulsion together and achieve that high, fluffy french brioche ovenspring.
Why did the butter separate from my brioche dough?
Butter separates and leaks out of the dough if the butter was too warm when added, or if the friction from the mixer heated the dough above 75°F (24°C).
To fix a breaking emulsion, immediately stop the mixer and place the bowl in the refrigerator for 15 to 20 minutes. Once the butter-rich yeast dough and the fat have cooled down, resume mixing on low speed until it re-incorporates into a smooth mass.
What does the windowpane test look like for brioche?
The windowpane test is successful when you can gently stretch a small piece of dough in all directions until it forms a translucent, membrane-like center that lets light pass through without tearing.
This visual cue confirms that the gluten strands have aligned perfectly. If the dough snaps or exhibits dough tearing during windowpane testing, it requires further kneading before you can safely begin incorporating softened butter.
Can you use active dry yeast instead of instant yeast?
Yes, you can substitute active dry yeast for instant yeast at a 1:1 ratio, provided you bloom it in warm liquid first to awaken the dormant cultures.
While instant yeast can technically be mixed directly into the dry ingredients, taking 10 minutes to bloom either type in warm whole milk (105-110°F) guarantees the yeast is alive before you waste expensive European unsalted butter and eggs on a dead dough.
How do you tell if brioche is fully baked inside?
The only foolproof way to know brioche is fully baked is to insert an instant-read thermometer into the exact center of the loaf; it must read between 190°F and 200°F (88°C-93°C).
Because of the high sugar and egg wash, a deeply bronzed top happens rapidly and can trick you into thinking the bread is done. If the crust is dark but the center hasn’t reached temperature, tent it with aluminum foil and continue baking.
Final Thoughts on Mastering the Buttery Brioche Bread Recipe
Tackling an authentic brioche recipe at home is a brilliant rite of passage for any baker. By deeply respecting the intricate science of temperature controlled fermentation, mastering the windowpane test, and exercising extreme patience during butter incorporation, you have successfully elevated your skills. You have moved from casual cooking to true viennoiserie baking. While the process demands time and precision, pulling a soaring, deeply mahogany, artisan bakery style brioche bread recipe at home out of your own oven is profoundly rewarding.
Now that you have this tested and perfected recipe in your active repertoire, the culinary possibilities are endless. Once your loaf has completely cooled on the wire rack, slice into that pillowy soft structure for the most luxurious morning toast of your life. You can also save a few slightly stale slices to soak up custard for a decadent weekend French toast. The nutty brown butter notes and tender feathery texture will fundamentally ruin store-bought bread for you forever.
Have you tried your hand at this rich brioche loaf yet? Did you opt for the classic loaf pan shape, or did you get creative with individual braided brioche buns? Drop a comment below with your experience, or share a photo of your perfect windowpane test!
Last update on 2026-09-29 / Affiliate links / Images from Amazon Product Advertising API
