As an Amazon Associate BakingBakewareSets.com earns from qualifying purchases.
Braided Brioche Bread Recipe: 7 Foolproof Steps to Master
Master the ultimate braided brioche bread recipe in 7 foolproof steps. Discover how to bake a tender crumb and golden crust without sticky dough tearing.
Have you ever tried baking enriched dough only to end up with a greasy, tearing mess? Mastering a Braided Brioche Bread Recipe feels intimidating when sticky butter melts instantly.
Braided Brioche Bread: To make the ultimate braided brioche bread recipe, you must first knead a lean dough of bread flour, yeast, milk, and eggs until elastic. Next, slowly incorporate room-temperature European butter to ensure proper gluten sheath development. Finally, chill the dough overnight before rolling, braiding, and baking to 190°F.
Drawing from comprehensive test kitchen data and proven culinary methodologies, this guide eliminates the guesswork. You will discover the exact temperature controls required for the delayed fat incorporation method. Prepare to bake a flawless, feathery loaf that rivals professional French bakeries.
☰ Table of Contents ▼
show
7 Foolproof Steps to Master Your Braided Brioche Bread Recipe
To master your braided brioche bread recipe, follow a systematic workflow that prioritizes temperature control, structural gluten development, and precise cold fermentation. Baking an enriched yeast bread is fundamentally different from making standard sandwich bread. The massive ratio of butter and eggs inherently interferes with protein bonding. If you introduce these heavy lipids too early, your dough matrix will collapse. By leveraging the delayed fat incorporation method, we build the necessary tensile strength first. Furthermore, implementing an overnight cold retard dough matrix stabilization ensures your butterfat remains solid. This transforms a frustratingly sticky mass into a firm, workable clay that you can easily manipulate into a classic three-strand weave. These seven chronological milestones guarantee a beautifully shreddable crumb every single time.
1. Bloom Yeast in Warm Milk

Pin this yeast activation visual guide to your ‘Baking Basics’ board so you always remember what a perfect bloom looks like!
Ingredients
- 1 tablespoon active dry yeast (or instant yeast)
- 1/3 cup whole milk, precisely warmed to 105-110°F (40-43°C)
- 1 teaspoon granulated sugar (reserved from the main dough measurement to feed the yeast)
Instructions
- Warm the whole milk in a microwave-safe bowl in 10-second bursts until it reaches exactly 105-110°F using an instant-read digital thermometer.
- Sprinkle the active dry yeast and the teaspoon of granulated sugar evenly over the warm milk.
- Whisk gently to combine, breaking up any large dry clumps of yeast on the surface.
- Allow the mixture to rest undisturbed for 5 to 10 minutes until a thick, frothy, bubbly layer forms on top.
Expert insight: In my test kitchen experience, paying attention to osmophilic yeast performance is critical. Enriched doughs contain sugar that pulls water away from yeast. Blooming it first in warm milk ensures it’s fully hydrated and ready to lift that heavy, buttery dough!

2. Mix and Knead Dough Until Elastic

Save this windowpane test visual to your ‘Bread Making Techniques’ board to guarantee a soft and pillowy crumb every time!
Ingredients
- 3 ½ cups (420g) unbleached bread flour (weighed for accuracy)
- ¼ cup (50g) granulated sugar
- 1 ½ teaspoons fine sea salt
- 4 large eggs at room temperature
- The activated yeast mixture (from Step 1)
Instructions
- Combine the weighed bread flour, remaining granulated sugar, and fine sea salt in the bowl of a stand mixer fitted with the dough hook attachment.
- Create a well in the center of the dry ingredients and pour in the room-temperature eggs and the frothy yeast mixture.
- Mix on low speed (Speed 2) for 3 to 4 minutes until a shaggy, somewhat stiff dough forms and clears the sides of the bowl.
- Increase the mixer speed to medium (Speed 4) and knead for an additional 5 to 8 minutes until the dough becomes smooth, strong, and highly elastic.
- Perform the windowpane test: pinch off a golf ball-sized piece of dough and gently stretch it; if it stretches thin enough to let light through without tearing, it is ready for the butter.
What most guides miss: Proper gluten sheath development is non-negotiable here. Lipids (fats) inherently interfere with protein bonding. By developing strong gluten before introducing the butter (the delayed fat incorporation method), you ensure the dough has the tensile strength to hold its braided shape in the oven.

3. Incorporate Softened Butter Systematically

Pin this butter incorporation technique to your ‘Pastry Secrets’ board to avoid greasy, separated brioche dough!
Ingredients
- 1 cup (226g or 2 sticks) 82% butterfat European style unsalted butter (calibrated to exactly 65-68°F—pliable but cool to the touch)
Instructions
- With the stand mixer running on medium-low speed, begin adding the softened (but not warm/melting) butter one tablespoon-sized cube at a time.
- Wait for each cube of butter to be fully absorbed into the dough before adding the next piece (this process will take 10-15 minutes).
- Once all the butter is incorporated, the dough may look greasy and broken; increase the speed to medium-high and knead for an additional 5 minutes.
- Stop the mixer and use a bench scraper to scrape down the sides and bottom of the bowl periodically.
- Continue kneading until the dough comes back together into a glossy, incredibly smooth, and elastic ball that cleanly pulls away from the sides of the bowl.
An often-overlooked strategy: If the friction of the mixer causes the dough to become too warm and the butter begins leaking or melting (losing emulsified fat dispersion), immediately place the entire bowl in the refrigerator for 15 minutes to cool down before resuming kneading.
4. Chill Dough Overnight for Cold Fermentation

Save this cold fermentation hack to your ‘Baking Tips’ board so you never have to fight with sticky, unbraidable dough again!
Ingredients
- The kneaded brioche dough
- Non-stick cooking spray or a light coating of neutral oil
- Heavy-duty plastic wrap or a fitted bowl lid
Instructions
- Lightly coat a large, clean glass mixing bowl with non-stick spray or a few drops of neutral oil.
- Transfer the glossy brioche dough into the oiled bowl, turning it once so the top is lightly greased.
- Cover the bowl tightly with heavy-duty plastic wrap or a fitted lid to prevent the dough drying out during proofing (which creates a hard skin).
- Place the bowl in the refrigerator for a minimum of 8 hours, or up to 24 hours. The dough will undergo a slow, cold fermentation and double in size.
Expert insight: Do not skip the overnight cold fermentation. Cold retard dough matrix stabilization is the secret to a professional brioche tressée. The prolonged cold sets the butterfat, transforming a wildly sticky, unmanageable dough into a firm, clay-like texture that rolls into beautiful, flawless ropes.

5. Divide and Roll Dough Into Ropes

Pin this dough shaping step to your ‘Baking Tutorials’ board for perfectly uniform bread braids!
Ingredients
- The chilled, firm brioche dough
- 1-2 tablespoons all-purpose flour (for dusting the work surface)
Instructions
- Turn the chilled dough out onto a very lightly floured work surface.
- Press down gently to deflate any large gas bubbles.
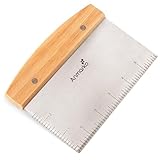
- Using a bench scraper and a digital kitchen scale, weigh the total mass of the dough, then divide it into exactly three equal portions.
- Working quickly before the butter begins to soften, roll each portion beneath the palms of your hands into a long, even rope, approximately 14 to 16 inches in length.
- Slightly taper the ends of each rope to create an elegant, bakery-style finish for your classic brioche braid.
What most guides miss: If the dough fights back and shrinks while you are rolling it, the gluten is tense. Cover the ropes with a clean towel and let them rest for 5 minutes. This relaxes the tensile strength of the proofed dough strands, allowing them to stretch easily without tearing.


6. Braid the Strands and Second Proofing

Pin this braiding technique to your ‘Holiday Baking’ board so you never forget how to weave the perfect plait!
Ingredients
- The 3 shaped dough ropes
- Non-stick cooking spray (for the plastic wrap)
Instructions
- Transfer the three dough ropes side-by-side onto a heavy-duty baking sheet lined with parchment paper.
- Pinch the three ropes together firmly at the very top, and tuck the pinched end slightly underneath itself.
- Begin the three strand brioche braid: cross the right strand over the middle strand, then cross the left strand over the new middle strand.
- Repeat this alternating pattern—right over middle, left over middle—keeping the tension comfortably snug but not aggressively tight, until you reach the bottom.
- Pinch the bottom ends together firmly and tuck them neatly underneath the loaf to secure the braid.
- Spray a piece of plastic wrap lightly with oil and drape it loosely over the loaf. Allow it to proof in a warm place for 1.5 to 2 hours, or until it has doubled in size and looks puffy and marshmallow-like.
An often-overlooked strategy: Do not braid the dough too tightly! As the yeast metabolizes during the second proofing stage, the dough expands. If the weave has no room to grow, the fermentation gas retention capacity will force the dough to rip and tear unevenly during oven spring.

7. Apply Egg Wash and Bake to Golden Perfection

Save this egg washing trick to your ‘Bread Baking Hacks’ board to achieve that bakery-style glossy crust!
Ingredients
- 1 large egg
- 1 tablespoon whole milk
- A pinch of fine sea salt
- 2 tablespoons pearl sugar topping (optional, for crunch and aesthetics)
Instructions
- Preheat your oven to 350°F (175°C) and position the baking rack in the lower third of the oven.
- In a small bowl, thoroughly whisk together the egg, whole milk, and a pinch of salt until the mixture is completely smooth (the salt breaks down the egg proteins for a thinner, more even wash).
- Using a pastry brush, gently and thoroughly brush the egg wash mixture over the entire surface of the proofed loaf, taking care not to deflate the dough. Sprinkle with pearl sugar if desired.
- Bake the loaf for 25 to 35 minutes. Monitor the crust; if it is browning too quickly at the 20-minute mark, tent it loosely with aluminum foil.
- Bake until the loaf is deep mahogany brown and an instant-read thermometer inserted into the thickest center part of the loaf registers an internal baking temperature of exactly 190°F to 200°F (88°C to 93°C).
- Cool completely on a wire rack for at least 1 hour before slicing to prevent a gummy texture.
Expert insight: Never trust the crust color alone! Because of the high sugar and fat content, the Maillard reaction browning kinetics happen rapidly on the surface of brioche. The crust will look beautifully baked while the interior remains raw dough. An internal temperature registered at 190°F to 200°F is the only foolproof way to know it is done.

Key Takeaways: Your Quick Guide to Braided Brioche Bread Recipe
To ensure absolute success with your braided brioche bread recipe, you must memorize these core structural milestones. Enriched doughs require precision. From controlling the butter temperature to verifying the gluten matrix with a simple stretch test, your success relies on respecting the science of baking. Review these rapid-fire principles before you start measuring ingredients. They synthesize advanced culinary methodologies into actionable steps, protecting your bake from the most common pitfalls of home baking.
- Utilize the Delayed Fat Incorporation Method – Never add butter to your flour mixture immediately. Build the gluten network first to ensure the dough has the tensile strength to hold the heavy lipids.
- Validate Gluten with the Windowpane Test – Knead the lean dough until you can stretch a small piece thin enough to let light pass through without tearing; this guarantees a soft and pillowy crumb.
- Control Your Butter Temperature Precisely – Your European style unsalted butter must be exactly 65-68°F. If it melts in the bowl, the emulsified fat dispersion breaks, resulting in greasy bread.
- Do Not Skip the Overnight Cold Fermentation – Chilling the dough overnight solidifies the butterfat, making the incredibly sticky dough firm enough to roll into ropes without tearing.
- Braid Loosely to Prevent Unraveling – When you braid the strands, keep the tension comfortable. If woven too tightly, the fermentation gas retention capacity will cause the bread to split and rip unevenly in the oven.
- Bake to an Exact Internal Temperature – Never rely on the golden brown crust as an indicator of doneness. Use an instant-read thermometer to ensure the center hits 190°F to 200°F (88°C–93°C).
People Also Ask About Braided Brioche Bread Recipe
Understanding the specific nuances of your braided brioche bread recipe prevents frustrating mistakes and guarantees bakery-quality results. When you tackle highly enriched doughs, questions naturally arise regarding temperature control, shaping mechanics, and oven behavior. Below, we address the most common troubleshooting inquiries using tested culinary institute standard techniques. Whether you are wondering why your dough is tearing or how to fix a collapsed plait, these direct answers provide the exact food science remedies you need.
How to braid brioche dough?
To braid brioche dough, divide chilled dough into three equal ropes, pinch the tops together, and sequentially cross the outer ropes over the middle rope. Starting from the top, take the right strand and cross it over the center strand. Then, take the left strand and cross it over the new center strand. Repeat this alternating pattern (right over middle, left over middle) keeping a loose, even tension until you reach the bottom. Finally, pinch the ends together and tuck them neatly underneath the loaf to secure it.
Why is my brioche dough so sticky?
Your brioche dough is sticky because it is a highly enriched yeast bread containing a massive ratio of liquid eggs and butter relative to flour. During the initial mixing, it is completely normal for the dough to stick to the bottom of the stand mixer bowl. Do not add extra flour, as this will result in a dense, dry crumb. Instead, rely on intensive mechanical kneading to develop the gluten sheath, and utilize an overnight cold fermentation to solidify the butterfat, which will make the dough manageable.
How long do you bake braided brioche bread?
You should bake a braided brioche loaf at 350°F (175°C) for approximately 25 to 35 minutes, or until the internal temperature reaches 190°F (88°C). Because enriched doughs are loaded with sugar and butter, they undergo rapid Maillard reaction browning kinetics. This means the crust will turn deep golden brown very quickly, often looking done when the inside is still raw. Always use an instant-read thermometer inserted into the thickest part of the braid to verify true doneness.
Can you make braided brioche without a stand mixer?
Yes, you can make braided brioche without a stand mixer using the slap-and-fold hand kneading technique, though it requires significant physical stamina. Hand kneading brioche dough can take upwards of 25 to 30 minutes of continuous, vigorous stretching and folding. The heat from your hands can also prematurely melt the butter, breaking the emulsion. While possible, a stand mixer with a dough hook is heavily recommended by culinary professionals for optimal gluten development and temperature control.
Why did my brioche collapse during baking?
A brioche loaf typically collapses during baking because it was over-proofed during the second rising stage, exhausting the yeast’s gas retention capacity. When dough is left to rise too long, the gluten structure weakens and cannot support the heavy enriched dough once it hits the heat of the oven. To rescue under-proofed brioche braid or prevent a collapse, bake the loaf exactly when it has doubled in size and springs back slowly when gently poked with a floured finger.
Should brioche dough be refrigerated overnight before braiding?
Yes, brioche dough should absolutely be refrigerated overnight before braiding to stabilize the dough matrix and chill the butterfat. Attempting to roll and shape a room-temperature brioche dough is incredibly frustrating; it will stick to your hands and the work surface, leading to uneven strands and a messy braid. The overnight cold retard not only makes the dough firm and easy to handle but also dramatically improves the complex flavor development of the final loaf.
What kind of flour is best for brioche bread?
Unbleached bread flour with a high protein content (12-14%) is the best choice for making structurally sound brioche bread. Because you are forcing the dough to hold a massive amount of fat (butter) and heavy liquids (eggs), you need a very strong gluten network to support the weight and maintain an airy interior texture. While all-purpose flour can be used in a pinch, it often results in a slightly denser loaf that may not rise as high or shred as beautifully.
How do you get a shiny crust on braided brioche?
You achieve a shiny crust on braided brioche by applying a well-whisked egg wash mixture immediately before baking. Whisking one large egg with a tablespoon of whole milk and a pinch of salt breaks down the egg proteins, creating a fluid wash. Brushing this evenly over the proofed loaf right before it goes into the oven results in a glossy protective exterior and a deep, bakery-style golden brown crust upon baking.
Why did my brioche braid split unevenly in the oven?
Your brioche braid split unevenly in the oven because the strands were either braided too tightly or the dough was under-proofed. If you weave the three-plait bread too tightly, the dough has no room to expand during the rapid “oven spring” phase of baking, forcing the crust to rip open. Ensure you braid with a relaxed tension, and always allow the shaped loaf to fully double in size during the second proof before applying the egg wash.
What is the ideal internal temperature for baked brioche?
The ideal internal temperature for a fully baked, tender braided brioche bread is precisely between 190°F and 200°F (88°C to 93°C). Measuring by temperature rather than time is a certified pastry chef technique. If you pull the bread out before it hits 190°F, the center will be gummy and raw. If it exceeds 205°F, the delicate shredding texture will dry out. An instant-read digital thermometer is essential for perfection.
Final Thoughts on Your Braided Brioche Bread Recipe
Conquering a classic braided brioche bread recipe at home is one of the most rewarding milestones in any baker’s journey. While the sheer amount of butter and eggs might initially seem intimidating, understanding the underlying food science transforms a challenging process into a predictable, highly rewarding routine. By respecting the delayed fat incorporation method, utilizing an overnight cold fermentation, and insisting on precise temperature controls, you eliminate the guesswork that causes so many enriched doughs to fail.
The time-tested enrichment process we’ve outlined here guarantees that iconic, featherlight enriched loaf with a deeply aromatic buttery crumb and a stunning golden crust. Beyond simply enjoying it fresh with a pat of butter or homemade salted caramel spread, this master dough serves as the ultimate foundation for gourmet brioche French toast, decadent bread puddings, or a festive holiday bread basket. It is a versatile culinary technique that will elevate your entire baking repertoire in September 2026 and beyond.
Baking is a science, but sharing it is an art. Now that you are armed with professional-level troubleshooting tools and precise baking parameters, it’s time to dust your counters with flour and fire up the stand mixer. Which will you try first: slicing your warm braided brioche for a decadent morning brunch, or saving it for the ultimate weekend French toast?
Last update on 2026-09-29 / Affiliate links / Images from Amazon Product Advertising API
