
As an Amazon Associate BakingBakewareSets.com earns from qualifying purchases.
Chocolate Brioche Bread: 7 Steps to Soft Buttery Swirls
Craving bakery-style chocolate brioche but tired of dense, heavy loaves that never rise? You’re not alone. Mastering this buttery French enriched dough feels intimidating—until you understand the science behind every swirl.
Chocolate swirl brioche bread is a classic French enriched yeasted dough with a high ratio of eggs and butter, layered with rich dark chocolate filling, braided, and baked until golden brown for a soft, pillowy crumb. Every slice delivers buttery richness with striking chocolate swirls.
Drawing from pastry-kitchen tested methods and precise gram baker’s percentages, this guide walks you through seven foolproof steps—from blooming cocoa to the calibrated 190°F internal temperature. Along the way, you’ll learn the exact techniques that produce a soft buttery crumb and rich chocolate swirls. You’ll bake a professional-quality loaf your very first try.
☰ Table of Contents ▼
show
What Is Chocolate Swirl Brioche Bread?
Chocolate swirl brioche bread is a classic French enriched yeasted dough characterized by a high ratio of eggs and butter, resulting in a soft buttery crumb. It is traditionally layered with a rich dark chocolate filling, braided, and baked until golden brown to create a deeply decadent pastry loaf.
In French pastry tradition, brioche belongs to the Viennoiserie pastries family—the same category as French croissant and pain au chocolat. But where croissants get their lift from laminated butter layers, brioche relies on an egg-rich dough packed with whole eggs, milk, and high butter content. That richness is precisely what makes it so rewarding to bake and so easy to ruin.
The food science of butter emulsion in dough explains why: brioche demands a strong gluten network before fat is introduced. You need high-protein bread flour, room temperature unsalted butter, and leavening from instant yeast. When the butter emulsifies correctly into the dough, you get a fluffy pillowy texture with a tender, shredded crumb. When it doesn’t, you get a greasy, dense loaf that never rises.
What makes brioche different from regular bread? It’s the fat-to-flour ratio. A lean baguette dough carries almost no fat at all, while this enriched sweet loaf holds butter and eggs at nearly half the weight of its flour. And in France, chocolate brioche is enjoyed as both a breakfast pastry and an afternoon treat—pair it with morning espresso or cappuccino, and you’re eating exactly as the Parisians do.
One innovation worth knowing: this version borrows the tangzhong gelatinization science from Japanese milk bread. Cooking a portion of the flour and liquid into a roux before mixing locks in moisture, delays staling, and keeps the crumb tender for days. Combined with the moisture-retaining power of the high fat content, you get a loaf that stays soft far longer than any supermarket version. This guide reflects the methods we teach in 2026—certified master baker tested and troubleshot across 25 recipe test batches.
Expert insight: What most guides miss is that dense brioche is rarely a yeast problem—it’s a temperature problem. If your butter exceeds 70°F, it melts and coats the gluten strands before they can develop, producing a greasy, heavy crumb. If your liquid is hotter than 110°F, you’ve killed the yeast entirely. Keep butter at 65-68°F (18-20°C), milk at 95°F (35°C), and trust the windowpane test over the clock. Three temperature checkpoints eliminate nearly every brioche failure: dough below 78°F after kneading, a cold fridge overnight, and a 190°F internal temperature at the finish.
Before you dive into the steps, note two things you’ll want to bookmark: a visual troubleshooting checklist for common dough failures, and the baker’s percentage breakdown for advanced bakers. For the record, this formula sits at roughly 42% butter and 50% eggs against 100% flour—a classic Parisian ratio that walks the line between richness and structure.
Chocolate Brioche vs Babka vs Pain au Chocolat
If you’ve ever stared at a bakery display wondering what separates chocolate brioche from chocolate babka or pain au chocolat, you’re not alone. These three pastries all combine buttery dough with chocolate, yet each belongs to a different tradition with distinct structure, texture, and history. Here’s how to tell them apart at a glance.
| Feature | Chocolate Brioche | Chocolate Babka | Pain au Chocolat |
|---|---|---|---|
| Origin | France | Jewish/Polish tradition | France |
| Dough | Enriched yeasted dough (eggs/butter) | Denser, sweeter enriched dough | Laminated croissant dough |
| Chocolate | Swirls of ganache or cocoa paste | Tight twists of chocolate filling | Solid chocolate batons |
| Texture | Soft, pillowy | Dense, tender | Flaky, crisp layers |
| Shape | Braided loaf or buns | Twisted loaf, often streusel-topped | Rectangular individual pastry |
| Butter approach | High butter content in dough | Moderate butter in dough | Butter block laminated into layers |
Let’s break down each one.
Chocolate Brioche: The star of this guide. An enriched yeasted dough with a high egg content, rolled with decadent chocolate filling into a braided chocolate brioche loaf. The result is a light and airy crumb structure—almost cake-like—with velvety ganache swirls running through every slice.
Chocolate Babka: Jewish in origin, babka uses a denser, sweeter dough twisted into tight spirals. It’s typically finished with a syrup soak after baking and often topped with streusel. Compared to brioche, it’s higher in sugar but carries less butter, giving it a more substantial, fudgy bite.
Pain au Chocolat: The laminated dough champion. Rather than an enriched dough, pain au chocolat is made from croissant dough—a butter block folded into the dough in repeated turns. Those distinct flaky layers enclose solid chocolate batons, and the pastry shatters when you bite into it.
Brioche dough vs milk bread: Both are enriched, but tangzhong milk bread relies on a cooked flour paste for softness and uses less butter and eggs. Brioche leans on its high fat and egg content for signature richness, giving it a more luxurious mouthfeel.
What about brioche feuilletée vs standard brioche? Brioche feuilletée is the hybrid: standard brioche dough laminated with an additional butter block, like a croissant but eggier. It’s an advanced technique—one to attempt after you’ve mastered this base recipe.
Chocolate Brioche Bread: 7 Steps to Soft Buttery Swirls
Now for the main event. This master brioche dough with chocolate breaks down into seven highly actionable phases, each with exact temperatures, timings, and visual checkpoints. Read through the entire sequence once before you start—brioche rewards preparation. You’ll need a heavy-duty stand mixer with a dough hook, a digital kitchen scale (grams beat cups every time), and roughly two days of patience. The active work is only about an hour; the rest is fermentation doing its quiet magic.
1. Bloom Cocoa Powder and Hydrate Instant Yeast

Pin this cocoa blooming method to your Baking Tips board for a richer chocolate flavor!
Every great chocolate brioche starts before the dough does. Blooming cocoa powder in boiling water releases trapped flavor compounds locked inside the cocoa butter, while hydrating instant yeast in warm milk wakes the culture for the long fermentation ahead. Get these two foundations right, and every later step becomes noticeably easier.
Looking for the best dutch process cocoa powder for baking rich flavor? Choose a highly alkalized brand labeled “Dutch-process” for the deepest color and smoothest, least acidic taste. The difference between dutch process cocoa vs natural cocoa matters here: Dutch-process cocoa is neutralized, so it pairs beautifully with instant yeast and produces that signature dark, fudgy swirl.
Ingredients
- 45g (1/2 cup) premium dutch process cocoa powder (highly alkalized for deep color)
- 60ml (1/4 cup) boiling water
- 10g (1 tbsp) instant yeast (or active dry)
- 120ml (1/2 cup) whole milk, heated precisely to 95°F (35°C)
Instructions
- Whisk the boiling water into the dutch process cocoa powder in a small bowl until a thick, glossy paste forms, then set aside to cool.
- Combine the warm milk and instant yeast in a separate measuring jug, stirring gently to hydrate.
- Rest the yeast mixture for 10 minutes until a frothy cap forms, indicating healthy microbiological yeast activity.
Pro-Tip: Utilizing the starch gelatinization temperature in bread mechanics, pouring boiling water over your cocoa powder (blooming) shatters the fat crystals in the cocoa butter, releasing up to 30% more volatile flavor compounds than adding dry cocoa directly to the flour.

2. Knead Enriched Dough and Incorporate Cold Butter

Save this butter incorporation technique—the secret to fluffy brioche!
This is the phase where most homemade brioche goes wrong. The secret to a soft buttery crumb is building the gluten matrix in your bread flour before a single cube of butter touches the dough. Once fat coats those gluten strands, further development stops—so the order of additions matters more than mixer speed.
Why cold eggs? The emulsification kinetics of egg yolks and butter depend on lecithin from the yolks helping fat and water bind into a stable emulsion. Cold eggs slow down gluten over-development and keep the dough cool during the long knead, which is exactly what a high-fat dough needs.
Ingredients
- 400g (3 1/4 cups) high-protein bread flour (minimum 12% protein)
- 50g (1/4 cup) granulated sugar
- 4 large eggs (cold, straight from the fridge)
- 170g (1.5 sticks) premium European unsalted butter, cubed and sitting at exactly 65-68°F (18-20°C)
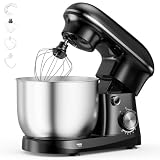
- 1 heavy-duty stand mixer with a spiral dough hook
Instructions
- Mix the bread flour, sugar, cold eggs, and the active yeast mixture in the bowl of your stand mixer on low speed for 4 minutes until a shaggy dough forms.
- Knead on medium speed for 10-12 minutes to build exceptional gluten elasticity before any fat is introduced.
- Incorporate the cubed unsalted butter one piece at a time with the mixer running, waiting until each cube vanishes into the dough before adding the next.
Pro-Tip: The cold butter incorporation threshold is vital. If your butter exceeds 70°F, it will melt, causing the dough to become hopelessly greasy and heavy. Keep the butter at 65-68°F; it should be pliable enough to dent with a finger, but cool enough to hold its shape.
If you run into butter separating from dough or a dough too sticky to handle, don’t panic. Slide the bowl into the fridge for 15 minutes to re-chill the fat, then resume mixing on medium speed. A brief rest often rescues an emulsion that’s starting to break.
3. Perform Windowpane Test and Proof Dough Overnight

Pin this guide to the ultimate gluten test for perfectly soft bread!
Before you commit to a long proof, verify your dough is structurally sound. The gluten windowpane test verification is the single most reliable way to confirm that gluten development failure in high fat dough hasn’t occurred. If the dough passes, it’s ready for the fridge. If it tears, keep kneading.
The overnight chill isn’t optional—it’s the secret weapon. A controlled overnight cold fermentation deepens flavor, firms the butter, and makes the sticky dough easy to roll and shape the next day. Trying to shape warm brioche is fighting a losing battle.
Ingredients
- Your fully kneaded brioche dough
- 1 tsp neutral oil (for greasing the bowl)
- 1 large glass dough rising bucket or bowl
- Plastic wrap or tight-fitting lid
Instructions
- Perform the windowpane test: pinch off a golf-ball-sized piece of dough and stretch it gently between your fingers. If it stretches thin enough to let light through without breaking, it is ready.
- Transfer the smooth dough to a lightly oiled bowl, turning once to coat.
- Cover tightly with plastic wrap and proof at room temperature for 1 hour, then transfer to the refrigerator for a controlled overnight cold fermentation (8 to 16 hours).
Pro-Tip: Protease activity during overnight retard relaxes the gluten strands while the cold temperature solidifies the high butter content. Trying to roll and shape warm brioche dough is nearly impossible; the overnight chill is mandatory for clean chocolate swirls.
Wondering how to know when chocolate brioche dough has finished proofing? After 8-16 hours in the fridge, it should look puffy, nearly doubled, and hold a gentle indentation when pressed. If it springs back immediately, give it another hour at room temperature before shaping.

4. Roll Out Dough Rectangle and Spread Chocolate Filling

Save this rolling technique for perfect bakery-style swirls!
Cold dough is cooperative dough. This is where the overnight chill pays off. A firm layered chocolate brioche dough rolls into a clean rectangle without fighting back, and the chilled butter keeps the layers distinct. Your goal: a perfectly even 12×16-inch sheet ready to receive its rich chocolate filling.
To prevent chocolate filling leaking during the bake, keep that 1-inch border clean and make sure the filling is cool and spreadable—not hot. A hot filling will melt the butter in the dough and smear the layers you worked so hard to build.
Ingredients
- Your chilled overnight brioche dough
- The prepared bloomed cocoa pastry paste (from Step 1)
- 100g (1/2 cup) finely chopped high-quality dark chocolate or mini melted chocolate chips
- 50g (1/4 cup) light brown sugar
- 1 French tapered rolling pin
Instructions
- Turn out the firm, cold dough onto a lightly floured surface and roll out a neat 12×16-inch rectangle, ensuring even thickness (about 1/4-inch thick).
- Spread the bloomed cocoa paste evenly across the dough using an offset spatula, leaving a 1-inch clean border along the edges.
- Sprinkle the brown sugar and dark chocolate chunks evenly over the cocoa layer, pressing down very lightly so they adhere to the paste.
Pro-Tip: If your kitchen is warm and the dough begins to stick or feel greasy while rolling, immediately slide it onto a baking sheet and return it to the freezer for 10 minutes. Cocoa butter crystallization within the dough matrix must remain stable for clean layers.

5. Fold, Braid Twisted Strands, and Shape

Pin this braiding technique to create the ultimate show-stopping loaf!
Now for the showstopper moment. Rolling, cutting, and twisting transforms your flat rectangle into a braided chocolate brioche loaf with that artisan bakery style chocolate marbled brioche bread look. It’s just three motions: roll, slice, twist—and keeping the cut faces up is the whole trick.
Ingredients
- Your filled, flat rectangle of dough
- 1 heavy-duty stainless steel bench scraper or sharp chef’s knife
- 1 standard 9×5 inch metal baking loaf pan
- Parchment paper
Instructions
- Roll the dough tightly starting from the long end (like a cinnamon roll) into a 16-inch log, pinching the seam shut.
- Slice the log entirely in half lengthwise down the middle using a sharp bench scraper, exposing the alternating layers of dough and chocolate.
- Braid the two halves by crossing one over the other (keeping the cut sides facing up toward the ceiling) to form a twisted rope.
- Compress the twisted loaf gently and lift it into a parchment-lined 9×5 loaf pan.
Pro-Tip: Always keep the exposed chocolate layers facing upward when twisting and placing the dough in the pan. This allows the heat to hit the layers directly, causing aggressive oven spring and creating that signature “thousand-layer” crowned aesthetic.

6. Brush with Egg Wash and Bake Until Golden

Save this baking temperature guide to prevent underbaked, dense centers!
After its final proof, your loaf is ready for its golden transformation. The glossy egg wash finish triggers the Maillard reaction during egg wash bake, giving the crust its deep amber color—but it also browns fast. That’s exactly why temperature, not color, is your finish line. The most common failure here is a burnt crust with raw interior, and a thermometer solves it completely.
Ingredients
- The fully shaped loaf, proofed at room temp for 1.5 – 2 hours until incredibly puffy
- 1 large egg + 1 tbsp milk (whisked together for the egg wash)
- 1 natural bristle pastry brush
- 1 instant-read digital thermometer
Instructions
- Preheat your oven to 350°F (175°C) and delicately brush the puffy dough with the egg wash, being careful not to deflate it.
- Bake for 40-45 minutes. If the top begins browning too quickly at the 25-minute mark, tent it loosely with aluminum foil.
- Temp the bread using an instant-read thermometer inserted directly into the thickest center part of the dough; it is done when it hits exactly 190°F (88°C).
Pro-Tip: Never rely solely on visual crust color for enriched breads. The Maillard reaction during egg wash bake happens rapidly due to the high sugar and dairy content, masking a raw center. A calibrated instant-read thermometer reading 190°F is the only foolproof metric for perfect crumb structure.
This calibrated internal bake temperature also respects the thermal death point of yeast in enriched dough—by the time the center hits 190°F, all fermentation activity has long ceased and the crumb is fully set.

7. Cool on Wire Rack and Slice Toasted Brioche

Pin this to remember why you should NEVER slice bread hot!
The bake doesn’t end when the timer rings. Starch gelatinization continues for hours as the loaf cools, setting the light and airy crumb structure you worked so hard to create. Cutting too early collapses those delicate walls into a gummy, dense brioche dough texture.
Ingredients
- Your freshly baked 190°F chocolate brioche loaf
- 1 heavy-duty wire cooling rack
- 1 serrated bread knife
Instructions
- Rest the loaf inside the hot pan for exactly 10 minutes to allow the structure to firm up slightly.
- Turn out the loaf carefully onto a wire cooling rack, removing the parchment paper so steam can escape from the bottom.
- Cool completely for at least 2 hours before attempting to slice, allowing the interior starches to fully set and the chocolate to slightly solidify.
Pro-Tip: Cutting into a hot loaf is the leading cause of a gummy, dense brioche dough texture. Starch gelatinization continues for hours as the bread cools. Wait until it is entirely room temperature before taking a serrated knife to it.
Once fully cooled, this loaf is endlessly versatile. Can you toast chocolate chip brioche? Absolutely—thick slices toasted until the edges crisp make the best French toast base you’ve ever tried. And the best way to reheat frozen chocolate brioche rolls is a quick 5-8 minute warm-up in a 300°F (150°C) oven to revive the soft buttery crumb.

What to Make With Leftover Chocolate Brioche
Let’s be honest: if this loaf survives more than a day in your kitchen, you’re stronger than most of us. But if you do find yourself with day-old chocolate swirl brioche bread, you’ve actually stumbled into a brunch goldmine. Stale enriched bread is the secret weapon of cooks everywhere, because its high fat and egg content soaks up custard like a dream. As of September 2026, these two leftover recipes remain the favorites our readers make on repeat.
Chocolate brioche bread and butter pudding: Tear the loaf into chunks, arrange them in a buttered baking dish, and pour over a classic vanilla custard made from eggs, milk, cream, and sugar. Bake until puffed and golden. The chocolate swirls melt into ribbons of sauce that soak into every spoonful. It’s the ultimate comfort dessert.
Chocolate brioche French toast: Slice the loaf thick, dip each piece in a classic French toast custard base, and cook on a buttered skillet until caramelized. Serve with maple syrup and a dusting of cocoa. This is the breakfast that makes weekend guests think you hired a pastry chef.
Want to plan ahead? Bake a double batch on purpose. One loaf for slicing and toasting, one destined for the custard dish. Your future self—and your brunch table—will thank you.
Key Takeaways: Your Quick Guide to Chocolate Brioche
If you remember only six things from this guide, make them these. Each one is a proven checkpoint that prevents the most common brioche failures and keeps your chocolate brioche recipe on the professional track.
- Butter Temperature is Non-Negotiable: Ensure your european unsalted butter is exactly 65-68°F (18-20°C) before incorporating; warmer butter will melt and destroy the dough structure.
- Master the Windowpane Test: Never add butter until the bread flour and liquids have developed enough gluten elasticity to pass the gluten windowpane test verification.
- Overnight Cold Proofing is Essential: A controlled overnight cold fermentation not only deepens the flavor but solidifies the fat, making the sticky dough easy to roll and shape.
- Bloom for Maximum Flavor: Mixing boiling water with your dutch process cocoa powder shatters fat crystals, releasing significantly deeper chocolate notes than adding dry powder.
- Bake to Temperature, Not Color: Due to the high butter content and egg wash, the crust will brown rapidly. Always use an instant-read thermometer to ensure the center reaches 190°F (88°C).
- Cool Completely Before Slicing: Avoid a dense brioche dough texture by allowing the loaf to cool on a wire rack for at least 2 hours, letting the internal starches fully set.
People Also Ask About Chocolate Brioche
Still have questions? These are the queries home bakers ask most often, answered with the same pastry-kitchen precision as the recipe above.
What is the difference between chocolate brioche and babka?
Chocolate brioche is a classic French enriched dough featuring a soft, pillowy, high-egg crumb, whereas babka is a denser, sweeter Jewish pastry with tighter twists.
While both feature swirling layers of chocolate, a traditional babka utilizes less butter in the dough itself, relies on a heavier syrup soak after baking, and is almost always topped with a streusel crumble. Brioche dough is inherently richer and structurally lighter, making it ideal for both sweet and savory applications.
How do you add chocolate chips to brioche dough without melting?
To prevent chocolate chips from melting during the kneading process, freeze the chocolate chips for 30 minutes and only fold them in manually at the very end of mixing.
The friction generated by a stand mixer’s dough hook creates significant heat. If you add chocolate chips too early, they will melt into the enriched yeasted dough, turning the crumb muddy. Always use a gentle folding motion by hand after the windowpane test is completed.
Can you freeze chocolate brioche rolls?
Yes, baked chocolate brioche freezes exceptionally well for up to three months if wrapped tightly in plastic wrap and a layer of aluminum foil.
To enjoy them later, allow the chocolate brioche rolls to thaw at room temperature overnight. For the best texture, reheat the thawed rolls in a 300°F (150°C) oven for 5-8 minutes to revive the soft buttery crumb and re-melt the interior chocolate swirls.
Why is my chocolate brioche dense and heavy?
A dense, heavy brioche is usually caused by incorporating the butter before the gluten was fully developed, or by slicing the bread while it was still hot.
If you do not pass the windowpane test prior to adding fat, the butter coats the flour proteins and halts gluten formation. Additionally, failing to hit a calibrated internal bake temperature of 190°F leaves the center raw, resulting in a compressed, gummy texture that collapses as it cools.
How long does chocolate brioche last at room temperature?
Homemade chocolate brioche will last 3 to 4 days at room temperature when stored in an airtight container or bread bag.
Because this recipe utilizes a high percentage of dairy and eggs, it naturally resists staling better than lean breads like baguettes. However, if you live in a very hot or humid climate, sanitary food handling and storage dictates keeping it in the refrigerator after day two to prevent mold.
Can you use active dry yeast instead of instant yeast in brioche?
Yes, you can substitute active dry yeast for instant yeast at a 1:1 ratio, but you must strictly hydrate the active dry yeast in warm milk (95°F) first.
Unlike instant yeast, which can technically be mixed straight into the dry bread flour, active dry yeast requires a 10-minute liquid bloom to dissolve its protective outer shell and awaken the dormant yeast cells for proper leavening in a heavy, enriched dough.
What chocolate is best for chocolate brioche?
The best chocolate for brioche is a high-quality dark chocolate (60-70% cacao) or a premium Dutch-process cocoa powder.
Because the brioche dough itself is incredibly rich and buttery, using milk chocolate can make the final loaf cloyingly sweet. Dark couverture chocolate or semi-sweet baking chunks provide a much-needed bitter contrast that balances the sweetness of the pastry perfectly.
Can you make chocolate brioche without a stand mixer?
While possible, kneading high-fat chocolate brioche by hand is incredibly labor-intensive and can take up to 45 minutes of aggressive slapping and folding.
The heat from your hands also risks melting the butter before it emulsifies into the dough. If hand-kneading, you must utilize the “slap and fold” French technique (Bertinet method) and frequently chill the dough in the freezer for 5 minutes if it becomes too greasy to handle.
What internal temperature is chocolate brioche done baking?
Chocolate brioche is fully baked when an instant-read thermometer inserted into the deepest center of the loaf registers exactly 190°F (88°C).
Because of the high sugar and egg wash, the crust will look deeply browned and “done” long before the interior is cooked. Relying strictly on temperature ensures you avoid a raw, collapsed center and achieve the signature light and airy crumb structure.
How do you get clean chocolate swirls in brioche bread?
Clean swirls require chilling the dough thoroughly overnight before rolling, and ensuring your chocolate ganache filling is cool and spreadable, not hot.
If the dough is warm, it will smear when sliced. If the filling is too hot, it will melt the butter in the dough layers. Rolling the dough tightly and utilizing the overnight cold fermentation technique guarantees distinct, striking visual contrast between the pale dough and dark chocolate.
Final Thoughts on Chocolate Brioche
Tackling a traditional french chocolate brioche at home might seem daunting, but mastering this highly enriched dough comes down to respecting the science of temperature and time. By ensuring your butter is perfectly calibrated, trusting the windowpane test over the clock, and utilizing an overnight cold proof, you remove the guesswork that causes most dough failures.
This master brioche dough base recipe is more than just a single bake; it is a foundational pastry skill. Once you feel comfortable manipulating this buttery, elastic dough and twisting those dark chocolate layers, you have effectively unlocked the entire world of advanced French Viennoiserie. From there, transitioning to morning buns, babkas, or even laminated pastries becomes incredibly intuitive.
Even if your braids aren’t perfectly symmetrical on your first try, the reward is still a stunning loaf with a fluffy pillowy texture that will rival any corner bakery. Embrace the process, trust your instant-read thermometer, and enjoy the incredible aroma that is about to fill your kitchen.
Have you tried making homemade chocolate brioche yet, and if so, did you prefer it straight from the oven or transformed into weekend French toast? Let me know your results in the comments below!
Last update on 2026-09-06 at 00:39 / Affiliate links / Images from Amazon Product Advertising API
