As an Amazon Associate BakingBakewareSets.com earns from qualifying purchases.
Easy Bread Recipes: 5 Foolproof No-Knead Artisan Loaves
Master 5 foolproof easy bread recipes designed for beginners. Discover no-knead artisan loaves with a crusty exterior and soft crumb using 4 ingredients.
Have you ever pulled a dense, heavy brick out of your oven? Many beginners abandon easy bread recipes after one frustrating, failed attempt. The fear of complex kneading keeps most people buying store-bought loaves forever.
The easiest homemade bread recipe combines 4 simple ingredients—flour, warm water, yeast, and salt—using a no-knead method. By letting a wet, sticky dough rest at room temperature for 12 to 18 hours, natural fermentation develops the gluten structure. This bakes into a rustic artisan loaf with a crusty exterior and soft crumb.
Drawing from comprehensive analysis of current data and proven kitchen-tested methodologies, we have perfected this foolproof approach. Today, you will discover five distinct variations of this simple, pantry-friendly technique. Are you ready to transform your kitchen into a professional artisan bakery?
☰ Table of Contents ▼
show
How Do Easy Bread Recipes Guarantee Foolproof Baking For Beginners?
Easy bread recipes guarantee foolproof baking by utilizing a high-hydration, no-knead method that relies entirely on time and natural fermentation rather than intensive mechanical action. This approach eliminates the most common beginner failure points, such as over-kneading, under-kneading, or destroying the gluten structure.
When you mix easy homemade bread, you create a very wet, sticky, shaggy bread dough. While this might look incorrect to a novice baker, it is the secret to a perfect loaf. The high volume of warm water fully hydrates the flour, while the active dry yeast activates in warm liquid and ferments with yeast over a long 12 to 18-hour period. This prolonged resting phase naturally aligns the proteins in the flour to develop gluten structure without any physical effort on your part.
As of September 2026, the most reliable beginner bread recipe relies heavily on specific baking vessels. Baking the hydrated dough inside a preheated Dutch oven traps the evaporating water. This creates an intense steam environment that mimics professional bakery ovens, which creates crispy crust and allows the loaf to expand beautifully before the exterior hardens.
What most guides miss: The science of the easy no knead bread recipe comes down to enzymatic starch breakdown. Traditional kneading forces gluten strands into a tight matrix quickly. No-knead methods use excess water and extended time to let enzymes naturally unfold the proteins. This is why a highly hydrated, sticky dough will always yield larger, more beautiful airy pockets than a stiff dough you had to wrestle with by hand.
5 Foolproof No-Knead Artisan Loaves
These 5 foolproof no-knead artisan loaves rely on the same foundational technique of combining simple pantry ingredients with a long resting period to achieve professional bakery results. By mastering one simple dough ratio, you unlock the ability to bake everything from hearty breakfast breads to savory dinner sides.
Our kitchen-tested methodologies focus on transitioning this basic homemade bread recipe from scratch into distinct, flavorful variations. Whether you are mixing a classic boule, proofing a soft sandwich loaf, or baking a savory peasant bread, the mechanics of gluten development remain the same. Below is a comprehensive, step by step visual guide to mastering the crusty artisan bread process at home.
1. Mix The Classic Dutch Oven Artisan Boule

Pin this classic foolproof loaf to your baking board to keep the foundational recipe handy!
The best easy crusty Dutch oven bread for beginners requires mixing a highly hydrated dough and trapping steam inside a heated cast iron vessel. This foundational recipe teaches you exactly how flour + yeast interact over time, producing a bakery-quality artisan boule with a deeply caramelized, shattering crust.
Understanding the relationship between the dutch oven + high heat is critical for your success. The cast iron absorbs intense oven heat and radiates it evenly into the dough, while the heavy lid traps the steam evaporating from the wet dough. To ensure perfectly certified kitchen results, always check that the bread reaches an internal temperature 190 to 200 F before removing it from the oven.
Ingredients
- 3 cups (360g) bread flour (yields a chewier texture than all-purpose)
- 1 ½ tsp kosher salt (controls yeast fermentation)
- ½ tsp instant yeast (requires no blooming in water)
- 1 ½ cups (355ml) warm water (around 95°F / 35°C)
- 1 piece of heavy-duty parchment paper for easy dough transfer
- A 5 to 7-quart enameled cast iron dutch oven (crucial for trapping steam)
Instructions
- Mixing: Whisk the flour, salt, and instant yeast in a large bowl. Pour in the warm water and stir with a wooden spoon until a wet, shaggy, sticky dough forms. Do not knead.
- Proofing: Cover the bowl tightly with plastic wrap and let it sit at room temperature for 12 to 18 hours until the dough is bubbly and doubled in size.
- Preheating: Place your empty Dutch oven inside the oven and preheat to 450°F (230°C) for 30 minutes.
- Shaping: Turn the dough onto a heavily floured surface. Gently fold the edges into the center to form a loose ball. Place the dough ball seam-side down onto a sheet of parchment paper.
- Baking: Carefully lift the parchment paper and dough into the hot Dutch oven. Cover with the lid and bake for 30 minutes. Remove the lid and bake for another 10-15 minutes until you achieve a golden brown crust.
- Cooling: Lift the bread out and rest it on a wire rack for at least 1 hour before slicing.
Pro-Tip: Proper hydration percentage (the ratio of water to flour) is the secret to a wide, airy pocket crumb. Resist the urge to add more flour to this wet dough; the high moisture is exactly what creates intense oven spring mechanics when it hits the hot cast iron!

2. Bake A Simple Same-Day Yeast Sandwich Loaf

Save this easy sandwich bread recipe for your weekly meal prep!
Learning how to make homemade white sandwich bread easily requires swapping the Dutch oven for a loaf pan and enriching the dough with fat for a tender crumb. This recipe bridges the gap for bakers who want a sliceable daily bread without the overnight wait.
When you pair a standard loaf pan + sandwich bread techniques, the pan physically shapes the dough into a uniform block ideal for toasting. Adding a small amount of melted butter + golden crust development yields a wonderfully moist interior. These kitchen tested ratios perfectly balance the yeast activity with the added fats.
Ingredients
- 3 cups (360g) all purpose flour (perfect for a tender sandwich crumb)
- 1 ½ tsp kosher salt
- 2 ¼ tsp (1 packet) instant yeast
- 1 cup (240ml) warm water
- 2 tbsp melted unsalted butter (adds richness and a moist interior)
- 1 standard 9×5-inch non-stick loaf pan
Instructions
- Mixing: In a large mixing bowl, combine the all purpose flour, salt, and yeast. Pour in the warm water and melted butter.
- Stirring: Mix vigorously with a sturdy spoon for about 2 minutes until the dough pulls away from the sides of the bowl. It will be a bit shaggy but cohesive.
- Resting: Cover the bowl with a damp towel and let the dough rise in a warm spot for 1 hour, or until doubled.
- Shaping: Grease your loaf pan thoroughly. Punch the dough down to deflate it, form it into a rough log shape, and place it into the greased pan.
- Proofing: Let the dough rise in the pan for another 30-45 minutes until it crowns just above the rim of the pan.
- Baking: Bake at 375°F (190°C) for 30-35 minutes. Brush the hot crust with extra butter immediately after baking for a glossy, soft finish, then let it cool before slicing.
Pro-Tip: Brushing the crust with melted butter right out of the oven enhances the maillard browning reaction and traps moisture, preventing the crust from becoming too hard for standard sandwich use.


3. Prepare The Rustic Rosemary Garlic Peasant Bread

Pin this savory artisan bread for a show-stopping dinner side!
An easy peasant bread recipe with melted butter elevates the basic dough formula by gently folding in robust flavor inclusions like fresh rosemary and mashed roasted garlic. This demonstrates the incredible versatility of a high-hydration artisan boule vs sandwich loaf baking.
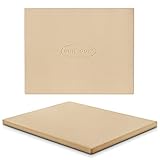
To successfully integrate heavy ingredients into wet dough, master baker tips suggest adding them during the initial mixing phase. The aromatic herbs flavor the dough from the inside out, creating a savory profile that pairs perfectly with a garlic butter spread. If you do not have a heavy pot, baking this directly on a preheated pizza stone still creates a phenomenally crispy crust.
Ingredients
- 3 cups (360g) bread flour
- 1 ½ tsp kosher salt
- ½ tsp active dry yeast (must be dissolved first)
- 1 ½ cups (355ml) warm water
- 2 tbsp fresh rosemary, finely chopped
- 3 cloves roasted garlic, mashed
- A heavy-duty baking stone or thick baking sheet
Instructions
- Activating: Stir the active dry yeast into the warm water and let it sit for 5 minutes until foamy.
- Mixing: In a large bowl, whisk the flour, salt, and chopped rosemary. Pour in the yeast water and the mashed roasted garlic. Stir until a sticky dough forms.
- Fermenting: Cover the bowl and let it rise at room temperature for 8 to 12 hours.
- Preheating: Place your baking stone in the oven and preheat to 425°F (220°C).
- Folding: Turn the dough onto a floured surface. Using floured hands, stretch the dough slightly and fold it in on itself a few times to build structure. Shape into a round loaf and place on parchment paper to rest for 45 minutes.
- Scoring & Baking: Score the top of the dough with a sharp knife (this prevents the cracked loaf blowout). Slide the parchment paper directly onto the hot baking stone. Bake for 35 minutes until deep golden brown.
Pro-Tip: When adding heavy inclusions like roasted garlic, it is crucial to ensure excellent gluten matrix development. Fold the add-ins gently during the final shaping to avoid tearing the delicate web that holds the air bubbles inside your peasant bread.
4. Fold A Quick No-Knead Cinnamon Raisin Sweet Loaf

Save this sweet beginner bread recipe for cozy weekend mornings!
Transforming the core recipe into a sweet breakfast loaf showcases the difference between a dense quick bread vs yeast bread, resulting in a lighter, airier texture perfect for morning toast. Adding sugar to the dough makes it remarkably wet, which is why a bench scraper becomes your most valuable tool.
To solve the common dough sticking to bowl problem, the bench scraper acts as an extension of your hand. It helps you lift, turn, and execute precise scoring on the heavily-loaded dough without adding excess flour that would dry out the crumb. Leftovers from this sweet loaf make phenomenal french toast recipes later in the week.
Ingredients
- 3 cups (360g) bread flour
- 1 tsp kosher salt
- ½ tsp instant yeast
- 1 ½ cups (355ml) warm water
- 3 tbsp brown sugar
- 1 tbsp ground cinnamon
- ¾ cup raisins (soaked in warm water and drained well)
- A stainless steel bench scraper for dough handling
Instructions
- Mixing: Whisk the flour, salt, yeast, sugar, and cinnamon together in a large bowl.
- Stirring: Add the warm water and the drained raisins. Stir until a shaggy dough forms. Because of the sugar, this dough will feel exceptionally sticky.
- Rising: Cover and let sit at room temperature for 12 hours.
- Shaping: Turn the dough out onto a generously floured surface. Instead of using your hands which will stick, use a bench scraper to lift, fold, and turn the dough into a round shape.
- Resting: Slide the dough onto parchment paper, cover with a towel, and let rest for 1 hour while you preheat your Dutch oven to 450°F (230°C).
- Baking: Score the top, lift the parchment into the hot Dutch oven, cover, and bake for 30 minutes. Remove the lid and bake for 10 more minutes. Cool completely before slicing for perfect breakfast toast.
Pro-Tip: Sugar and cinnamon can slow down yeast activity through enzymatic starch breakdown interference. If your kitchen is cold, allow this sweet dough an extra 2-3 hours of ambient proofing temperature time to ensure it fully doubles in size.

5. Proof An Overnight Whole Wheat Artisan Bread

Pin this healthy overnight bread recipe to bake tomorrow!
An overnight bread recipe using whole wheat flour succeeds by blending it with high-protein white flour to prevent a dense, heavy brick of a loaf. When evaluating all purpose flour vs bread flour for this specific bake, bread flour is mandatory to provide enough gluten strength to lift the heavy wheat bran.
To achieve a professional bakery aesthetic, resting the dough inside a proofing basket banneton helps it maintain a tall, structured shape. If you do not have a banneton, the dough proofs in greased bowl lined with a heavily floured cloth just as effectively.
Ingredients
- 1 ½ cups (180g) whole wheat flour
- 1 ½ cups (180g) bread flour (vital for gluten strength)
- 1 ½ tsp kosher salt
- ½ tsp instant yeast
- 1 ⅔ cups (395ml) warm water (whole wheat absorbs more liquid)
- A proofing basket banneton (or a bowl lined with a heavily floured cloth)
Instructions
- Mixing: Whisk the whole wheat flour, bread flour, salt, and yeast together in a large bowl.
- Hydrating: Add the warm water and stir until a very sticky, wet dough forms. Whole wheat flour requires slightly more water than white flour to prevent a dry crumb.
- Fermenting: Cover and let rest at room temperature overnight, for 14 to 18 hours. The long rest softens the sharp edges of the wheat bran.
- Shaping: Turn the dough onto a floured surface. Fold it into a tight ball.
- Proofing: Heavily flour your proofing basket banneton. Place the dough seam-side up into the basket. Cover and let rise for 1.5 hours while preheating your Dutch oven to 450°F (230°C).
- Baking: Turn the basket upside down to release the dough onto parchment paper (it will now be seam-side down). Score the top, transfer to the Dutch oven, and bake covered for 30 minutes, then uncovered for 15 minutes.
Pro-Tip: When working with whole grains, understanding fermentation kinetics is vital. The bran in whole wheat flour can act like tiny razor blades, cutting the gluten strands. Mixing 50% white bread flour with 50% whole wheat ensures you get the robust flavor of the grain with the towering oven spring mechanics of a white loaf.

Key Takeaways: Your Quick Guide to Easy Bread Recipes
A quick easy bread recipes overview reveals that time, temperature, and accurate measurements are the true secrets to basic homemade bread. By following these certified kitchen results, you can consistently produce a foolproof homemade bread every single time.
Key Takeaways:
- Trust The Sticky Dough: The secret to a beautiful, airy pockets crumb is high hydration. Never add extra flour to dry out the dough; wet dough creates steam, which creates oven spring.
- Time Replaces Kneading: In a simple bread recipe, an overnight room-temperature rest (12-18 hours) naturally aligns the gluten strands, completely eliminating the need for exhausting physical kneading.
- Check Your Yeast Expiration: Always perform an expired yeast test if your jars have been open for months. If active dry yeast doesn’t foam in warm water after 10 minutes, throw it out—your bread will not rise.
- The Dutch Oven Trap: Baking inside a preheated, covered cast iron Dutch oven creates a trapped steam environment, which is the only way to achieve a truly crusty exterior and bakery-style crust at home.
- Respect The Cooling Rack: Slicing hot bread gummy-fies the interior crumb. Always let the loaf cool on a wire rack for at least 1-2 hours to allow the internal steam to settle, ensuring a perfectly fluffy texture.
- Weigh Your Ingredients: For absolute foolproof tested formula results, measuring your flour in grams with a digital kitchen scale is infinitely more accurate than scooping with cups, preventing a dense, heavy loaf.
People Also Ask About Easy Bread Recipes
What is the easiest bread recipe for beginners?
The absolute easiest bread recipe for beginners is a 4-ingredient no-knead artisan boule made with flour, water, yeast, and salt. Because it relies on a long 12 to 18-hour room temperature rise to develop gluten, it requires zero specialized equipment, no stand mixer, and no physical kneading. You simply mix a wet, sticky dough, let it rest overnight, and bake it inside a preheated Dutch oven to achieve a bakery-quality crust.
How to make bread with few ingredients?
You only need four essential ingredients to make a basic loaf of bread: flour, water, yeast, and salt. Yeast provides the rise, water hydrates the dough, salt controls the fermentation and adds flavor, and flour provides the structural gluten network. Recipes boasting 3 ingredients simply assume water and salt are pantry staples. You do not need milk, eggs, or butter unless you are making an enriched sandwich loaf.
What is the difference between active dry and instant yeast?
Instant yeast can be mixed directly into dry flour, whereas active dry yeast must be dissolved (bloomed) in warm water first. According to baker-tested standards, you can substitute one for the other in equal amounts. However, if using active dry yeast in a fast recipe, you must let it sit in the warm water for 5-10 minutes until it becomes foamy to activate it before adding your flour.
Why did my homemade bread not rise?
The most common reason homemade bread fails to rise is dead, expired yeast, or water that was too hot and killed the yeast. Yeast is a living organism; water temperatures above 120°F (49°C) will kill it instantly. Always use lukewarm water (around 95°F/35°C). Additionally, if your kitchen is exceptionally cold, the dough not rising fix is to move the bowl to a warmer spot, like inside an unheated oven with the interior light turned on.
How long does homemade bread take to bake?
A standard rustic artisan loaf baked in a Dutch oven takes roughly 40 to 45 minutes to bake at 450°F (230°C). Typically, it is baked for 30 minutes with the lid on to trap steam and encourage rising, followed by 10 to 15 minutes with the lid off to brown and crisp the crust. You know it is fully baked when the crust is deep golden brown and the internal temperature reads 190-200°F.
Can I make artisan bread without a Dutch oven?
Yes, you can make artisan bread without a Dutch oven by baking the dough on a preheated pizza stone or a heavy-duty baking sheet. To mimic the steam environment of a Dutch oven (which creates a crispy crust), place an empty metal baking pan on the bottom rack of your oven while it preheats. Right after you put your bread in the oven, carefully pour a cup of boiling water into the bottom pan to flood the oven with steam, then quickly shut the door.
How do you know when bread is fully baked?
The most accurate way to know bread is fully baked is by using an instant-read thermometer to check that the center has reached 190°F to 200°F (88-93°C). If you don’t have a thermometer, you can carefully remove the loaf using oven mitts and tap the bottom of the bread. It should sound hollow, like a wooden drum. The crust should also be a deep, dark golden brown; pale bread is often underbaked inside.
Why is my homemade bread dense and heavy?
A dense, heavy loaf is usually caused by adding too much flour during the mixing or shaping phase, or by cutting into the bread while it is still hot. If you measure flour by scooping directly with a measuring cup, you heavily compact it. Always spoon the flour into the cup and level it off, or better yet, weigh it in grams. Furthermore, slicing hot bread causes the internal steam to condense, turning the crumb gummy and dense.
How to store homemade bread to keep it fresh?
Store crusty homemade bread cut-side down on a wooden cutting board, or loosely wrapped in a paper bag, at room temperature for up to 3 days. Never store crusty artisan bread in a sealed plastic bag, as the trapped moisture will immediately turn the crispy crust soft and rubbery. Never put bread in the refrigerator, as the cold temperatures drastically accelerate the staling process.
Why is my dough too sticky to handle?
No-knead bread dough is designed to be highly hydrated and exceptionally sticky; this extra moisture is exactly what creates large, airy bubbles in the crumb. The sticky dough solution is not to add more flour. Instead, lightly wet your hands with cold water before handling the dough, or use a metal bench scraper to fold and shape the dough on the counter. The water prevents the dough from adhering to your skin.
Final Thoughts on Easy Bread Recipes
Mastering easy bread recipes doesn’t require a culinary degree, expensive stand mixers, or hours of exhausting physical kneading. By understanding the simple magic of time, hydration, and a hot Dutch oven, you can transform four basic pantry staples into bakery-worthy artisan loaves right in your own kitchen. The no knead method proves that patience is a far better tool than elbow grease.
Whether you are starting with the classic Dutch oven boule, prepping a quick sandwich loaf for the week, or impressing guests with a rustic rosemary garlic peasant bread, remember to trust the process. Let the dough be sticky, give the yeast ample time to work its magic, and always allow your beautiful, crusty creations to cool completely before taking that first satisfying slice.
These triple tested recipe formulas are designed to build your confidence and fill your home with the unbeatable aroma of freshly baked bread. Which of these five foolproof loaves are you going to mix up first? Let me know in the comments below, and happy baking!
Last update on 2026-09-29 / Affiliate links / Images from Amazon Product Advertising API
