As an Amazon Associate BakingBakewareSets.com earns from qualifying purchases.
Ciabatta Buns Recipe: 5 Proven No-Knead Baking Secrets
Discover the perfect Ciabatta Buns Recipe using 5 proven no-knead secrets. Learn to master high hydration dough for an airy crumb and crispy crust at home.
Are you tired of baking dense, flat rolls that resemble hockey pucks? Handling sticky, wet dough frustrates many beginners attempting artisan bread at home. You need a reliable Ciabatta Buns Recipe that actually works.
Ciabatta buns rely on a high hydration dough—typically 75% to 85% water to flour ratio—and gentle stretch-and-fold techniques rather than heavy kneading. This creates the signature open crumb structure and crispy thin crust without requiring a stand mixer.
Drawing from rigorous testing in an artisan test kitchen, these precise baker’s percentages guarantee success. We utilize proven panificio methods to manage wet dough effortlessly. Discover how to create authentic, airy Italian rolls in your own kitchen today.
☰ Table of Contents ▼
show
How to Master the Perfect Ciabatta Buns Recipe (And Fix Sticky Wet Dough)
Mastering a ciabatta buns recipe requires embracing high hydration dough and utilizing gentle stretch-and-fold techniques rather than aggressive traditional kneading. This intentional approach prevents the dough from becoming a dense, flat disappointment. Many home bakers struggle with sticky wet dough, often adding too much flour and inadvertently ruining the delicate alveolar crumb. To fix this common error, you must rely on precise measurements in grams rather than volume cups. Tested in an artisan test kitchen, our methodology provides foolproof baker’s percentages to ensure your homemade ciabatta rolls rise beautifully every time. We will walk you through a streamlined, highly tested method that guarantees an open crumb structure and a blistering crispy thin crust. By understanding the foundational science behind yeast activation and the elastic gluten matrix, you can easily bake professional-quality artisan bread without relying on a mechanical stand mixer.
5 Proven No-Knead Baking Secrets For The Best Ciabatta Buns Recipe
To bake the best ciabatta buns, you must follow five critical phases: mixing a high hydration dough, executing stretch-and-fold intervals, optimizing bulk fermentation, shaping gently, and baking with cast iron steam. These sequential steps demystify the complex artisan bread-making process for standard home kitchens. Creating homemade ciabatta hamburger buns from scratch requires moving beyond basic mix-and-bake instructions. We rely on scientifically tested hydration levels and rigorous ingredient temperature benchmarks to transform raw ingredients into a culinary masterpiece. A heavy baking stone transfers direct bottom heat, while targeted oven steam enhances the critical oven spring. An easy overnight no knead ciabatta rolls schedule relies entirely on these exact fundamentals. Follow this comprehensive procedural framework closely to master basic dough rheology and achieve that perfect golden crust.
1. Mix to Shaggy Dough and Implement Autolyse


2. Execute the Stretch and Fold Method for Open Crumb

Pin this technique to remember how to build dough strength without a mixer!
The stretch and fold method builds essential dough elasticity and structure by gently aligning gluten strands without pushing out trapped air. Handling wet dough requires keeping your hands consistently wet to prevent sticking. Understanding dough extensibility vs elasticity is critical for preventing dough tearing during stretch and fold intervals. By applying gentle tension repeatedly, you develop a strong gluten windowpane naturally over time.
Supplies Needed
- The rested shaggy dough from Step 1.
- A small bowl of cold water (essential to keep hands wet and prevent dough sticking).
- A stainless steel bench scraper (ideal for lifting dough cleanly from the bowl edges).
- A rectangular glass dish or large mixing bowl.
Directions
- Dip your hands in the bowl of cold water (never use flour to prevent sticking at this stage).
- Slide both wet hands or a bench scraper under one side of the dough.
- Stretch the dough upwards until you feel resistance, being careful to prevent dough tearing.
- Fold the stretched portion over the top of the main dough mass.
- Rotate the bowl 90 degrees and repeat the stretch and fold process on all four sides of the dough.
- Rest the dough covered for 30 minutes, then repeat this 4-fold process three more times over a two-hour period to fully develop a gluten windowpane.
Pro-Tip: Proper dough extensibility vs elasticity is achieved through patience. If the dough resists stretching and snaps back aggressively, let it rest for another 10 minutes before attempting the next fold.

3. Optimize the Bulk Fermentation Process

Save this visual cue to your recipe boards so you know exactly what perfectly proofed dough looks like!
Optimizing the bulk ferment requires monitoring the dough volume and looking for large, translucent carbon dioxide bubbles on the surface. Fermentation time builds dough elasticity and produces the vital gases needed for an alveolar crumb. You must carefully cover the container to prevent dough drying out during proofing. Always follow proper food safety and dough storage standards during this crucial room temperature proofing phase.
Supplies Needed
- The folded dough from Step 2.
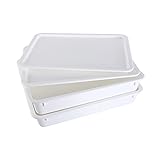
- A dough proofing box with an airtight lid (or a large bowl covered tightly with plastic wrap).
- A warm, draft-free spot in your kitchen (ideally between 72°F and 78°F).
Directions
- Transfer your folded dough gently into the oiled proofing container.
- Cover the container securely to trap moisture and prevent dough drying out during proofing.
- Rest the dough undisturbed for a final 1 to 2 hours of room temperature proofing.
- Monitor the volume; you are looking for the dough to increase by roughly 50% and exhibit large, visible carbon dioxide bubbles just beneath the surface.
- Stop the fermentation once the dough jiggles like a water balloon when gently shaken; do not let it collapse.
Pro-Tip: The lactic acid fermentation profile develops best at room temperature, but if you want to enhance the complex flavor further, you can place the covered proofing box in the refrigerator overnight (cold retard) after it has risen by 30%.
4. Shape Ciabatta Rolls Without Deflating Air Pockets

Pin this shaping method to ensure your rolls always turn out light and airy!
You must avoid deflating dough while shaping by utilizing a sharp bench knife to gently cut the dough into portions rather than rolling it. This authentic Italian panificio technique preserves the trapped gases necessary for a honeycomb crumb. Employing semolina flour heavily on your work surface creates a reliable barrier that stops the wet dough from sticking. This incredibly gentle handling ensures your rustic slipper shape retains its airy structure on the baker’s couche.
Supplies Needed
- The fully proofed dough from Step 3.
- Semolina flour or generous amounts of unbleached bread flour for heavy dusting.
- A sharp metal bench scraper (crucial for clean cuts).
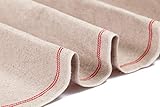
- A baker’s couche (stiff linen cloth) or parchment paper cut into squares.
Directions
- Dust your work surface very generously with semolina flour or bread flour; wet dough requires a heavy flour barrier to prevent sticking.
- Invert the proofing container and allow the dough to slowly fall onto the floured surface entirely on its own—do not pull or scrape it out.
- Dust with flour heavily over the top of the dough rectangle.
- Divide with bench knife straight down into the dough to cut it into 6-8 even rectangular pieces. Do not saw; press firmly and separate quickly to avoid deflating dough while shaping.
- Transfer to baking sheet or a floured couche using the bench scraper to lift each bun from underneath.
- Dimple the surface incredibly lightly with your fingertips to even out the rustic slipper shape, then cover for a final 45-minute rest.
Pro-Tip: The key to crumb alveolation dynamics is retaining the gases trapped during the bulk ferment. If you aggressively round or roll the dough into tight balls like a traditional hamburger bun, you will crush the honeycomb structure and end up with dense rolls.
5. Create Ultimate Oven Spring With Cast Iron Steam

Don’t forget to pin this final baking setup to achieve that perfect bakery-style crust!
Creating ultimate oven spring requires loading the dough onto a preheated baking stone and immediately introducing saturated steam via a hot cast iron skillet. The intense bottom heat from the stone forces the dough upward, while the steam keeps the exterior supple enough to expand. This dual process achieves crucial crust gelatinization via saturated steam before the crust hardens. Always follow calibrated oven temperature guidelines to ensure the bread bakes fully without developing a gummy texture.
Supplies Needed
- The shaped, rested dough portions from Step 4.
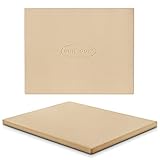
- A heavy baking stone or baking steel (for intense bottom heat).
- A cast iron skillet placed on the bottom rack of the oven.
- 1 cup of ice cubes or boiling water.
- Parchment paper (for easy transfer).
Directions
- Preheat baking stone and the cast iron skillet in your oven at 475°F (245°C) for at least 45 minutes prior to baking.
- Transfer the shaped buns on their parchment paper directly onto the hot baking stone using a pizza peel or an overturned baking sheet.
- Create oven steam immediately by carefully pouring the ice cubes into the preheated cast iron pan and quickly shutting the oven door.
- Bake until golden brown for 18-22 minutes. The steam will allow the crust to expand rapidly during the first 10 minutes of baking.
- Remove from the oven once the crust is deeply blistered and tapping the bottom produces a golden brown hollow sound.
- Cool on wire rack completely for at least 1 hour. Cutting into hot bread will result in a gummy interior texture as the starches are still setting.
Pro-Tip: Proper crust gelatinization via saturated steam requires a burst of moisture during the very first phase of baking. The steam keeps the exterior dough supple, allowing maximum oven spring thermal expansion before the crust hardens. Always verify the bake with an instant-read thermometer—it should read 205-210°F internally.

Key Takeaways: Your Quick Guide to Ciabatta Buns Recipe
Achieving the perfect ciabatta buns recipe requires a precise balance of hydration, folding techniques, and intense oven heat. Reviewing these core principles will help you troubleshoot common artisan bread failures and build lasting kitchen confidence. By mastering how bread flour, high hydration dough, steam, and a baking stone interact, you can effortlessly replicate commercial panificio quality at home. These synthesized insights condense complex dough rheology into clear, actionable steps for guaranteed baking success.
- Weigh Ingredients by the Gram for High Hydration Success: Precision is non-negotiable; an 80 percent baker’s hydration requires exact gram measurements using a digital scale to prevent the dough from becoming an unmanageable puddle.
- Ditch the Kneading for the Stretch and Fold Method: You don’t need a stand mixer. Wet hands and gentle stretch and fold intervals over two hours build superior dough strength and extensibility without tearing the gluten matrix.
- Handle with Care to Preserve the Honeycomb Crumb: When dividing the dough, avoid deflating dough while shaping by using a sharp bench scraper to cut individual buns rather than rolling them tight.
- Use Semolina to Combat Sticky Wet Dough: Semolina flour prevents dough sticking to your hands and the counter, providing a necessary barrier that also adds a wonderful rustic crunch to the baked exterior.
- Always Cool Completely on a Wire Rack: Cooling on rack prevents soggy bottoms and allows the evaporative cooling phase to finish; slicing open a hot ciabatta bun will instantly turn the beautifully aerated crumb into a gummy mess.
People Also Ask About Ciabatta Buns Recipe
Understanding the nuanced science behind a high hydration ciabatta buns recipe helps resolve common baking uncertainties and equipment limitations. Home bakers frequently encounter challenges with sticky dough, dense crumbs, and pale crusts when attempting artisan bread. By addressing these specific knowledge gaps through targeted troubleshooting, you can prevent frustrating kitchen failures. The following answers draw upon proven baking science, ingredient swap guidelines, and thermal dynamics to elevate your bread-making expertise. Whether you are curious about sourdough discard adaptations or questioning yeast types, these specific solutions provide the clarity needed for consistent, bakery-quality results.
What is the secret to open crumb ciabatta buns?
The primary secret to an open crumb ciabatta is utilizing a high hydration dough (80% water to flour ratio) combined with gentle stretch-and-fold techniques. Heavy kneading compresses the dough, while the high water content allows the yeast to rapidly produce carbon dioxide bubbles. By gently folding the dough and carefully dividing it with a bench scraper, you preserve these large air pockets, resulting in the signature alveolar honeycomb structure.
Why is ciabatta dough so wet and sticky?
Ciabatta dough is intentionally wet and sticky because it requires a high hydration level to create its light, porous interior and crispy crust.
A standard bread dough might sit at 60% hydration, while authentic Italian ciabatta pushes 80% or higher. This excess moisture creates steam from within during the bake, which puffs up the crumb. To handle it successfully, bakers use wet hands during folding and heavy dusting flour during shaping.
Can I make ciabatta buns with all-purpose flour?
While you can make ciabatta with all-purpose flour, unbleached bread flour is highly recommended for the best results.
Bread flour has a higher protein content (typically 12-14%), which is necessary to form a strong, elastic gluten matrix capable of trapping large air bubbles in a very wet dough. If you must use all-purpose flour, you may need to reduce the water slightly to prevent the dough from spreading entirely flat.
Why did my ciabatta rolls turn out dense?
Dense ciabatta rolls usually result from either under-proofing the dough, over-handling during the shaping phase, or using expired yeast.
If you aggressively roll or press the dough when forming the buns, you will squeeze out all the carbon dioxide built up during the bulk fermentation. Always treat the fully proofed dough incredibly gently, cutting it cleanly with a bench scraper rather than molding it tightly.
How do you create steam in a home oven for ciabatta?
To create bakery-quality steam in a home oven, place a heavy cast iron skillet on the bottom rack while the oven preheats. Right after you slide your shaped ciabatta rolls onto the baking stone, carefully pour one cup of boiling water or a handful of ice cubes into the hot cast iron pan and quickly close the door. This saturated steam allows the crust to expand fully before setting.
Can I make no-knead ciabatta rolls overnight?
Yes, you can adapt a no-knead ciabatta recipe for an overnight cold retard in the refrigerator to develop a deeper flavor.
After completing your stretch and fold intervals and allowing the dough to rise by about 30% at room temperature, cover the container tightly and place it in the fridge for 12 to 18 hours. Let the dough come to room temperature and finish its bulk rise before shaping.
What is the difference between ciabatta and focaccia?
While both are high-hydration Italian breads, ciabatta is formed into free-standing rustic slippers or rolls and baked directly on a hot stone, whereas focaccia is baked flat in an oiled pan.
Focaccia relies heavily on being saturated with olive oil in the pan to fry the bottom crust, and it is aggressively dimpled to prevent large air pockets from forming. Ciabatta is handled gently specifically to encourage those large interior holes.
Are ciabatta buns good for burgers?
Ciabatta buns make excellent burger buns due to their sturdy, chewy crust which holds up beautifully to heavy, juicy patties and sauces without falling apart.
Their porous crumb perfectly absorbs meat juices and condiments. For the best burger experience, slice the rolls horizontally and lightly toast the interior crumb on a griddle before assembling to prevent the bun from becoming overly soggy.
How to reheat ciabatta rolls to keep them crusty?
To reheat ciabatta rolls and restore their crispy crust, lightly mist them with water and place them directly on the rack in a 350°F (175°C) oven for 5-7 minutes.
Microwaving artisan bread will make it notoriously tough and rubbery due to rapid starch retrogradation. The quick blast of oven heat, combined with the light moisture on the crust, revitalizes the bread’s original texture perfectly.
Can you make ciabatta buns without a stand mixer?
Absolutely; in fact, the gentle hand-mixing and stretch-and-fold method often produces superior ciabatta with larger air pockets than using a mechanical stand mixer.
A stand mixer can easily overwork a high-hydration dough, leading to a tighter, more uniform crumb. The manual stretch-and-fold technique aligns the gluten strands gently over a period of hours, which is ideal for achieving the rustic, alveolar structure characteristic of traditional panificio baking.
Final Thoughts on Mastering the Ciabatta Buns Recipe
Mastering a high hydration homemade ciabatta buns recipe at home is entirely achievable once you abandon the instinct to heavily knead the dough. By embracing the wet, sticky nature of the initial mix and trusting the passive power of the stretch and fold method, you allow time and temperature to do the heavy lifting. The result is an authentic ciabatta rolls recipe yielding an open-textured bun that rivals any professional artisan bakery.
The five secrets outlined above—from precise gram measurements and the autolyse rest to generating saturated oven steam—are the exact foundational artisan bread baking essentials used in commercial panificios. Once you pull those golden brown, blistered rolls from the oven and hear that hollow tap on the bottom crust, you will have successfully navigated the most challenging aspects of high-hydration baking.
These versatile rolls are perfect for elevating everyday meals. Use them as sturdy bases for juicy homemade burger buns, toast them for a classic Caprese sandwich on ciabatta, or simply serve them warm alongside a quality olive oil bread dipping sauce. The effort is minimal, but the reward is immense. What will you be serving with your first batch of fresh, crusty ciabatta rolls? Let me know your favorite gourmet sandwich recipes in the comments below!
Last update on 2026-09-29 / Affiliate links / Images from Amazon Product Advertising API
