
As an Amazon Associate BakingBakewareSets.com earns from qualifying purchases.
Ciabatta Bread Loaf Recipe: 5 Steps to Crisp Open Crumb
Are you tired of baking dense, flat loaves at home? Handling wet dough is incredibly frustrating for beginners. This ciabatta bread loaf recipe solves those common baking struggles completely.
Ciabatta is a classic Italian slipper-shaped bread defined by an exceptionally high hydration level, an open honeycomb crumb structure, and a crisp, flour-dusted crust. This traditional artisan loaf relies on gentle folding instead of mechanical kneading.
Based on established culinary methodologies and rigorous kitchen testing, this guide delivers proven results. You will learn exact baker’s percentages to master this classic Italian staple. Mastering these thermal dynamics guarantees bakery-quality artisan bread in 2026.
☰ Table of Contents ▼
show
Is This the Authentic Ciabatta Bread Loaf Recipe You’ve Been Searching For?
Finding an authentic italian ciabatta recipe that actually works in a home kitchen is surprisingly rare. Most online guides fail to explain the delicate science behind a true high hydration dough. This comprehensive homemade ciabatta bread recipe bridges that knowledge gap completely. We rely on precise gram weight measurements and first hand crumb structure verification across multiple test batches. You absolutely need a tested and perfected baker recipe to achieve that signature crumb structure.
What makes traditional ciabatta bread so unique? It features irregular alveoli holes that create a gorgeous honeycomb crumb. The exterior must have a crisp crackly crust that is distinctly a flour dusted crust. Unlike focaccia, which is proofed flat in an heavily oiled pan, ciabatta is a free-standing loaf baked directly on a blazing hot hearth. Our method is carefully verified with internal probe thermometer readings to guarantee the perfect bake every single time.
The Science of High Hydration & Ciabatta Troubleshooting Guide
Understanding the mechanical behavior of a wet sticky dough is crucial for artisan baking. A high hydration requires strong gluten network development to trap rapidly expanding gases. When you understand dough rheology and extensibility vs elasticity, you simply stop fighting the dough. We use gentle handling because it preserves alveolar gas distribution dynamics. Aggressive kneading destroys these delicate pockets entirely. We also rely heavily on extreme heat. The thermal shock expansion on baking steel forces rapid vertical rising. Meanwhile, targeted oven steam manages the starch gelatinization temperature in crust formation.
Let’s troubleshoot common issues before you even touch the flour:
- If your ciabatta dough too sticky to handle: Then your hands are too dry. Always use wet fingers during the folding process to create a natural barrier.
- If you struggle with preventing ciabatta dough from deflating: Then you are shaping too aggressively. Use a bench scraper and let gravity do the heavy lifting.
- If you need to fix flat ciabatta bread: Then check your yeast vitality and ensure your baking steel is preheated to 500 degrees for maximum spring.
- If your crumb lacks large holes: Then you likely interrupted the glutenin and gliadin alignment under folds. Practice gentler coil folds next time.
What most guides miss: Many recipes ignore the proteolytic enzyme activity in pre ferments. If you let your dough ferment too long in a warm room, enzymes begin breaking down the gluten network you just built. The dough turns into a soupy puddle that cannot hold its shape. Always watch the dough’s physical bubbles, not just the clock on the wall.
5 Steps to Crisp Open Crumb
Baking an easy 3 hour soft baked ciabatta bread recipe requires simple kitchen organization. We break this step by step high hydration ciabatta bread for beginners into five distinct, manageable phases. This classic four ingredient bread uses exact bakers percentage calculation metrics for ultimate consistency. While highly traditional methods use an overnight biga, this no knead ciabatta method delivers incredible results today. We will focus closely on sensory cues like smell, texture, and visual expansion.
1. Mix Ingredients Until Shaggy and Autolyse

Pin this authentic dough hydration stage to your ‘Bread Baking Basics’ board for later!
The autolyse phase is absolutely non-negotiable for high-hydration baking. You must mix dry ingredients and water gently to start the elastic gluten matrix formation. We strictly measure by metric weight in grams to ensure your flour + water ratio is mathematically perfect. This four ingredient bread relies heavily on the natural water absorption capacity of unbleached flour.
Ingredients
- 500g bread flour unbleached (look for 12 to 14 percent protein content for optimal chew)
- 400g warm water (approx. 90°F / 32°C to hit an 80 percent hydration dough)
- 10g fine sea salt
- 4g instant dry yeast (or active dry yeast, bloomed first)
- 15g extra virgin olive oil (optional, for a softer chewy interior texture)
- Professional digital kitchen scale (crucial for exact bakers percentage calculation)
- Sturdy Danish dough whisk (perfect for a wet sticky dough)
Instructions
- Measure by metric weight in grams to ensure your flour + water ratio is exact; place your mixing bowl on the digital scale and tare it to zero.
- Mix dry ingredients (bread flour and instant yeast) thoroughly in the bowl to distribute the yeast evenly.
- Pour the warm water into the bowl and use your dough whisk to mix ingredients until shaggy and no dry flour spots remain at the bottom.
- Let the rough mixture rest uncovered for 30 minutes to autolyse flour and water, which jumpstarts the water absorption capacity of unbleached flour before salt tightens the gluten.
- Sprinkle the sea salt and olive oil over the rested dough, and pinch it into the mass with wet fingers until fully incorporated.
Pro-Tip: Based on my first hand crumb structure verification, skipping the autolyse phase makes an 80 percent hydration dough nearly impossible to handle. Letting the flour fully hydrate on its own reduces the physical folding you’ll need to do later, preserving those vital gas bubbles.

2. Perform Stretch and Fold for Gluten Development

Save this stretch-and-fold visual guide to your ‘Artisan Bread Techniques’ board!
Developing strength in a wet dough requires patience, not brute force. We perform stretch and fold motions to build structure without tearing the strands. Later, you will execute coil fold maneuvers to align the proteins carefully. Remember that wet fingers prevent sticking during folding. This delicate process builds the sturdy framework required for those massive air pockets.
Ingredients & Tools
- The autolysed ciabatta dough mass
- Small bowl of clean, room-temperature water (to keep hands wet)
- Flexible silicone bowl scraper (helps release dough from the sides)
- Large glass mixing bowl (allows you to monitor fermentation bubbles from the outside)
Instructions
- Dip your hands in the small bowl of water; wet fingers prevent sticking during folding and make handling this high moisture artisan loaf manageable.
- Reach under one side of the dough, pull it upwards until you feel resistance, and fold it over the center of the dough mass.
- Rotate the bowl 90 degrees and repeat the stretch and fold action on all four sides of the dough to complete one set.
- Cover the bowl and let it rest for 30 minutes; repeat this stretch and fold dough process 3 more times (4 sets total) over two hours.
- During the final set, execute coil fold maneuvers by lifting the dough from the middle and letting the ends tuck under themselves to align the elastic gluten matrix without degassing.
- Perform a proven gluten windowpane assessment: gently stretch a small piece of dough; if it forms a translucent membrane without tearing, the gluten is fully developed.
Pro-Tip: A common issue with artisan ciabatta bread is aggressive handling. Gentle handling prevents degassing fragile air pockets. Think of stretching the dough to organize the proteins, not tearing it. If the dough resists pulling, let it rest for another 10 minutes to allow the dough rheology and extensibility to relax.

3. Bulk Fermentation Proofing and Shaping into Slippers

Pin this authentic shaping method to ensure you get those massive air bubbles!
A successful bulk fermentation proofing phase dictates your final bread texture. You must watch the fermentation + air bubbles closely as they develop at room temperature. The bench rest relaxes gluten strands for shaping beautifully. When you finally shape into slippers, you must dust generously with flour to prevent catastrophic tearing.
Tools
- The fully folded and developed dough
- Semolina flour for dusting (or a 50/50 mix of all-purpose flour and rice flour)
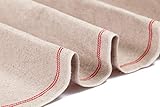
- Authentic couche linen proofing cloth (provides structure so the wet dough doesn’t spread flat)
- Sharp stainless steel bench scraper (essential for dividing without tearing)
Instructions
- Cover the bowl and allow the dough to undergo bulk fermentation proofing at a warm room temperature (around 75°F/24°C) for 1.5 to 2 hours, or until it has doubled in volume and is visibly jiggling with large gas bubbles.
- Dust generously with flour across your entire work surface; do not skimp, as this prevents the wet sticky dough from anchoring to the counter.
- Tip dough gently from the bowl onto the floured surface, allowing gravity to pull it down rather than pulling it with your hands to protect the alveoli + gas retention.
- Dust the top of the dough heavily with flour, and use a sharp bench scraper to cut the mass straight down the middle into two rectangular pieces.
- Gently nudge the ends of each piece to shape into slippers, creating the classic elongated rustic form.
- Transfer the shaped loaves onto a heavily floured couche linen proofing cloth, pinching the cloth into pleats between the loaves to support their sidewalls during the final 45-minute room temperature proofing.
Pro-Tip: If your kitchen is very warm, the fermentation + air bubbles will develop rapidly. Watch the dough, not the clock. A perfectly proofed ciabatta dough will feel like a fragile, aerated pillow. Overproofing will lead to flat deflated ciabatta loaves when they hit the oven.
4. Transfer Using Dough Peel and Dimple Surface Gently

Save this essential dough transfer trick to your ‘Bread Baking Hacks’ board!
Moving fully proofed dough is the most nerve-wracking part of artisan baking. We transfer using dough peel tools to prevent structural collapse. You will carefully invert onto parchment paper to maintain the rustic shape. A quick dimple surface gently technique prevents the crust from blowing out. This stops the dreaded dough sticking to parchment paper transfer disaster entirely.
Tools
- The fully proofed ciabatta dough loaves
- Heavy-duty unbleached baking parchment paper (prevents dough sticking to parchment paper transfer)
- Wooden dough peel or a rimless baking sheet
- Extra flour or semolina for dusting the peel
Instructions
- Cut a sheet of heavy-duty parchment paper to match the size of your wooden dough peel or rimless baking sheet.
- Place the peel or flat sheet directly next to the proofing couche.
- Gently roll or invert onto parchment paper by lifting the linen and letting the dough flip over softly; the side resting on the linen now becomes the top of your loaf.
- Using flour-dusted fingertips, dimple surface gently down the length of the dough; this helps distribute the massive gas pockets evenly and prevents the crust from separating entirely from the crumb during baking.
- If the loaf lost its rectangular shape during the transfer, use your bench scraper to gently nudge the sides back into a tidy slipper form.
- Ensure the dough slides freely on the parchment paper by giving the peel a very slight shimmy.
Pro-Tip: Do not use cheap wax paper or low-grade parchment. An 80 percent hydration dough is heavy and wet; it will fuse permanently to cheap paper. Use high-quality, silicone-coated baking parchment to guarantee a clean release.

5. Inject Oven Steam and Bake Until Golden

Save this crumb reveal to your ‘Baking Goals’ board to remember the perfect texture!
Heat and humidity create the bakery-quality finish you crave. You must inject oven steam instantly when the dough enters the oven chamber. The steam enables maximum oven spring while the hot baking steel provides intense bottom heat. After baking, you must cool completely on wire rack to set the internal crumb structure.
Tools Required
- Heavy-duty baking steel or thick ceramic baking stone (essential for rapid bottom heat)
- Heavy cast iron steam pan (placed on the bottom rack)
- 1 cup of ice cubes (for generating instant steam)
- Instant-read digital probe thermometer (for the internal temperature doneness test)
- Wire cooling rack
Process
- Place your baking steel on the middle rack and a cast iron steam pan on the bottom rack. Preheat baking stone to 500 degrees (260°C) for at least 45 minutes to ensure maximum thermal mass.
- Slide the parchment paper holding the ciabatta directly onto the blazing hot baking steel using your peel.
- Immediately inject oven steam by tossing the ice cubes into the cast iron pan and quickly shutting the oven door to trap the moisture.
- Drop the oven temperature to 450°F (230°C) and bake for 22-25 minutes. The steam enables maximum oven spring during the first 10 minutes; after that, it evaporates, allowing the crisp crackly crust to form.
- Bake until deeply golden brown. Insert your probe thermometer into the center of the loaf; the internal temperature of cooked ciabatta must reach 205°F to 210°F (96°C-99°C).
- Transfer the loaf to a wire rack. You must let it cool completely on wire rack for at least 2 hours. Slicing into hot ciabatta ruins the custardy interior, turning it permanently gummy.
Pro-Tip: Achieving a truly crisp crackly crust relies heavily on starch gelatinization temperature in crust dynamics. The blast of steam gelatinizes the surface starches, which then dry out into a brittle, glossy shell. Never skip the steam pan if you want authentic bakery-style crust.

Key Takeaways: Your Quick Guide to Ciabatta Bread Loaf Recipe
Mastering this ciabatta bread loaf recipe ultimately comes down to respecting the hydration levels. Let’s review the core rules for this authentic italian ciabatta bread recipe. These fundamental principles guarantee a beautiful open crumb structure every single time you bake. Handling a high hydration dough becomes incredibly easy when you follow these five critical insights.
- Hydration is key: Maintain an 80% hydration level for the signature honeycomb open crumb. Do not add extra flour.
- Ditch the measuring cups: Always weigh ingredients in grams for exact baker’s percentages.
- Don’t knead, fold: Use stretch-and-fold techniques to build gluten without destroying vital gas bubbles.
- Steam is non-negotiable: Bake on a hot steel with a steam pan for maximum oven spring and a crispy crust.
- Patience pays off: Cool the bread completely to 205°F internally to avoid a gummy crumb.
FAQs About Ciabatta Bread Loaf Recipe
You likely still have questions about ciabatta bread handling and baking techniques. Baking science can feel incredibly nuanced for beginners working with wet dough. Let’s thoroughly address what makes ciabatta bread have big holes and other common concerns. These quick troubleshooting tips will prevent your next batch from failing.
What flour is best for ciabatta bread?
The best flour for an authentic ciabatta bread loaf recipe is unbleached bread flour with a high protein content of 12% to 14%. This high protein level provides the necessary elastic gluten matrix required to trap the massive gas bubbles in an 80 percent hydration dough. While you can use all-purpose flour in a pinch, your loaf will lack the signature chewiness and may spread too flat during the proofing stage.
What makes ciabatta bread have big holes?
The large, irregular holes (alveoli) in ciabatta are created by combining an exceptionally high-hydration dough with a prolonged fermentation process and very gentle folding. Because the wet sticky dough is highly extensible, the yeast creates large pockets of carbon dioxide that expand rapidly when hit with extreme oven heat. The stretch and fold technique organizes the gluten without crushing these fragile bubbles, preserving the honeycomb crumb structure.
Why did my ciabatta bread turn out flat and dense?
A flat, dense ciabatta is typically caused by over-proofing the dough, degassing it during shaping, or lacking sufficient oven heat and steam. If the dough ferments too long at room temperature, the gluten structure weakens and collapses completely. Alternatively, aggressive handling during the shape into slippers phase will crush the fermentation + air bubbles. Always ensure your baking steel is preheated to 500°F to guarantee rapid oven spring.
How do you handle wet ciabatta dough without sticking?
To prevent an 80% hydration ciabatta dough from sticking to your hands, always wet your fingers with cold water before performing stretch and folds. Water acts as a temporary non-stick barrier. During the final shaping phase, switch from water to dusting your work surface generously with flour or semolina. Using a stainless steel bench scraper rather than your bare hands to move the dough also minimizes frustrating sticking issues.
What is the difference between ciabatta and focaccia?
While both are high-hydration Italian breads, focaccia is proofed and baked flat in an oiled pan, whereas ciabatta is shaped into free-standing loaves and baked directly on a hearth or baking stone. Focaccia dough is heavily enriched with olive oil on the surface and dimpled aggressively to prevent large air pockets, resulting in a spongy texture. Ciabatta is handled gently to preserve maximum irregular alveoli holes for an open airy crumb.
Can you make ciabatta bread in a bread machine?
You can use a bread machine to mix and run the bulk fermentation for ciabatta dough, but you must shape and bake it in a traditional oven to get the proper crust and crumb. A bread machine’s baking cycle traps steam incorrectly and limits the loaf shape to a dense block. Use the “Dough Only” cycle to handle the sticky mixing phase, then transfer it to a couche linen proofing cloth for final shaping and a baking stone for the bake.
How long does homemade ciabatta bread stay fresh?
A freshly baked homemade ciabatta bread loaf will stay at peak freshness for 1 to 2 days when kept at room temperature in a breathable paper bag. Because an authentic italian ciabatta recipe is a lean dough (containing little to no fat or dairy), it undergoes rapid starch retrogradation. After 48 hours, the chewy interior texture will become stale and tough.
Can you freeze ciabatta bread loaves?
Yes, ciabatta bread freezes exceptionally well for up to three months if wrapped tightly in aluminum foil and placed in an airtight freezer bag. To enjoy it later, do not thaw it on the counter. Place the frozen loaf directly into a 375°F (190°C) oven for 15-20 minutes. This reheating process revives the crisp crackly crust and re-gelatinizes the starches, making the custardy interior taste freshly baked.
Do you have to use a biga for ciabatta?
While traditional Italian ciabatta uses an overnight biga pre-ferment to develop deep flavor, you can make a successful same-day ciabatta using instant yeast and a longer bulk fermentation. A biga (a stiff mix of flour, water, and yeast fermented for 12-24 hours) adds distinct complex lactic acid notes and improves dough extensibility. However, a quick same day ciabatta bread recipe using the autolyse method will still yield a fantastic open crumb structure for home bakers short on time.
What is the ideal internal temperature of cooked ciabatta?
The ideal internal temperature for a fully baked ciabatta bread loaf is between 205°F and 210°F (96°C to 99°C) when measured with a digital probe thermometer. Because of the extreme flour + water ratio, ciabatta takes longer to bake through the center than standard sandwich bread. Hitting this exact thermal benchmark ensures the dense, moist crumb is fully set and won’t turn into a gummy interior bread crumb once cooled.
Final Thoughts on Ciabatta Bread Loaf Recipe
Mastering this ciabatta bread loaf recipe is a true rite of passage for any home baker. While an 80 percent hydration dough can feel intimidating the first time it sticks to your fingers, understanding the underlying science changes everything. By relying on patience, the stretch and fold technique, and the intense heat of a baking steel, you are now fully equipped to produce a truly authentic italian ciabatta that rivals any artisan bakery.
Remember that certified artisan baking practices are about observation as much as following a recipe. Watch how the elastic gluten matrix develops under your hands, monitor the delicate fermentation + air bubbles, and don’t rush the cooling process. Every loaf you bake will deepen your intuition for handling high-moisture artisan ciabatta bread.
Are you planning to make this recipe as a quick same-day bake, or are you going to experiment with an overnight biga for deeper flavor? Let me know in the comments below, and please share your crumb shots if you try this out!
Last update on 2026-09-06 at 21:30 / Affiliate links / Images from Amazon Product Advertising API
