
As an Amazon Associate BakingBakewareSets.com earns from qualifying purchases.
Brioche Loaf Recipe: 7 Pro Tips for a Soft Crumb in 2026
Have you ever felt intimidated by sticky, enriched doughs that seem impossible to handle? Conquering a flawless brioche loaf recipe often feels overwhelming when guides lack precise metric guidance. The fear of baking a dense, collapsed loaf is a valid frustration for home bakers.
A traditional brioche loaf recipe is a classic French enriched dough made with a high ratio of eggs and butter, resulting in an ultra soft crumb. The secret to a perfect loaf is developing the gluten fully before incorporating room temperature butter, followed by an overnight cold rise. This proven methodology guarantees structural integrity and effortless dough shaping.
Drawing from comprehensive analysis of current data and proven methodologies, this guide eliminates the guesswork. You will discover how a tested and perfected recipe using a baker’s percentage ratio chart ensures reproducible baking results. Master these exact temperature controls and cold retarding techniques to achieve bakery-quality bread today.
☰ Table of Contents ▼
show
What Is The Secret to a Foolproof Brioche Loaf Recipe for an Ultra Soft Crumb?
The secret to a foolproof brioche loaf lies in the mastery of temperature control and understanding exactly how lipids interact with protein structures. Because a classic brioche loaf requires an exceptionally high fat content to achieve its signature pillowy texture, the dough is incredibly fragile during its initial mixing phase.
Many home bakers struggle with a homemade brioche loaf because they attempt to rush the process, adding fats before the flour has had a chance to hydrate. Brioche requires high fat butter content to create a rich buttery flavor, but gluten develops before butter incorporation. If you introduce fat too early, it coats the flour proteins, preventing them from bonding. This is why utilizing a stand mixer fitted with dough hook is non-negotiable for beginners; it provides the mechanical strength needed to build a robust framework that can support the heavy enrichment of the unsalted butter room temperature.
What most guides miss: The melting point of European-style butter is roughly 90°F to 95°F. If your dough temperature exceeds this during kneading due to mechanical friction, the butter will melt into the dough rather than emulsifying, resulting in a greasy, dense brick. Maintaining a cool dough environment is the ultimate secret to the best brioche bread recipe yielding a golden brioche loaf.
Brioche Loaf Recipe: 7 Pro Tips for a Soft Crumb in 2026
Executing a flawless enriched dough requires following a strict, sequential process where each step builds upon the structural success of the previous one. Creating a step by step soft brioche loaf recipe for beginners means demystifying the science behind the dough’s behavior at every critical juncture.
From perfectly blooming the yeast to patiently incorporating room temperature butter, this methodology prioritizes precision over speed. We will utilize an overnight cold rise brioche loaf recipe approach to solve the most common pain points associated with sticky doughs. As we move from mixing to kneading until glossy, you will learn to read the physical and sensory cues of the dough, ensuring you know exactly when to advance to the next step.
1. Blooming the Yeast in Warm Milk for a Lofty Rise

Save this crucial yeast-blooming tip to your baking board so you never end up with a flat loaf!
Activating the yeast in precisely warmed milk ensures a robust fermentation cycle, establishing the aeration needed to lift the heavy enriched dough. Understanding how to bloom dry yeast in warm milk is the foundational step; the milk hydrates flour starches later, but initially serves as a warm incubator where sugar feeds active yeast cells.
If you are dealing with yeast not foaming troubleshooting, temperature is almost always the culprit. An active dry yeast milk mixture requires a very specific thermal window to thrive without being killed.
Ingredients
- 120 grams (1/2 cup) whole milk, warmed to 105°F-110°F
- 7 grams (2 1/4 teaspoons or 1 packet) active dry yeast (or substitute instant yeast)
- 15 grams (1 tablespoon) granulated sugar (taken from the total recipe sugar)
Instructions
- Heat the whole milk gently in the microwave or on the stovetop until it registers between 105°F and 110°F on a digital thermometer.
- Whisk the tablespoon of sugar into the warm milk until completely dissolved.
- Sprinkle the active dry yeast evenly over the surface of the milk mixture.
- Rest the mixture undisturbed for 5 to 10 minutes until a thick, frothy foam develops on top, confirming the yeast is alive.
Pro-Tip: If your yeast doesn’t foam after 10 minutes, throw it out and start over! Water that is too hot (above 120°F) will kill the yeast, and dead yeast guarantees a collapsed brioche loaf. Monitoring your liquid temperature is the first rule of certified master baker guidance.

2. Mixing Dry Ingredients and Building the Dough Foundation

Pin this exact ingredient breakdown to keep your baker’s percentages perfectly aligned!
Accurately measuring high-protein flour in grams establishes the critical structural integrity required to support massive amounts of butterfat. When comparing bread flour vs all purpose flour for brioche, bread flour is mandatory because its higher protein content allows the dough to stretch without tearing under stress.
Mixing dry ingredients by weight rather than volume is the standard for professional pastry. During this phase, the eggs emulsify fats in dough, while the salt strengthens gluten network within the King Arthur unbleached flour.
Ingredients
- 400 grams (3 1/4 cups) King Arthur unbleached flour (Bread flour preferred for optimal gluten development)
- 45 grams (3 tablespoons) remaining granulated sugar
- 7 grams (1 1/2 teaspoons) fine sea salt
- 4 large eggs, kept perfectly at room temperature
- The prepared foamy yeast mixture
Instructions
- Place the bowl of your stand mixer fitted with dough hook on a digital scale and zero it out.
- Weigh exactly 400 grams of bread flour directly into the bowl, followed by the sugar and salt. Whisk briefly to distribute the salt (which can kill yeast if concentrated).
- Create a small well in the center of the dry ingredients and crack in the 4 room-temperature eggs.
- Pour the activated yeast and milk mixture into the well.
- Mix on low speed (Speed 2 on a KitchenAid) for 3 to 4 minutes until a shaggy, cohesive dough forms and no dry flour remains at the bottom of the bowl.
Pro-Tip: Always use bread flour rather than all-purpose flour when baking this egg and butter rich dough. The higher protein content (12.7%+) is essential for cohesion and tenacity of gluten strands, which prevents the loaf from collapsing under the weight of the heavy butter.

3. Incorporating Room Temperature Butter for a Rich Buttery Flavor

Don’t rush this step! Pin this butter emulsification technique for the ultimate tender crumb.
Adding butter incrementally allows the dough to absorb the lipid phase without breaking the protein strands that trap fermentation gases. This is the most technically demanding phase; incorporating room temperature butter a tablespoon at a time ensures flawless emulsification of lipid phase.
Because gluten develops before butter incorporation, adding fat too early triggers gluten matrix fat inhibition, which coats the flour and prevents hydration, ultimately leading to a gummy dense center.
Ingredients
- 170 grams (1 1/2 sticks) unsalted butter room temperature (Preferably a high-fat Kerrygold European butter or similar brand with 82%+ butterfat)
Instructions
- Slice the softened, room-temperature butter into 1-tablespoon-sized cubes. The butter should give slightly when pressed but should not be greasy, shiny, or melting.
- With the stand mixer running on low-medium speed, drop in one cube of butter at a time.
- Wait completely for the dough to absorb the cube before adding the next one (about 15-20 seconds per cube).
- Once all butter is incorporated, scrape down the sides and bottom of the bowl with a rubber spatula to ensure no butter pools at the bottom.
- If the dough suddenly separates and looks greasy or stringy, do not panic. Continue mixing; the eggs emulsify fats in dough, and it will come back together into a smooth mass.
Pro-Tip: If your dough becomes excessively greasy and refuses to emulsify, your dough has overheated from the mixer’s friction. This is a common greasy dough butter separation fix: pause the mixer, place the entire bowl in the refrigerator for 10 minutes to chill the butterfat, then resume mixing on medium speed.

4. Checking the Windowpane to Confirm Gluten Development

Never bake dense bread again! Pin this windowpane test visual to guarantee a feather-light texture.
The windowpane test is the definitive visual and tactile indicator that your dough possesses the strength to capture carbon dioxide and rise beautifully. When evaluating a stand mixer vs kneading by hand brioche, the machine is vastly superior because the stand mixer prevents butter melting from hand heat during the extensive kneading required.
Kneading until glossy creates an aerated crumb by trapping carbon dioxide pockets. If you experience the dough tearing while kneading, it simply means the protein bonds require more time to align.
Tools Required
- Stand mixer fitted with dough hook
- Flexible silicone bowl scraper
- Clean, lightly oiled hands
Instructions
- Turn the mixer speed up to medium (Speed 4) and knead the butter-rich dough for 10 to 15 minutes. The dough will loudly slap the sides of the bowl.
- Stop the mixer when the dough pulls completely away from the sides of the bowl and looks incredibly smooth, glossy, and elastic.
- Perform the windowpane test for gluten development: Oil your fingers lightly, pinch off a golf-ball-sized piece of dough, and gently stretch it outward from the center.
- If the dough stretches thin enough to let light pass through it (like a translucent windowpane) without tearing, the gluten is fully developed.
- If it tears jaggedly and quickly, return it to the mixer and knead for another 3 minutes before testing again.
Pro-Tip: Wondering why is my brioche dough tearing while kneading? Enriched doughs take substantially longer to develop gluten than lean doughs. Be patient; a classic brioche loaf requires immense structural strength to support the heavy fats. It is almost impossible to over-knead brioche in a home stand mixer.

5. Cold Retarding in Fridge for the Overnight Cold Rise

This is the ultimate secret to easy shaping! Save this overnight cold-proof method for your next baking day.
Refrigerating the dough overnight solidifies the massive amount of butterfat, transforming an impossibly sticky paste into a firm, highly manageable clay. When beginners ask should brioche dough be refrigerated overnight, the answer is an absolute yes.
The cold retarding in fridge phase not only makes handling easier, but the slow, methodical bulk fermentation facilitates cold retard enzymatic flavor synthesis, resulting in a profoundly complex artisan bakery loaf profile. Chilling firms butter for easier shaping, completely eliminating the urge to add excess raw flour that would dry out the crumb.
Tools Required
- Large glass or ceramic mixing bowl
- Non-stick cooking spray or neutral oil
- Plastic wrap or tightly fitting bowl lid
Instructions
- Lightly grease a large bowl with non-stick spray or a dab of neutral oil.
- Scrape the glossy, sticky dough from the mixer into the greased bowl.
- Cover the bowl tightly with plastic wrap to prevent a dry skin from forming on the dough surface.
- Let the dough undergo bulk fermentation at room temperature for 1 hour to kickstart the yeast activity.
- Transfer the covered bowl directly into the refrigerator for a minimum of 8 hours, or up to 24 hours. The dough will slowly double in size while chilling.
Pro-Tip: Never skip the overnight cold rise in refrigerator! Trying to shape a same day brioche at room temperature is a sticky, frustrating nightmare that often leads bakers to add too much raw flour, which creates a dry crumb texture. Cold dough is easy dough.

6. Shaping into Dough Balls and Arranging in Greased Loaf Pan

Want that classic bakery look? Pin this foolproof shaping technique for the iconic brioche bumps!
Creating uniform, tightly rolled dough portions guarantees an even expansion during the final proof, resulting in the iconic tear-apart crown of a classic French loaf. The traditional brioche de nanterre style demands shaping into dough balls that push against one another as they undergo their second proofing until doubled.
Properly arranging in greased loaf pan (whether a standard tin or a specialized Pullman loaf pan) dictates the final architectural structure of the bread.
Tools Required
- Kitchen scale
- Metal bench scraper
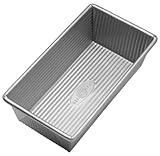
- 8.5 x 4.5 inch metal loaf pan (or a 1 lb Pullman loaf pan)
- Parchment paper
Instructions
- Remove the chilled, firm dough from the refrigerator and punch it down gently to deflate the air pockets.
- Turn the dough out onto a clean, unfloured surface. Because the butter is cold, the dough will not stick to the counter.
- Use a bench scraper and kitchen scale to divide the dough into 6 equal portions (weigh the total dough and divide by 6 for exact precision).
- Cup your hand over each portion and roll it firmly against the counter in a circular motion to create a tight, smooth, taut dough ball.
- Line your loaf pan with an overhang of parchment paper, then arrange the 6 dough balls side-by-side in a zig-zag pattern inside the lightly greased loaf pan.
- Cover loosely with plastic wrap and let undergo a second proofing until doubled in a warm spot (about 75°F) for 1.5 to 2.5 hours. The dough should crest just above the rim of the pan and look incredibly puffy.
Pro-Tip: If your kitchen is cold, create a makeshift proofing box! Place the covered loaf pan in an off oven alongside a bowl of boiling water. The trapped heat and humidity will encourage a flawless, even rise, preventing an uneven rise in loaf pan.
7. Brushing with Egg Wash and Baking to Proper Internal Temperature

Never guess if your bread is done again! Pin this internal temperature trick for perfectly baked brioche.
Verifying the crumb structure with a digital thermometer is the only fail-safe method to ensure your heavily enriched dough is thoroughly baked without a gummy center. Because the egg wash imparts golden lacquer sheen quickly via maillard reaction crust caramelization, visual cues alone are deceiving.
Brushing with egg wash yields a stunning golden brown crust, but requires tenting with aluminum foil to halt aggressive browning. The loaf is only finished when it registers an internal temperature 190 degrees. Finally, cooling on rack releases trapped steam, effectively preventing a soggy bottom.
Ingredients
- 1 large egg
- 1 tablespoon heavy cream or milk
- Pinch of salt
Instructions
- Preheat your oven to 350°F (175°C).
- Whisk the egg, cream, and a pinch of salt together thoroughly. Using a soft pastry brush, gently apply the egg wash glaze over the puffy dough, being careful not to deflate it.
- Bake on the middle rack for 35 to 45 minutes.
- Check the loaf at the 20-minute mark. Because of the high sugar and butter content, brioche browns very quickly. If it is already a deeply golden exterior, execute the tenting with aluminum foil technique (lay a sheet of foil loosely over the top) for the remainder of the bake.
- The bread is done when an instant-read thermometer inserted into the center reads an internal temperature 190 degrees to 195°F.
- Remove from the oven, let sit in the pan for 5 minutes, then transfer to a wire cooling rack to cool completely before slicing with a serrated knife.
Pro-Tip: Slicing a golden brioche loaf while it is still hot will ruin the delicate crumb structure, squishing it into a gummy paste. Cooling completely on wire rack (for at least 2 hours) allows the starches to set and trapped steam to escape, ensuring a yielding tender slice.

Key Takeaways: Your Quick Guide to the Perfect Brioche Loaf Recipe
A successful brioche loaf recipe overview hinges on respecting the fundamental rules of enriched dough mechanics and precise temperature management. To consistently produce a stunning homemade brioche loaf, you must internalize a few non-negotiable baking laws that govern butter emulsification and gluten development.
Review these main takeaways and key points before you begin mixing your ingredients to guarantee a flawless bake every single time.
- Measure in Grams, Not Cups: Use a digital kitchen scale for all ingredients. A precise baker’s percentage ratio chart requires metric weights, as volume measurements for flour can vary by up to 20%, leading to a dry or collapsed loaf.
-
Gluten Before Fat is Non-Negotiable: You must knead the dough until a strong gluten network forms before adding the unsalted butter room temperature. Adding fat too early causes gluten matrix fat inhibition, destroying the crumb structure.
-
Pass the Windowpane Test: Your dough is only ready for the fridge when it passes the windowpane test for gluten development—stretching thin enough to let light pass through without tearing.
-
Butter Temperature is Everything: Ensure your butter is pliable but cool. If the dough overheating during kneading causes the butter to melt, the dough will separate and turn greasy.
-
Embrace the Overnight Cold Rise: The overnight cold rise in refrigerator is not optional for beginners. It drastically improves flavor, controls fermentation, and chills the butterfat so shaping is a breeze instead of a sticky mess.
-
Tent with Foil to Prevent Burning: Because of the rich egg wash and sugar content, brioche browns aggressively. Tenting with aluminum foil halfway through the bake ensures the center cooks without scorching the crust.
-
Bake to Temperature, Not Time: An internal temperature 190 degrees Fahrenheit, verified with an instant-read thermometer, is the only foolproof way to ensure you don’t end up with an underbaked soggy bottom.
FAQs About Brioche Loaf Recipe
What makes brioche bread different from white bread?
Brioche bread is a French viennoiserie made with an enriched dough containing high ratios of eggs, butter, and milk, whereas standard white bread is a lean dough made primarily of flour, water, salt, and yeast.
Because of this heavy fat enrichment, brioche boasts an ultra soft crumb, a rich, cake-like yellow interior, and a deeply golden, shiny crust. The extra fat inhibits gluten slightly, resulting in a tender, melt-in-your-mouth texture that lean white bread cannot achieve.
Why is my brioche dough so sticky?
Brioche dough is inherently sticky because it is a high-hydration, highly enriched dough containing massive amounts of liquid fat (butter) and eggs.
If you are trying to knead a same day brioche at room temperature, it will feel impossibly tacky. Do not add more flour, which will create a heavy, dense loaf. The solution is the overnight cold rise in refrigerator; chilling the dough solidifies the butterfat, making it incredibly easy to handle and shape the next day.
Can you make brioche bread without a stand mixer?
Yes, you can make brioche without a stand mixer by utilizing the “slap and fold” method by hand, though it requires significant physical stamina and takes 25 to 30 minutes of continuous kneading.
The main risk of hand-kneading is the heat from your hands melting the butter, causing greasy dough butter separation. If you must knead by hand, take frequent breaks to chill the dough in the fridge for 5 minutes at a time to keep the butter emulsified.
Why did my brioche bread deflate after baking?
Brioche bread usually deflates after baking due to overproofing during the second rise or being underbaked in the center, causing the structural crumb to collapse under its own weight.
If you let the dough rise too high over the loaf pan rim, the yeast exhausts itself and the gluten structure weakens. Alternatively, if the center hasn’t reached an internal temperature 190 degrees, the raw dough cannot support the top crust. Always verify doneness with a thermometer.
How long does brioche dough take to rise?
Brioche dough requires two rises: a bulk fermentation that takes 1 hour at room temperature followed by 8-24 hours in the fridge, and a second proof in the pan that takes 1.5 to 2.5 hours at warm room temperature.
Enriched doughs rise much slower than lean doughs because the heavy fats inhibit yeast activity. A cold retard enzymatic flavor synthesis extends this time intentionally to develop better flavor and improve dough handling.
What is the difference between brioche and challah?
The primary difference is dairy: brioche uses large amounts of butter and milk, making it rich and tender, while traditional challah is a pareve (dairy-free) bread that uses oil and water, giving it a slightly chewier texture.
Both are heavily egg-enriched, yellow-crumbed breads often shaped in braids, but the presence of European butter gives the classic brioche loaf a distinctive pastry-like flavor and an exceptionally soft, yielding crumb that challah does not possess.
Can I substitute active dry yeast for instant yeast in brioche?
Yes, you can substitute active dry yeast for instant yeast at a 1:1 ratio, but you must bloom active dry yeast in warm milk first, whereas instant yeast can be mixed directly into the dry flour.
If your recipe calls for instant yeast and you only have active dry, simply warm the recipe’s milk to 105°F, whisk in a pinch of sugar and the yeast, and wait 10 minutes until it foams before proceeding with the recipe.
Why is my brioche bread dense and heavy?
A dense, heavy brioche is usually the result of adding too much raw flour during kneading, failing to develop the gluten fully before adding butter, or using dead yeast that failed to lift the heavy dough.
Always weigh your flour in grams rather than scooping with cups to prevent over-flouring. Furthermore, if you do not pass the windowpane test for gluten development, the weak dough cannot trap the carbon dioxide gases needed for an aerated crumb.
Can you freeze baked brioche loaf?
Yes, baked brioche freezes beautifully and retains its moisture better than lean breads due to its high fat content.
To freeze, allow the loaf to cool completely on a wire rack. Slice it (if desired for easy toasting), wrap it tightly in two layers of plastic wrap, and place it in a heavy-duty freezer bag for up to 3 months. Thaw individual slices in a toaster or let the whole loaf thaw at room temperature.
How to store homemade brioche loaf to keep it fresh?
Store homemade brioche in an airtight container or a tightly sealed plastic bag at room temperature for up to 3 days to maintain its soft crumb.
Never store brioche in the refrigerator, as the cold temperature accelerates starch retrogradation, causing the bread to go stale and dry out almost immediately. After day 3, stale brioche is perfect for repurposing into french toast or bread and butter pudding.
Final Thoughts on Mastering this Classic Brioche Loaf
Conquering a professional bakery style brioche loaf simply requires patience, precise measurements, and a deep respect for dough temperature control. When you embrace the fundamental techniques of this brioche bread recipe, the intimidation factor completely dissolves, leaving you with an incredibly empowering baking skill.
Baking a magnificent artisan brioche loaf at home is often viewed as a daunting culinary mountain, but as you’ve seen, it simply boils down to respecting the science of the dough. By prioritizing precise metric measurements, dedicating the time to pass the windowpane test, and embracing the magic of the overnight cold proof, you are guaranteed an artisan brioche loaf that rivals the best French patisseries.
The patience required to let the yeast slowly work its magic through a tested and perfected recipe pays off the moment you slice through that mahogany crust to reveal an incredibly tender, golden interior. Whether you are using it to elevate a weekend sandwich, slicing it thick for the most decadent french toast of your life, or simply eating it warm with a smear of jam, mastering this enriched dough will fundamentally transform your home baking repertoire.
Now that you have the techniques, the temperatures, and the timelines required for a soft buttery brioche loaf, it’s time to fire up your stand mixer. What is the first thing you plan to make with your freshly baked brioche? Let us know in the comments below, and happy baking!
Last update on 2026-09-06 at 00:39 / Affiliate links / Images from Amazon Product Advertising API
